Product review: tabbed bezel settings

Bezel cups are great. They let you set stones that would never survive the kiln into metal clay, while being much less work than bezel wire. However, they aren’t perfect. Most bezel cups are simply metal cups. Getting them to remain in the clay, while it is being refined or while it is being fired, is a challenge for some. Even if you have mastered getting bezel cups to stay, they still take time. There is an alternative.   Metalclayfindings.com makes bezel cups with pronged backings (http://metalclayfindings.com/product/9992316.aspx). That is, they are bezel cups with short prongs in the back that can be inserted into metal clay.

I have recently started using this product, and have been extremely impressed. Getting the bezel cup to stay in the metal clay is a snap — just insert the prongs into the wet clay, let the clay dry, and then fire the piece with the bezel pointed downward. Less time spent with the mechanics of metal clay means more time for the creative aspects! I have only found one minor drawback: the metal clay needs to be at least as thick as the prongs are long, so they don’t stick out the back. If you work 0.75 mm thick, the prongs will not stick out, but will still be visible. If you work 1.0 or more mm thick, the prongs are completely invisible.

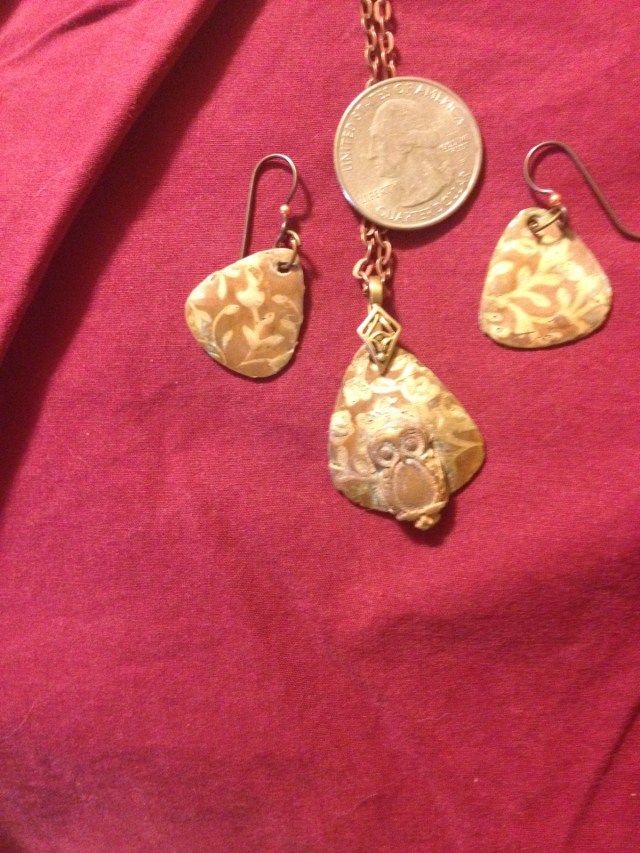
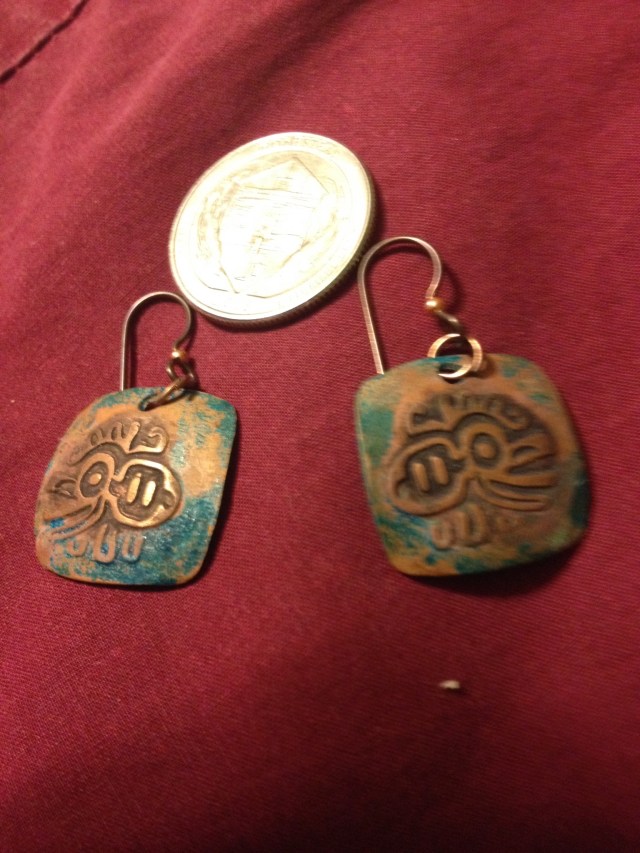
What kind of work can you do with this? I’ll provide pictures to illustrate a simple pair of silver earrings with moonstone setting that I recently made.

img_0827

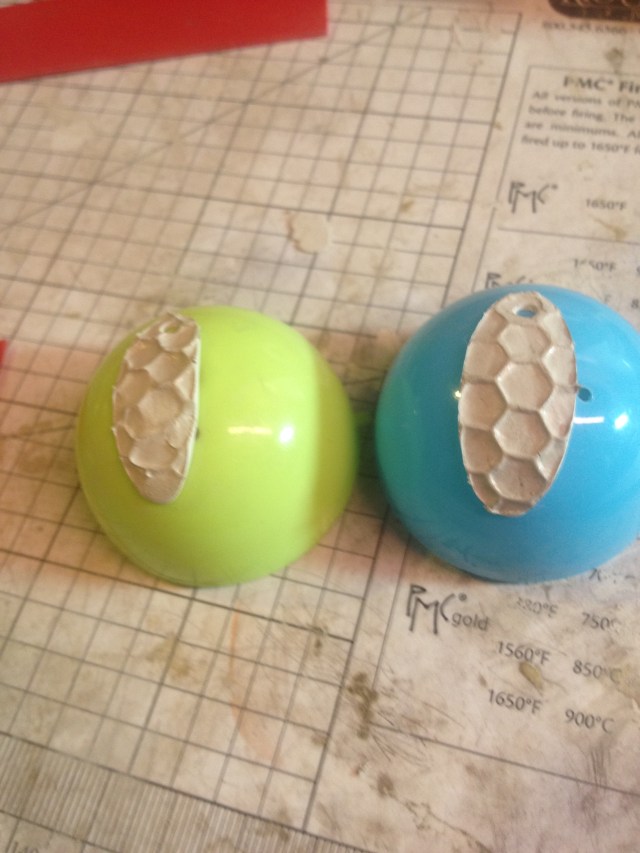
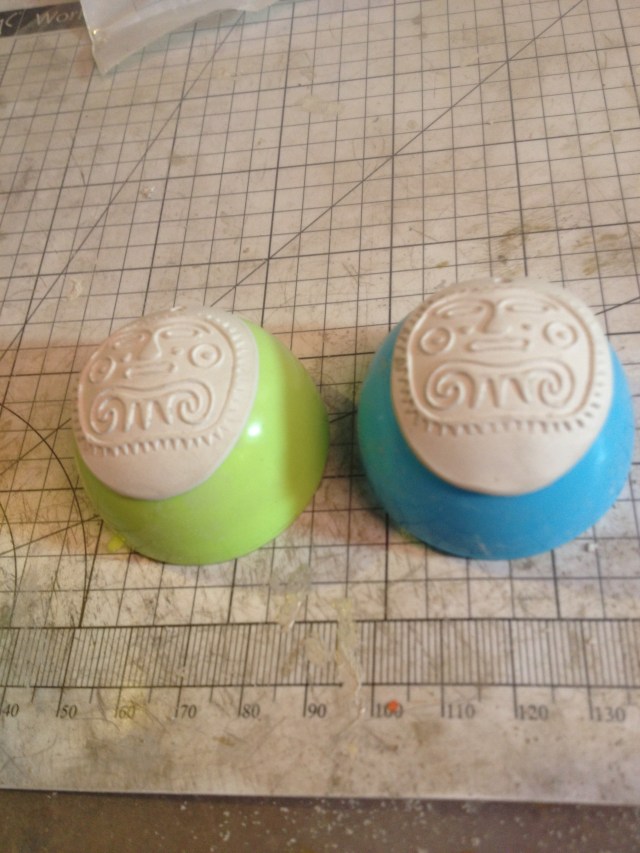
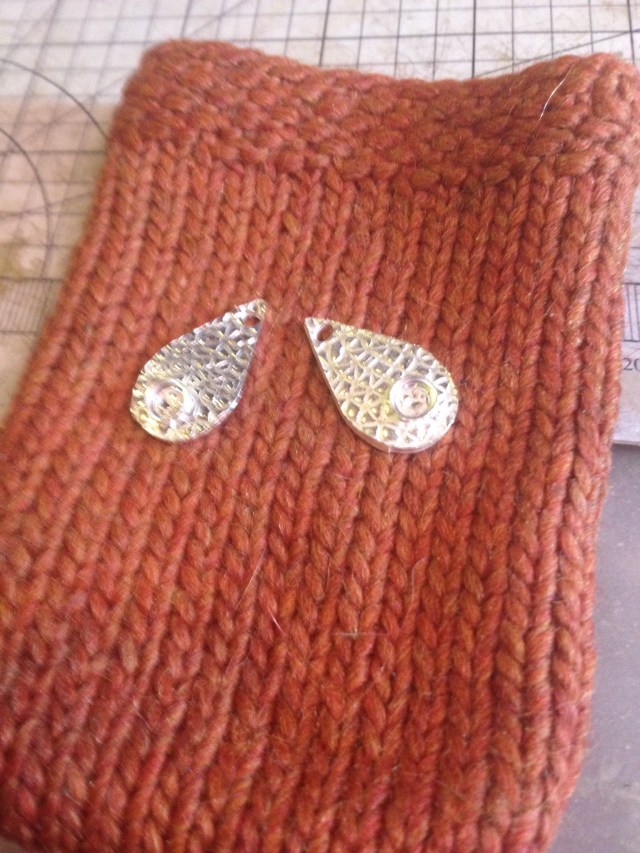
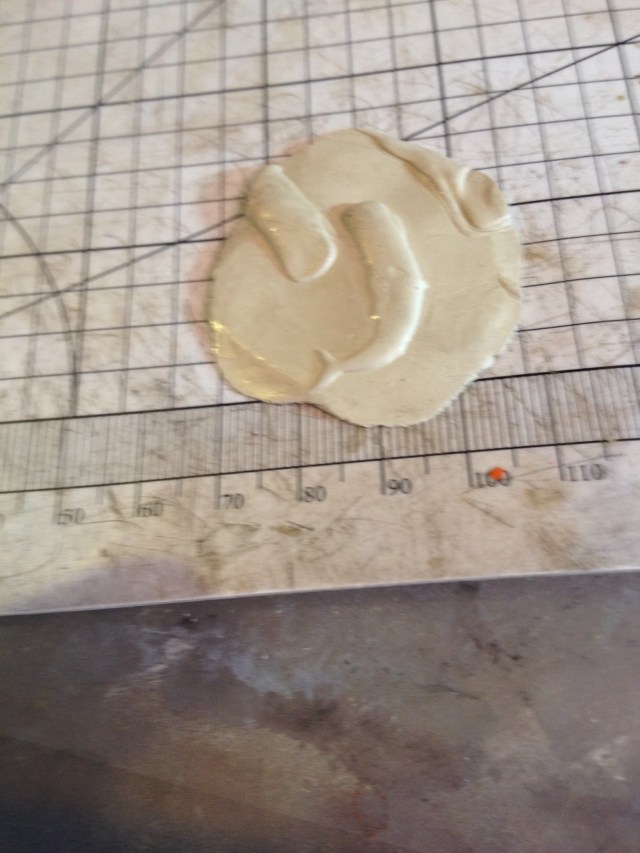
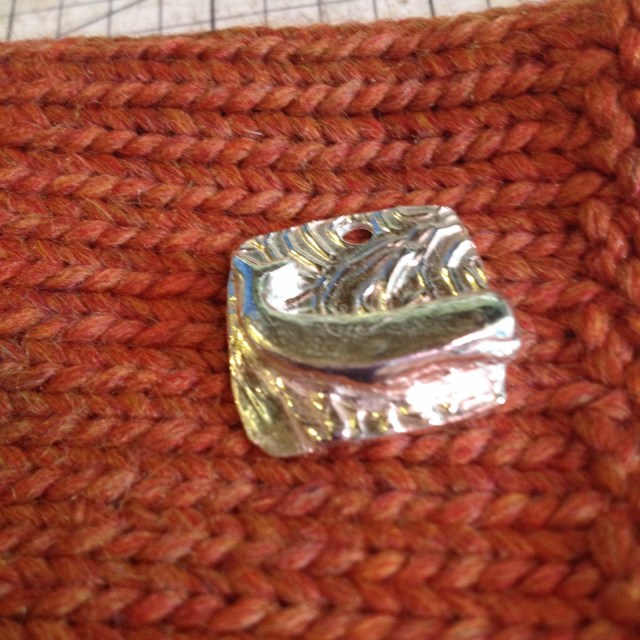
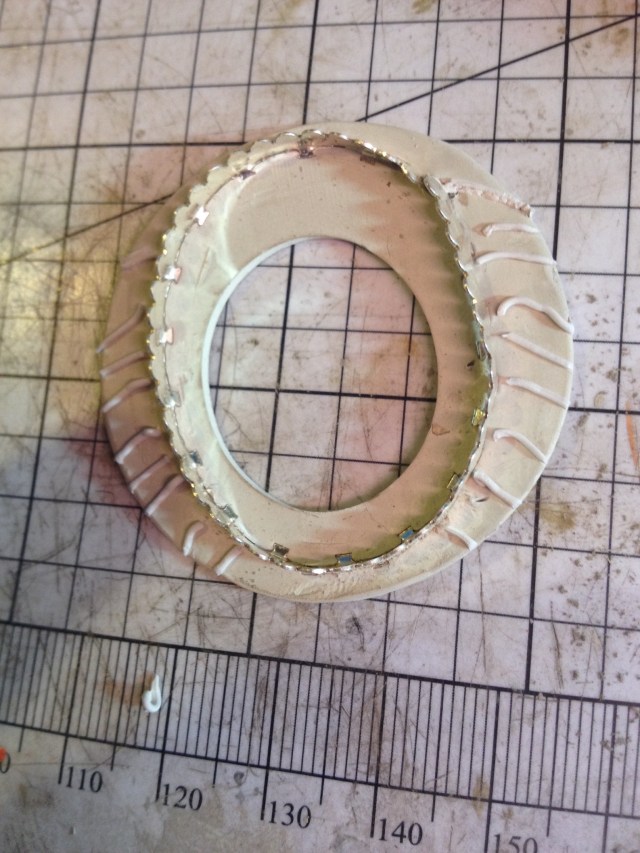
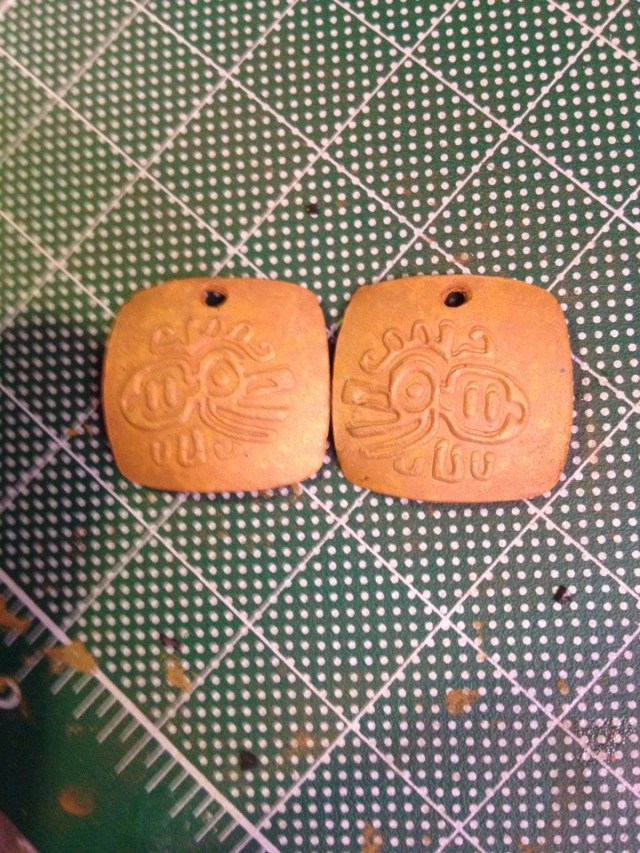
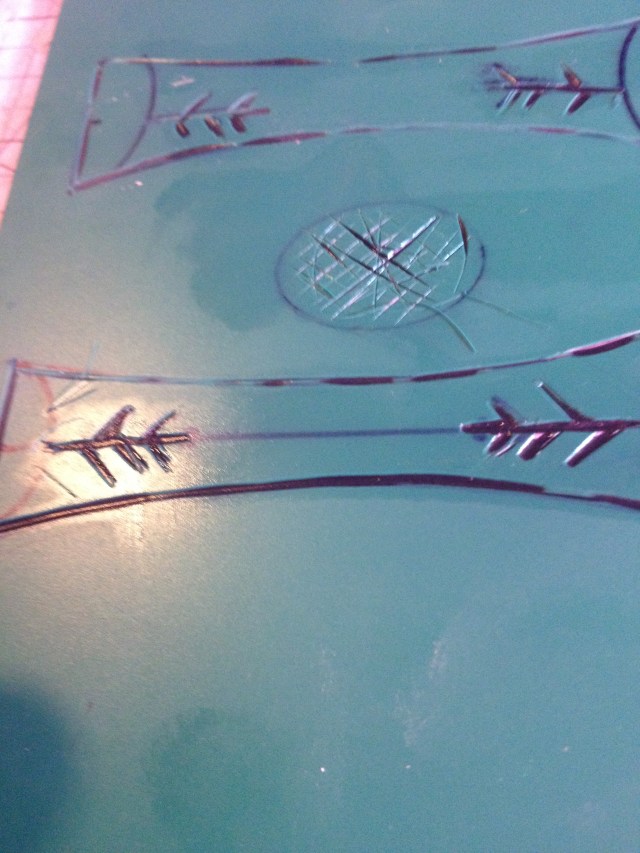
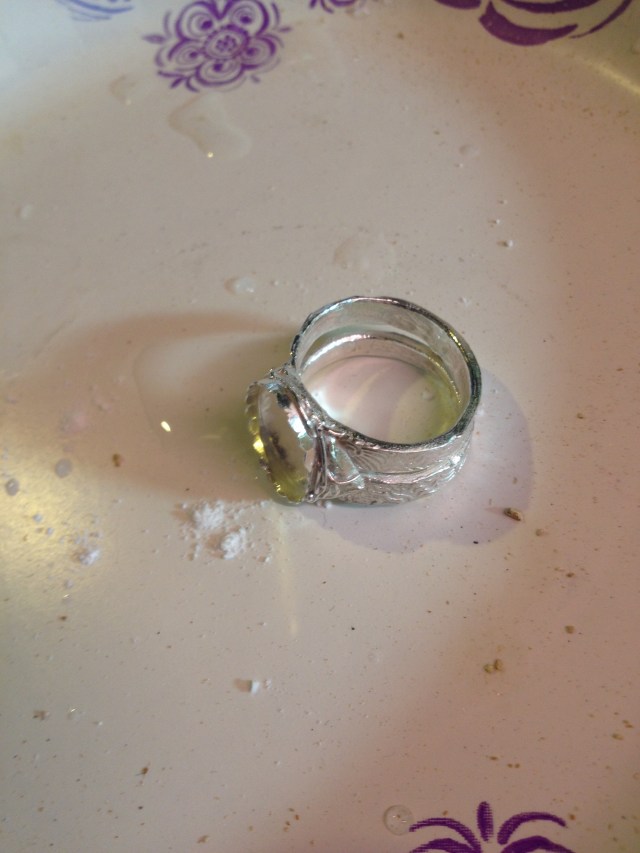
Here are the earrings in greenware. I simply rolled out silver clay to a thickness of 0.75 mm, textured it, inserted the bezel cups, and then cut out the shapes. When the clay dried, I finished it using usual methods. The bezel cups remained firmly fixed, not showing any tendency to move.

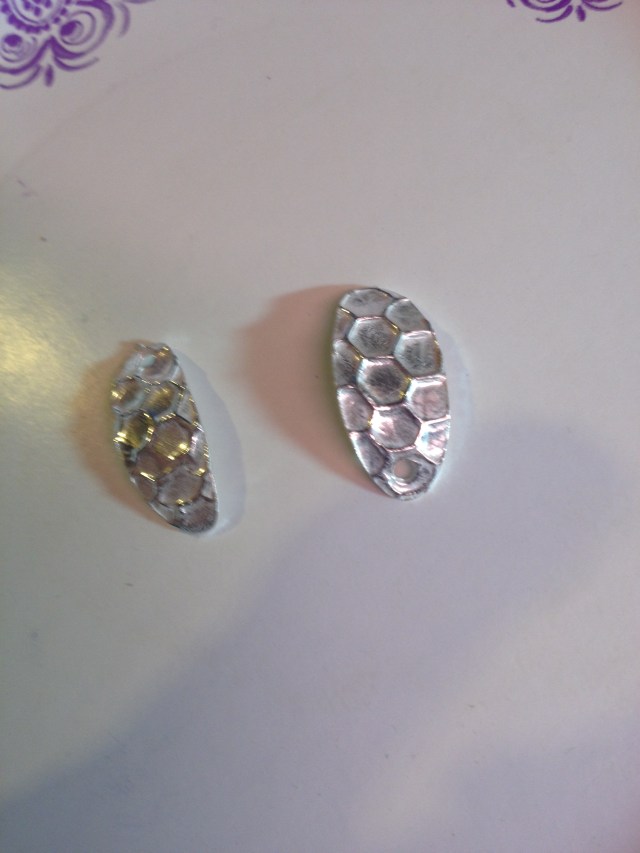
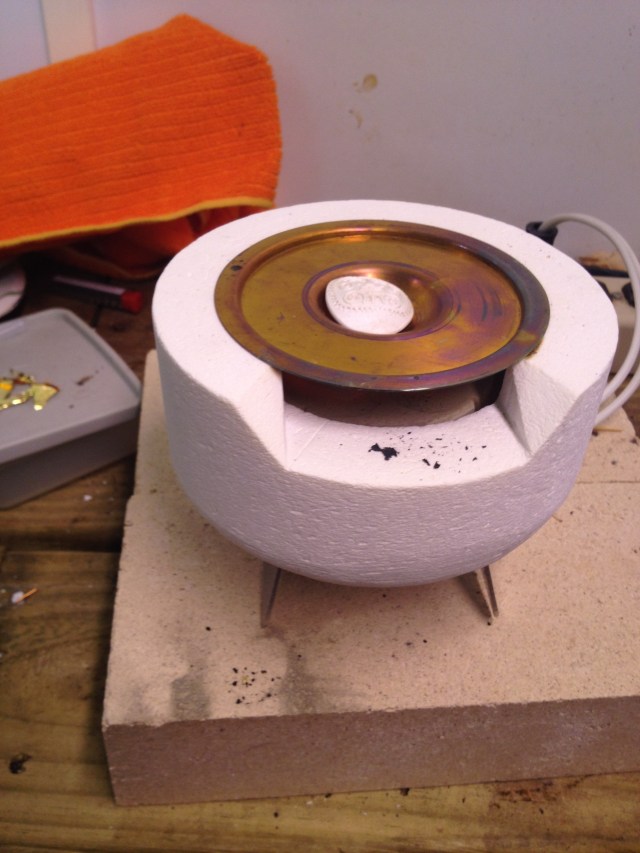
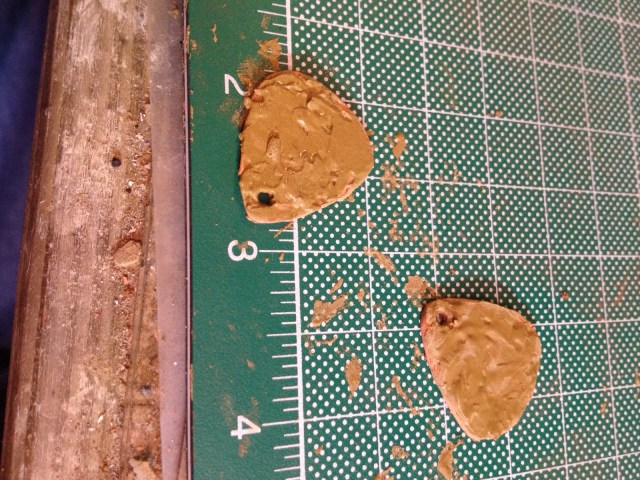
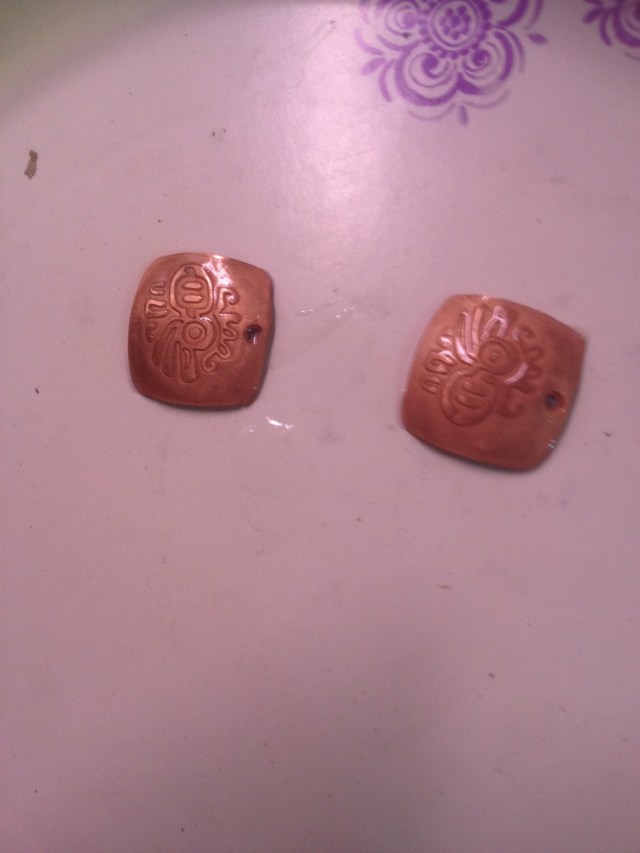
After firing and brushing, I tumbled them.

img_0829
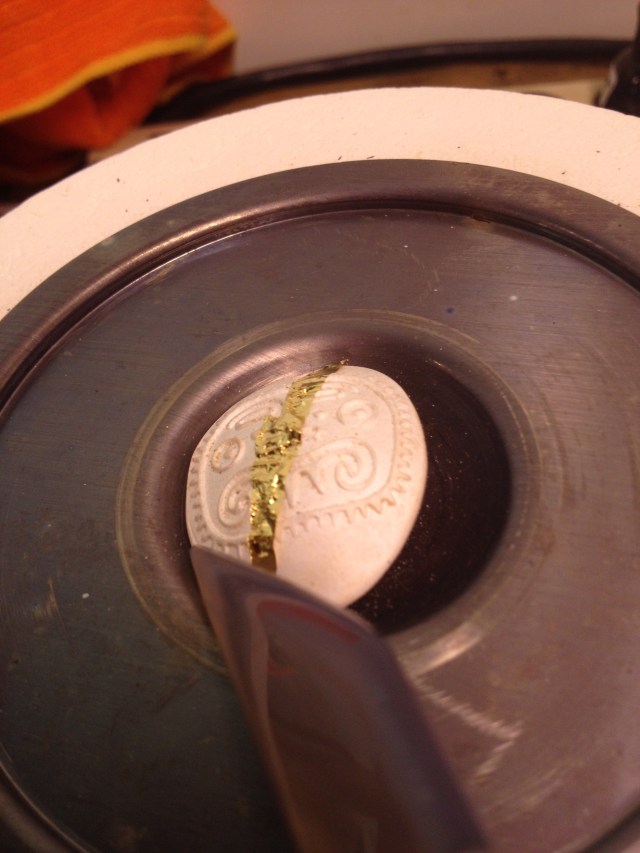
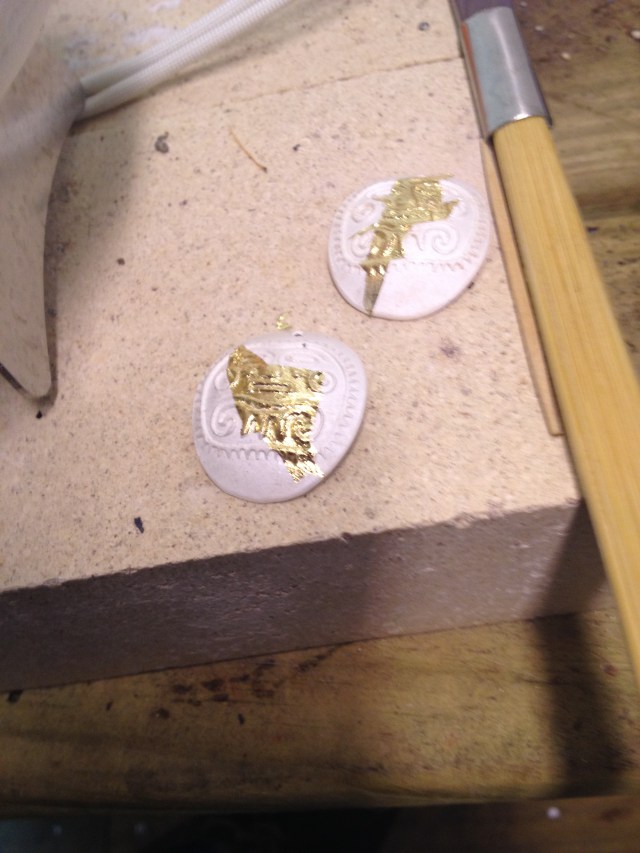
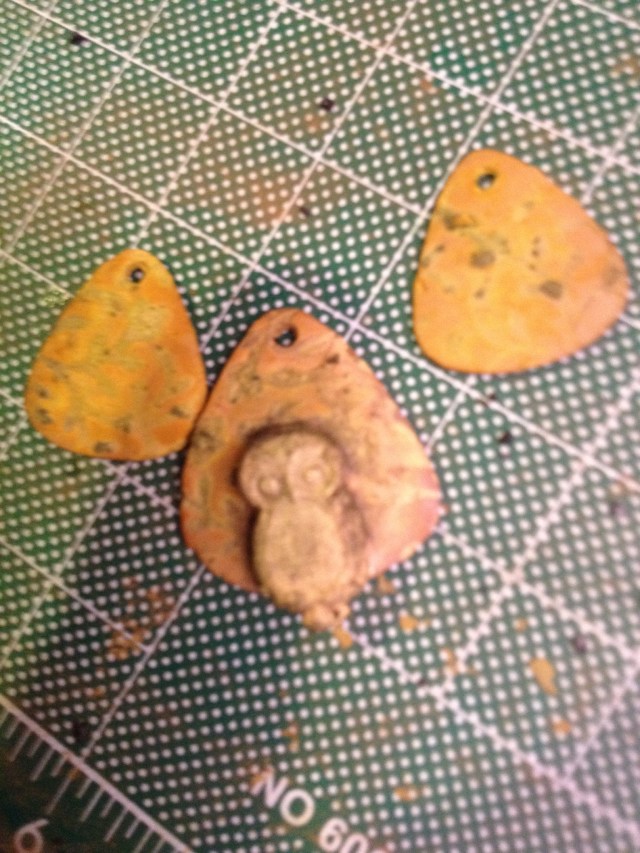
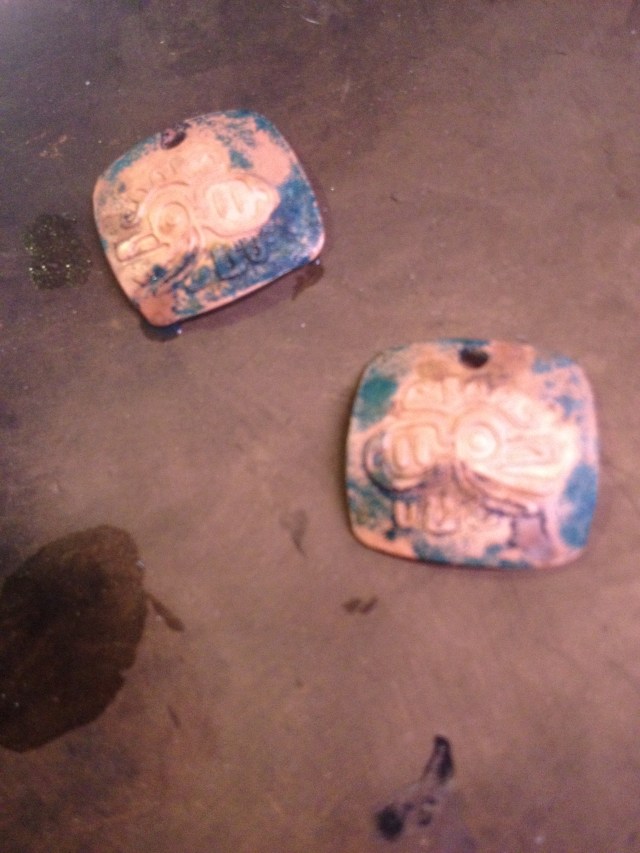
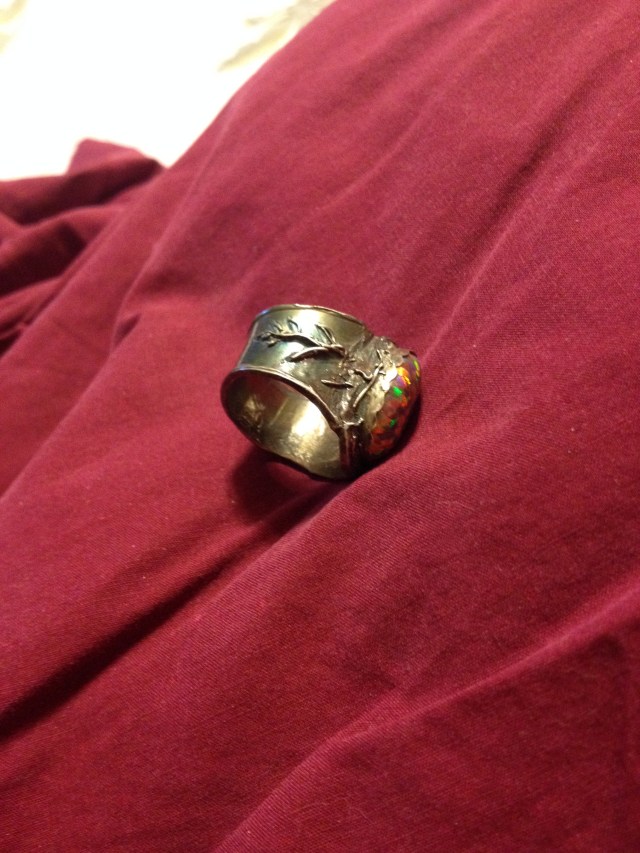
After  tumbling, I patinaed them. I used Maxblack, but, of course, other patinas would be fine.

img_0831

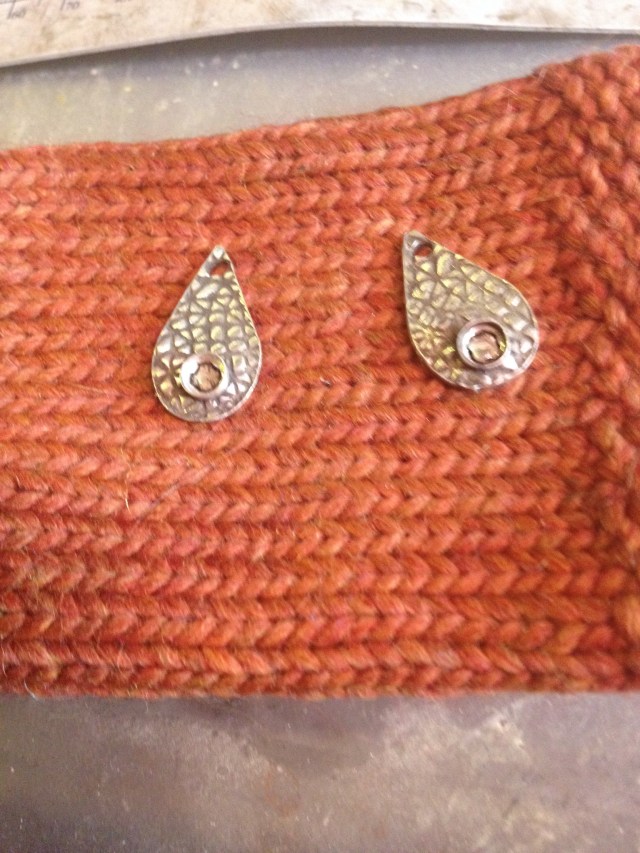
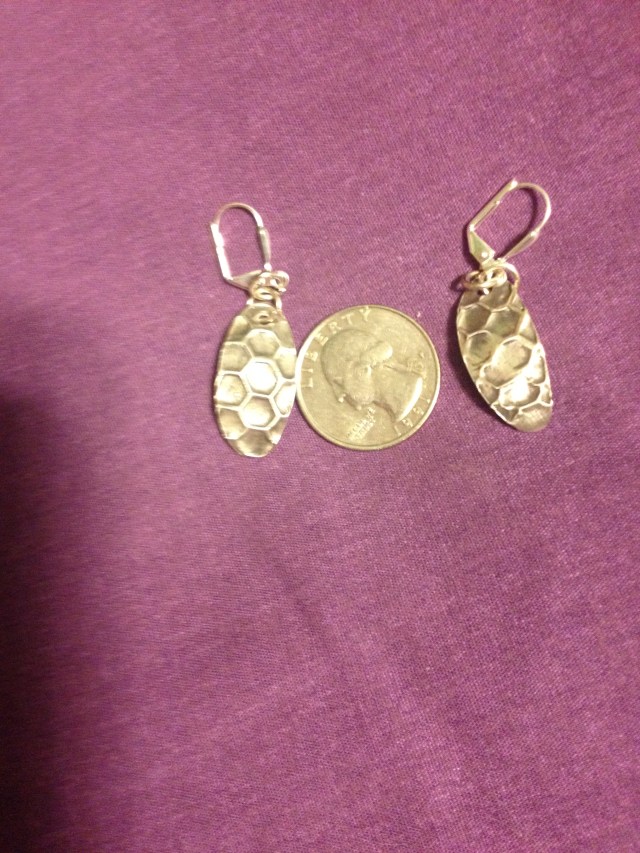
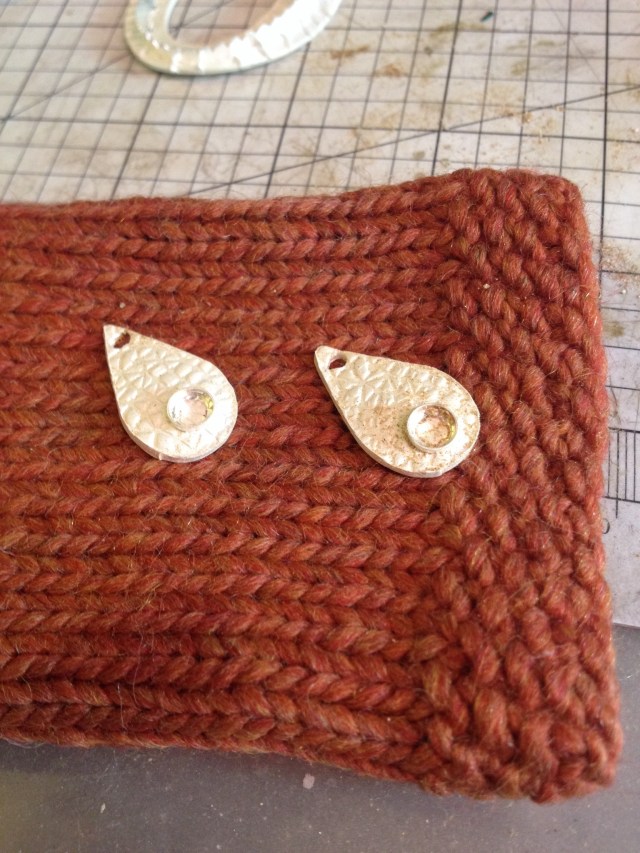
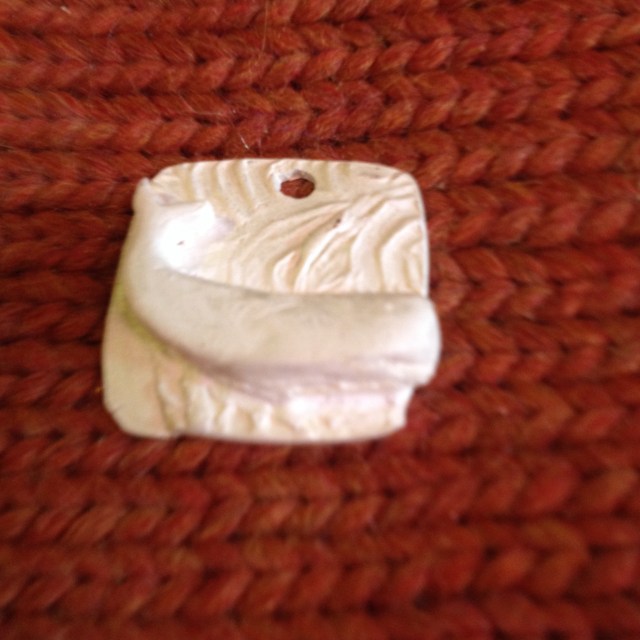
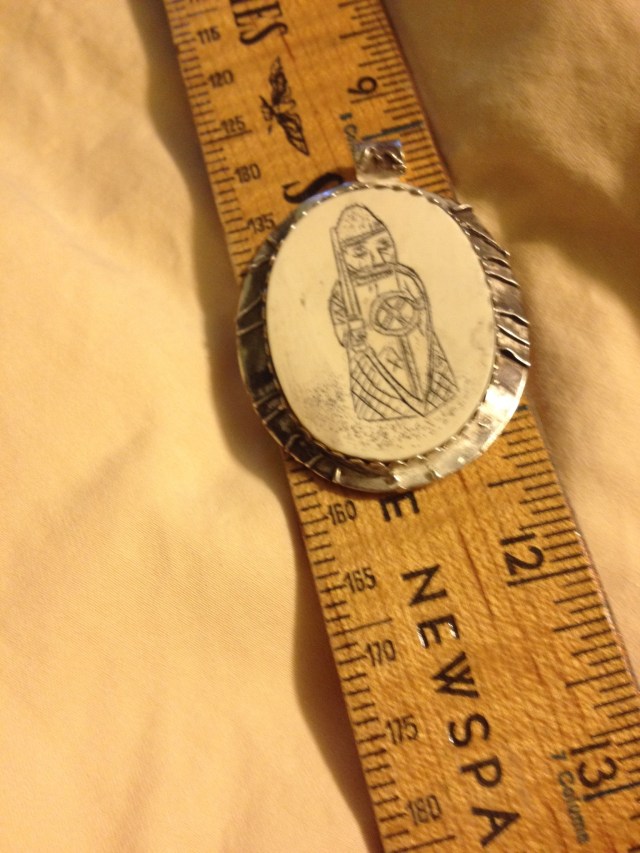
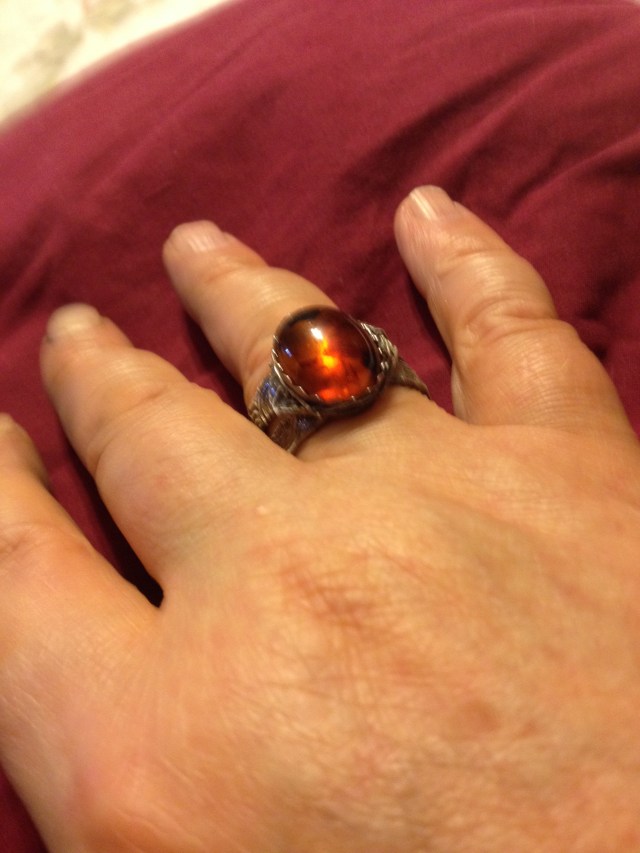
I then added the moonstones. Using a metal burnishing tool, I bent the edges of the cups to hold the stones.

img_0832All that remained was adding the earwires.

img_0833
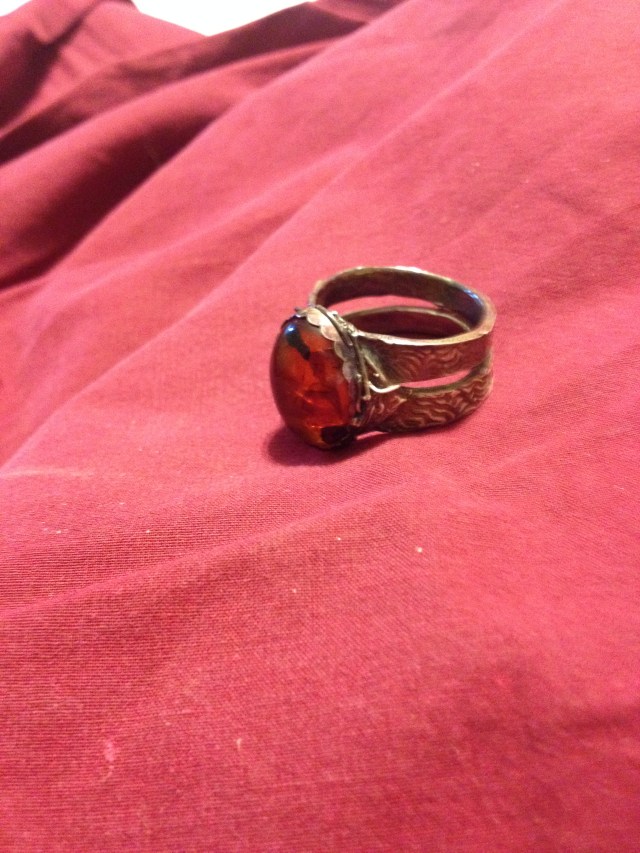
So there you have it. Tabbed bezel cups can make adding non-firable stones a snap. I hope you try it.


Three dimensional images from templates

We all love three dimensional work — that’s one of the many strengths of meta clay. However, they can be limiting or difficult. You can sculpt a three dimensional image from greenware — takes lots of time, with many possibilities for error. You can use a commercial mold — which limits what you can do. You can make your own molds — but only if you have an original to make the mold from. Today, we are going to discuss how you can make a three dimensional figure from a template. I used a commercial template, but, of course, you can make your own template.

img_0849

The  piece I am going to describe is titled ‘Gastineau Channel’. It’s the name of a waterway between Juneau, Alaska, and a nearby island, and the first place I ever saw a whale. There’s nothing special about the image I chose — you can use the same technique for any image you like. I used silver clay, but any other metal will work too.

img_0834

First, roll your clay out. I made this fairly thick (2 mm) because I wanted the whale to be substantial. Remember that the final image will be thicker than what you start with. If it’s too thick or too thin, you can always wad the clay up and start over.

img_0835

Choose a template that you want to use. I used the sperm whale. Cover the metal clay with plastic wrap, being careful to not have any wrinkles. Then place the template atop the plastic wrap, so you have the template atop plastic wrap atop metal clay. Press the template down hard with your thumbs, going around the template. The metal clay will bulge up through the template. The plastic wrap will cause it to form a rounded image.

img_0836

This is what the whale looked like after pressing. You will notice that there is quite a bit of flash. Don’t waste clay! Trim away as much of the flash as you can without impacting your image.


img_0845 
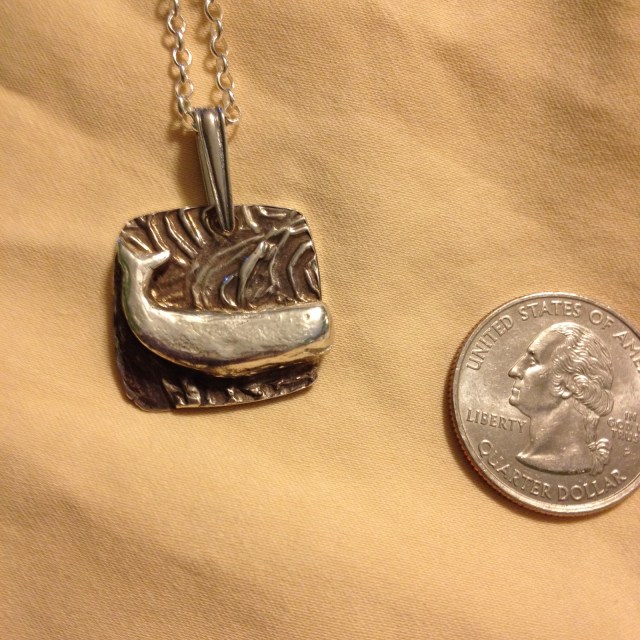
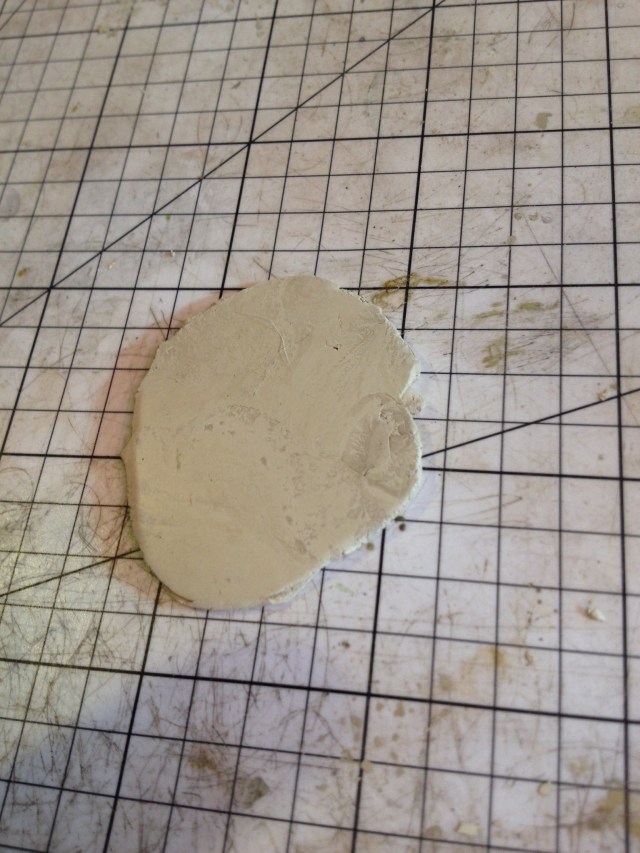
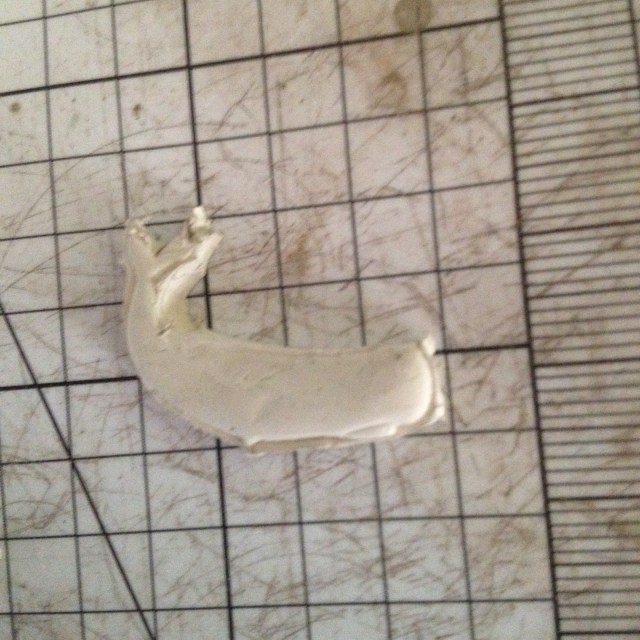
This is what the whale looked like after I trimmed the flash. There is obviously lots of work to do to clean it up, but that comes in the greenware stage.

img_0837

Make a background. I could have used a commercial texture sheet. However, I carved my own in hard rubber.

img_0847

This is what the sanded greenware looked like, attached to the background.

img_0848

This is the same piece, fired and tumbled.

img_0849

I applied Maxblack ™ patina to the background, and left the whale shiny.

This techniques opens up a whole new world of making three dimensional images from metal clay. Have a leaf template? This makes a three dimensional leaf, that you can inscribe the details into. Have a template of an animal or human figure? You can make something more complicated than a flat image.

Explore this technique. I hope you enjoy it as much as I have.

Scrimshaw and metal clay

Scrimshaw, an art probably created by 18th century whalers, is the act of inscribing images in ivory or bone. You obviously can’t put ivory or bone in a kiln, so what is the connection? We’re going to talk about combining scrimshaw into a metal clay piece.

img_0811

First, let’s look at an example of scrimshaw I made. This fellow is a copy of one of the Isle of Lewis chessmen, a Viking berserker warrior. I put him standing at a bit of an angle because a vertical figure tends to look dignified, while one at a slight angle tends to look threatening. A Viking berserker shouldn’t look dignified.

img_0812

The key to combining scrimshaw and meta clay is the appropriate bezel wire. Bezel wire is wire that you use to hold a cabochon. It is often difficult to use with metal clay, because it must be fit to the stone to be set, and it tends to warp when fired. However, there is a solution. Metal clay findings (http://www.metalclayfindings.com/bezelwires.aspx) has introduced a type of beze wire, pictured above that warps relatively little in metal clay.

img_0813

As with any form of bezel wire, the wire must be shaped to fit the piece. You can use spring tension to hold the bezel wire together, putting the seam in an inconspicuous place. Although I did not do it with this piece, another alternative is to use syringe to hide the seam.

img_0814

The next step is to roll clay to at least 0.75 mm thick (here, it is 1 mm). Cut out the piece. Insert the bezel wire using the protrusions on the bottom, making sure that the piece you intend to set still fits. The piece within the bezel wire can be easily removed at this stage by either using a thin wire to pry it out, or by placing a piece of dental floss behind the piece to be set.

img_0818

Remove the scrimshaw. Cut an opening in the back of the piece. This reduces weight, and saves meta clay. All that matters is that you leave a lip where the scrimshaw can sit. Finish and decorate the greenware as you wish. I used a bit of syringe.

img_0828

Here is what the metal clay piece looks like after brushing and tumbling. If you are going to patina, do it now. The next step is to insert the scrimshaw. (Although it probably wasn’t necessary, I used a two-part epoxy prior to affixing the scrimshaw with the bezel wire.) Using a metal burnishing tool, bend the edges of the bezel wire over. This will fix the scrimshaw in place.

There you have it. While I made a very masculine looking piece, with a Viking warrior, you can use any design you wish – flowers, birds, or the most traditional scene for scrimshaw — ships, whales, and other nautical scenes. In any case, scrimshaw and metal clay have a lot to offer each other. I hope you explore the possibilities.

img_0840


Why Metal Clay?

This is going to be a bit of a departure. People have been producing jewelry through metalsmithing as long as humans have worked in metal. Metal clay is only a few decades old. Why do metal clay?

Let me start off by describing some of the advantages of traditional metalsmithing. First of all, the raw materials are cheaper. Silver sheet goes for around $US 25 /troy ounce (that doesn’t account for the waste in working with silver sheet) while silver clay goes for around $54/25 grams. That’s about $US 0.80 /gram for sheet silver and $US 2.16 per gram for silver clay. Secondly, getting really crisp edges is possible with metal clay, but not particularly easy – if you want to make a box with crisp edges, you are probably better off with metalsmithing. Finally, there are limitations on mixed metal pieces (not counting cold connection) with metal clay that you don’t have with sheet metal.

So, with that, why metal clay? Since I work primarily in metal clay, I obviously think it has many advantages. Some of these are:

  1. Sawing. Learning to saw sheet metal is hard. Until you have been at it for a long time, you will make lots of errors (and break lots of saw blades). You can, and if you keep at it, will, learn – but plan on lots of frustration on the way. Plus, you can take more away from your sheet metal (if your sawing doesn’t end up like you want) but you can’t add. Metal clay, in the wet clay form, can be shape you want. If you remove too much, you can wad up your wet clay and start over. If the clay has dried to greenware, you can add more.
  2. Texturing. Texturing sheet metal takes texturing hammers or a rolling mill. A rolling mill is an expensive piece of hardware. Plus, if you don’t like what you have with sheet metal, you are stuck – either learn to like it or recycle. With metal clay, if you don’t like your texture on wet clay, wad it up and start over. With sheet metal, you must have the appropriate hammers or texture sheets. With metal clay, texture sheets are relatively cheap and you can create your own textures with leaves, seeds, textured cloth, etc.
  3. Equipment cost. This is hard to assess, because, with either medium, you can get by with minimal tools or you can go for the best. However, with sheet metal, you really need a torch, a jeweler’s saw, and appropriate hammers. With metal clay, the minimal tool set is quite cheap – especially if you decide to torch fire instead of kiln fire. While I recommend a kiln, one can fire many metal clays with a butane torch that costs a few tens of dollars. And your other tools can be as simple as a cutting tool and something to sand with. Engraving? Lots of expensive equipment if you want to do it on metal, easy if you want to inscribe images in metal clay that has not been fired.
  4. Safety. An error with a jeweler’s torch can be, well, very bad. With metal clay? If one exhibits appropriate caution in handling just fired pieces (such as letting them cool first, or being sure to only handle with tongs), then there is little risk beyond a piece not coming out as you intended. And, while the chemicals used for patinas can be toxic, there is no difference between putting a patina on metal clay and putting a patina on sheet metal.
  5. Sculpting. Learning to make sculptural figures using metalsmithing techniques? Decades of dedicated work. Learning to make sculptural figures with a mold and metal clay? A beginner can do it. Making your own molds or learning to sculpt greenware takes a bit of learning, but nothing like it would have if you were not working with metal clay.
  6. Special techniques. You can paint a design on greenware with fingernail polish and then sponge away the clay around it. You can use microbeads to make special textures. The list goes on and on. Because metal clay is malleable, there are design techniques you can do with metal clay that would be difficult, if not impossible, with traditional metalsmithing.

Finally, there are arguments for learning both metal clay and traditional metalsmithing. For example, you can make a decorative piece from metal clay and then solder it onto a piece made by traditional metalsmithing – this results in a piece that is cheaper than it would have been if it had been pure metal clay, but easier to make than it would have been if it had been pure metalsmithing. The more tools you have in your toolbox, whether metal clay, traditional metalsmithing, or both, the greater the flexibility you have and the better your work will be.

Mixed Metal: Copper and Bronze

Copper and bronze take patinas differently. That should be no surprise. However, you can exploit this to make some truly striking work. Here, I am going to tell you how to make a mixed metal earring and pendant set.

I used Art Clay Copper and Fast Fire Bronz. There are certainly other clays that you can use. However, these two shrink at about the same rate. If you use these, I can guarantee that you won’t have ugly gaps between your copper and bronze. If you use others, they might or might not work.

Your first step is to choose a texture that: (1) is quite deep (shallow textures don’t show) (2) doesn’t have fine lines (they tend to blur) and (3) is reasonably close to half recessed and half raised (lots of leeway here, just don’t choose something that is 90% one or the other). I selected a texture with flowers and vines. I made a pair of earrings and a pendant (some shape, but larger) our of copper clay. The greenware appears below. I used a pinch bail for the pendant, so only a hole in the top is needed until the final stage.)

The next step, after finishing and sanding, is to thin copper clay to the texture of Greek yogurt. Use distilled water. Tap water might or might not contain impurities that would interfere with sintering, and distilled water is cheap. Then, cover the copper with the bronze paste, making sure it fills the recessed areas. The earrings, at the step, looked like the following:

IMG_0768

Yes, they are messy looking, but it doesn’t matter at this stage. Let the paste dry thoroughly. Then carefully sand the bronze past away. The result is that the bronze will stay in the recessed areas, but will be sanded away in the raised areas. After this stage, the pendant looked like:

IMG_0769

You can see the pattern in this piece because the bronze and copper clays are differently colored (and, yes, there is a divot on the side of the pendant, which I fixed after this photo with a sanding block). The earrings are done the same way.

OPTIONAL: I wanted to decorate the pendant with a figure. Using bronze clay, I made a small owl:

IMG_0770

After the owl dried and I finished it, I attached it to the pendant with bronze paste.

IMG_0771

Now fire the pieces. Yes, I know that bronze and copper fire at different temperatures. However, copper will fire at the right temperature for bronze if you give it enough time. Put the finished greenware in activated charcoal, with about 0.5 inches of charcoal below the pieces and about 0.5 inches above. Then, fire at whatever temperature you use for bronze (it varies among kilns) at full ramp for 3-3.5 hours. When your pieces come out of the kiln, they will appear somewhat disappointing — the bronze and copper’s colors will be so similar that it is difficult to see the pattern, and there might be some unattractive splotches on the work. Nothing to worry about…we’ll fix in the next step.

IMG_0773

The next step is to polish the metal. While you can use a tumbler, you will get better results if you polish by hand (I don’t know why). To polish by hand, use multiple grades of sandpaper. Sand with the coarsest grade (lowest number) first. Then, sanding at a 90 degree angle to your original sanding, sand again with the next coarsest grade. (Polishing is grinding out the scratches from the previous sanding, which is why you change direction and use a finer grade of sandpaper). Continue using finer grades, shifting by 90 degrees each time, until you are happy with the shine you get (the deeper the shine, the better the piece will look when it is done).

The final step is to patina. You can use liver of sulfur (just darkens), liver of sulfur plus salt and ammonia (darkens and adds a flash or red) or (my choice, and what I did here), Baldwin’s patina. Baldwin’s patina is not like liver of sulfur — you dab, not dip, and you don’t need to heat anything The more you dab, the more you darken the metal. The fun part about Baldwin’s patina: it reacts rapidly with the copper, turning it brown. However, it reacts very slowly with the bronze, leaving it shiny.

Here is the finished work, with findings added and a coin for scale:

IMG_0779

Both the sanding away of the bronze paste and the hand finishing take time. However, if you are willing to invest the time, you get a unique and striking look!


Making Copper Look Ancient

Ancient artifacts — forgotten treasures — remnants of a lost civilization. We obviously can’t incorporate these into our jewelry, but we can incorporate the romance of an archeological dig.

I’m going to describe how to make copper jewelry look like it had spent lost eons beneath the earth. I made a pair of earrings, but, of course, you can use the same techniques on anything you want.

A word of warning: The techniques I am about to describe work with metal clay. If you start off with metallic copper, they will only work if the copper has not been treated to prevent corrosion. Corrosion is what we want — it’s what makes copper look ancient!

IMG_0774

I began with a pair of Meso-American inspired earrings. Here they are in their greenware form, sanded but with no more preparation.

IMG_0775

Here they are after firing. I hand finished them instead of tumbling; tumbling makes the metal seem shiny and new, and I wanted the antique look. To hand finish, you sand with progressively finer grits of sandpaper, with each subsequent sanding going perpendicular to the one before. When do you stop? When you think the copper is shiny enough, of course!!

Before you attempt to age the copper, be sure to remove all finger oils. Noname brand patina prep is my favorite, but there are any number of enamel preps (or even plain old baking soda) that you could use. Just be sure to wash off the prep, and then to not get more finger oils on the copper! You can hold it by the edge or, if it has a hole in it, run a wire through the hole and hold it by that.

Now get ready for the magic of aging. There are many ways to age copper. There are commercial preparations, but they are expensive and often contain very noxious chemicals. I’m about to describe three methods for aging that involve only household products:

  • Measure enough vinegar to cover your jewelry. Mix it with an equal amount of salt. Stir until the salt dissolves. Submerge your jewelry in this mixture.
  • Dampen a paper towel with vinegar. Put it in a sealable container. Sprinkle salt onto the paper towel. Put your jewelry, face down, on the paper towel. Sprinkle a bit more salt on the top. Cover with another paper towel, dampened with vinegar. Close up the container. (This is the method I used for this example.)
  • Dampen a paper towel with non-sudsy ammonia. Put it in a sealable container. Dampen your jewelry with vinegar and sprinkle salt on it. Suspend your jewelry by a wire so it does not touch the paper towel. Seal the container, so the ammonia fumes cannot escape. Not only should you not breath ammonia fumes for any length of time, but the fumes are what will give the copper color.

In any of these methods, potassium chloride (a common salt substitute) can be substituted for salt — doing so will result in different colors. Not better, not worse, just different.

For any of these methods, let  your jewelry stay in place at least one hour. Then check it approximately once an hour to see if you are happy with the results. You probably want to get a bit more color than you want to end up with, since some of the color will come off in the subsequent steps.

Now for the most wonderful part of aging copper — you never know what sort of color you will get! It could be green, blue, turquoise, reddish orange — you just never know until you try! What if you don’t like the color you get? Just wipe off the patina and try again!

Once you decide the copper has enough color, remove it from the coloring solution. Be sure to dispose of the ammonia (if that’s what you used) in a safe manner. The earrings I made looked like this:

IMG_0777

The next step is to gently rinse the copper in running water. A small stream will do, because the patina will wash off.  Once I had done that, I thought that the Meso-American figures in the center weren’t visible enough, so I applied a tiny drop of Black Max brand patina. That brought out the imagery while leaving the patina. Just be sure, in cleaning up the Black Max (if you use it) that you don’t accidentally wipe away your patina.

You are almost done. The only problem is that the patina is somewhat fragile, and that copper can discolor skin or clothes. There are several ways to fix this. The easiest one is to spray the patinaed jewelry with the same protective spray that brass players use on their instruments. However, if you don’t have that, gently applied clear nail polish will get the same results.

After I had finished this, I added findings and the earrings were done. (The coin is for scale.)

IMG_0781 (002)

There is one last observation — it might be tempting, if you make earrings, to use copper ear wires to match the copper earrings. Don’t. Copper ear wires will discolor the skin. Niobium ear wires go well with copper jewelry, are hypo-allergenic, and will never discolor the skin.

Rings — not as hard as you think

Metal clay is a wonderful way to make rings. One just has to plan a bit (metal clay shrinks, so you have to make the ring a bit larger than you want it to wind up). I’m going to talk about silver; you can use bronze or copper, but have to take some extra steps so the ring does not discolor the finger of the wearer.

There are several ways to go about producing a ring. I prefer to use the MultiMandrel™ Set, pictured below. This tool has interchangeable cylindrical mandrels on which to make your ring. It comes in multiple sizes. Because it is aluminum, which does not mix with silver clay, you need to tape a piece of paper over the mandrel on which you will be working.

IMG_0734

The size depends on your brand of metal clay. With Art Clay silver, you need to make your ring 1.5 sizes bigger than you need. With PMC, you need two sizes. This isn’t a problem, as long as you plan for it.

IMG_0731

There are many ring templates out there. I made my own, carving it from a rubber block. I wanted the glyphs to go on either side of the stone, although I planned from the first on elaborating on them. I used standard methods to roll out the clay on this and cut it out. I placed it on the mandrel to dry.

IMG_0735

I used a bezel cup, because the stone I planned on using would not survive the kiln. If your stone can be fired, other methods can be used. I will talk about them in another posting. A bezel cup needs to be of the same material as the clay — a fine silver cup to go with fine silver clay. Otherwise, there is a risk of chemical reactions, rarely a good thing.

IMG_0738

This is the ring after being removed from the mandrel. It was cleaned like any metal clay. Additional decorations were added using syringe. If you aren’t familiar with syringe work, I will do another posting about that at a later time. Don’t worry, though. Syringe is not required for ring making.

IMG_0743

Here is a view of the ring straight out of the tumbler. If you like the shiny look, great. I prefer to patina my work. I used Liver of Sulfur, with a dash of salt and clear ammonia, because I wanted a dash of color. Had I just wanted to darken the work, I would have used Black Max.

After applying patina, I placed a stone, sized to fit the bezel cup, into the cup. Be careful about placement, because it is hard to get the stone out once it is in; if you want to see it without placing it, put a bit of dental floss behind the stone, so it can be popped out. The setting can be made permanent by using a burnisher to bend the edge of the bezel cup over. Bend one tiny section, then a section on the opposite side, etc. until you have gone all the way around the stone. It might take more than one circuit to get the stone set. If so, don’t worry about it.

I chose a synthetic fire opal for the setting. TWO views of it appear below. One emphasizes the stone and one the metal.

IMG_0747

IMG_0755

There is nothing special about this design. I used the exact same method (except I made two narrow bands instead of one wide one, with the bands joined behind the setting) to make a ring with an amber setting.

IMG_0758

IMG_0757

Don’t be afraid of ring making! Rings looks complicated but, except for the sizing issue, are no more complicated than any other metal clay project. I encourage you to give them a try!


Sometimes, simplicity is good

As the title says, work doesn’t need to be complicated to be appealing. Here, I am going to dscribe how to make a very simple, yet effective, pair of earrings.

IMG_0717
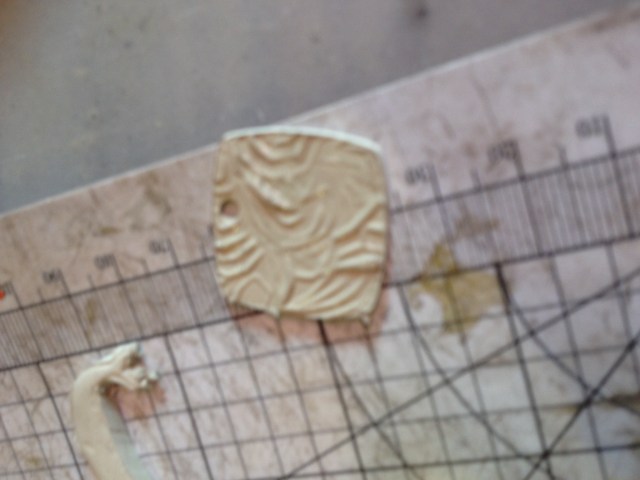
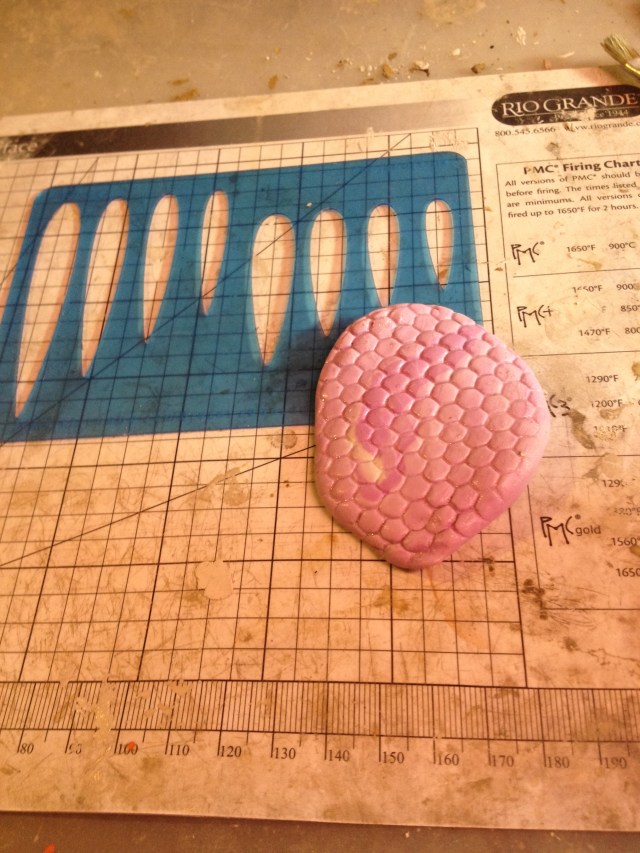
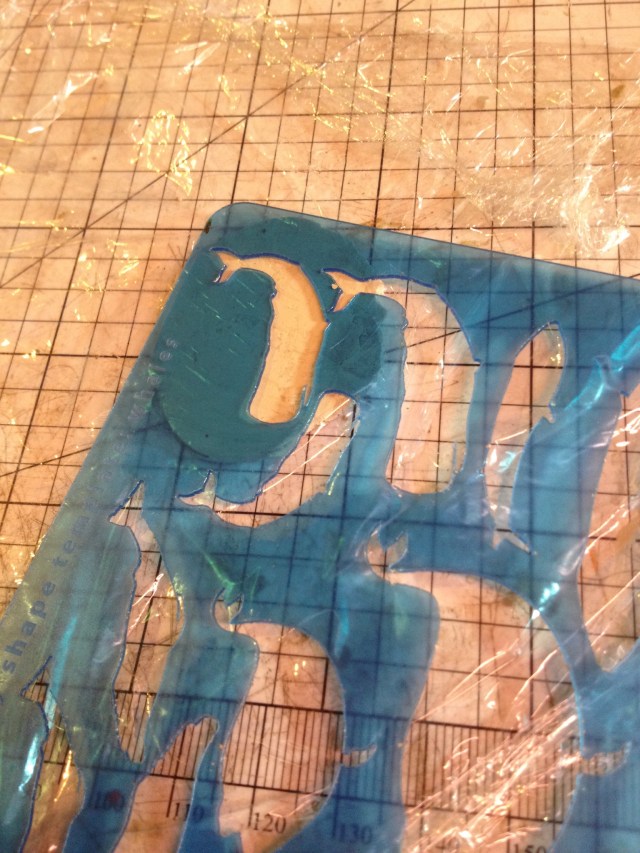
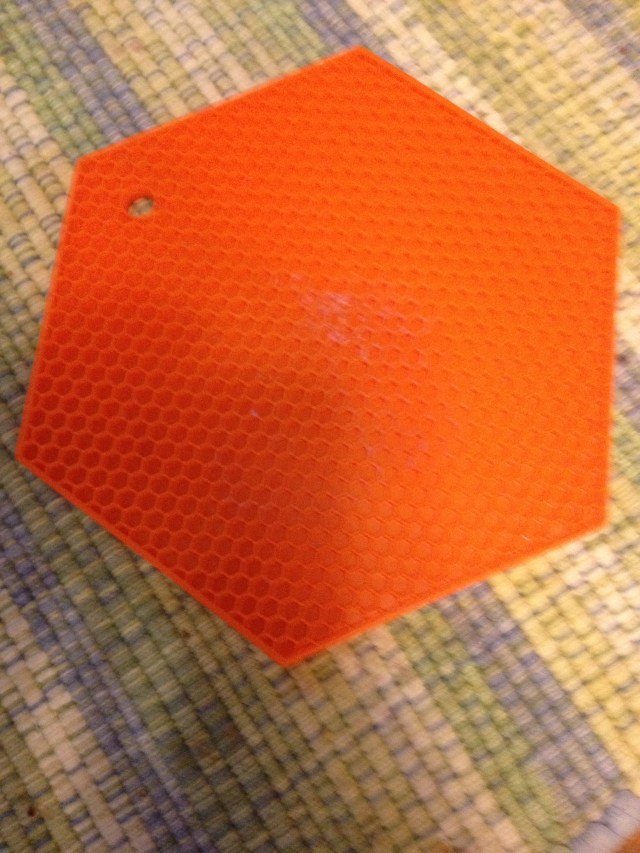
This is a silicone pot holder. I found the hexagonal pattern to be quite attractive. I thought I could use it. Of course, nothing I say here is peculiar to this pot holder. You could use any texture you find around the house or in nature that appeals to you — lichens, a clean scrubbing pad, almost anything.

The first step is to acquire some two-part molding compound. Two part molding compounds are available from almost all sources that sell metal clay. As the name suggests, they come in two putty-like parts. The trick is to never combine the two parts unless you mean it — they will set up hard in a few minutes. Using two different spoons, one for each part, remove approximately the same amount of molding compound from each jar. Flatten them together, and work them with a roller or your hands until the color is uniform (usually, one part is white and the other is a pastel). Once you have that, you have a few minutes of working time. You can use the molding compound to make a mold of almost anything, except human skin. Here, I used the pot holder, pushing the molding compound mixture down into it and removing it after the compound had dried. This made a mold I could use with metal clay.

IMG_0714

This picture depicts the mold I made, and the template I originally intended to use for the earrings. I later changed my mind and used a different template. However, that doesn’t change any part of what I have to say. I used the mold as a texture sheet — rub it with a lubricant (I use Hattie’s No-Stik ™) and roll metal clay out on it. Remove the metal clay and use your template and cutting tool to cut out your earrings, being careful to punch holes for the ear-wire (I use cocktail straws).

IMG_0722

I used silver clay. Obviously, bronze, copper, gold, or any other metal would work — the only real difference would be in the firing schedule. I decided that the earrings lacked a bit of visual interest if they were flat. I put them atop plastic Easter eggs and air dried them. If you live in a climate where air drying is difficult, you only need to dry them enough to hold their shape. Then you can transfer them to a dehydrator. The next step was greenware finishing, which was just like every other piece of metal clay. I then fired, brushed, and tumbled the earrings.

IMG_0723

This is what they look like out of the tumbler. I prefer to patina my work. That is, of course, optional. I used Black Max(tm) patina. Had I wanted color instead of simply darkening the clay, I could have used liver of sulphur.

IMG_0725

Here are the earrings, patinaed and with ear wires attached. I photographed them with a coin to provide scale.

Again, the point of this post is to emphasize that you don’t need to do complicated work for it to be attractive. I made my own texture sheet using household materials. I did a simple ‘texture, cut, shape, fire, polish, and patina’. You can do the same! The only limit is your imagination.


An Esperanto Haiku

I haven’t posted in quite a while, due to some health problems. I hope to be back up and running in the near future.

Just so things don’t get too static, I have decided to post an Esperanto haiku I wrote. Haiku is a Japanese poetic form, in which there are five syllables in the first and last lines, and seven in the third. Ideally, the poem concerns a particular moment in time, usually with references to nature. Also ideally, the reader does not understand the poem until the last line.

In Esperanto poetry, it is considered acceptable to drop the final ‘o’ to make a line scan, replacing it with an apostrophe. I have used that convention. I have a long history of writing science fiction haiku, and I followed up on that here. Anyway, here is the poem:


Estas sen varmo

Eta punkt’ en mallumo

La sun’ el Pluto


Translation (which reflects the meaning but does not honor the syllable count):

It is without warmth

A tiny dot in darkness

The sun above Pluto.


Another translation (very free, but honors the poetic form):

Light that gives no heat

Tiny point in the dark sky

Sun seen from Pluto.

Keum Boo: Make Gold Go Further

We all love the luxurious shine of gold. The problem: it’s expensive. Especially gold clay. There is a work around, a Korean technique called Keum Boo that lets you fuse gold to fine (not sterling — it can be done but it’s harder) silver. Here we are going to discuss making a pair of earrings that are mostly silver but have some gold to give them that extra something.

IMG_0686

Step 1. Make a pair of earrings from silver clay. Some texture is OK, but too much will make applying the gold difficult. No texture makes the piece lack interest. I suggest choosing a piece that has some texture, but not too much. The picture above depicts a MesoAmerican design (yes, I know keum boo is Asian, not Native American). I dried the clay on plastic eggs to give them some shape. That is not necessary — flat is fine if that’s what you prefer.

Step 2. Finish the greenware. Fire the earrings, but do not brush (yet).

IMG_0693

Step 3. Obtain the use of a beehive kiln. They are inexpensive, and many come with brass plates just for doing keum boo. Place the piece to which gold will be applied on the brass plate. Heat it until it will char a toothpick at a touch. If you are measuring temperature, you are looking for 600-800 degrees F. However, I have found that the toothpick method is just as good.

IMG_0694

Step 4. Apply gold foil (not gold leaf) to the unbrushed piece. Use tweezers to apply, both because the foil is too delicate to handle and because the piece you are working with is hot. Once it has been applied, use an agate burnisher to tap the gold down onto the silver. If it’s not sticking, keep going. Enough light pressure at the right temperature, and the gold and silver will bond. If you choose to use multiple layers of gold, you get an even deeper color. The picture above uses two layers.

IMG_0695

Step 5.  Here is what the gold looks like when it is attached to the (still unbrushed) silver. In the picture, the earrings are resting on a fire brick (they are still hot). You can see the handle of the agate burnisher I used and the toothpick I used to determine if the silver was hot enough.

IMG_0697

Step 6. Brush the product like any silver clay. The gold will adhere if you have done it correctly. If you are nervous, cover the gold with your thumb while brushing. Then tumble. The gold will not come off in tumbling if it is solidly joined to the silver.

IMG_0698

Step 7. I applied a dark patina on one side of the gold. I polished the other side to make it as bright as possible. And there you have it, a pair of silver earrings that display shiny silver, darkened silver, and the luster of gold. It’s not as hard as it seemed, is it? I encourage you to try it for yourself …. incorporate gold into you silver clay work without spending a fortune!!