

Metal clay is a wonderful way to make rings. One just has to plan a bit (metal clay shrinks, so you have to make the ring a bit larger than you want it to wind up). I’m going to talk about silver; you can use bronze or copper, but have to take some extra steps so the ring does not discolor the finger of the wearer.
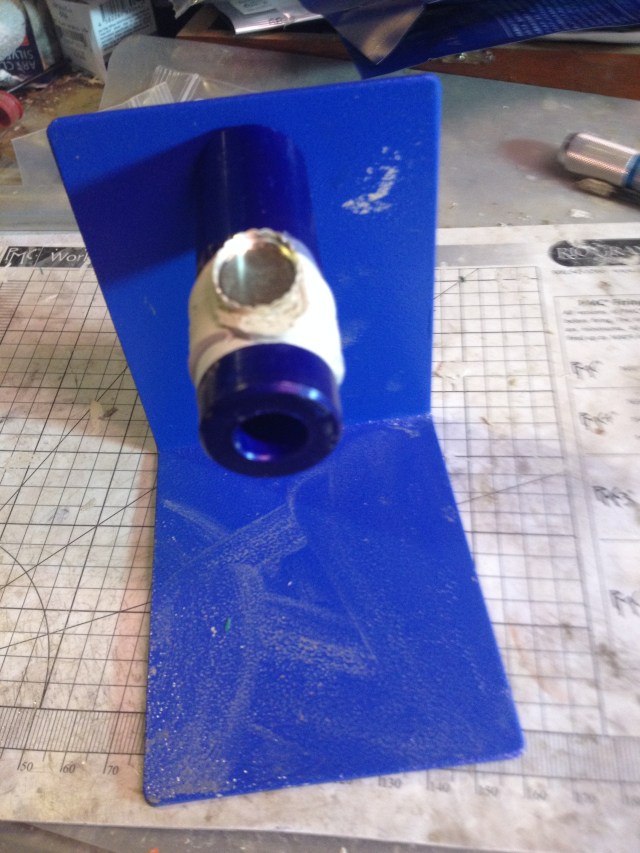
There are several ways to go about producing a ring. I prefer to use the MultiMandrel™ Set, pictured below. This tool has interchangeable cylindrical mandrels on which to make your ring. It comes in multiple sizes. Because it is aluminum, which does not mix with silver clay, you need to tape a piece of paper over the mandrel on which you will be working.

The size depends on your brand of metal clay. With Art Clay silver, you need to make your ring 1.5 sizes bigger than you need. With PMC, you need two sizes. This isn’t a problem, as long as you plan for it.
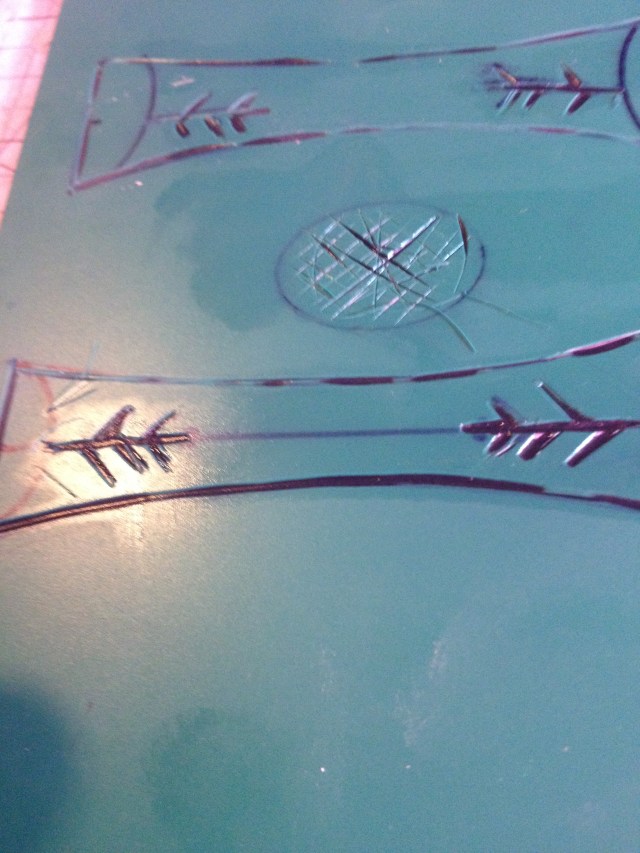
There are many ring templates out there. I made my own, carving it from a rubber block. I wanted the glyphs to go on either side of the stone, although I planned from the first on elaborating on them. I used standard methods to roll out the clay on this and cut it out. I placed it on the mandrel to dry.
I used a bezel cup, because the stone I planned on using would not survive the kiln. If your stone can be fired, other methods can be used. I will talk about them in another posting. A bezel cup needs to be of the same material as the clay — a fine silver cup to go with fine silver clay. Otherwise, there is a risk of chemical reactions, rarely a good thing.
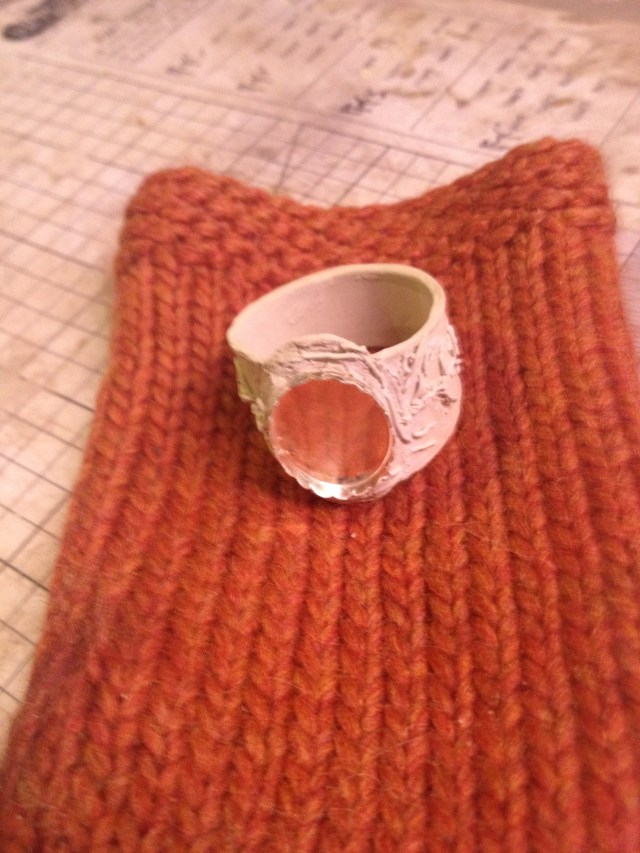
This is the ring after being removed from the mandrel. It was cleaned like any metal clay. Additional decorations were added using syringe. If you aren’t familiar with syringe work, I will do another posting about that at a later time. Don’t worry, though. Syringe is not required for ring making.
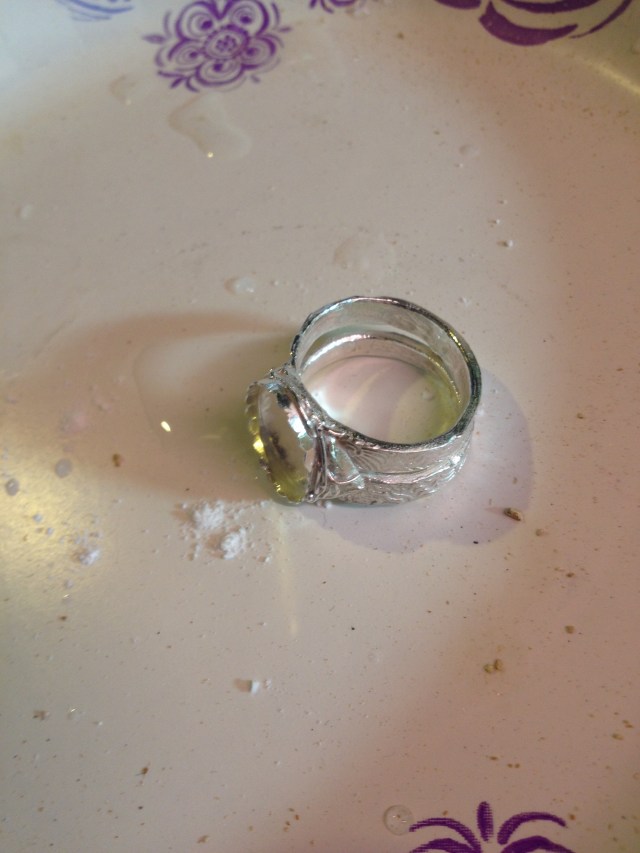
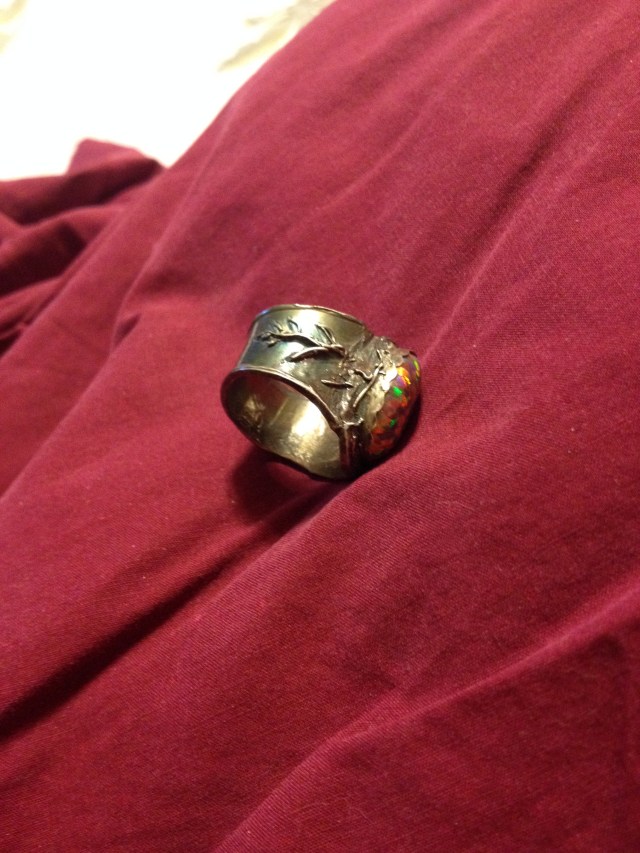
Here is a view of the ring straight out of the tumbler. If you like the shiny look, great. I prefer to patina my work. I used Liver of Sulfur, with a dash of salt and clear ammonia, because I wanted a dash of color. Had I just wanted to darken the work, I would have used Black Max.
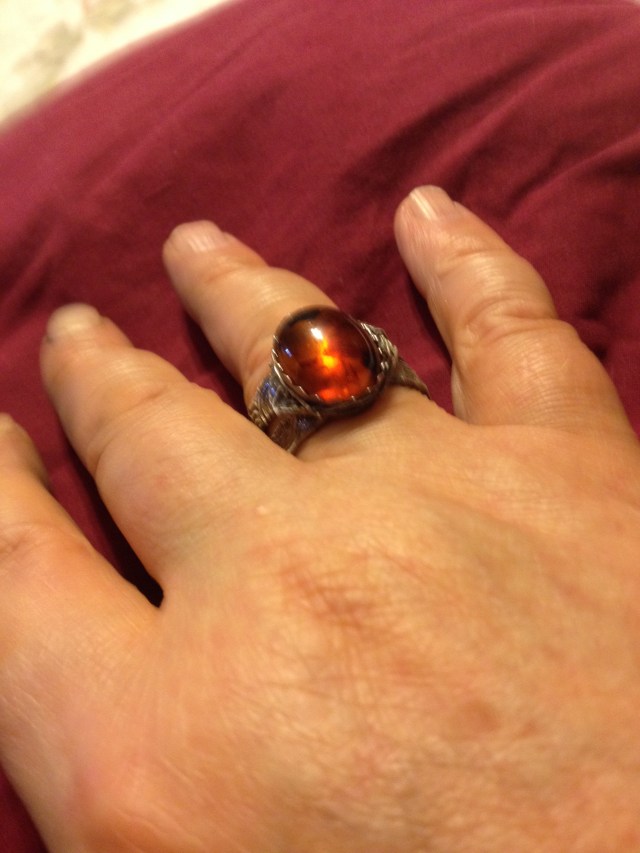
After applying patina, I placed a stone, sized to fit the bezel cup, into the cup. Be careful about placement, because it is hard to get the stone out once it is in; if you want to see it without placing it, put a bit of dental floss behind the stone, so it can be popped out. The setting can be made permanent by using a burnisher to bend the edge of the bezel cup over. Bend one tiny section, then a section on the opposite side, etc. until you have gone all the way around the stone. It might take more than one circuit to get the stone set. If so, don’t worry about it.
I chose a synthetic fire opal for the setting. TWO views of it appear below. One emphasizes the stone and one the metal.

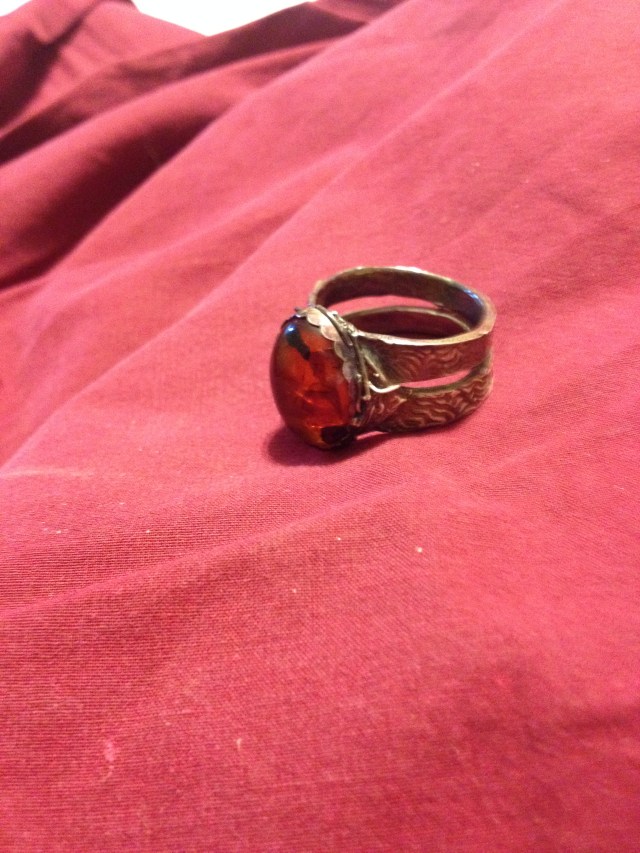
There is nothing special about this design. I used the exact same method (except I made two narrow bands instead of one wide one, with the bands joined behind the setting) to make a ring with an amber setting.
Don’t be afraid of ring making! Rings looks complicated but, except for the sizing issue, are no more complicated than any other metal clay project. I encourage you to give them a try!
