Art Deco

Art Deco was an artistic style that became popular in France, just beforBe the First World War, and continued for several decades later. It is characterized by bold geometrics, and, often, a streamlined design.

I recently came on some Art Deco molds, and saw the possibilities for use with metal clay. Below are two Art Deco pieces in greenware, both made from Aussie ruby bronze. Since this clay can be fired at a relatively low temperature, I was able to include a sapphire cabochon.

The same two pieces, after firing, tumbling, and applying a light patina appear below. In all images of finished pieces, a coin is included to provide scale.

I thought these were successes, so I tried three more Art Deco pieces. These were made with Fastfire Bronz clay.

Art Deco and metal clay just seem to go together. Look around for Art Deco molds. They can be the start of some very appealing work.

Scythian Stag

The Scythians were an ancient people of Central Asia/Eastern Europe. To the Scythians, the stag was a symbol of the sun and its daily journey across the sky. The famous Scythian stag (you have almost certainly seen it somewhere) can be reproduced in bronze clay. If the bronze is highly polished, it even resembles the gold of the original.

I started by cutting out the general shape of the stag, 0.75 mm thick. I used Aussie Ruby Bronze for the entire project, because I like its shininess, and thought it would reflect the golden original.

Then I added the rough shape of the antlers. They don’t look very good yet, but that will be fixed later.

The head was made free-form. A simple depression was left for the eye, to be filled in later with a sphere of clay, creating the eye. The shoulder was rolled 1 mm thick, and then formed by cutting out the shape. I used a clay shaping tool to slightly round the shoulder.

The rest of the body, and the tail, were made by free-from shaping of clay. The hooves and mouth were put in place by using a needle tool.

Previously, the image was somewhat rough. That is to be expected. Smoothing it out came from a great deal of sanding and shaping.

If it is to be worn, it needs a bail. I struggled with the decision– hidden bail (which would obscure the openings in the antlers) or visible bail (which makes the antlers a little harder to read from a distance). I made the latter choice. The texture on the bail helps it stand out from the un-textured stag. Also, the bail’s sloping sides will help the asymmetric shape hang evenly when someone wears it.

Aussie clay requires a two stage firing. I fired according to package directions, then brushed, then tumbled. I chose to not apply a patina. Since this is made in homage to artwork of the 6th century BCE, I chose to let it weather as nature directs.

The finished piece, with a coin for scale, appears above.

The Scythians had a unique style of art, much of it produced in gold. This artistic style provides inspiration for working in bronze clay.

Taking it Easy

The Cernunos figure that I described in my last post took a lot of effort. After that, I decided to do something simple — and use up the clay left over from making the Cernunos. I made three simple rings, each with a twist to make it somewhat unusual. All were both easy to do and visually appealing. I will describe the three of them here, and say something about how they were made.

20200415_153824

This ring is the easiest to describe. I made a simple textured ring, although I made it a bit thicker than usual (1.25mm instead of 1 mm). Then, using a small plastic straw, I punched evenly spaced holes in it. The increased thickness is to make up for the ring not being as solid as usual. I patinaed the ring, and then polished the patina off the raised part of the texture. The holes complement the texture, which combines light and dark, giving the ring a unique look.

20200415_153844

For this ring, I rolled out a snake of clay. I then gripped it by the middle, held it up in the air, and spun it slowly, so the snake would twist around itself. I then placed the twisted snake over a ring mandrel. I used a clay shaper and a bit of slip to make sure the ends would stick. After firing, I decided that this ring looked best shiny. In other words, I did not apply a patina.

20200415_153836

To make this ring, I extruded a snake. An extruded snake is even; a rolled snake, as in the ring above, is not. Neither is better than the other. It’s simply an artistic choice. I then rolled the extruded snake around a ring mandrel. I made a ‘cinnamon bun’ shape around a bezel cup, making sure the extruded snake was snugly fit around the cup, so it would stay in place. Using a clay shaper, I cut around the edges of the cup, so the setting would stand out and so it would be easier to set the stone. After firing, I decided that this piece, also, did not need a patina. I set it with an aquamarine stone. The combination of the twist of the rounded band, the ‘cinnamon bun’, and the pale stone give the ring a lovely ‘organic’ look. One caveat — a ring like this has a top and a bottom — if worn the other way, it tends to twist. However, it is easy to figure out which way is correct — just wear the ring a few minutes and, if it needs to be reversed, you will quickly know it.

These pieces are all easy to make, and provide attractive alternatives to standard rings. They are also light-weight, and do not get in the wearer’s way. Give ring design some thought — there are many easy ways to make unique rings!!

\

Cernunos

I was recently commissioned to make a silver pendant of Cernunos, the ancient Celtic god of death and rebirth. While there are many historic images of Cernunos, they don’t agree on appearance. The only communality is a severe looking human face with horns or antlers. That gave me lots of freedom.

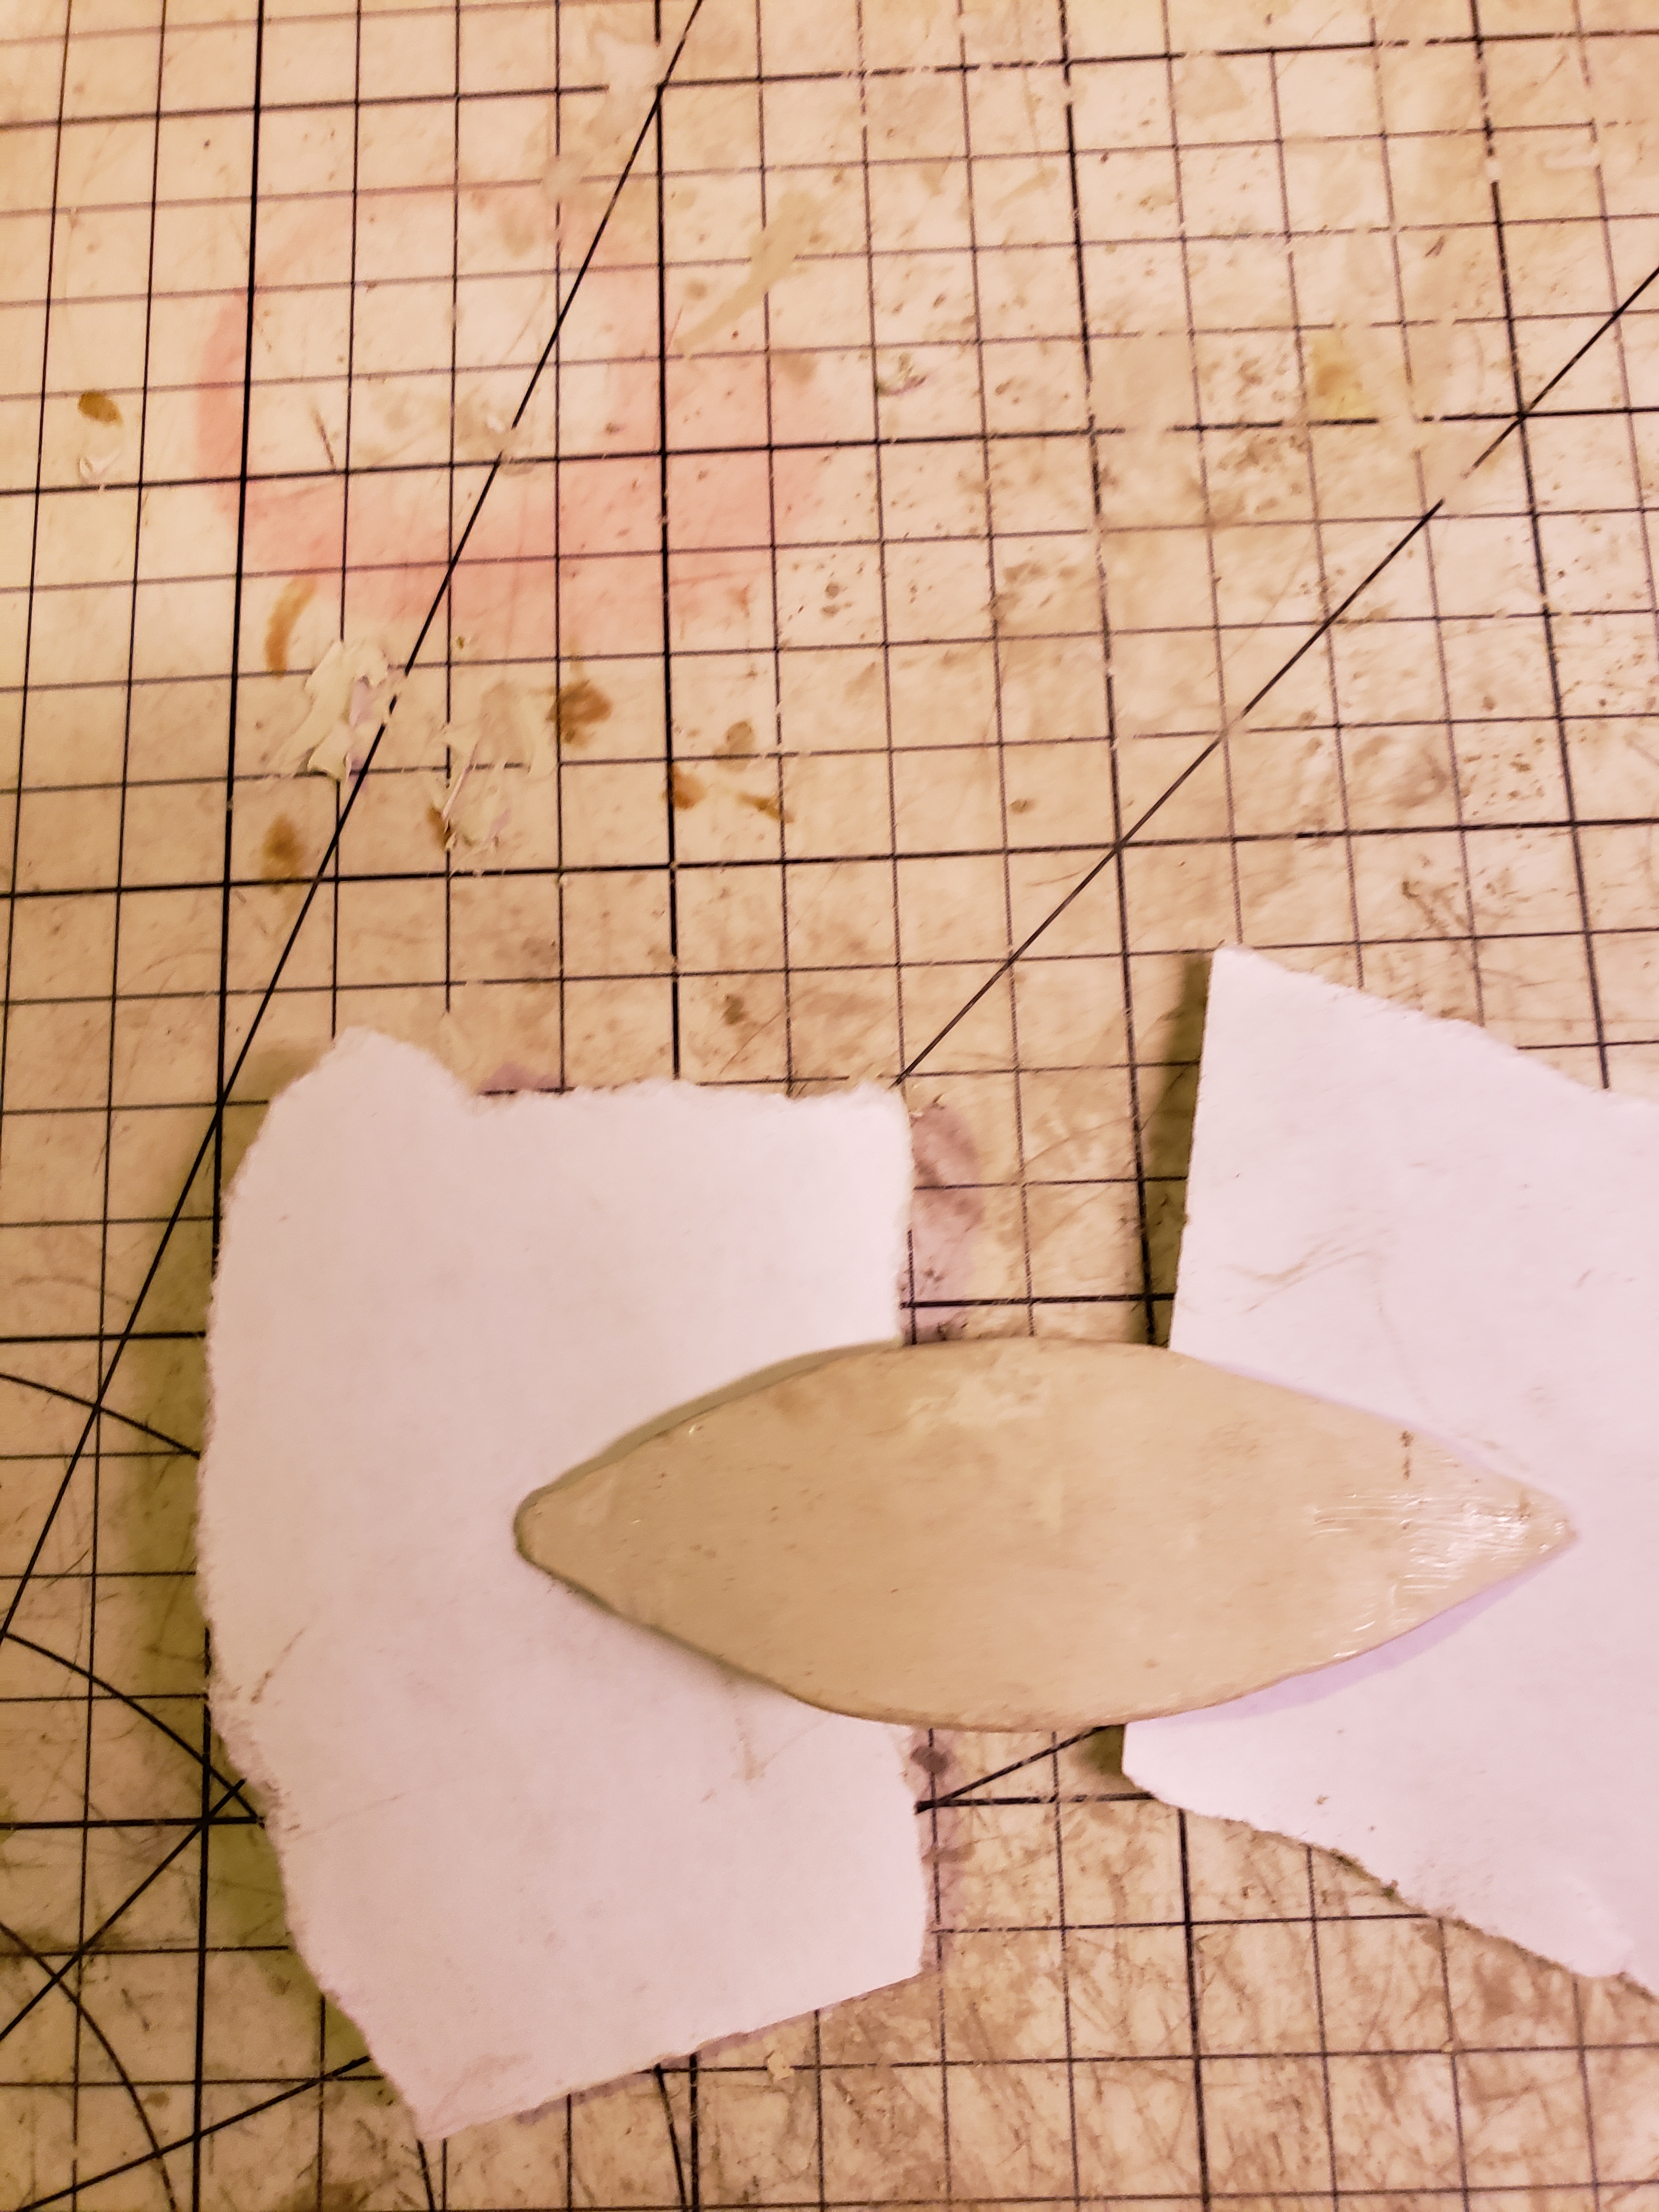
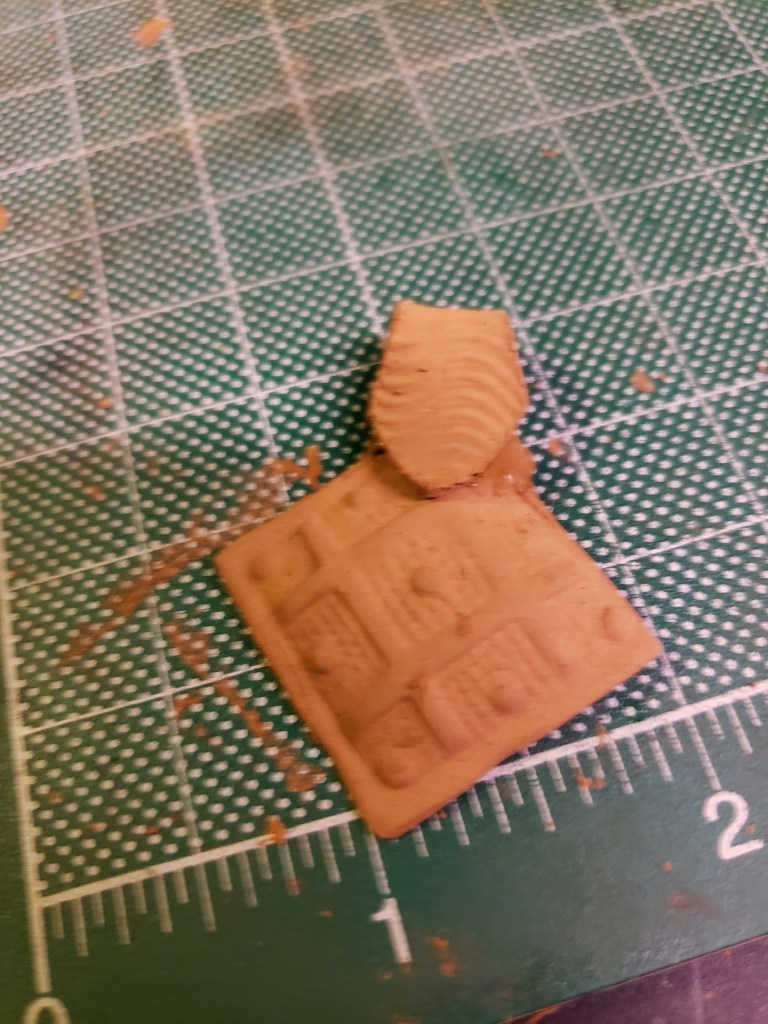
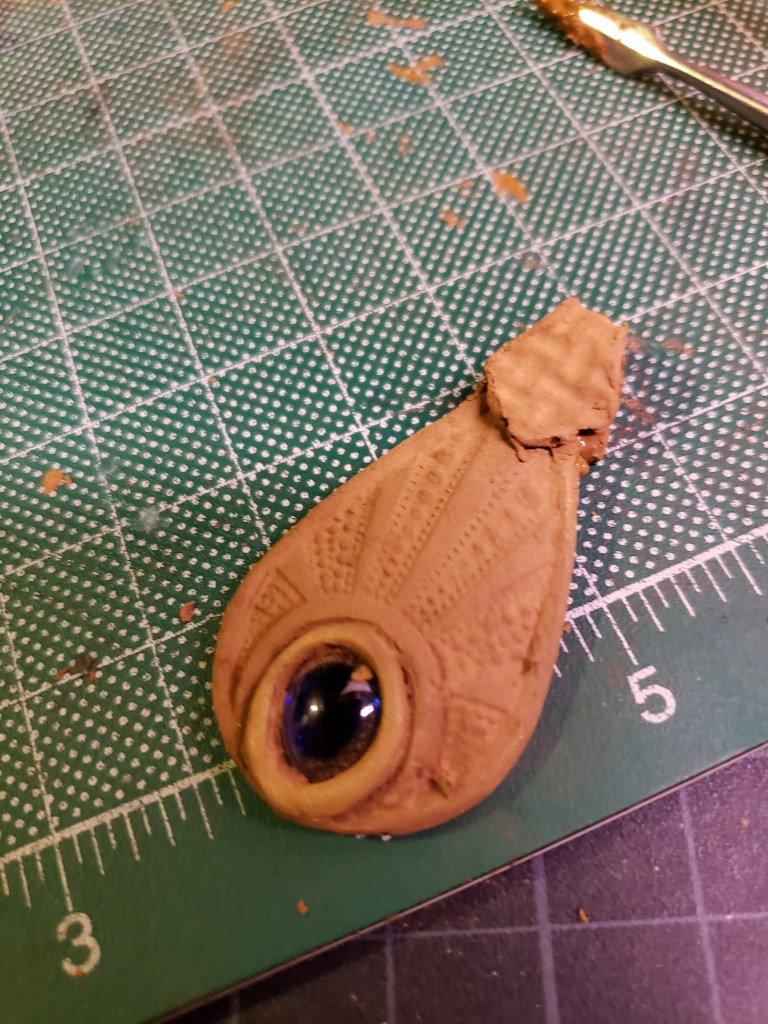
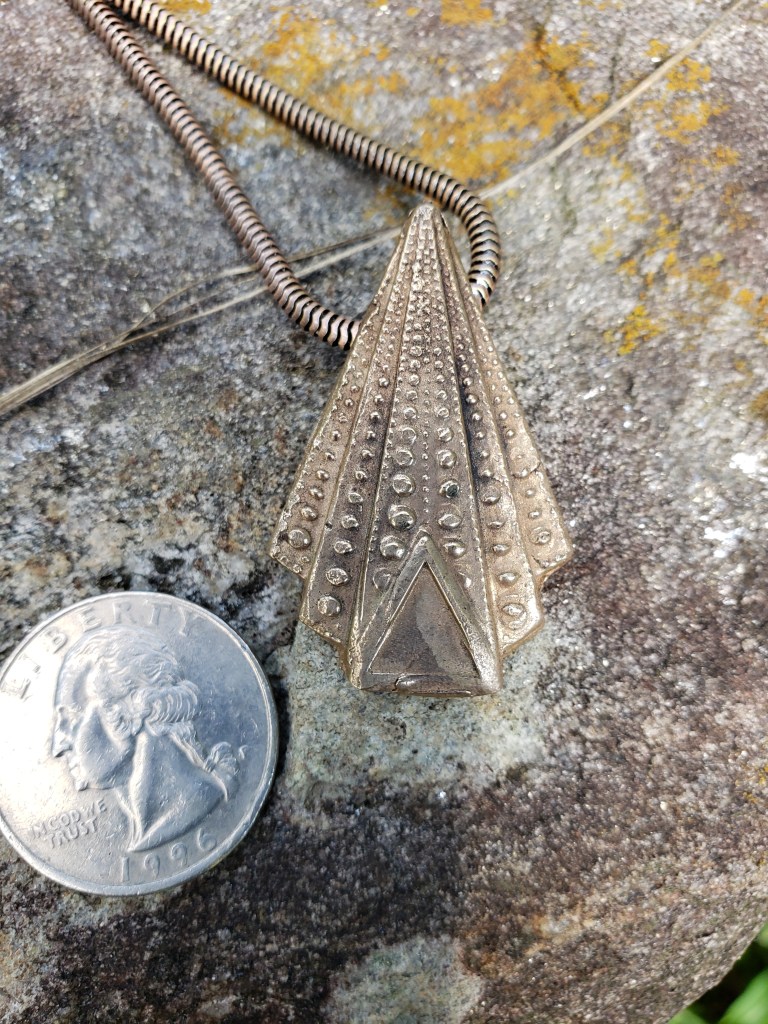
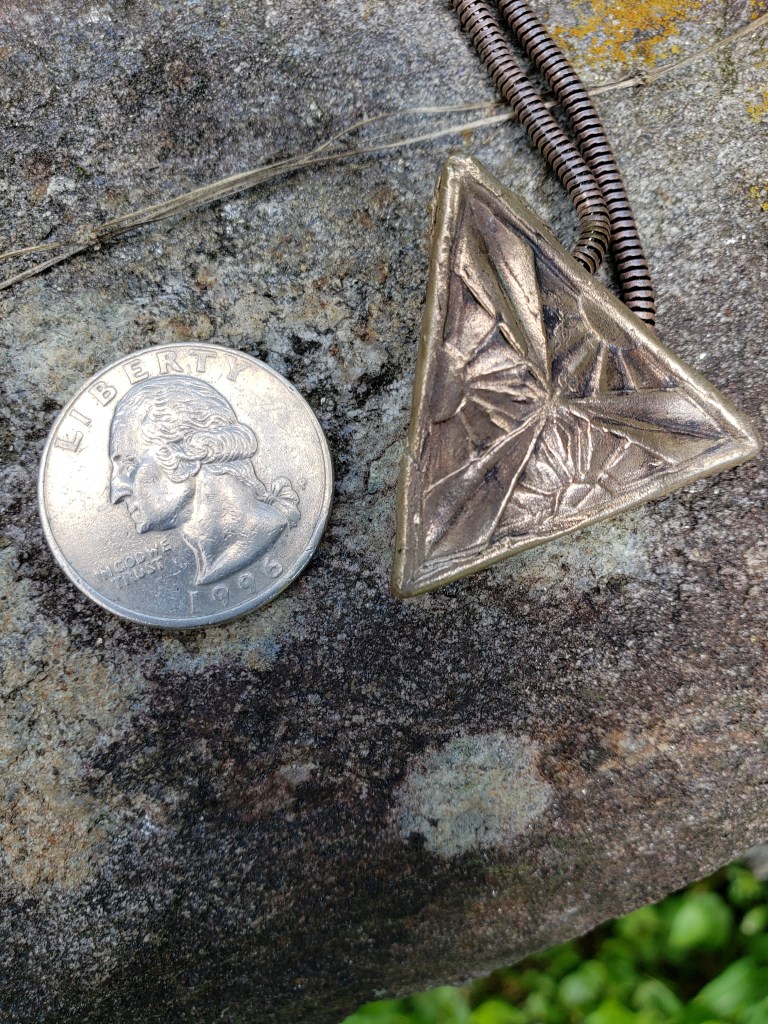
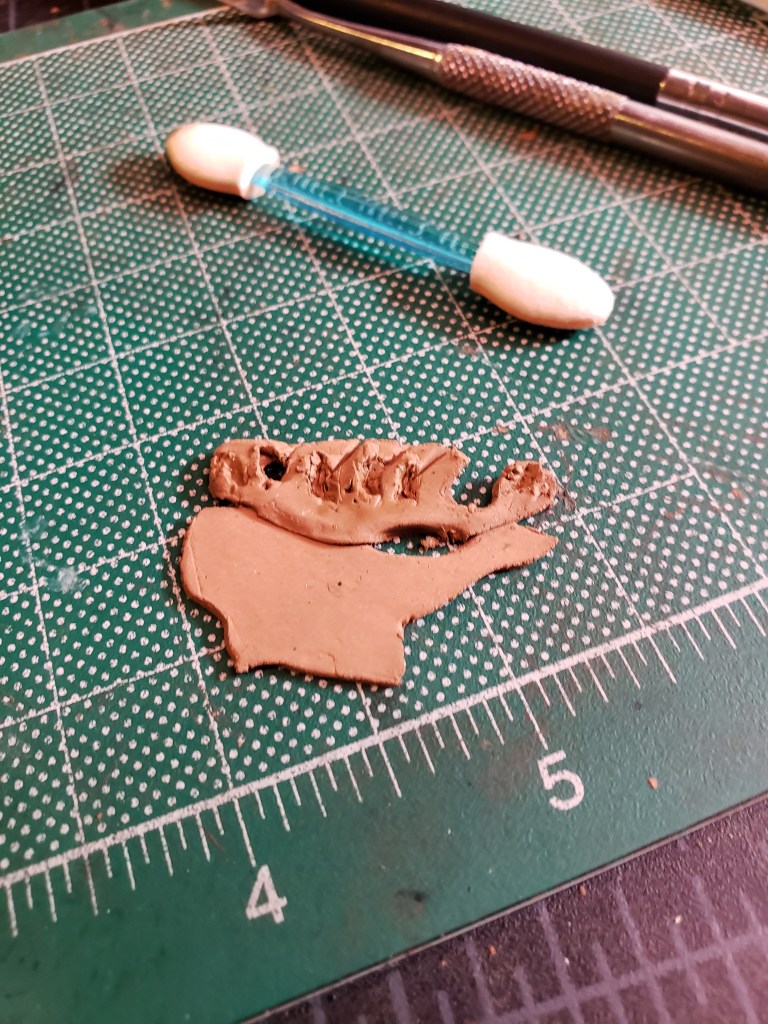
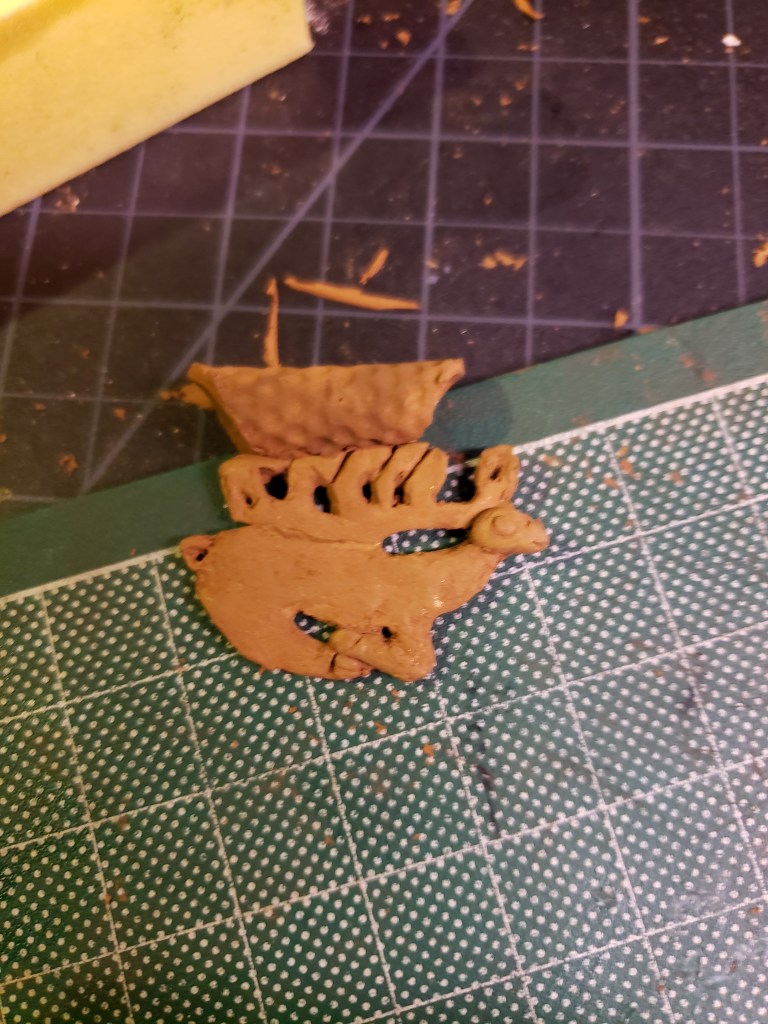
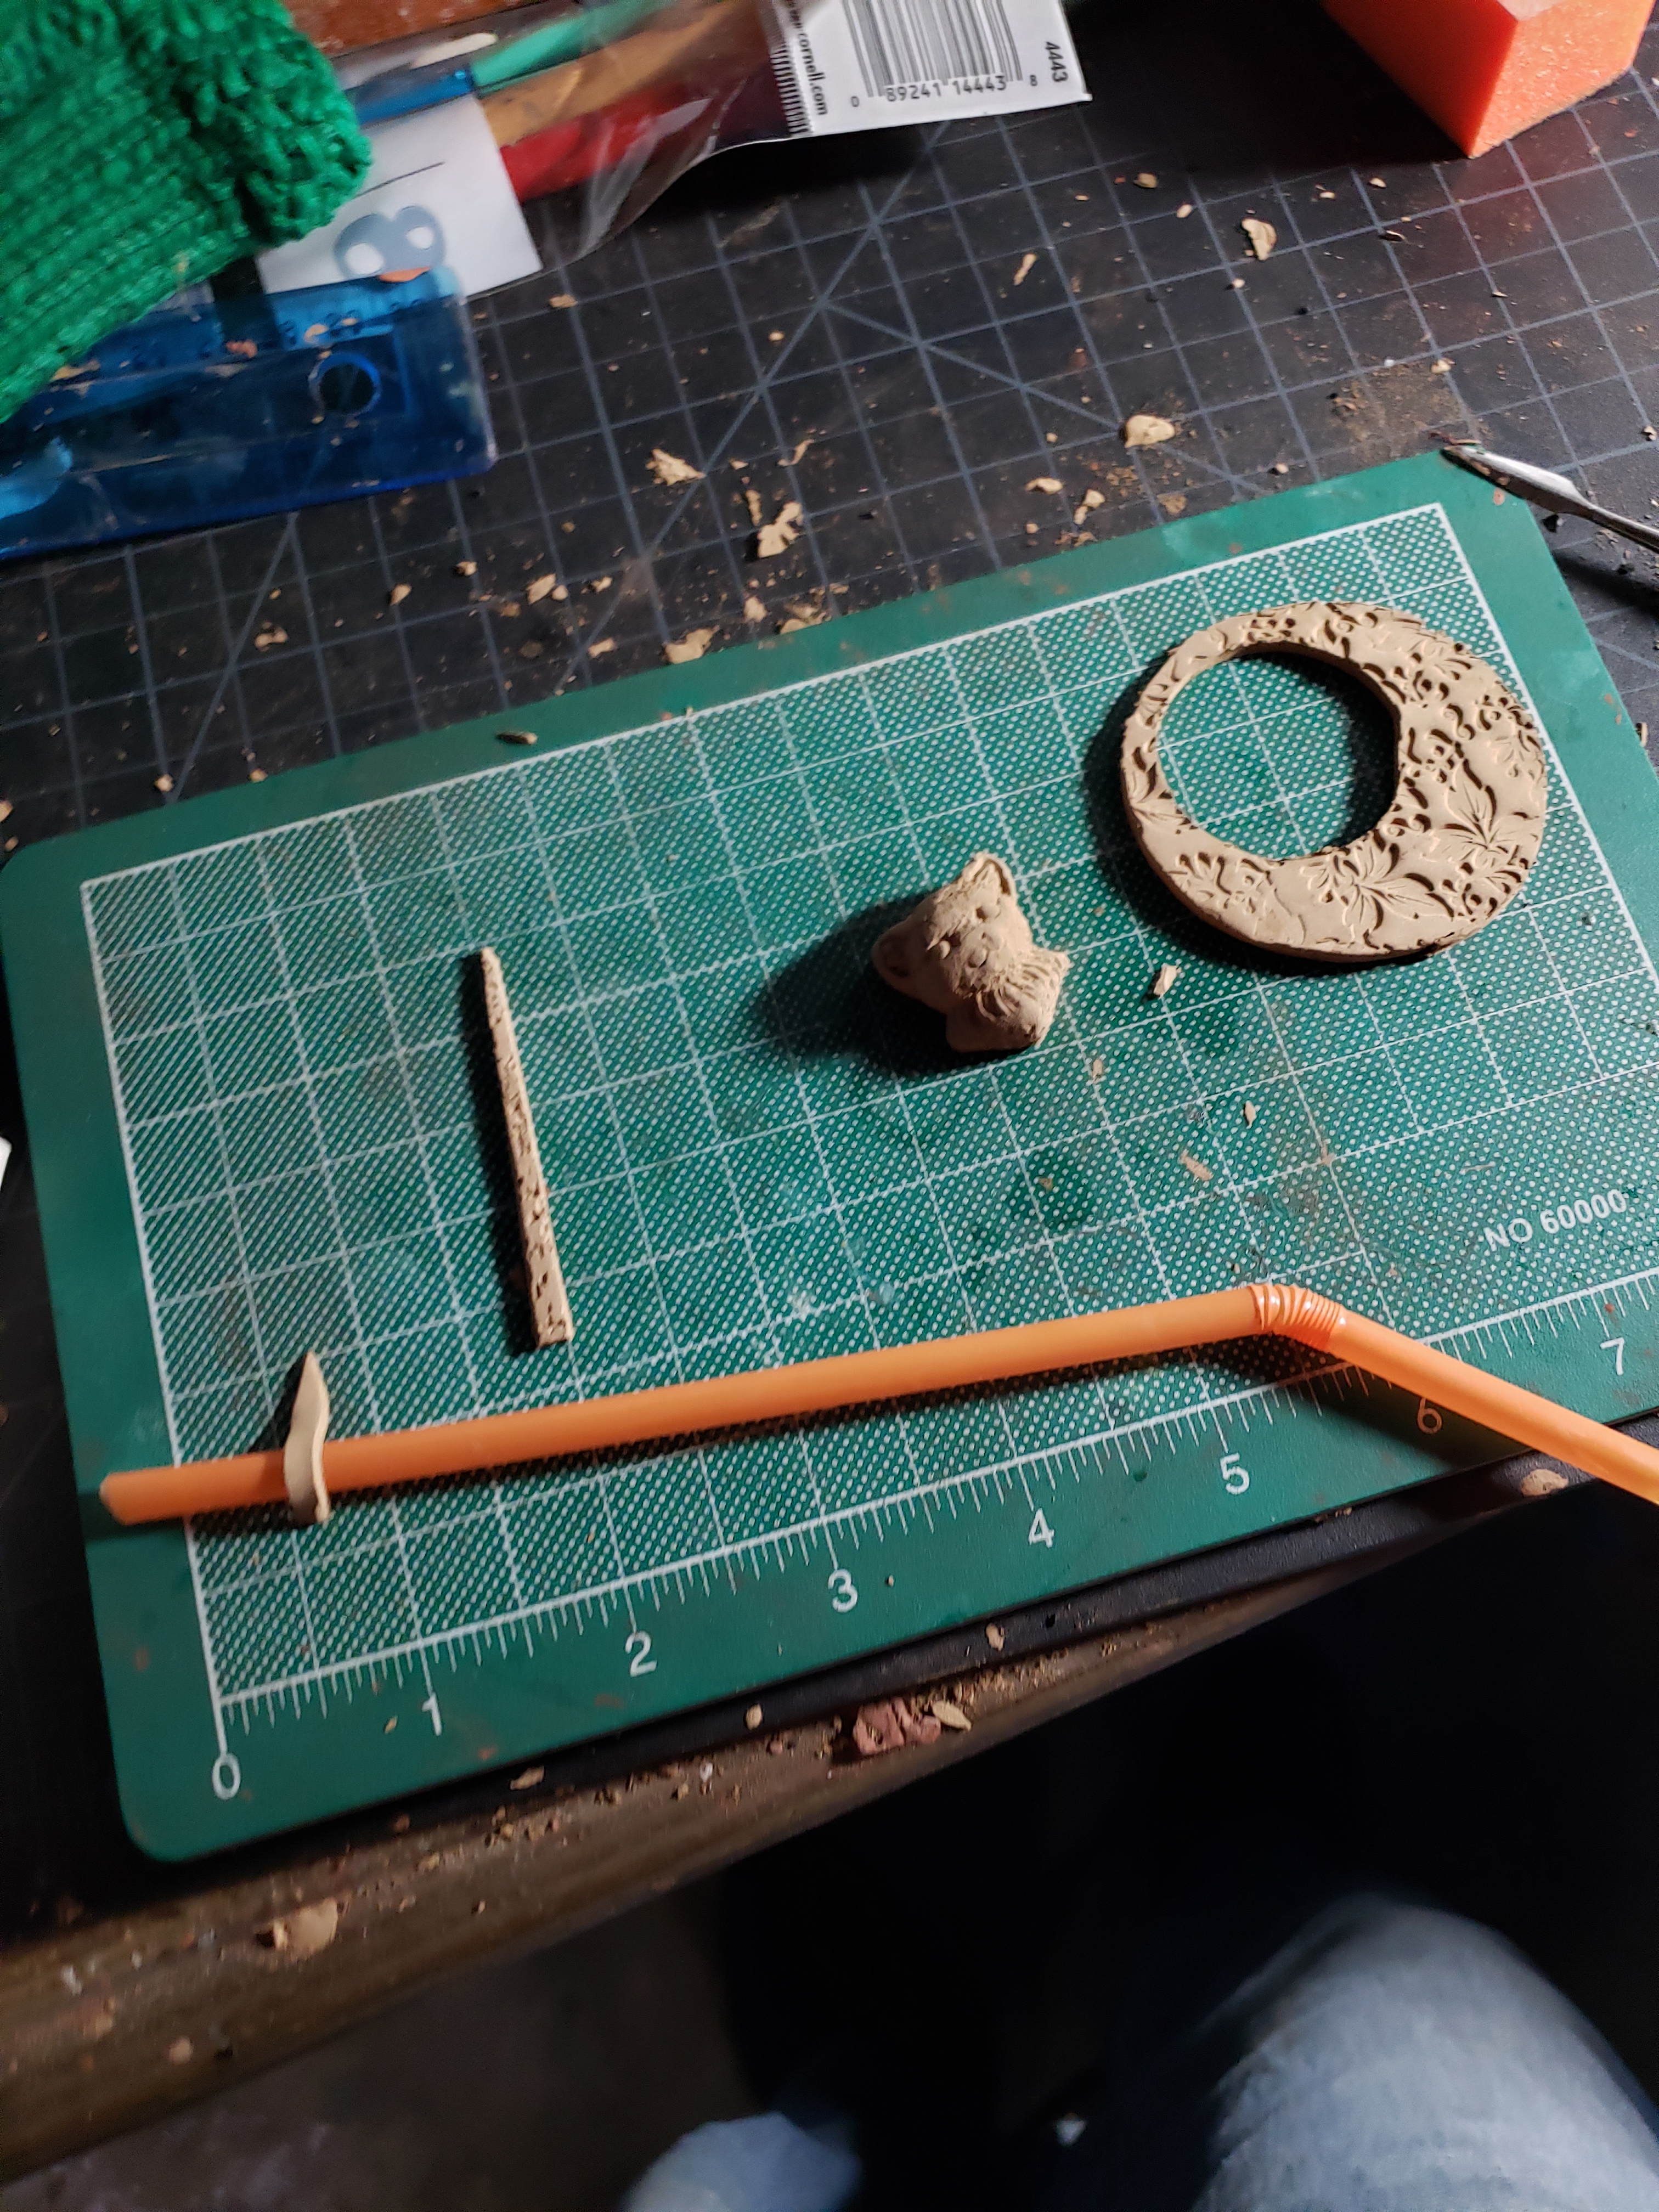
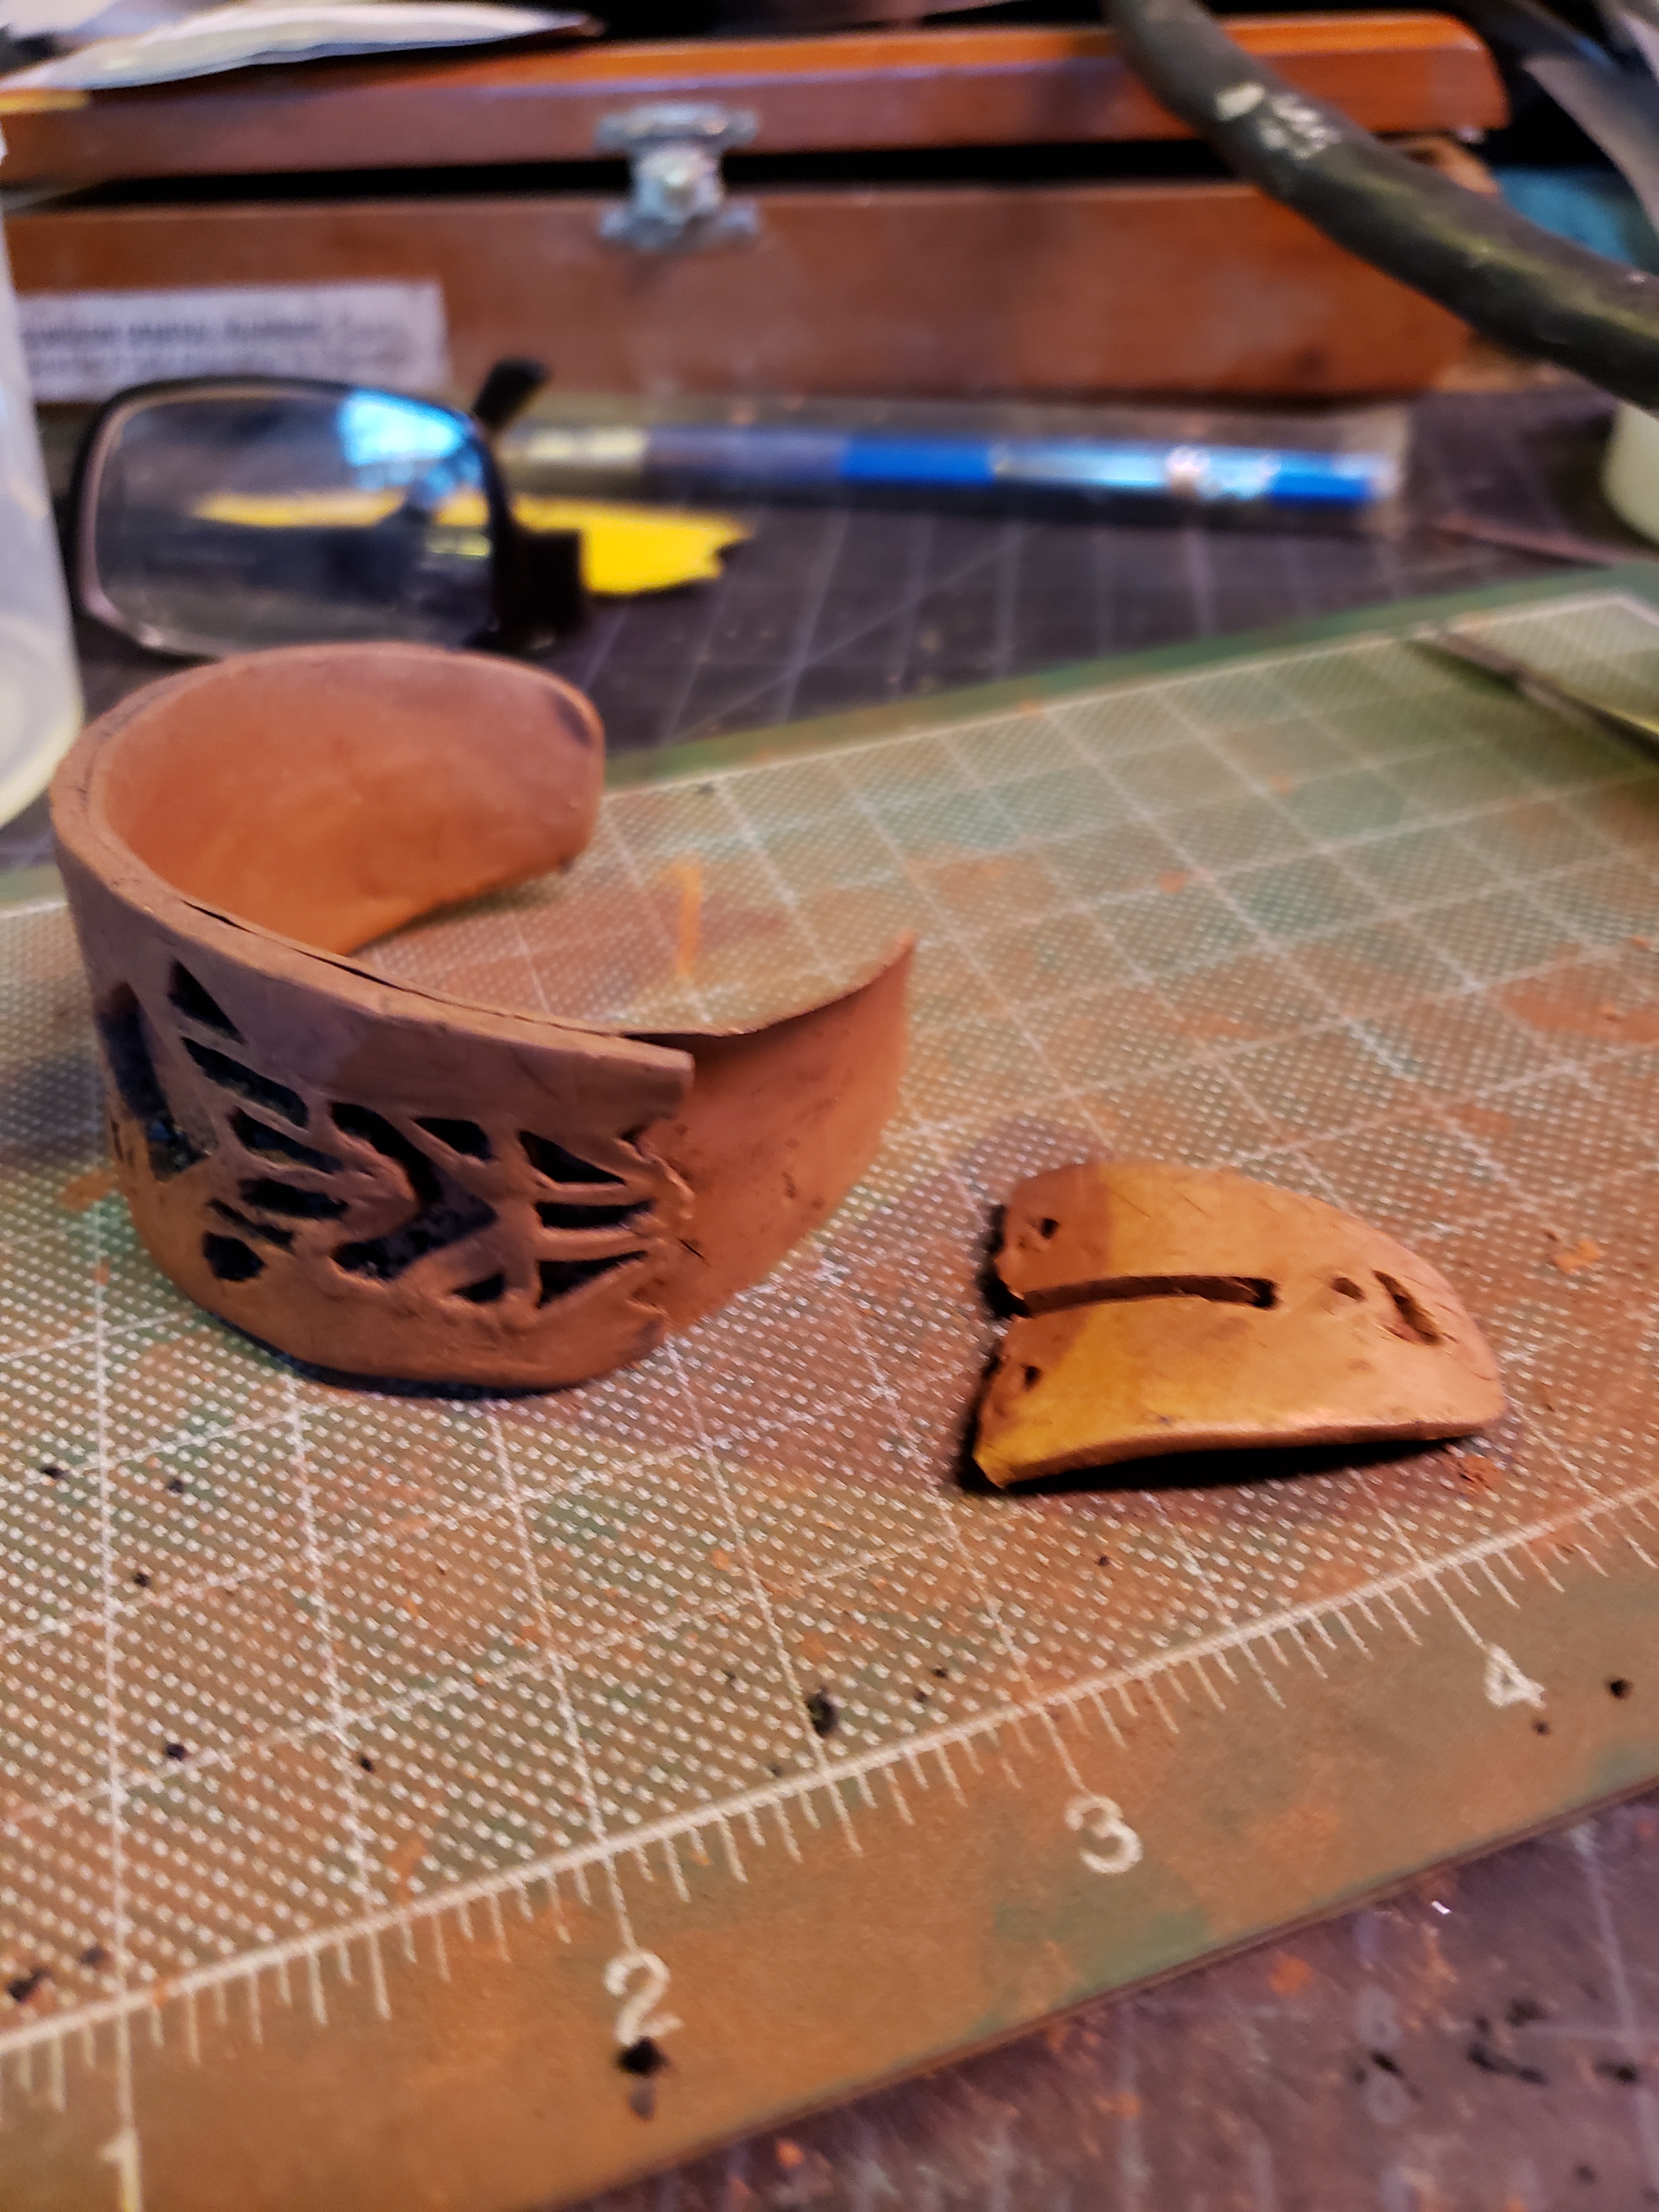
I started by making Cernunos’ head from an embossed puffy triangle. This shape is good for making a face look severe. I used a clay shaper to form cheekbones, brow ridges, and a prominent chin. I cut out the eye sockets. I then embossed shapes for the eyes, giving them a more natural look. I attached them from the rear of the piece. I free-hand sculpted a nose and lips. I embossed antlers, and added them to the head. I used syringe to add a few more details to the eyes. I sculpted a torc (a piece of jewelry ancient Celtic men often wore around their necks).

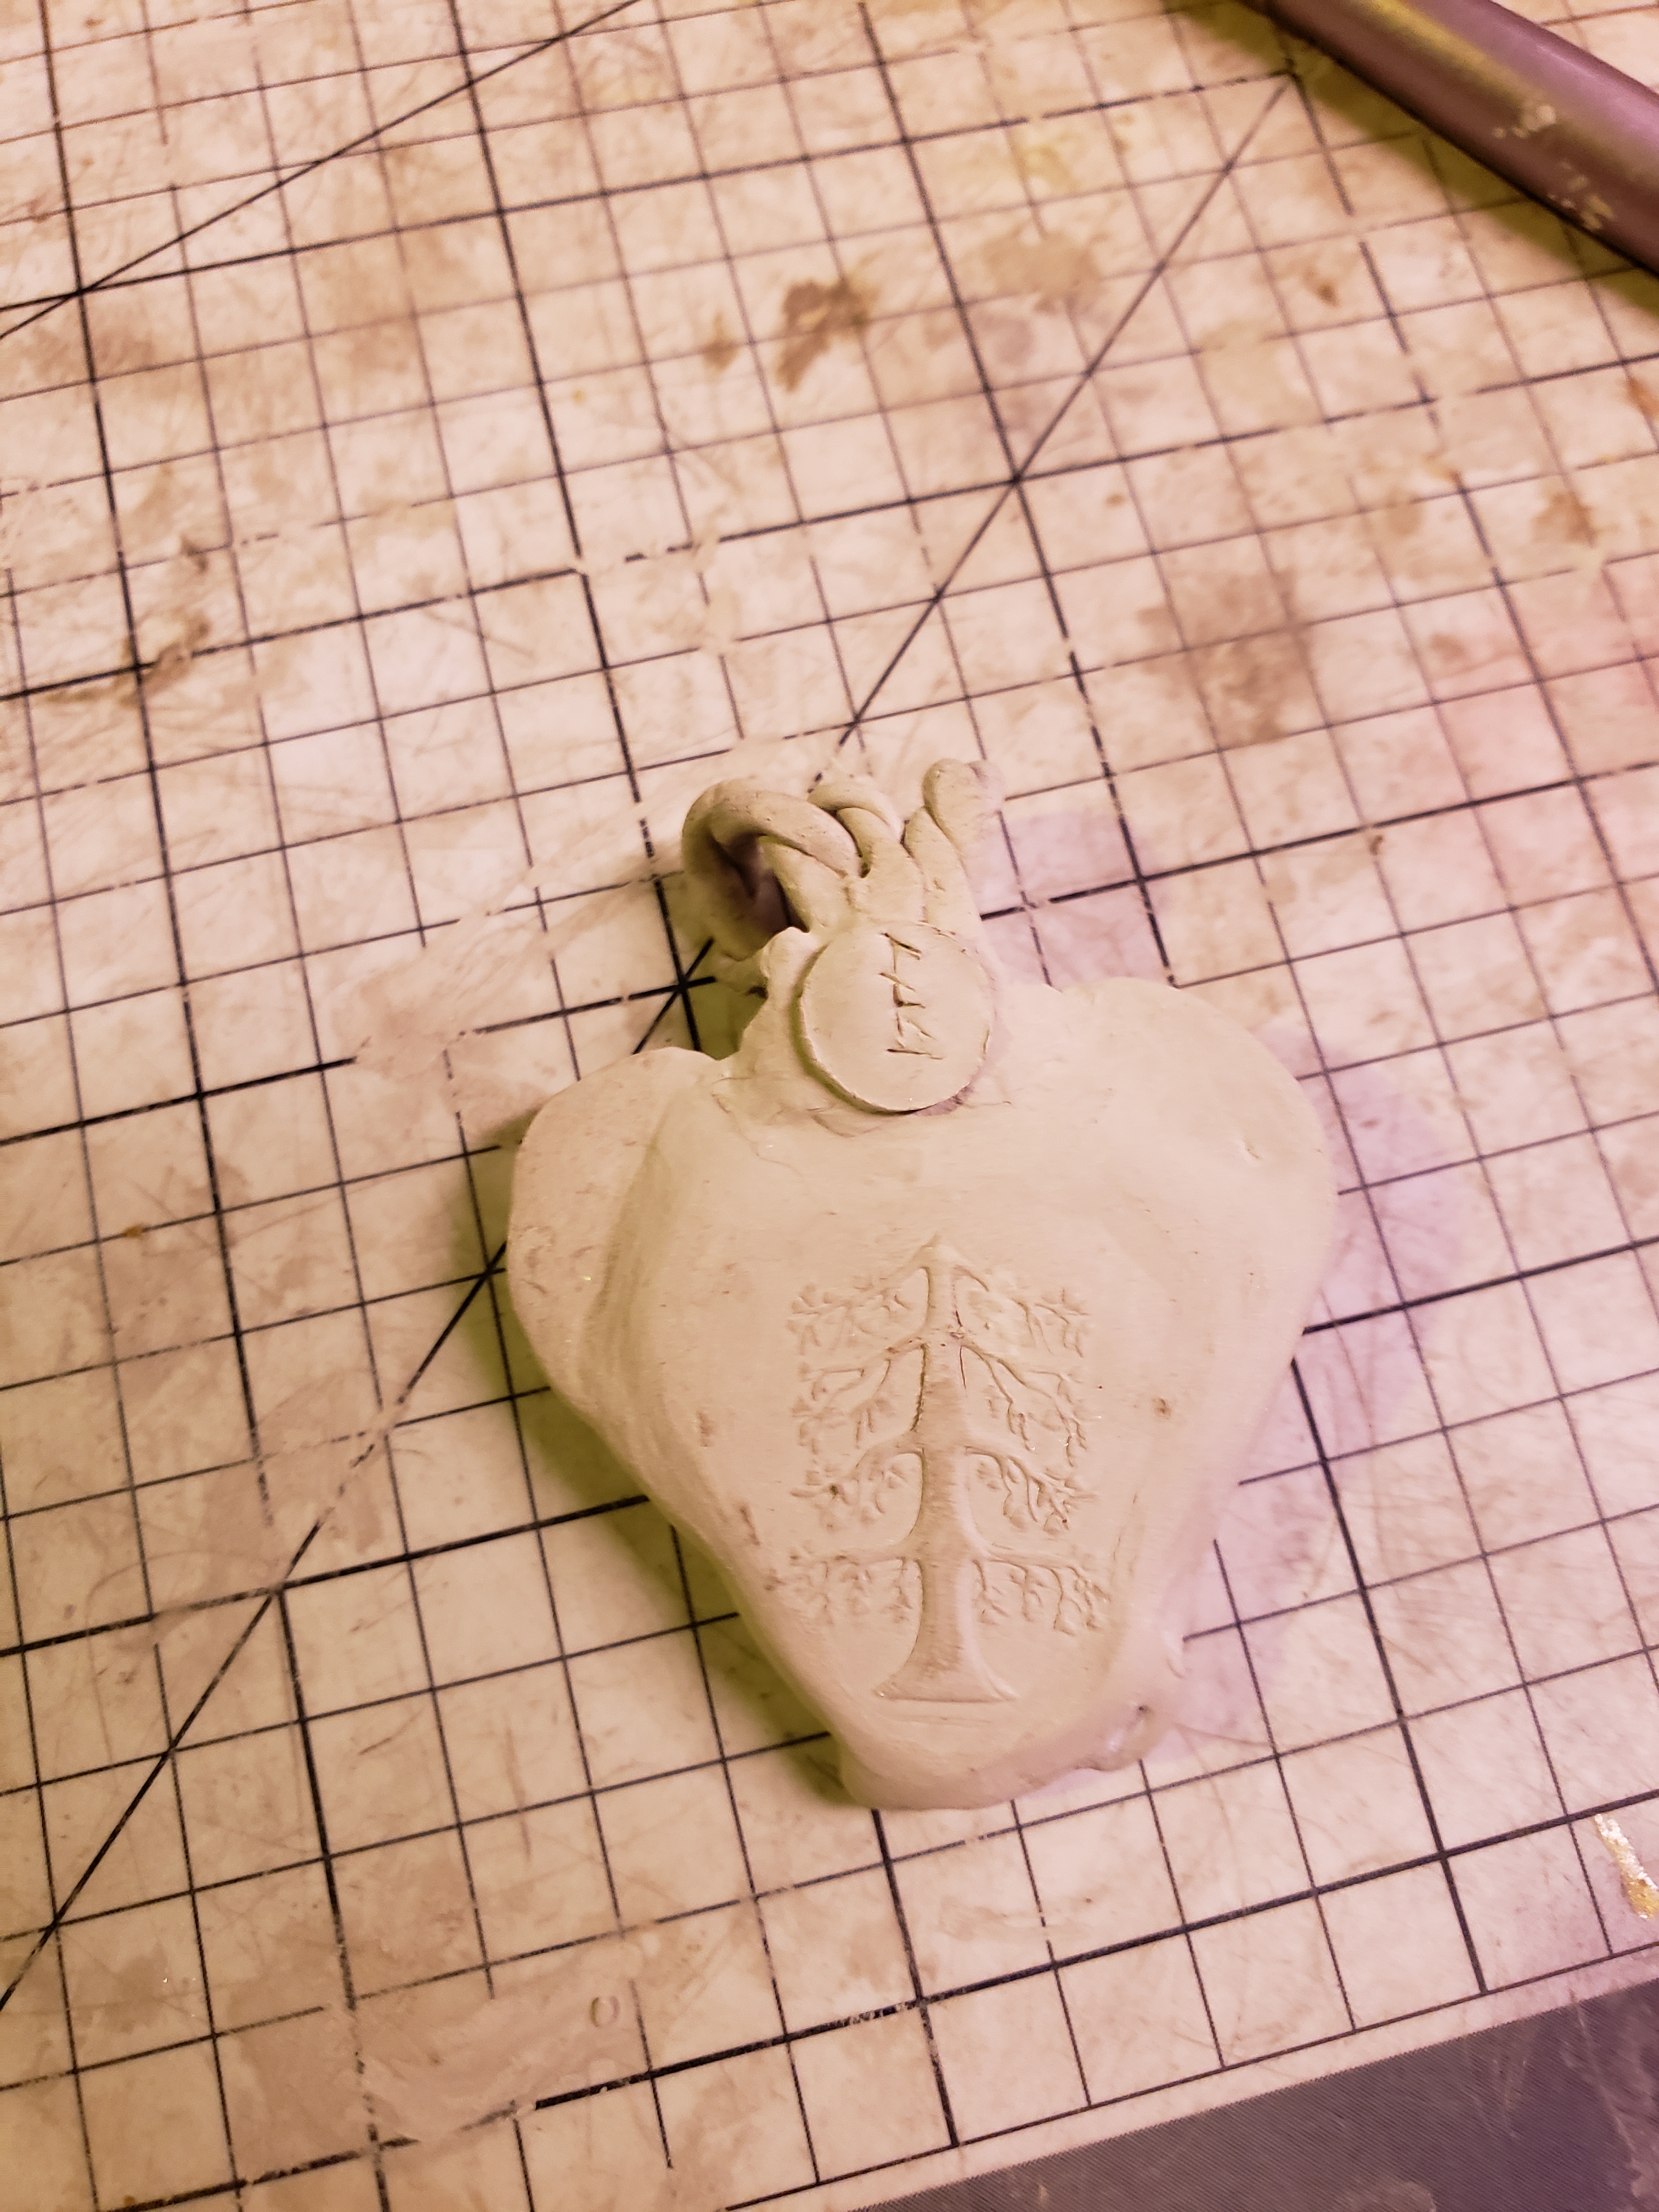
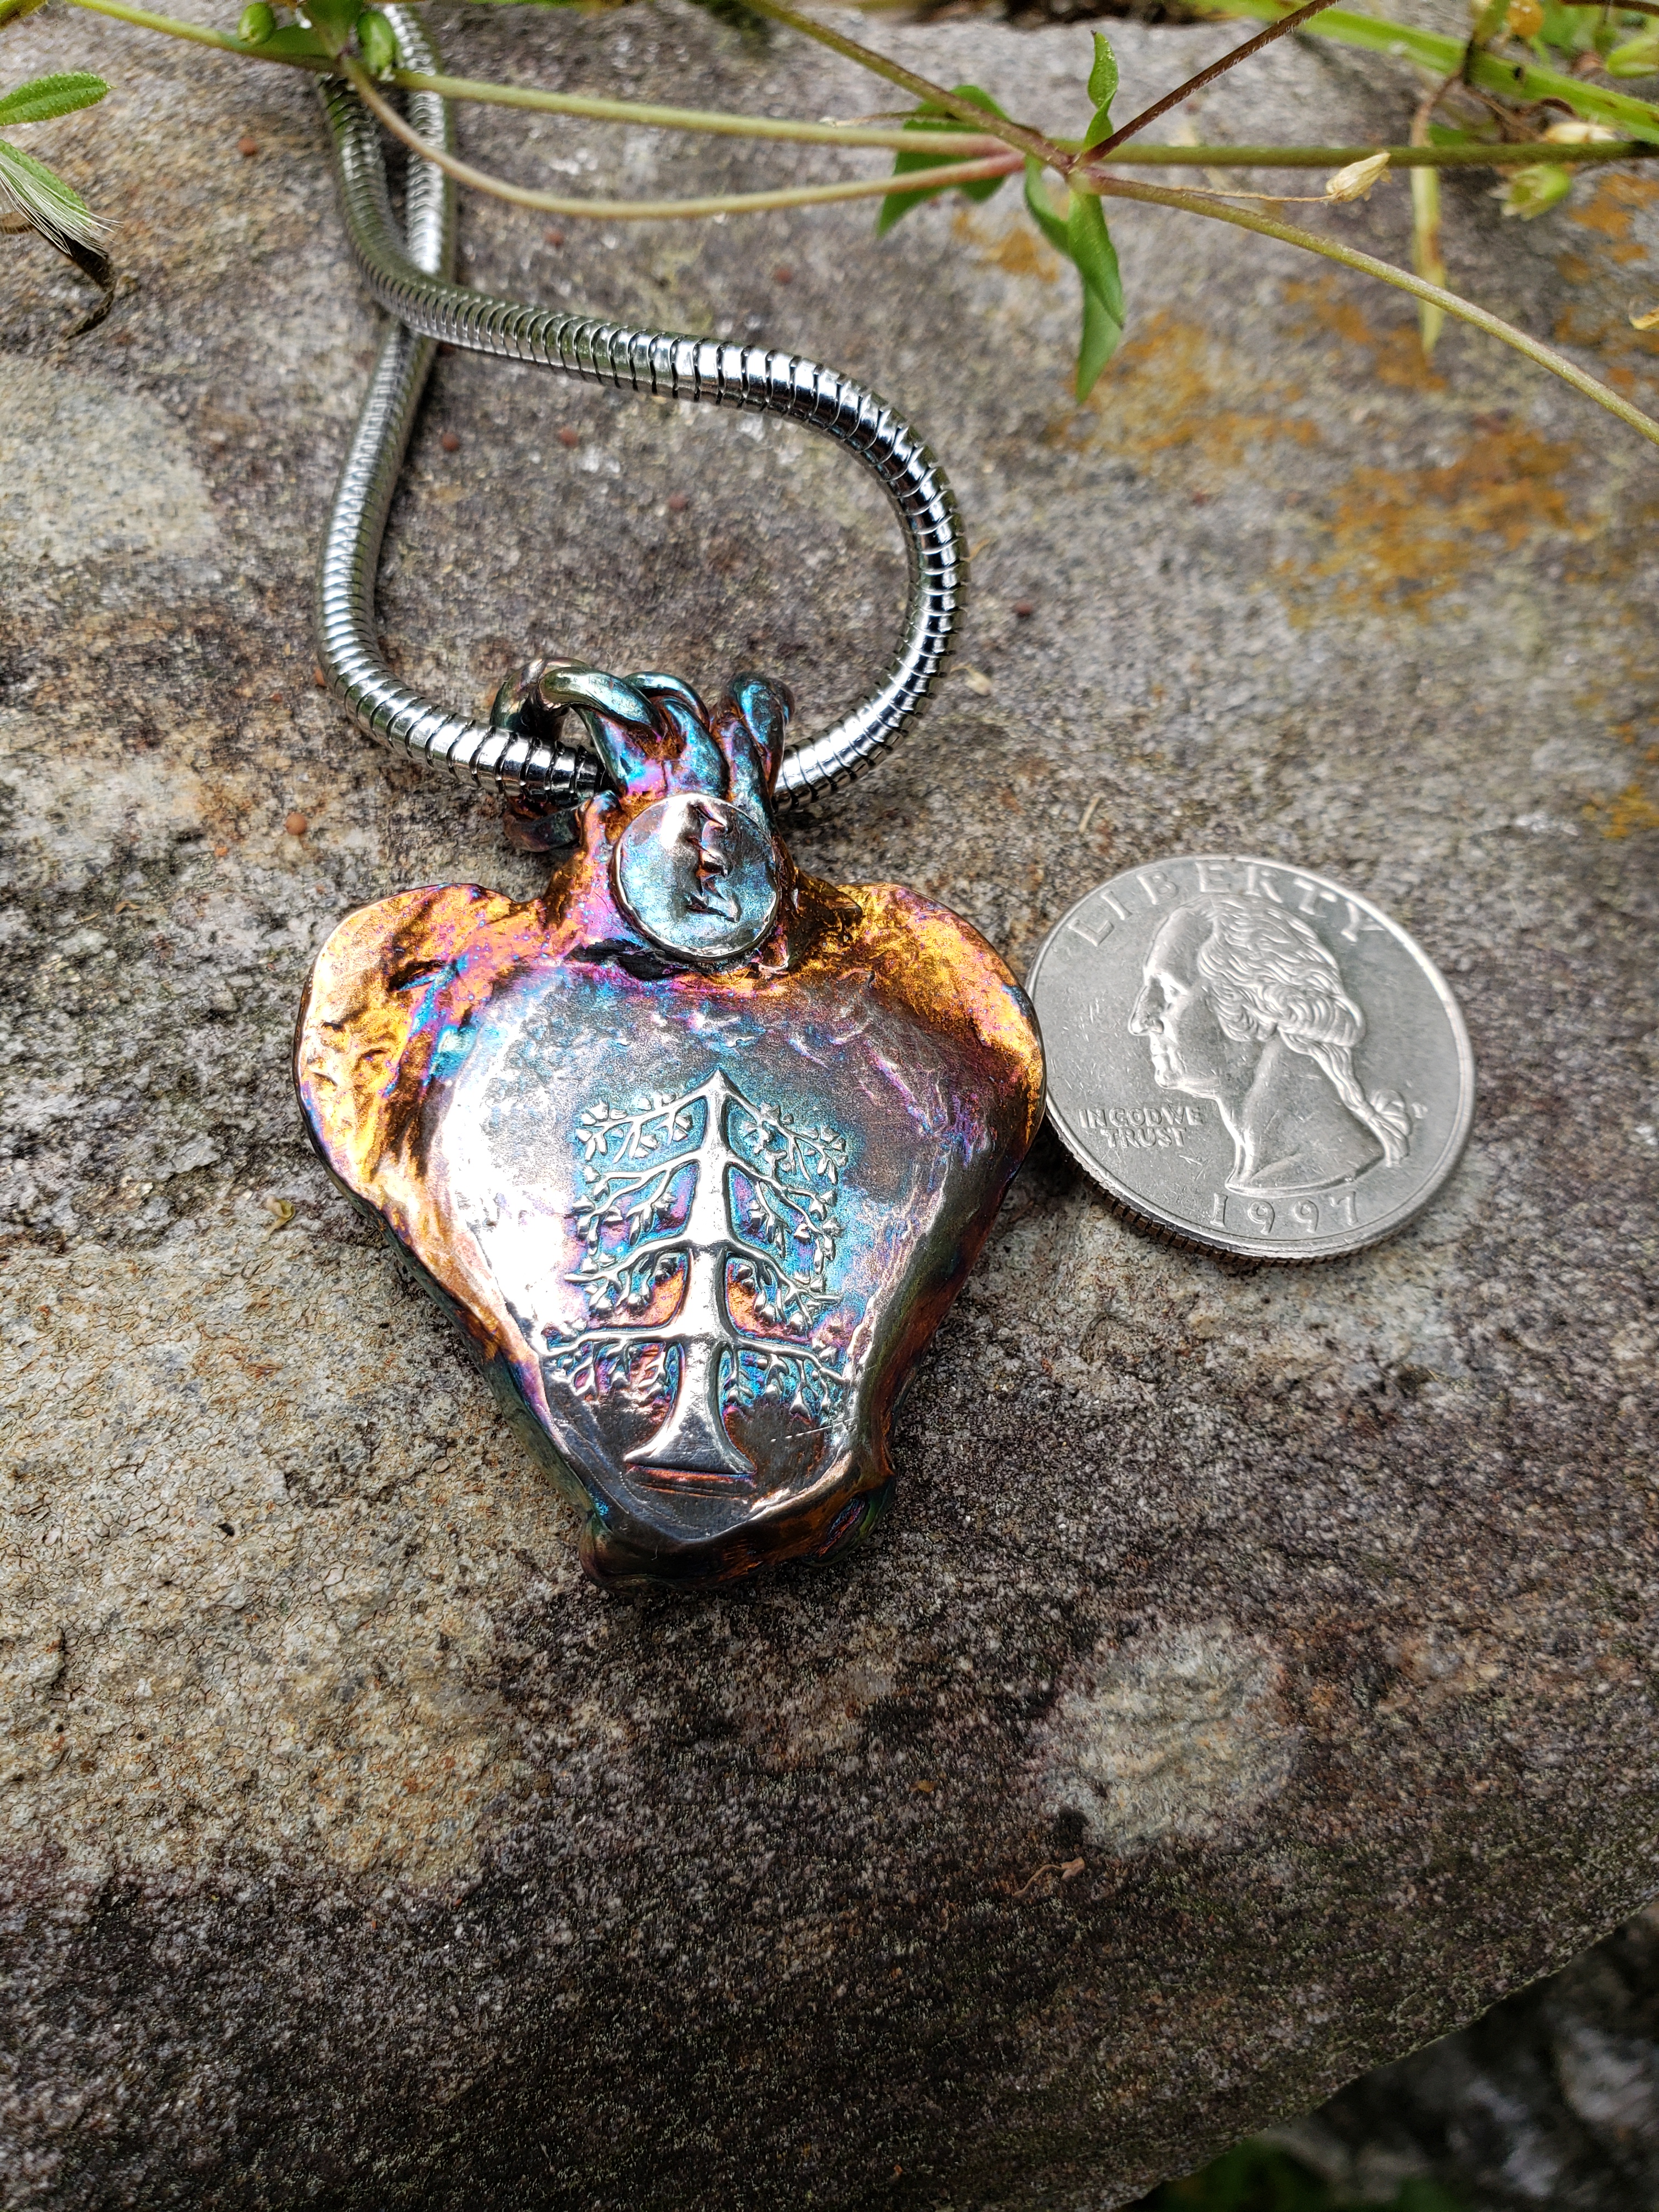
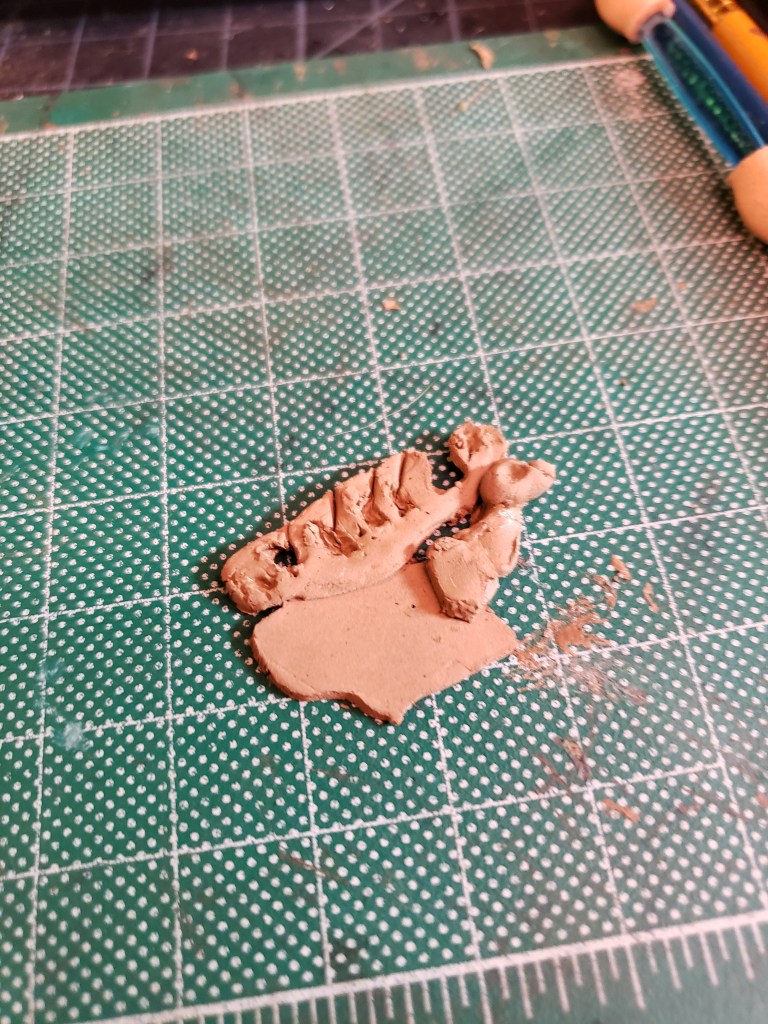
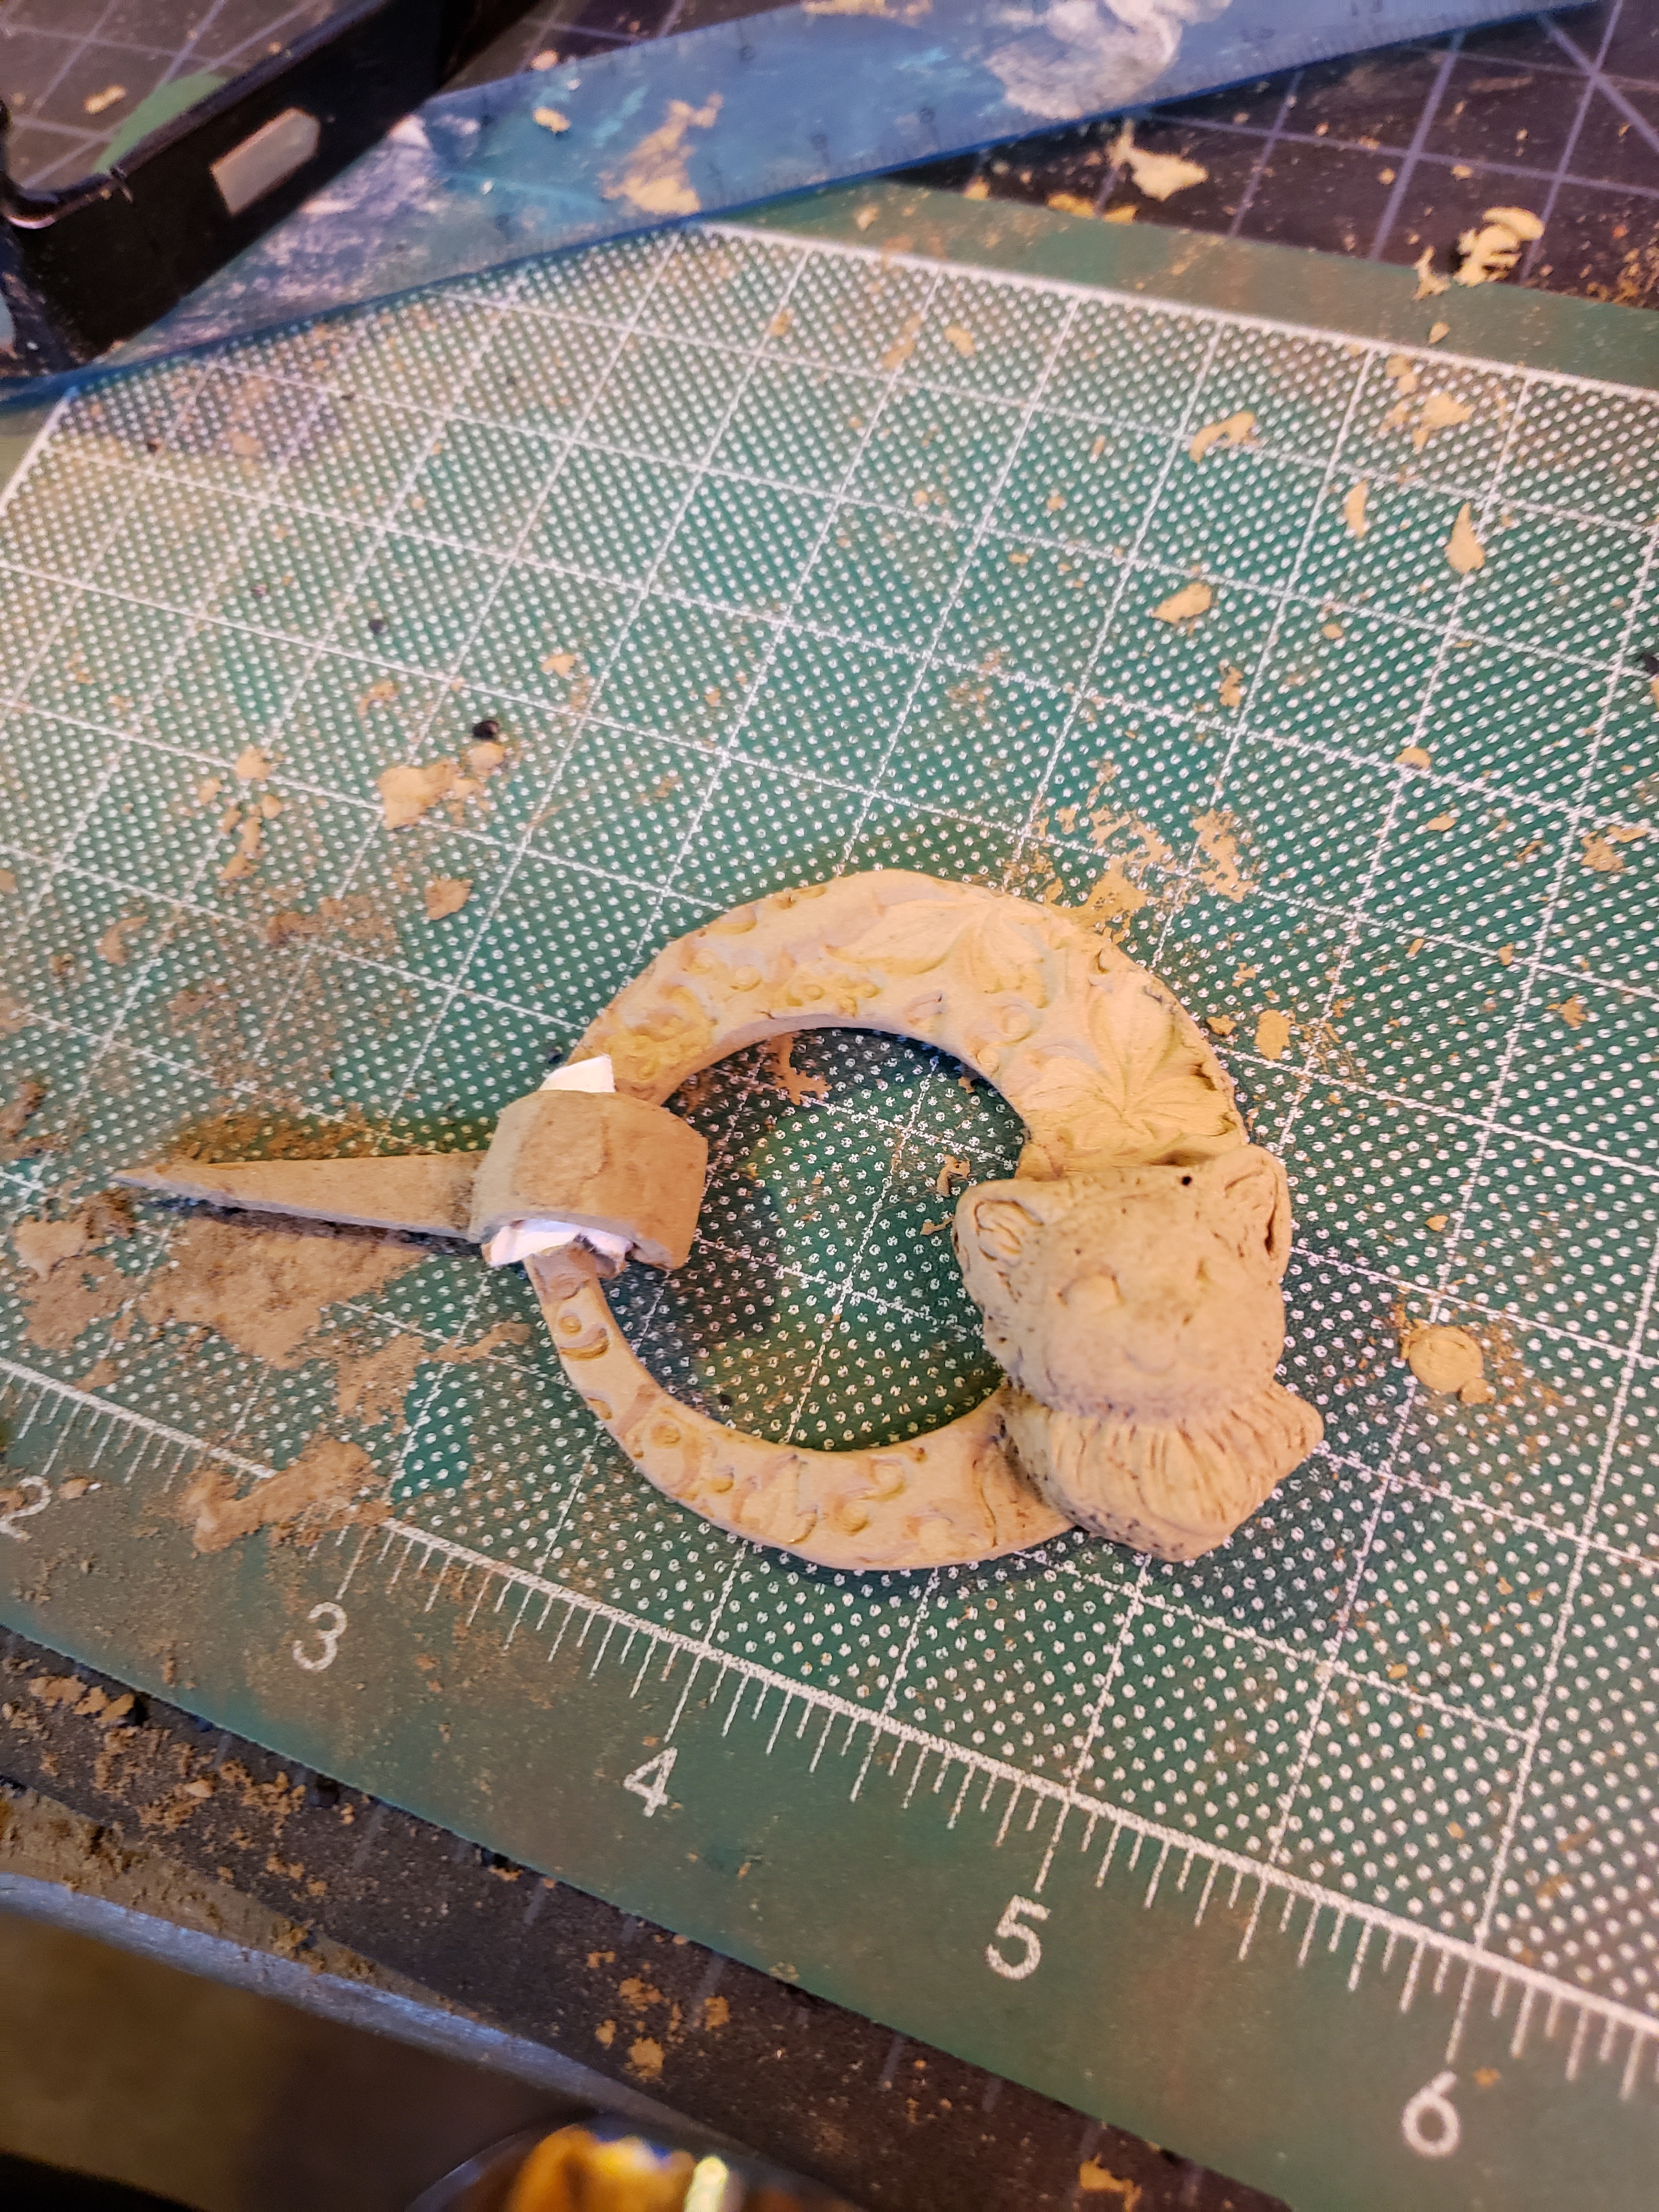
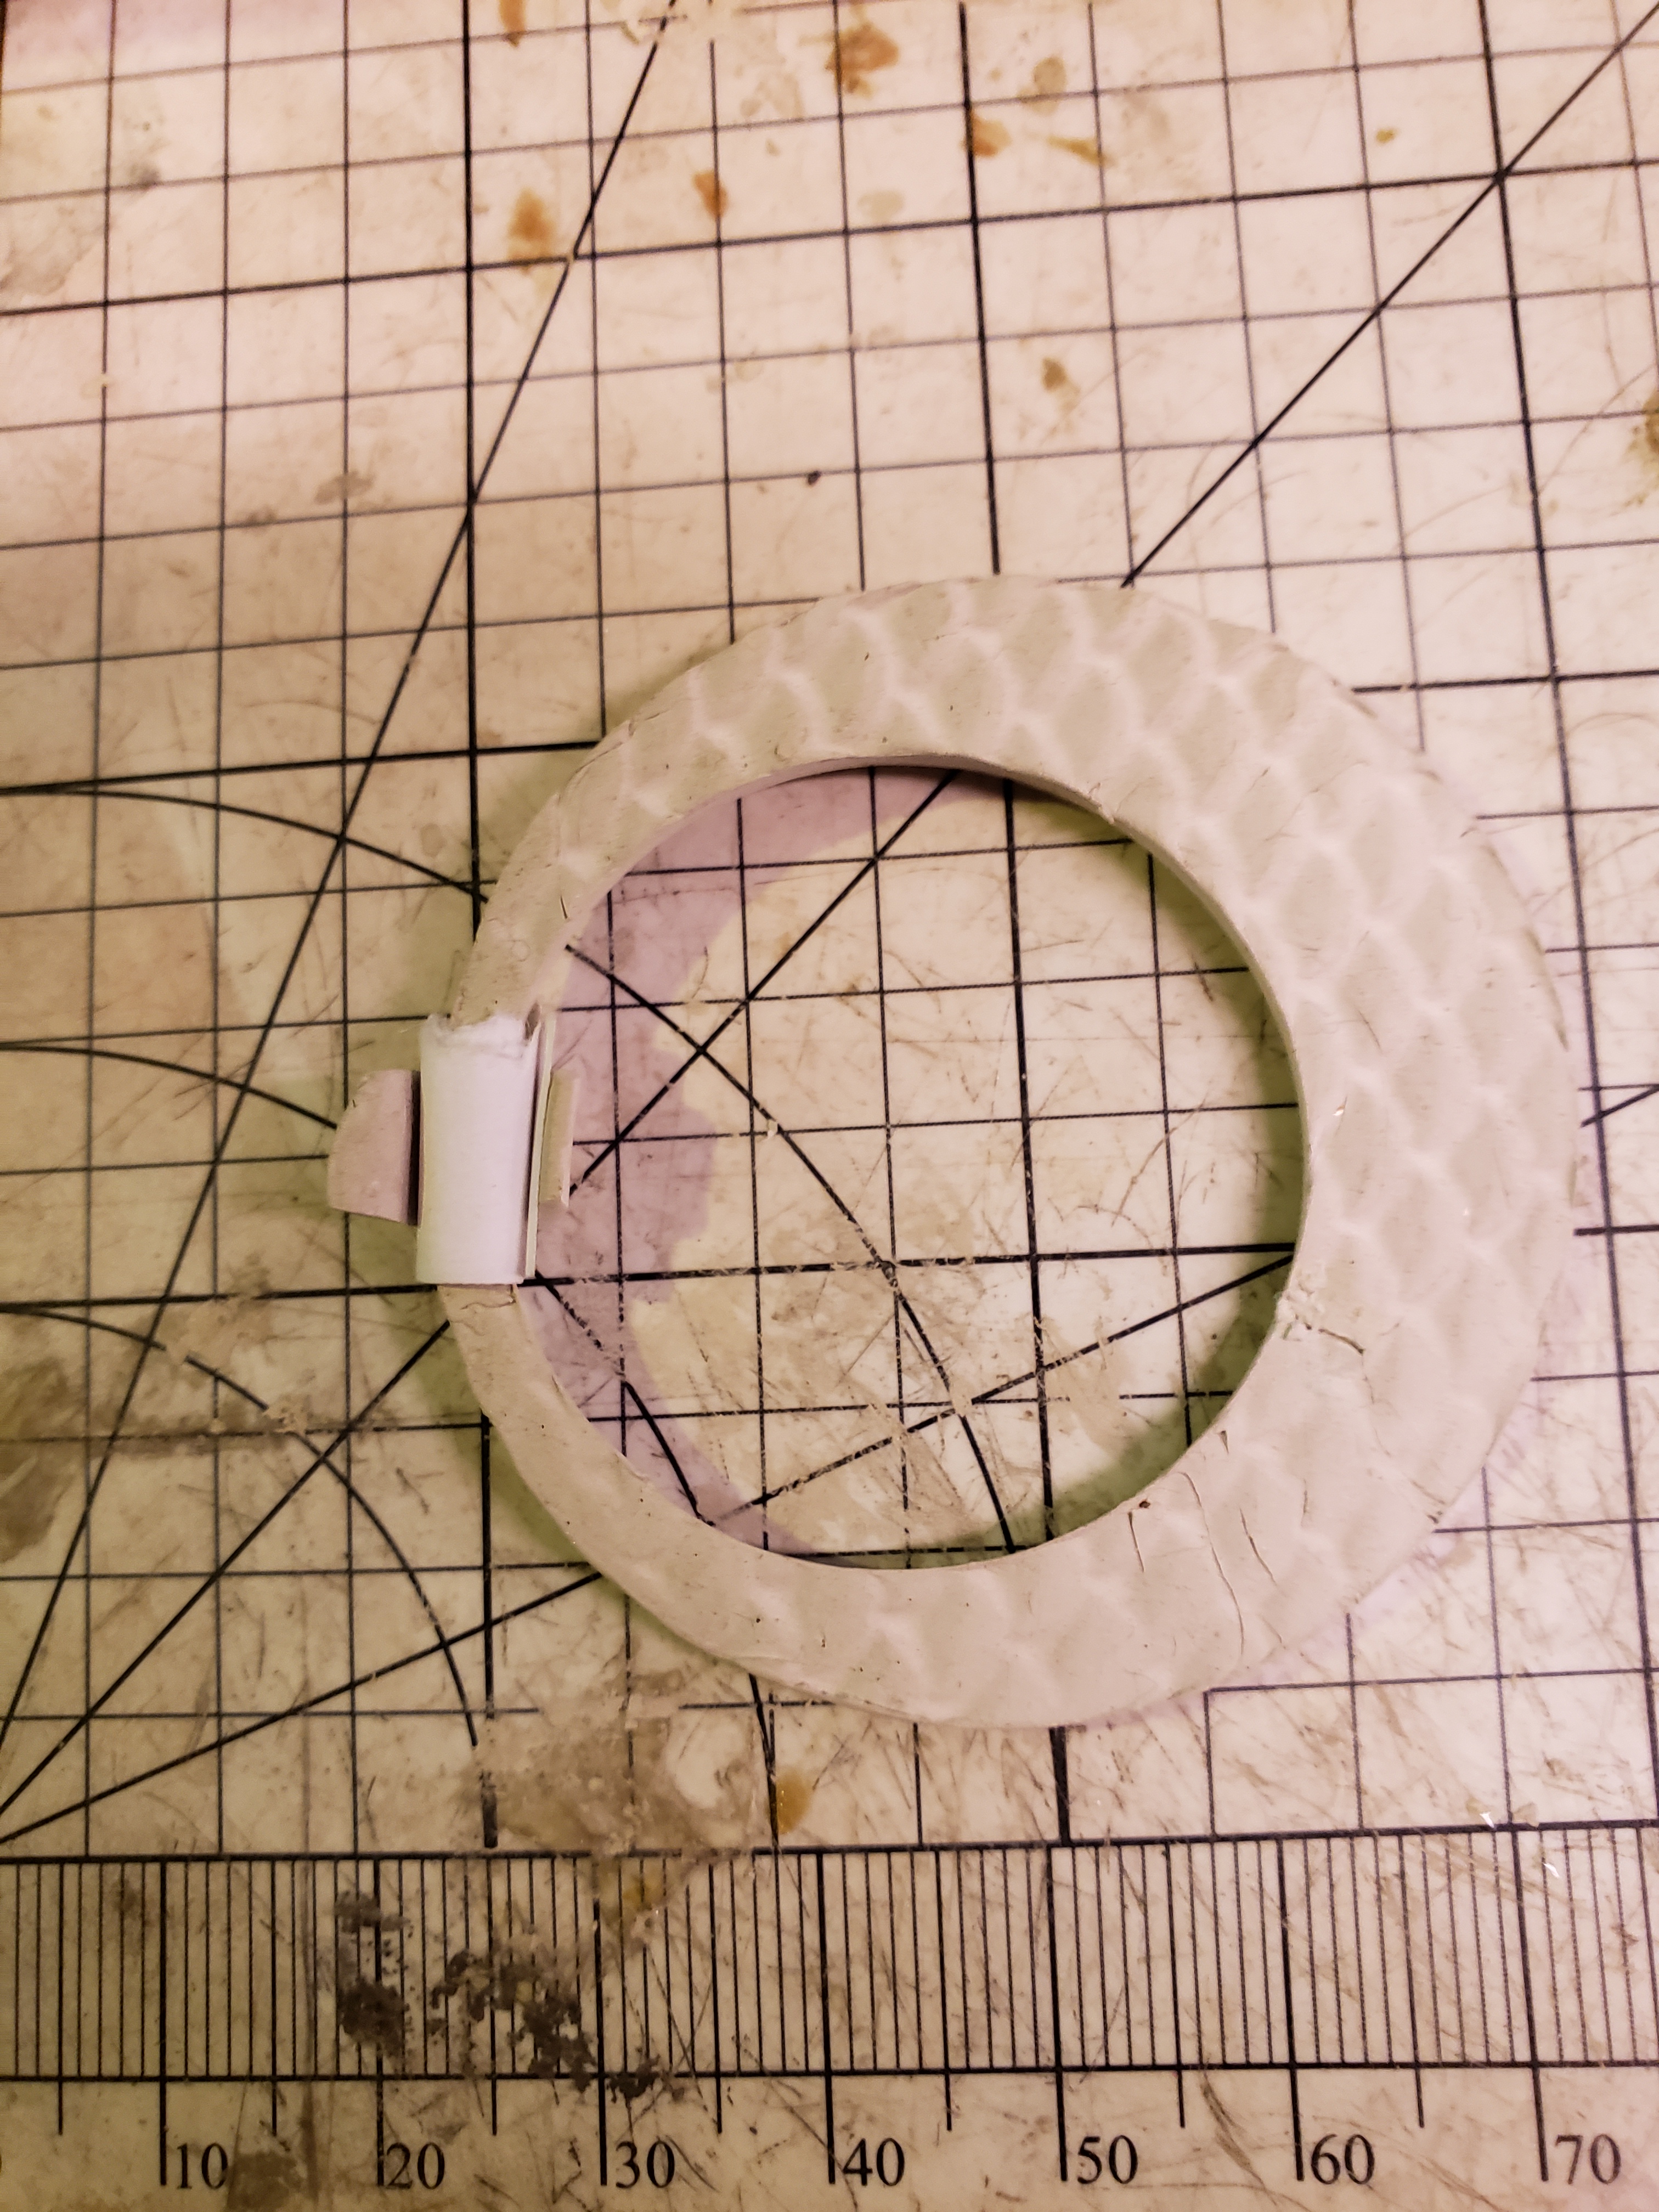
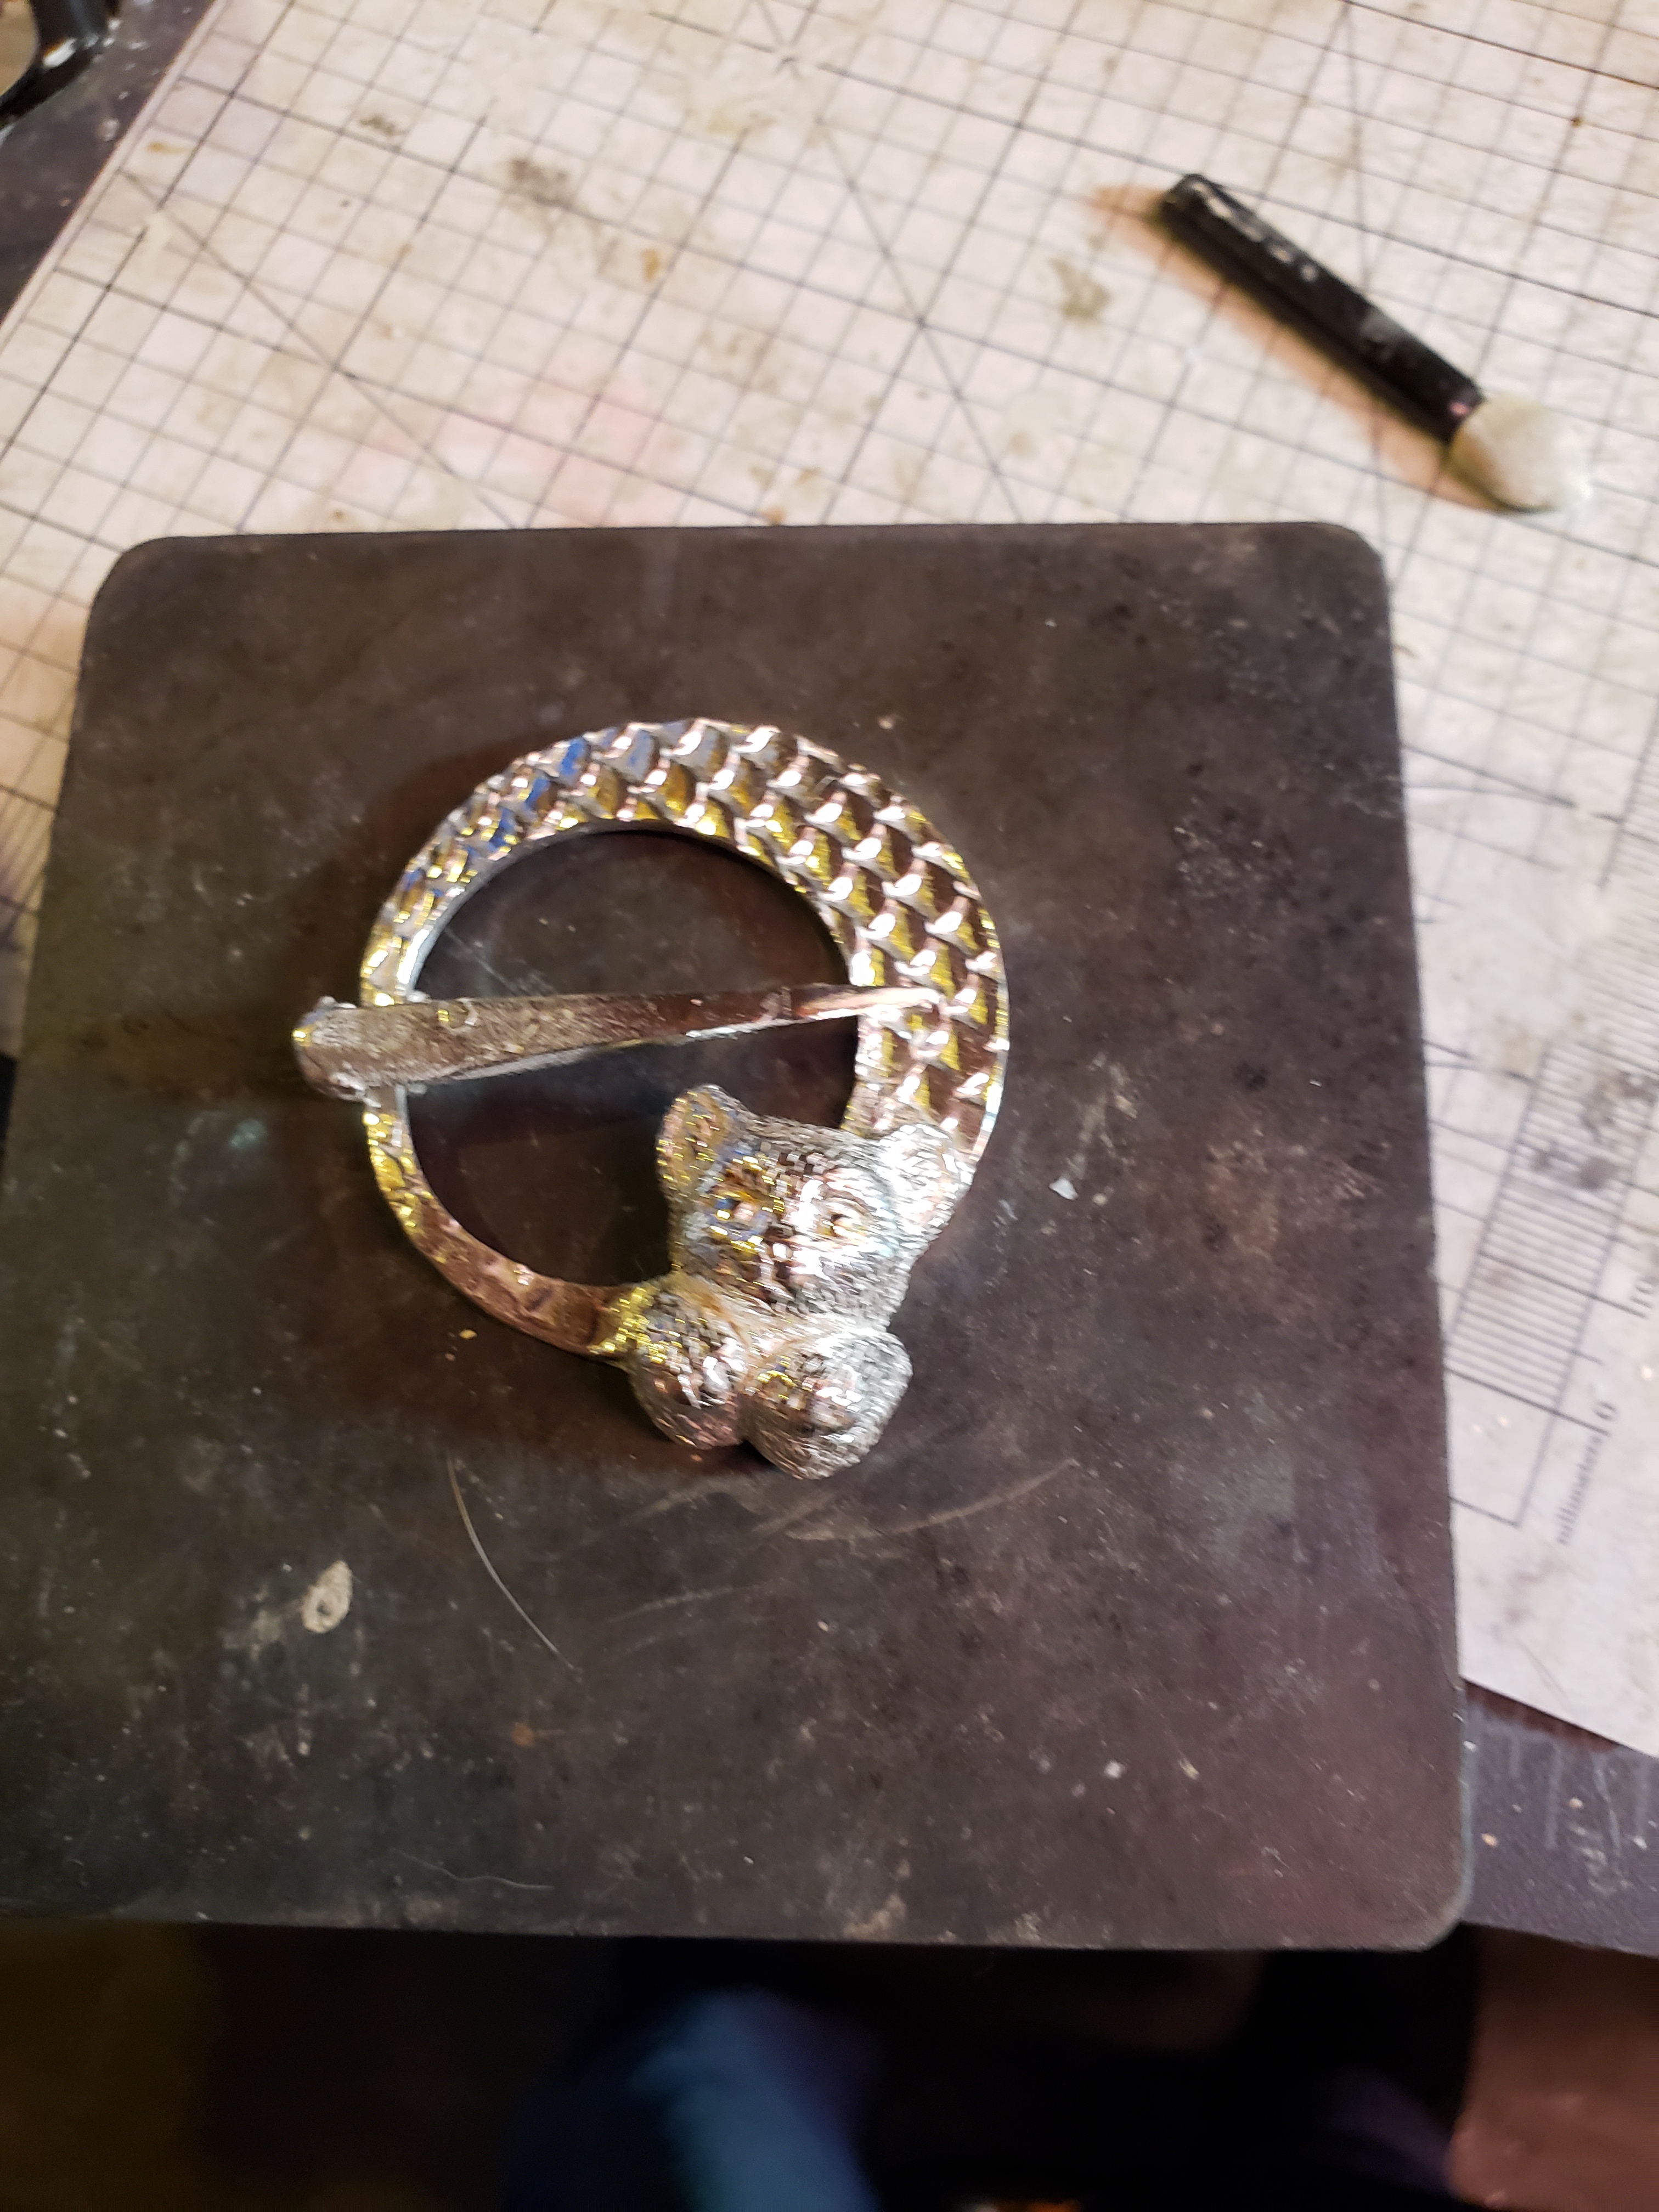
Both to reinforce the piece and to make it look more Celtic, I used a commercial mold to make a circle of knotwork. I attached that to the back of the head, covering up the work I had done placing the eyes. I then made a thin puffy triangle decorated with a tree design, from a commercial mold. I attached that to the back (because customers will often turn pieces over and look at the backs as soon as they have seen the front). I used extra clay to smooth the transition between the back and front. Of course this needed a great deal of sanding and finishing. However, prior to cleaning the piece up, this is what I had:

20200329_093447

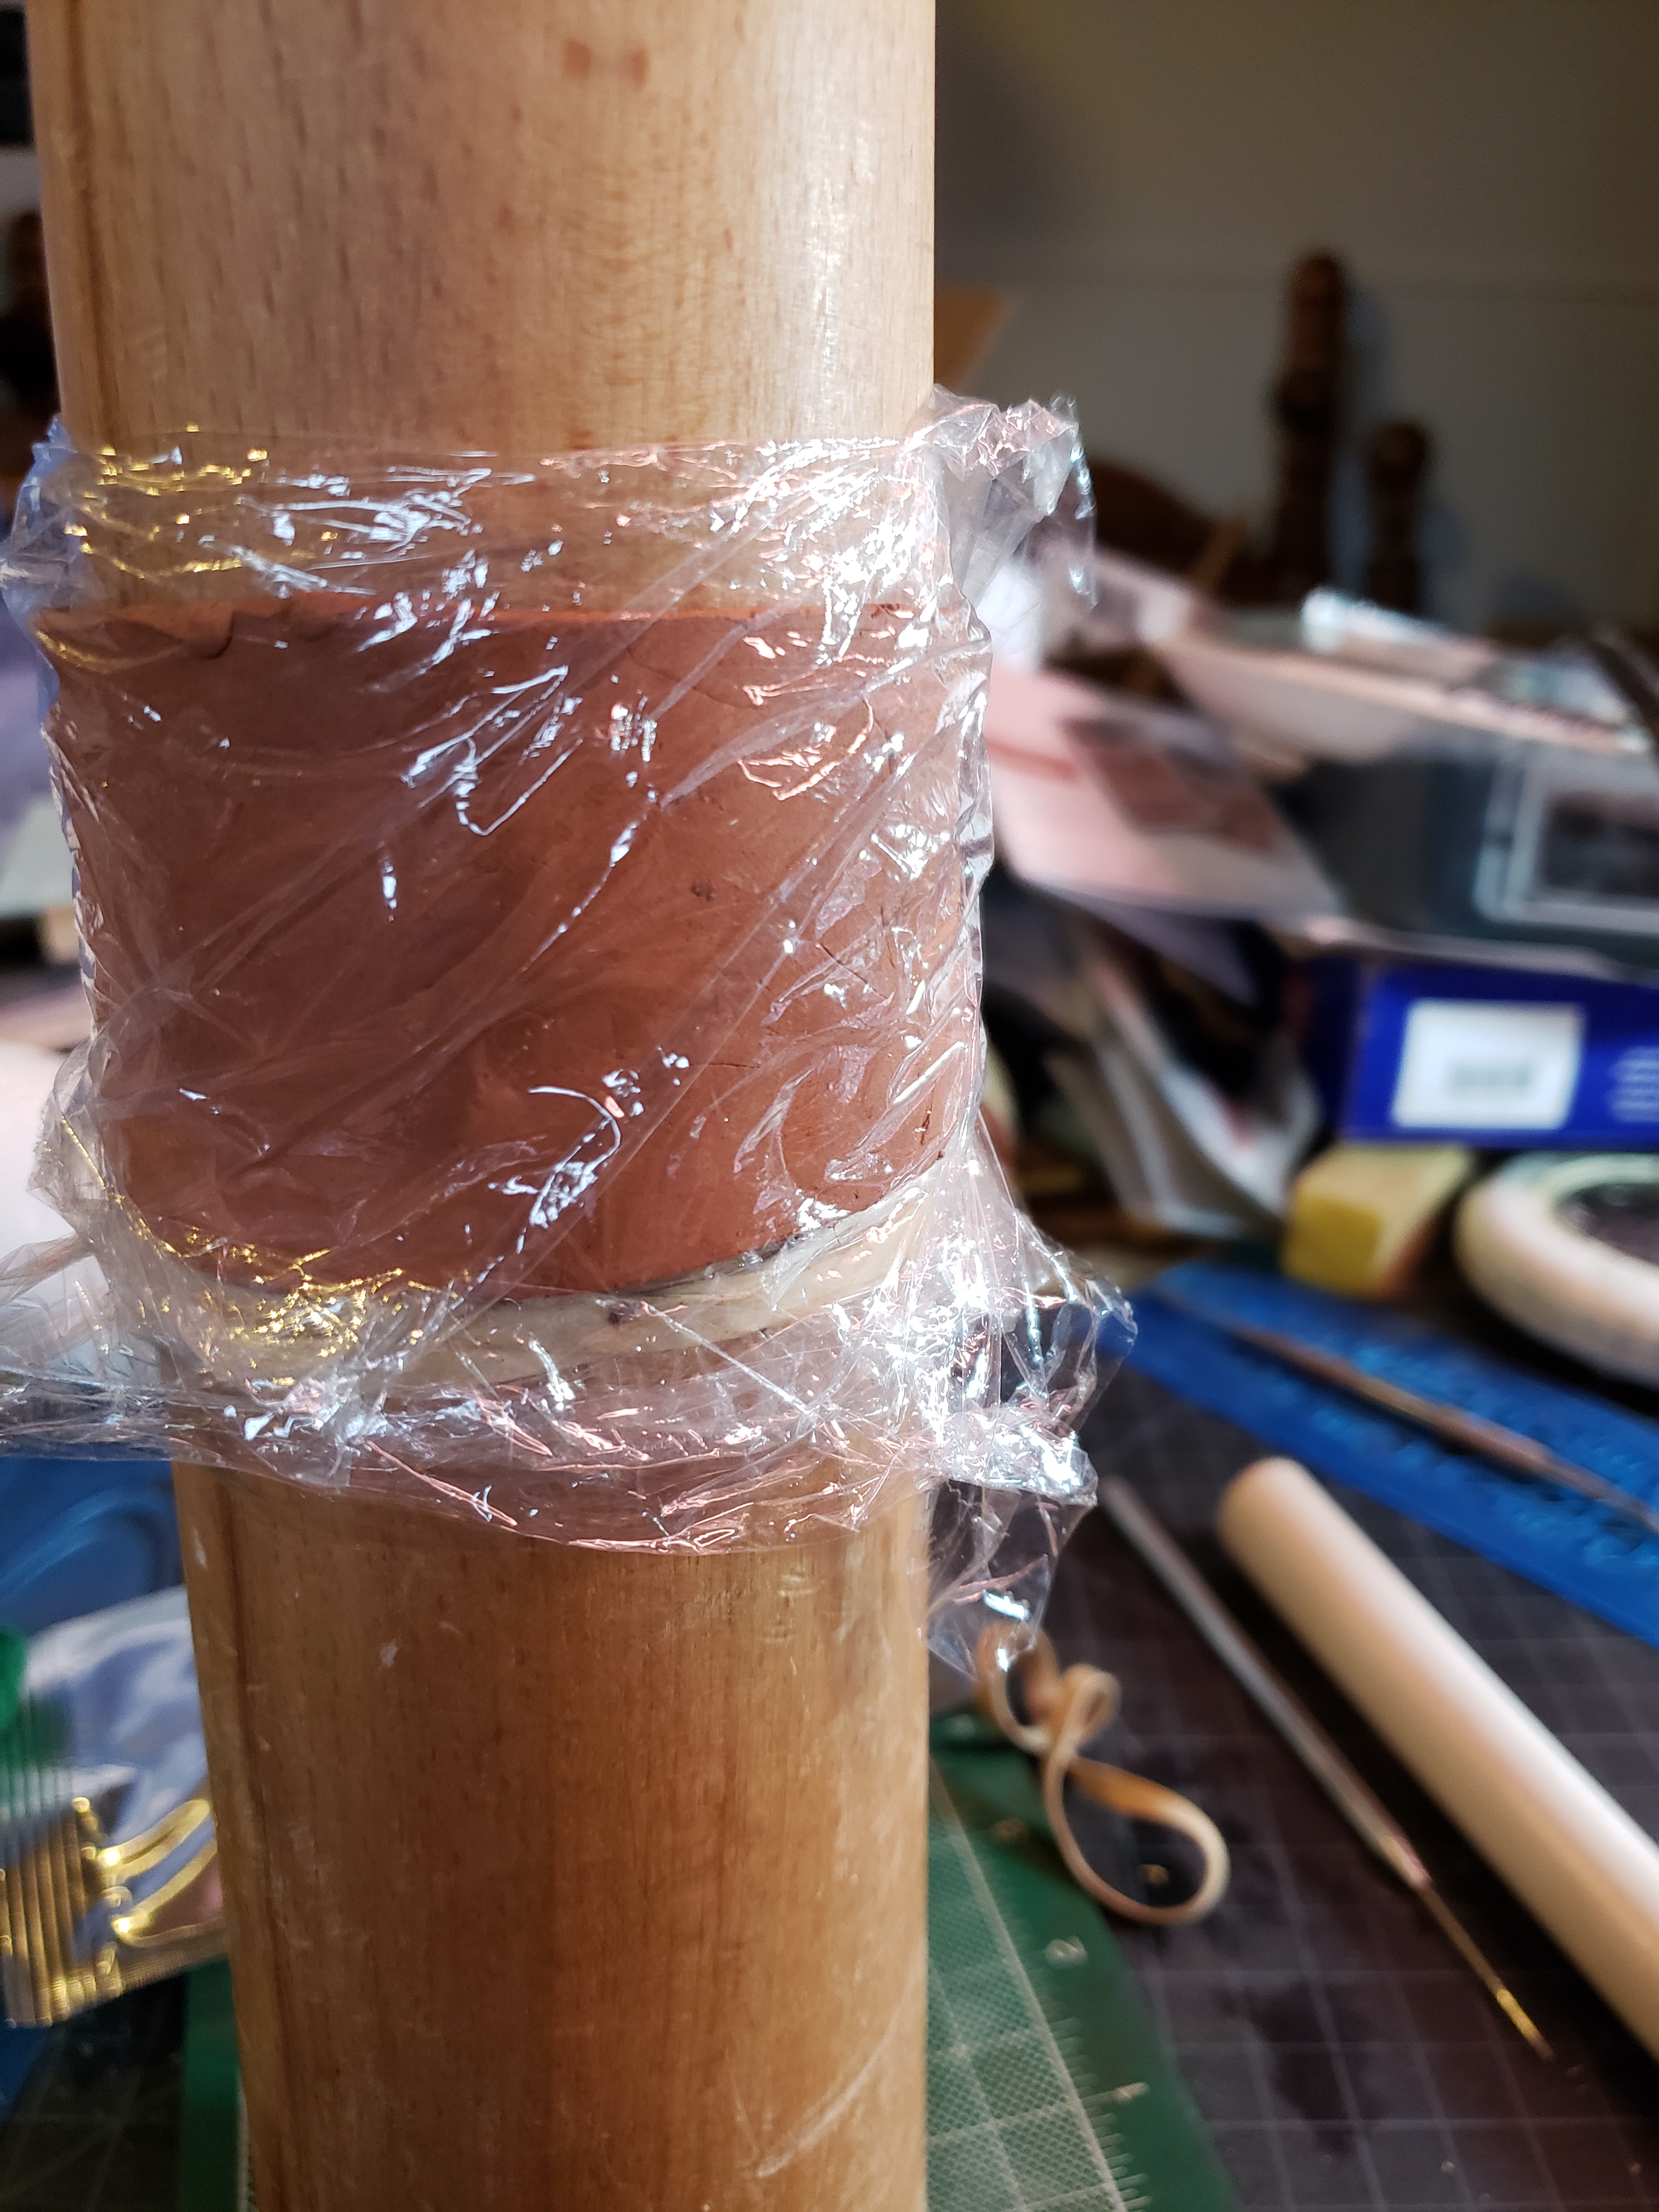
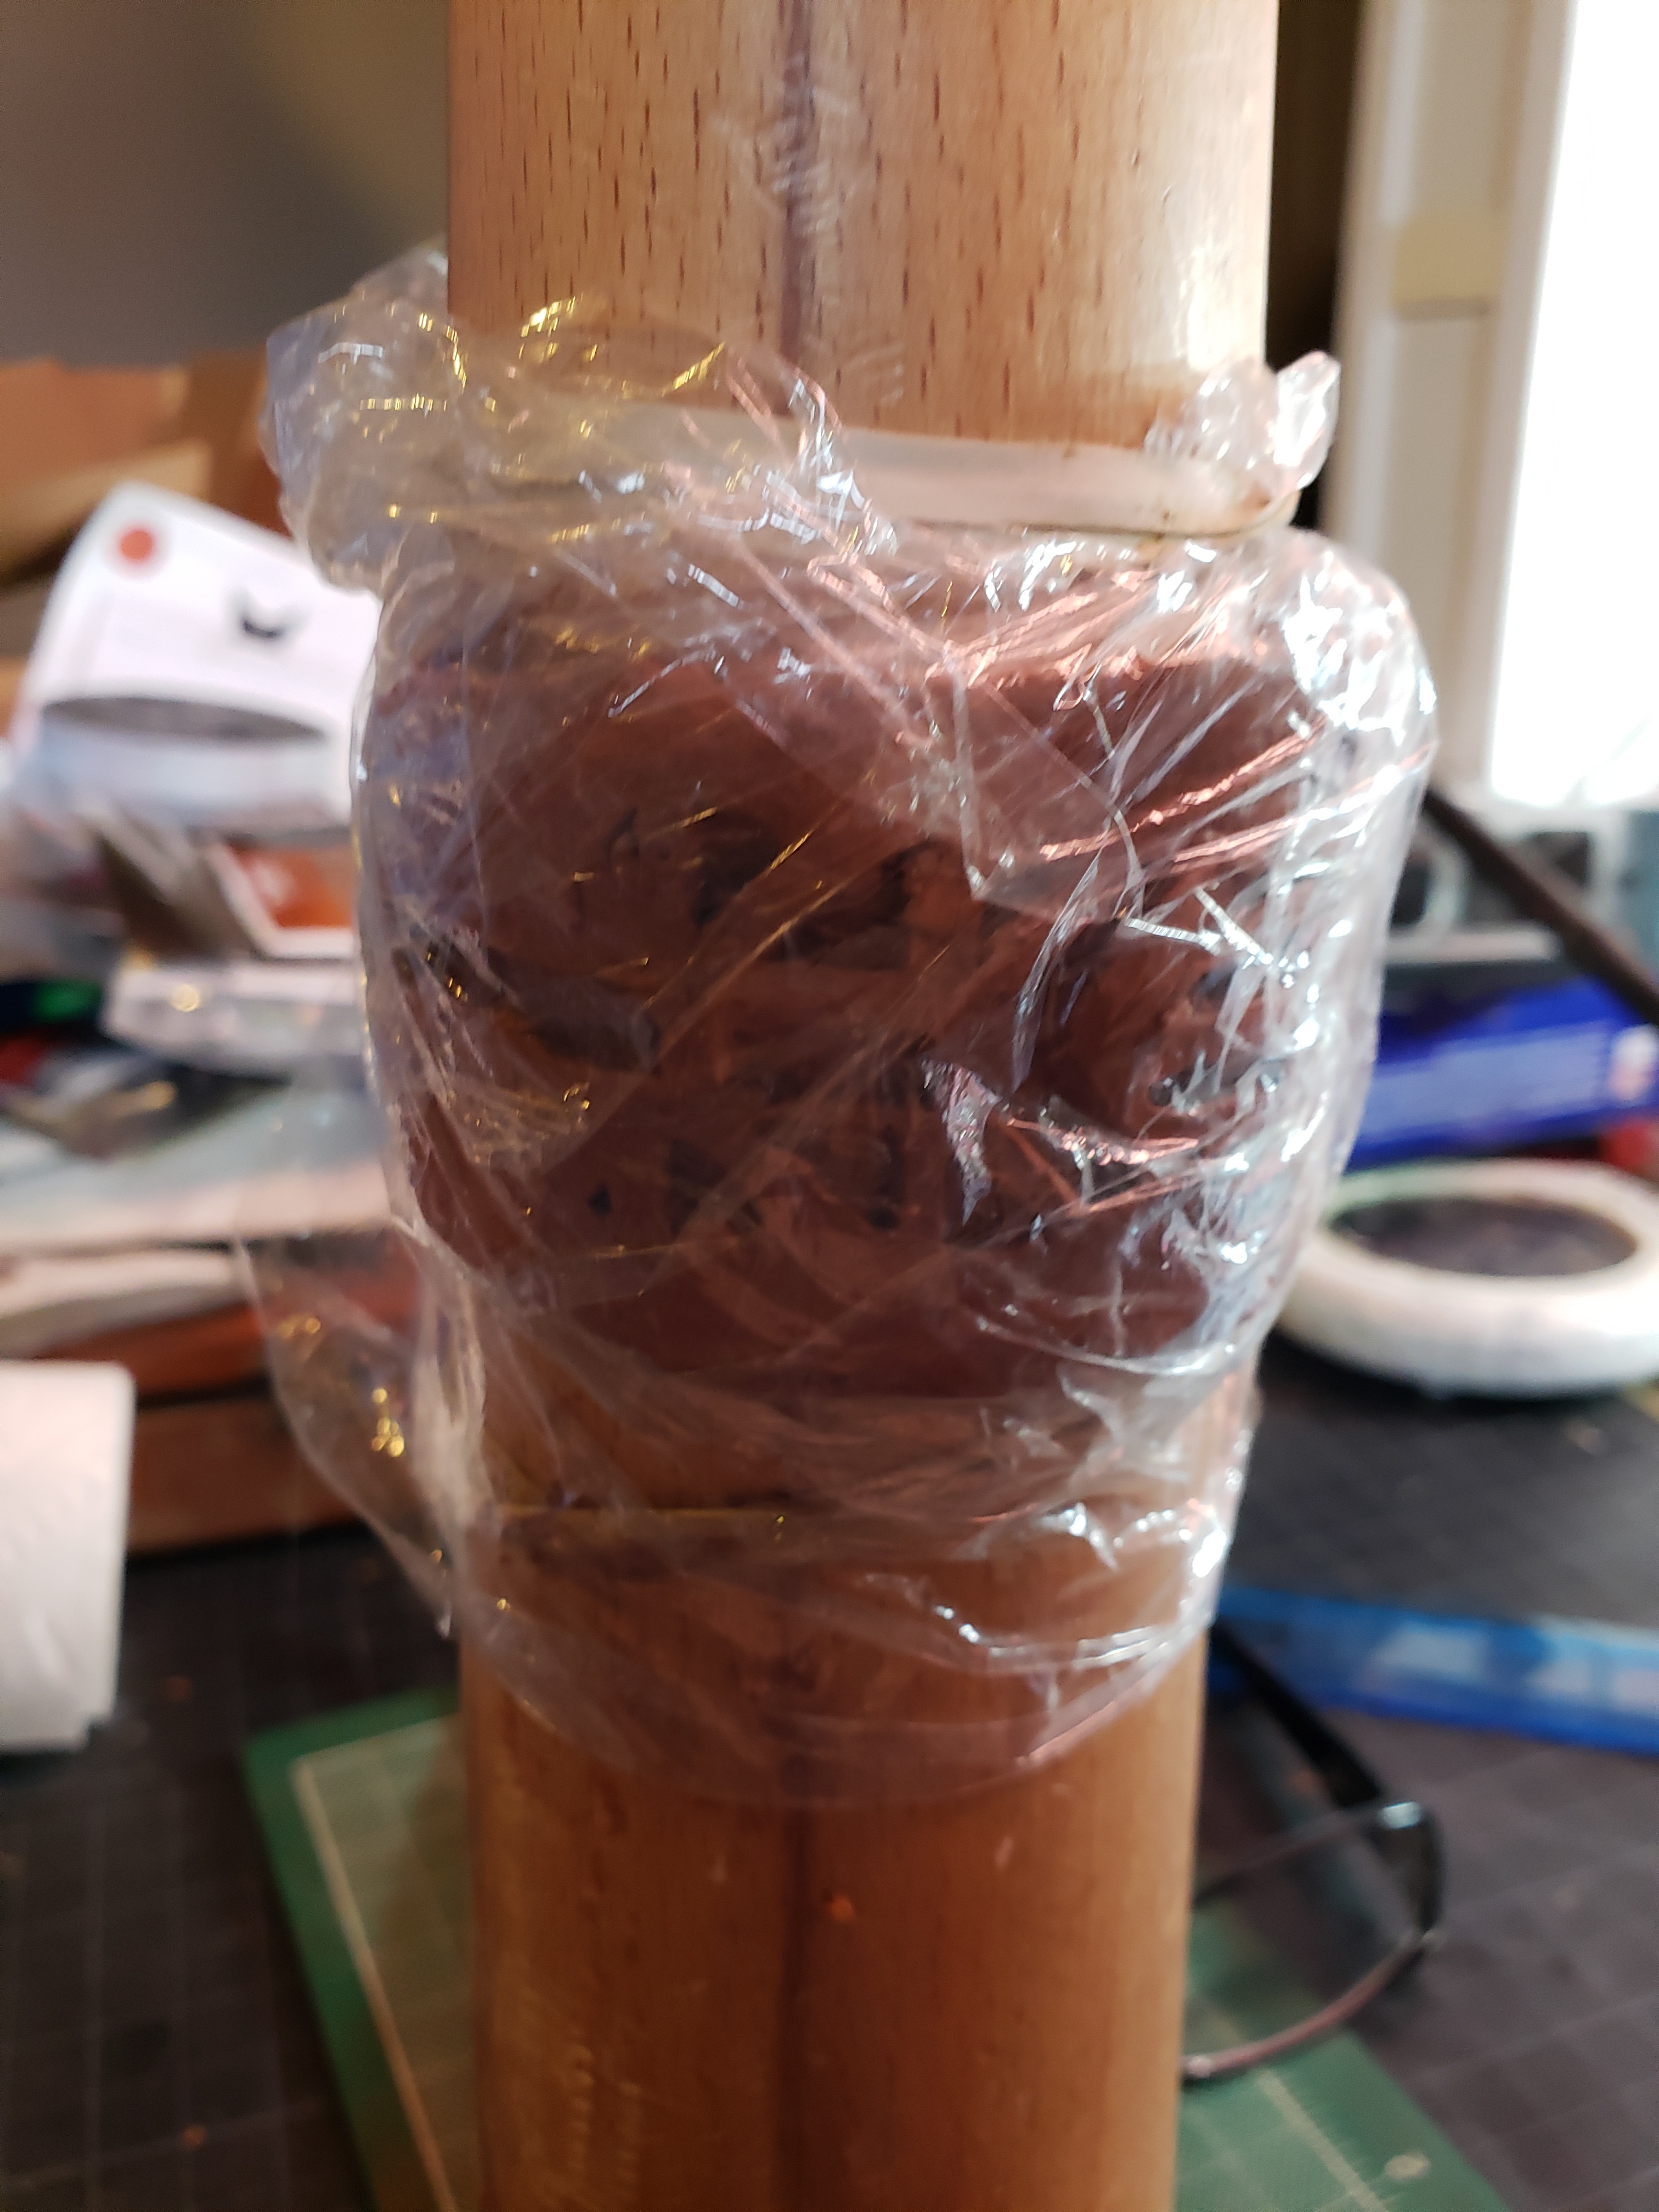
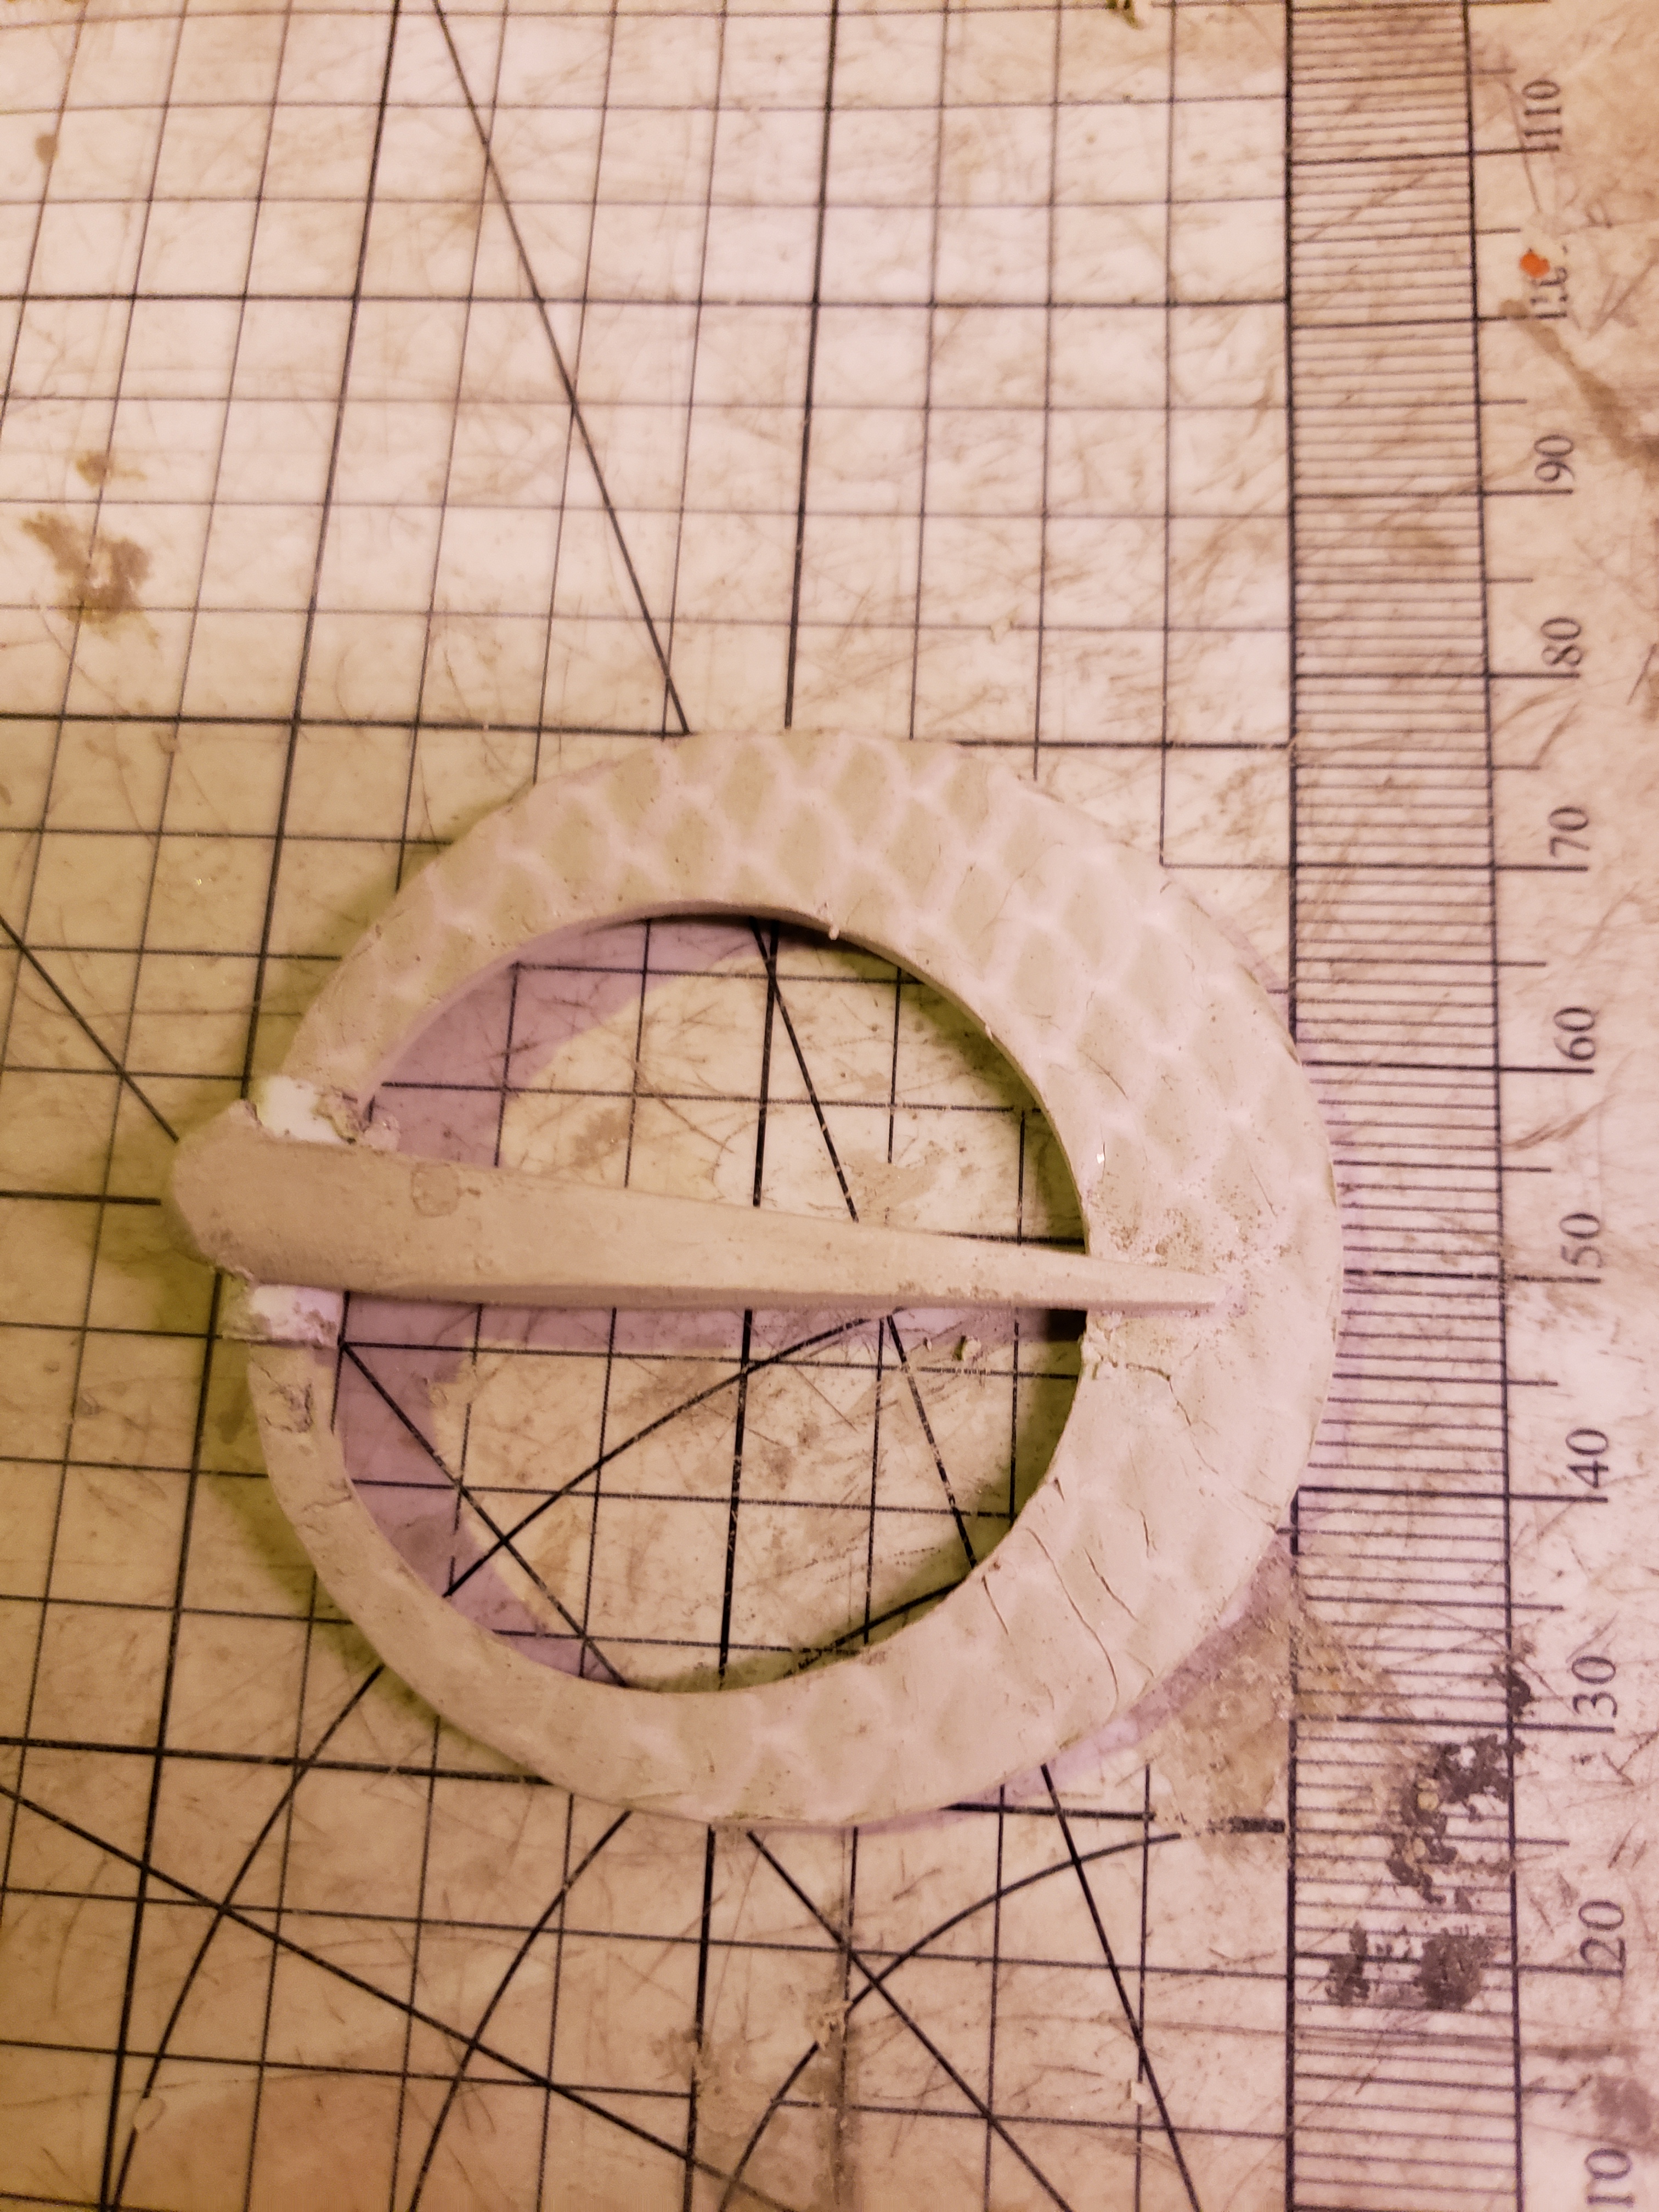
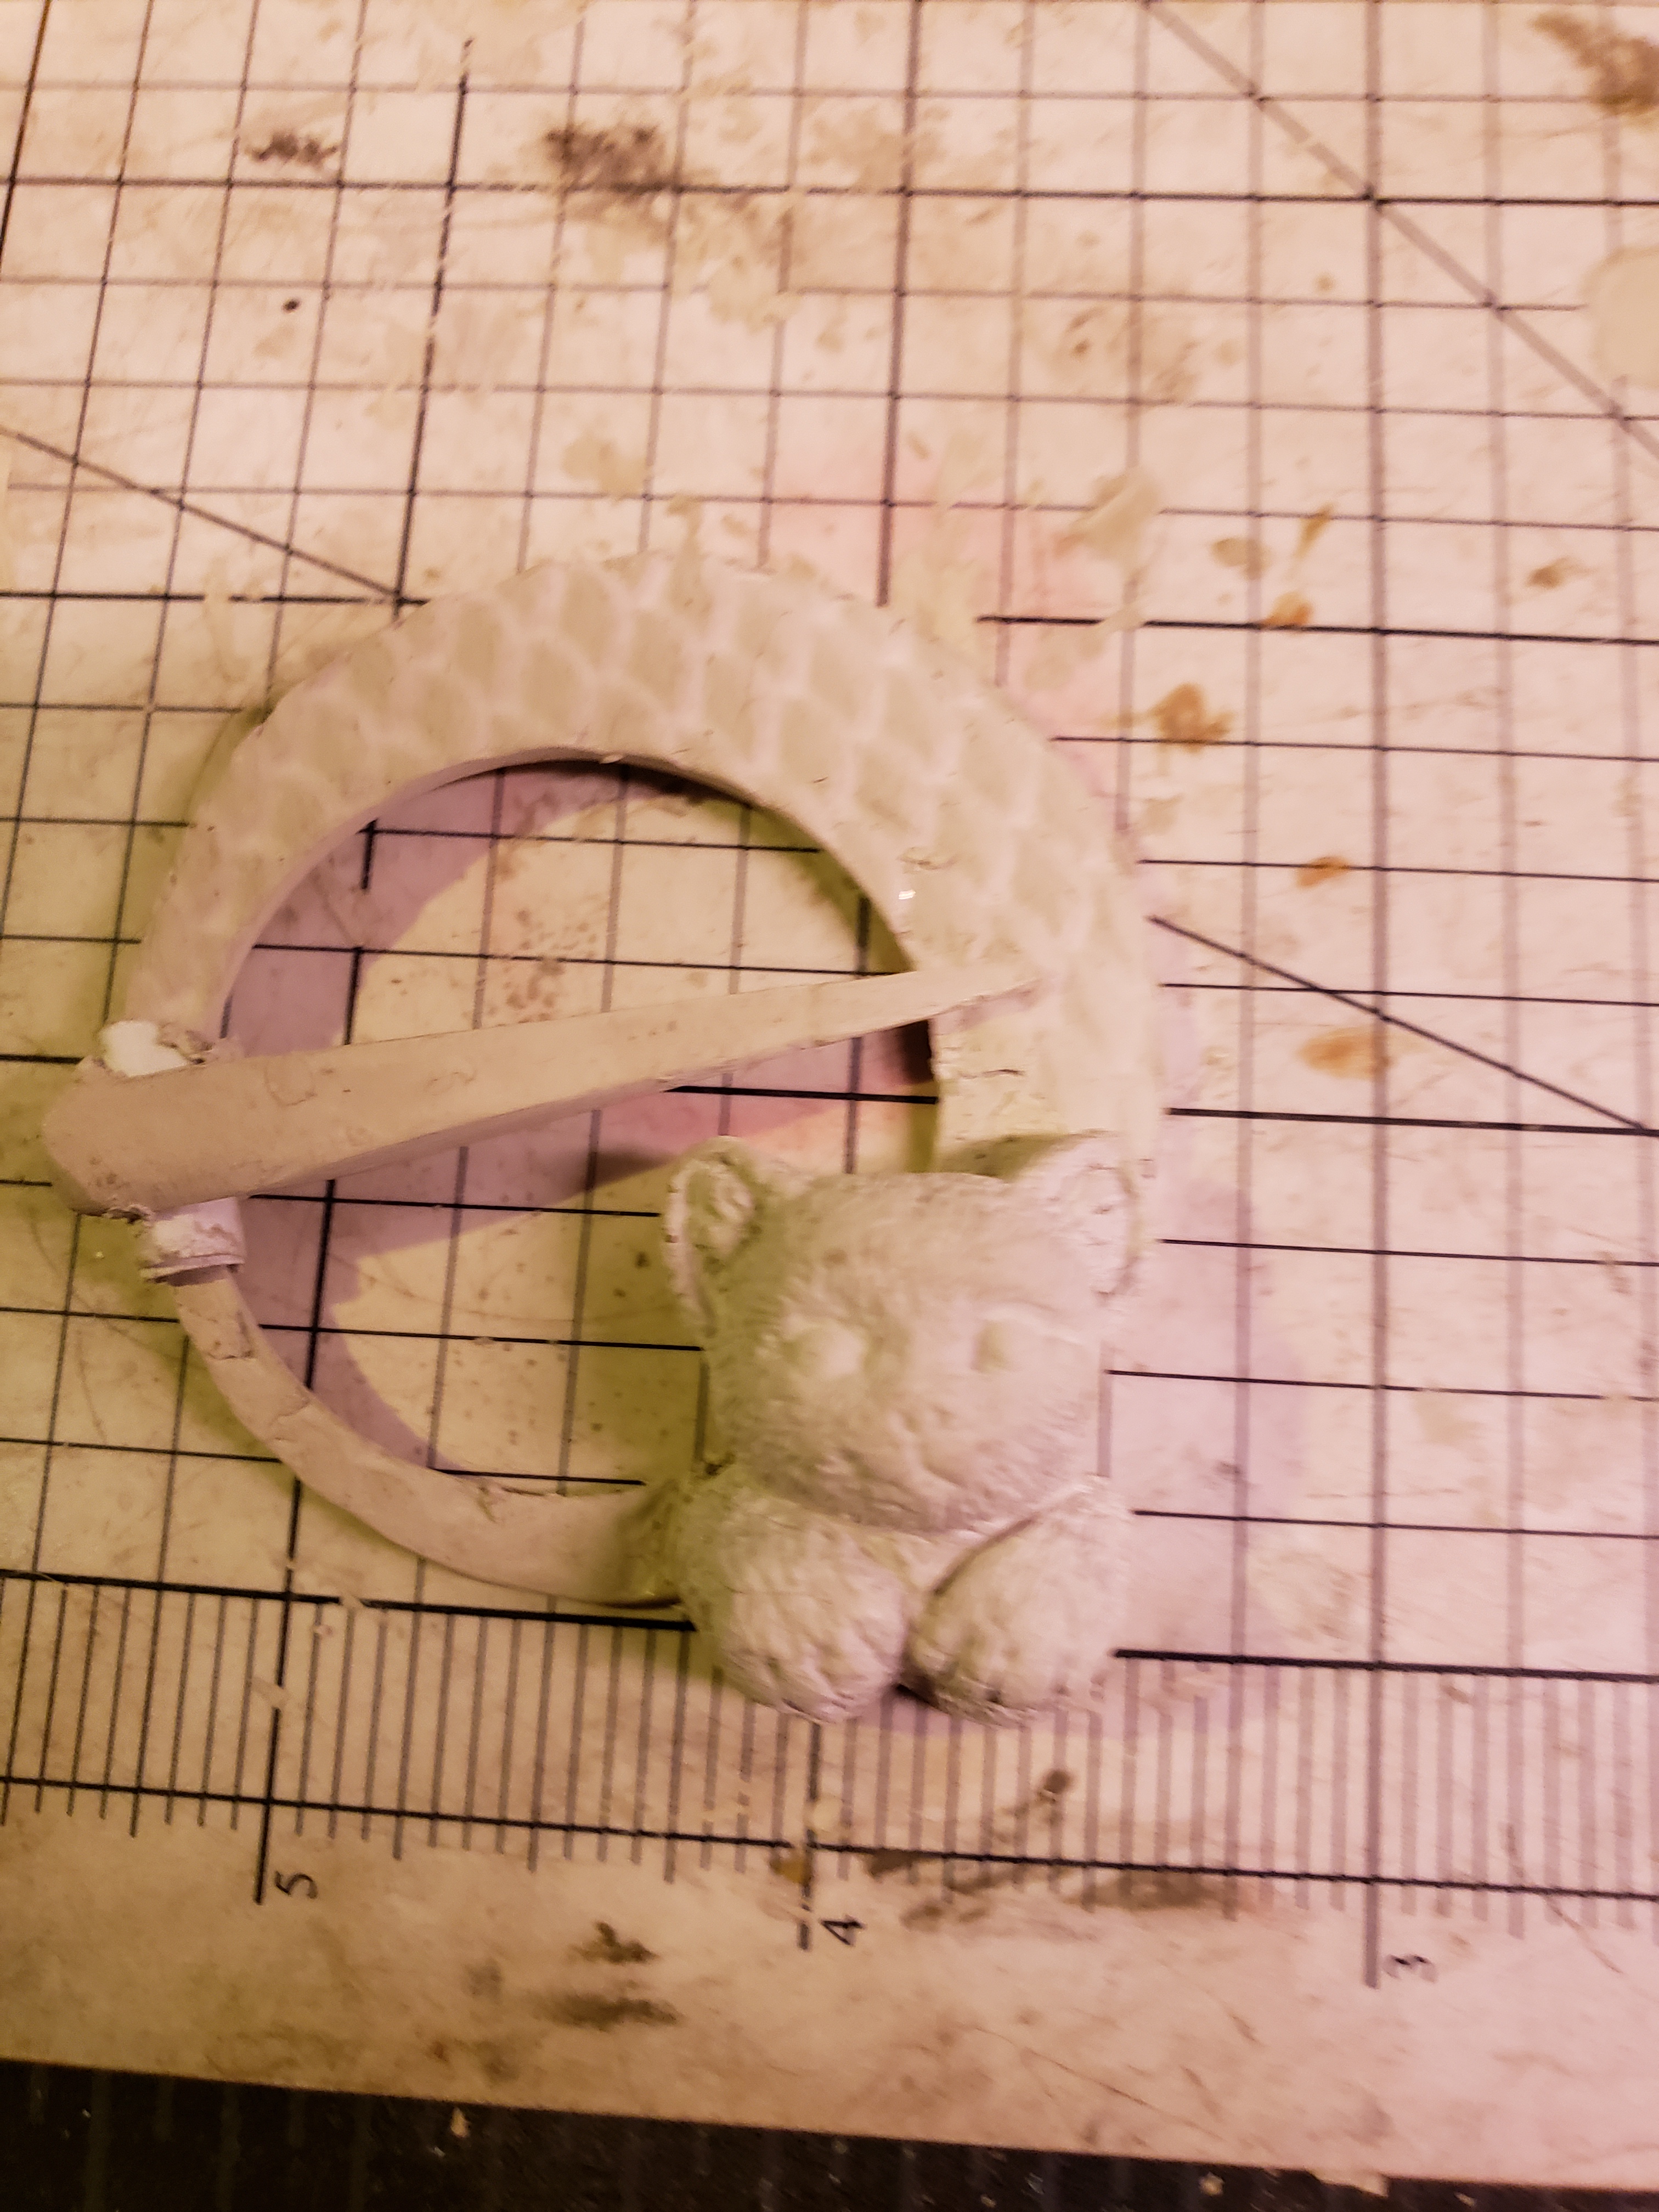
I thought a piece as elaborate as this one deserved more than a simple bail. To make one, I started with a rolled snake of silver clay.

20200401_154403

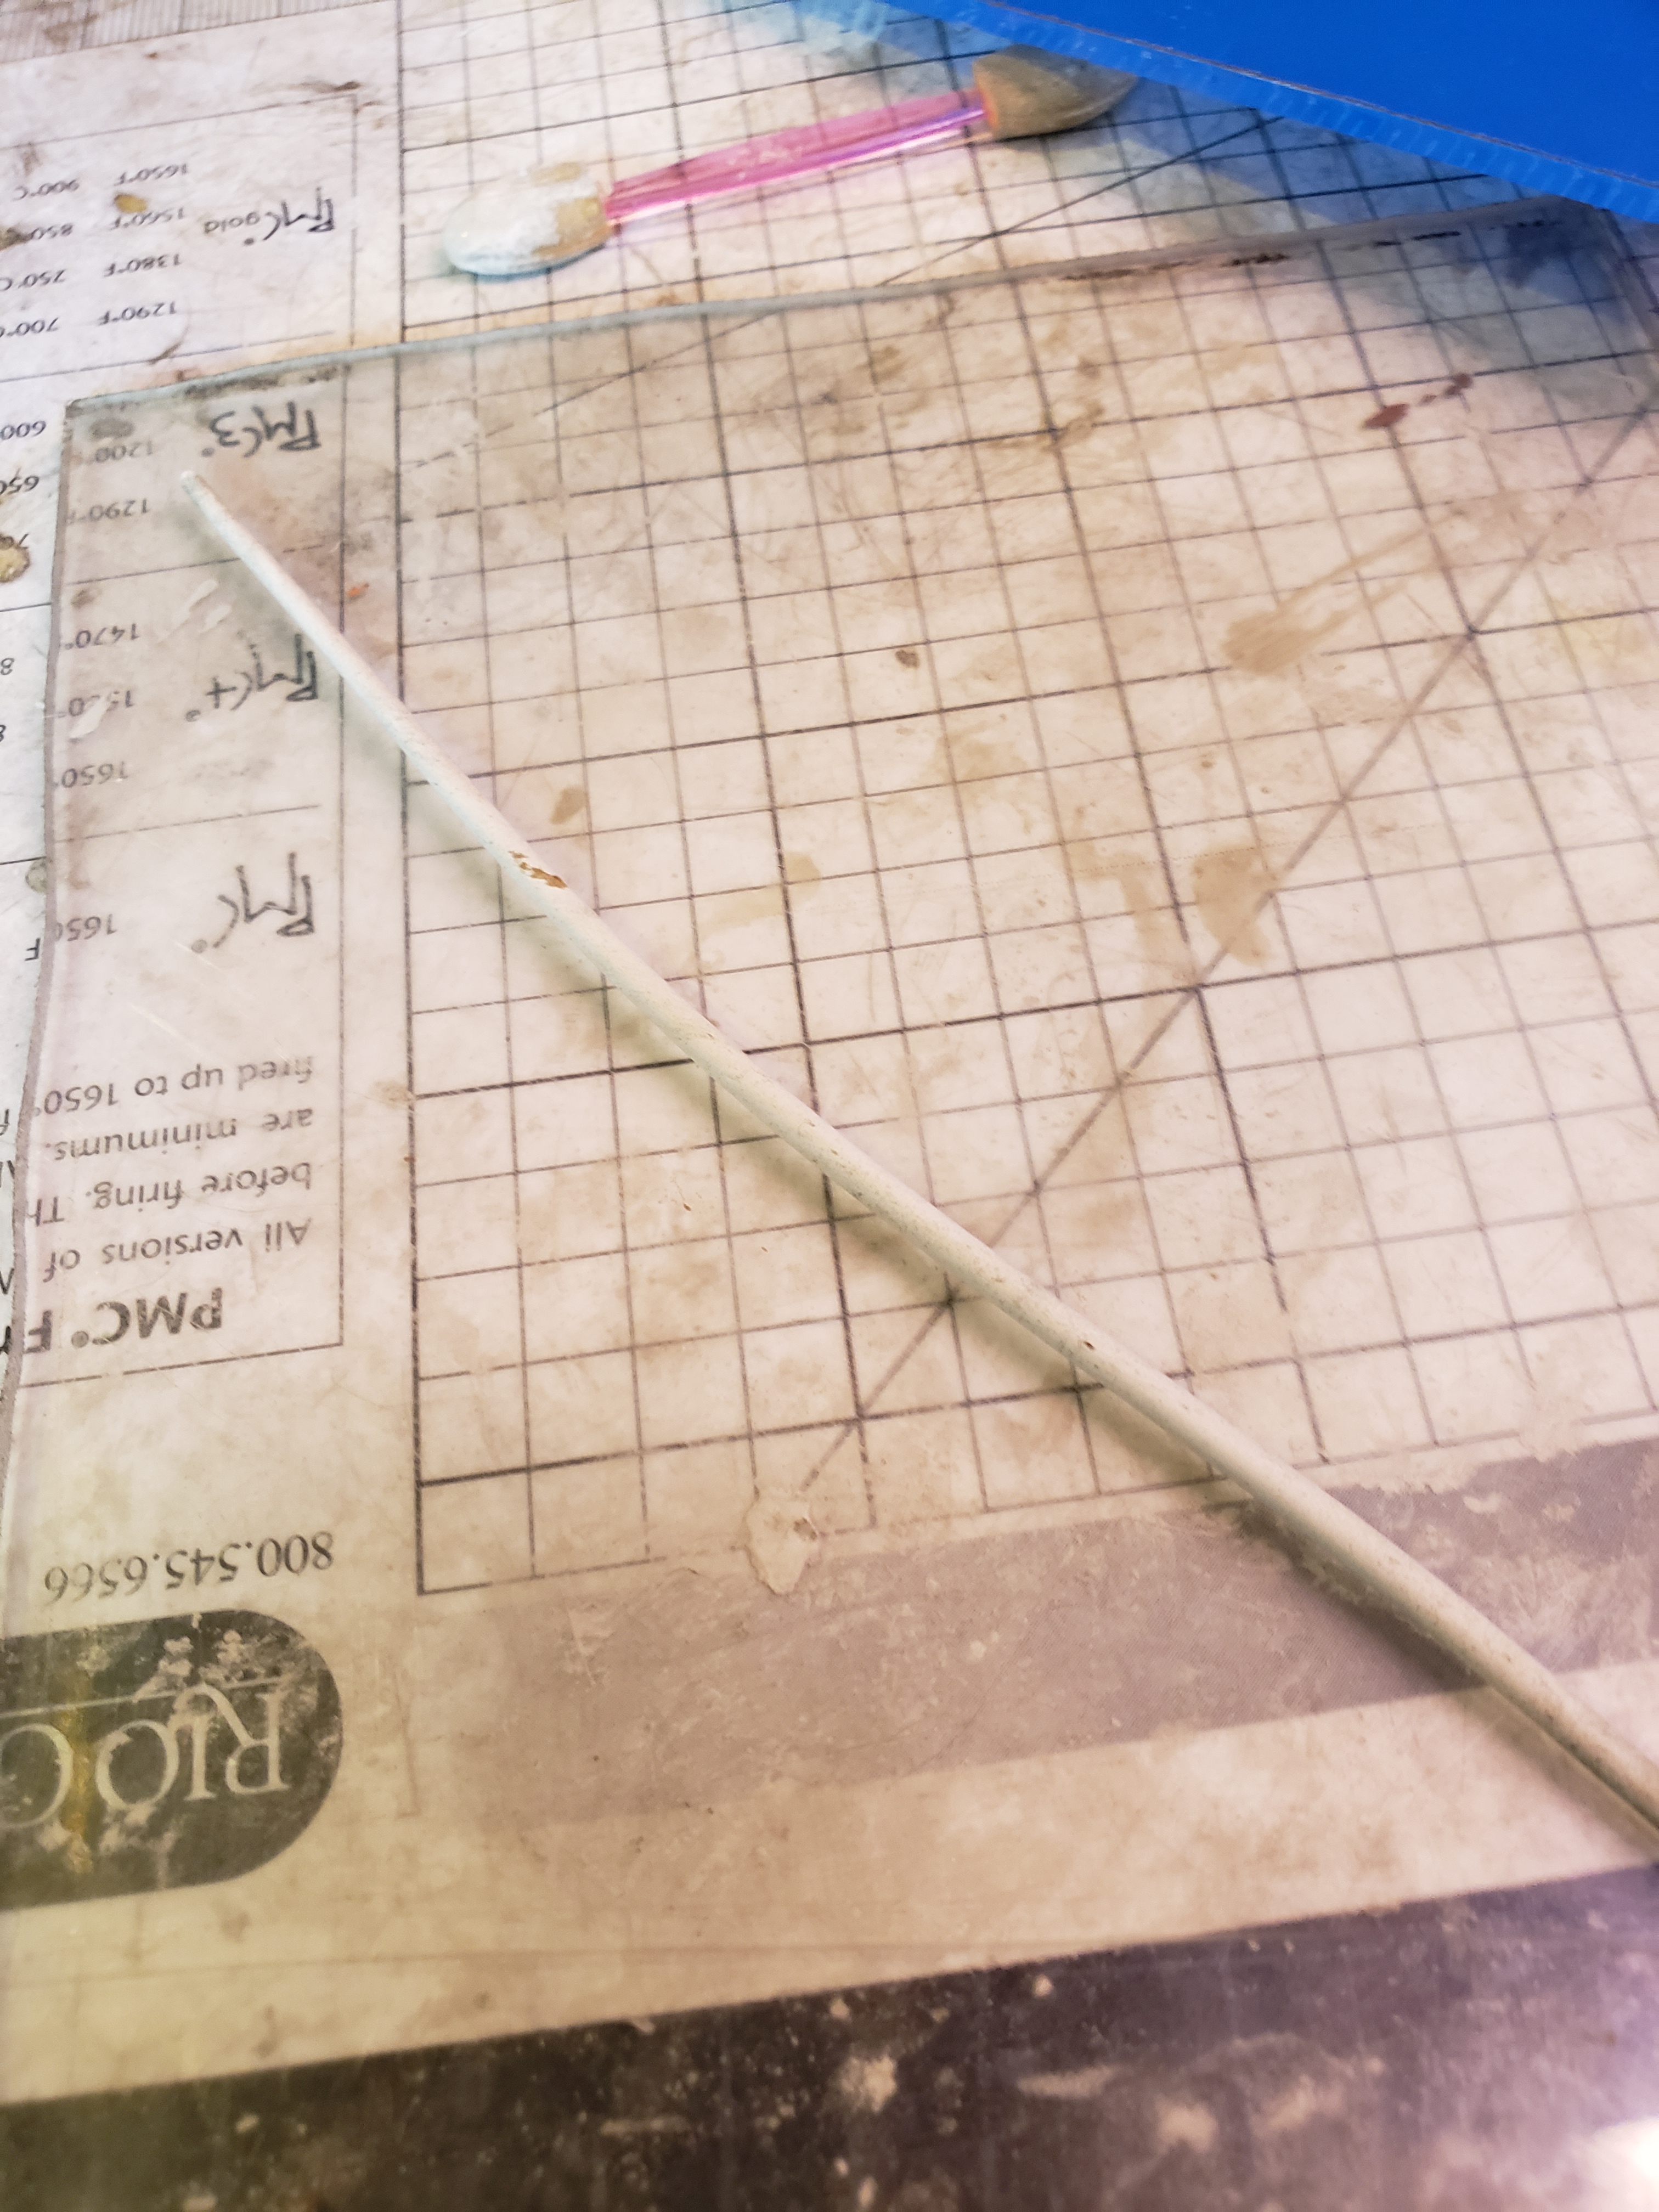
I picked it up by  the middle and slowly spun it, letting the snake spiral.

20200401_154432

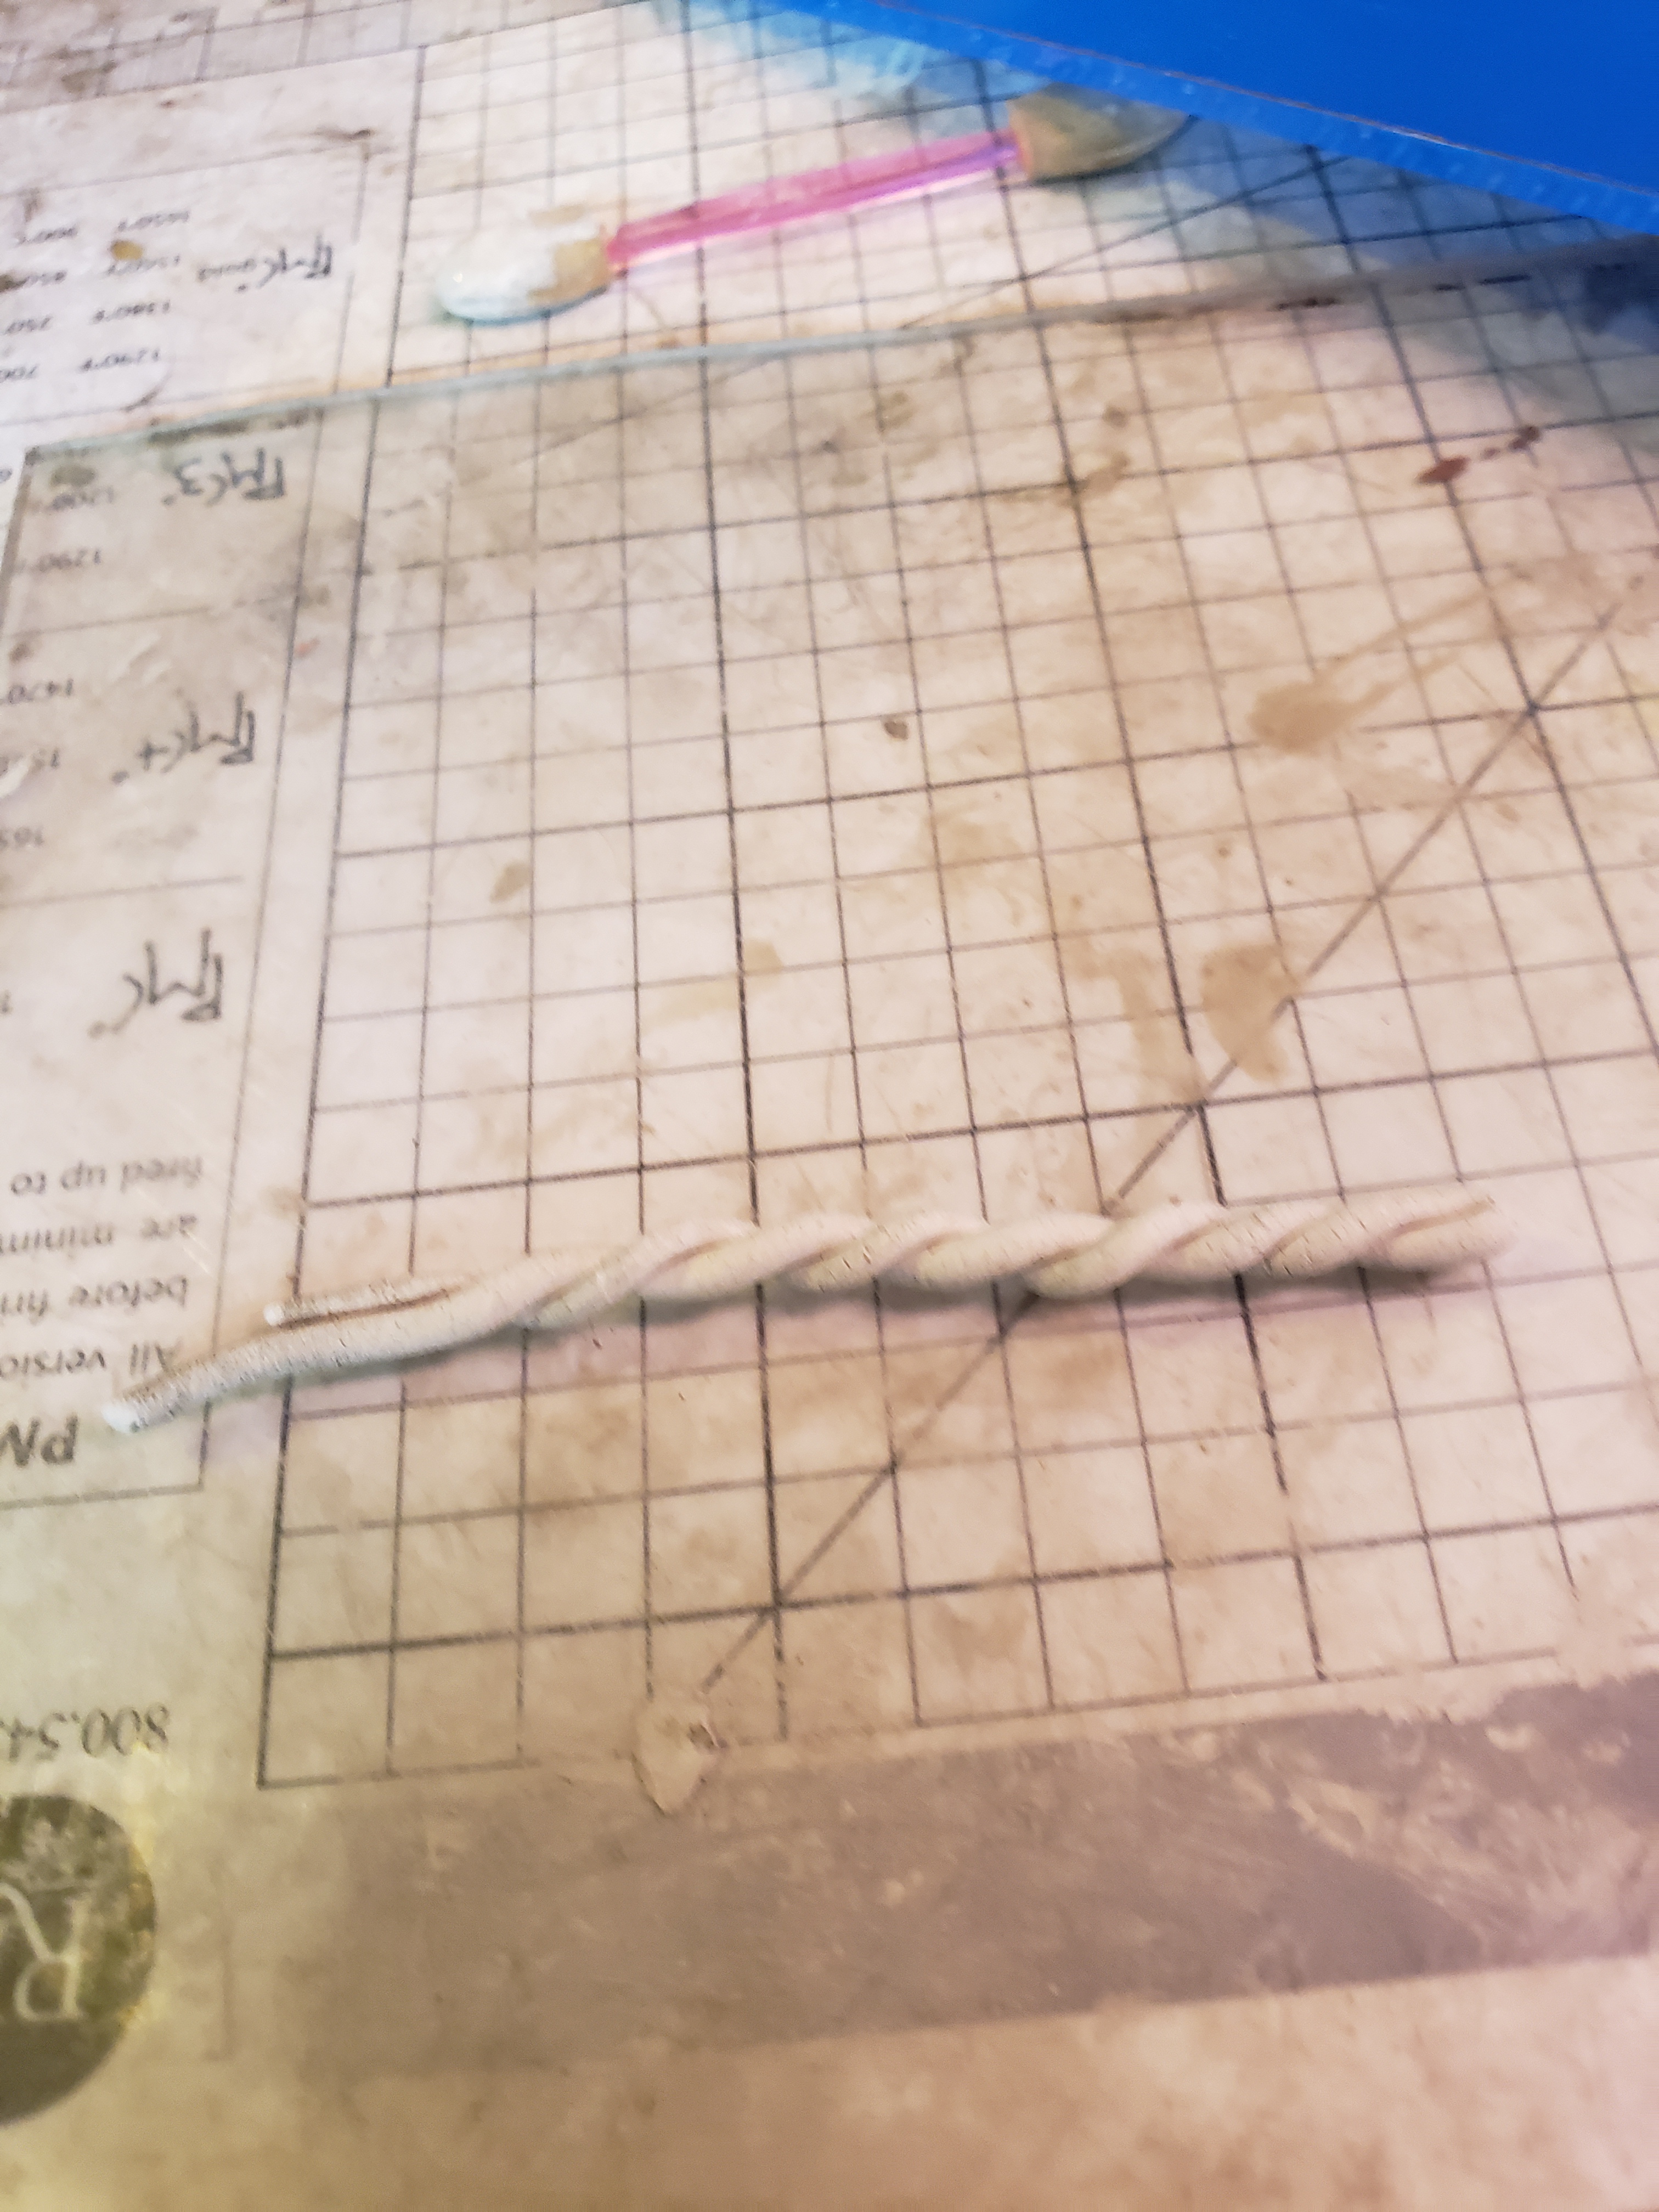
I then formed a vine bail from this, and let it dry over a soda straw.

20200401_154644

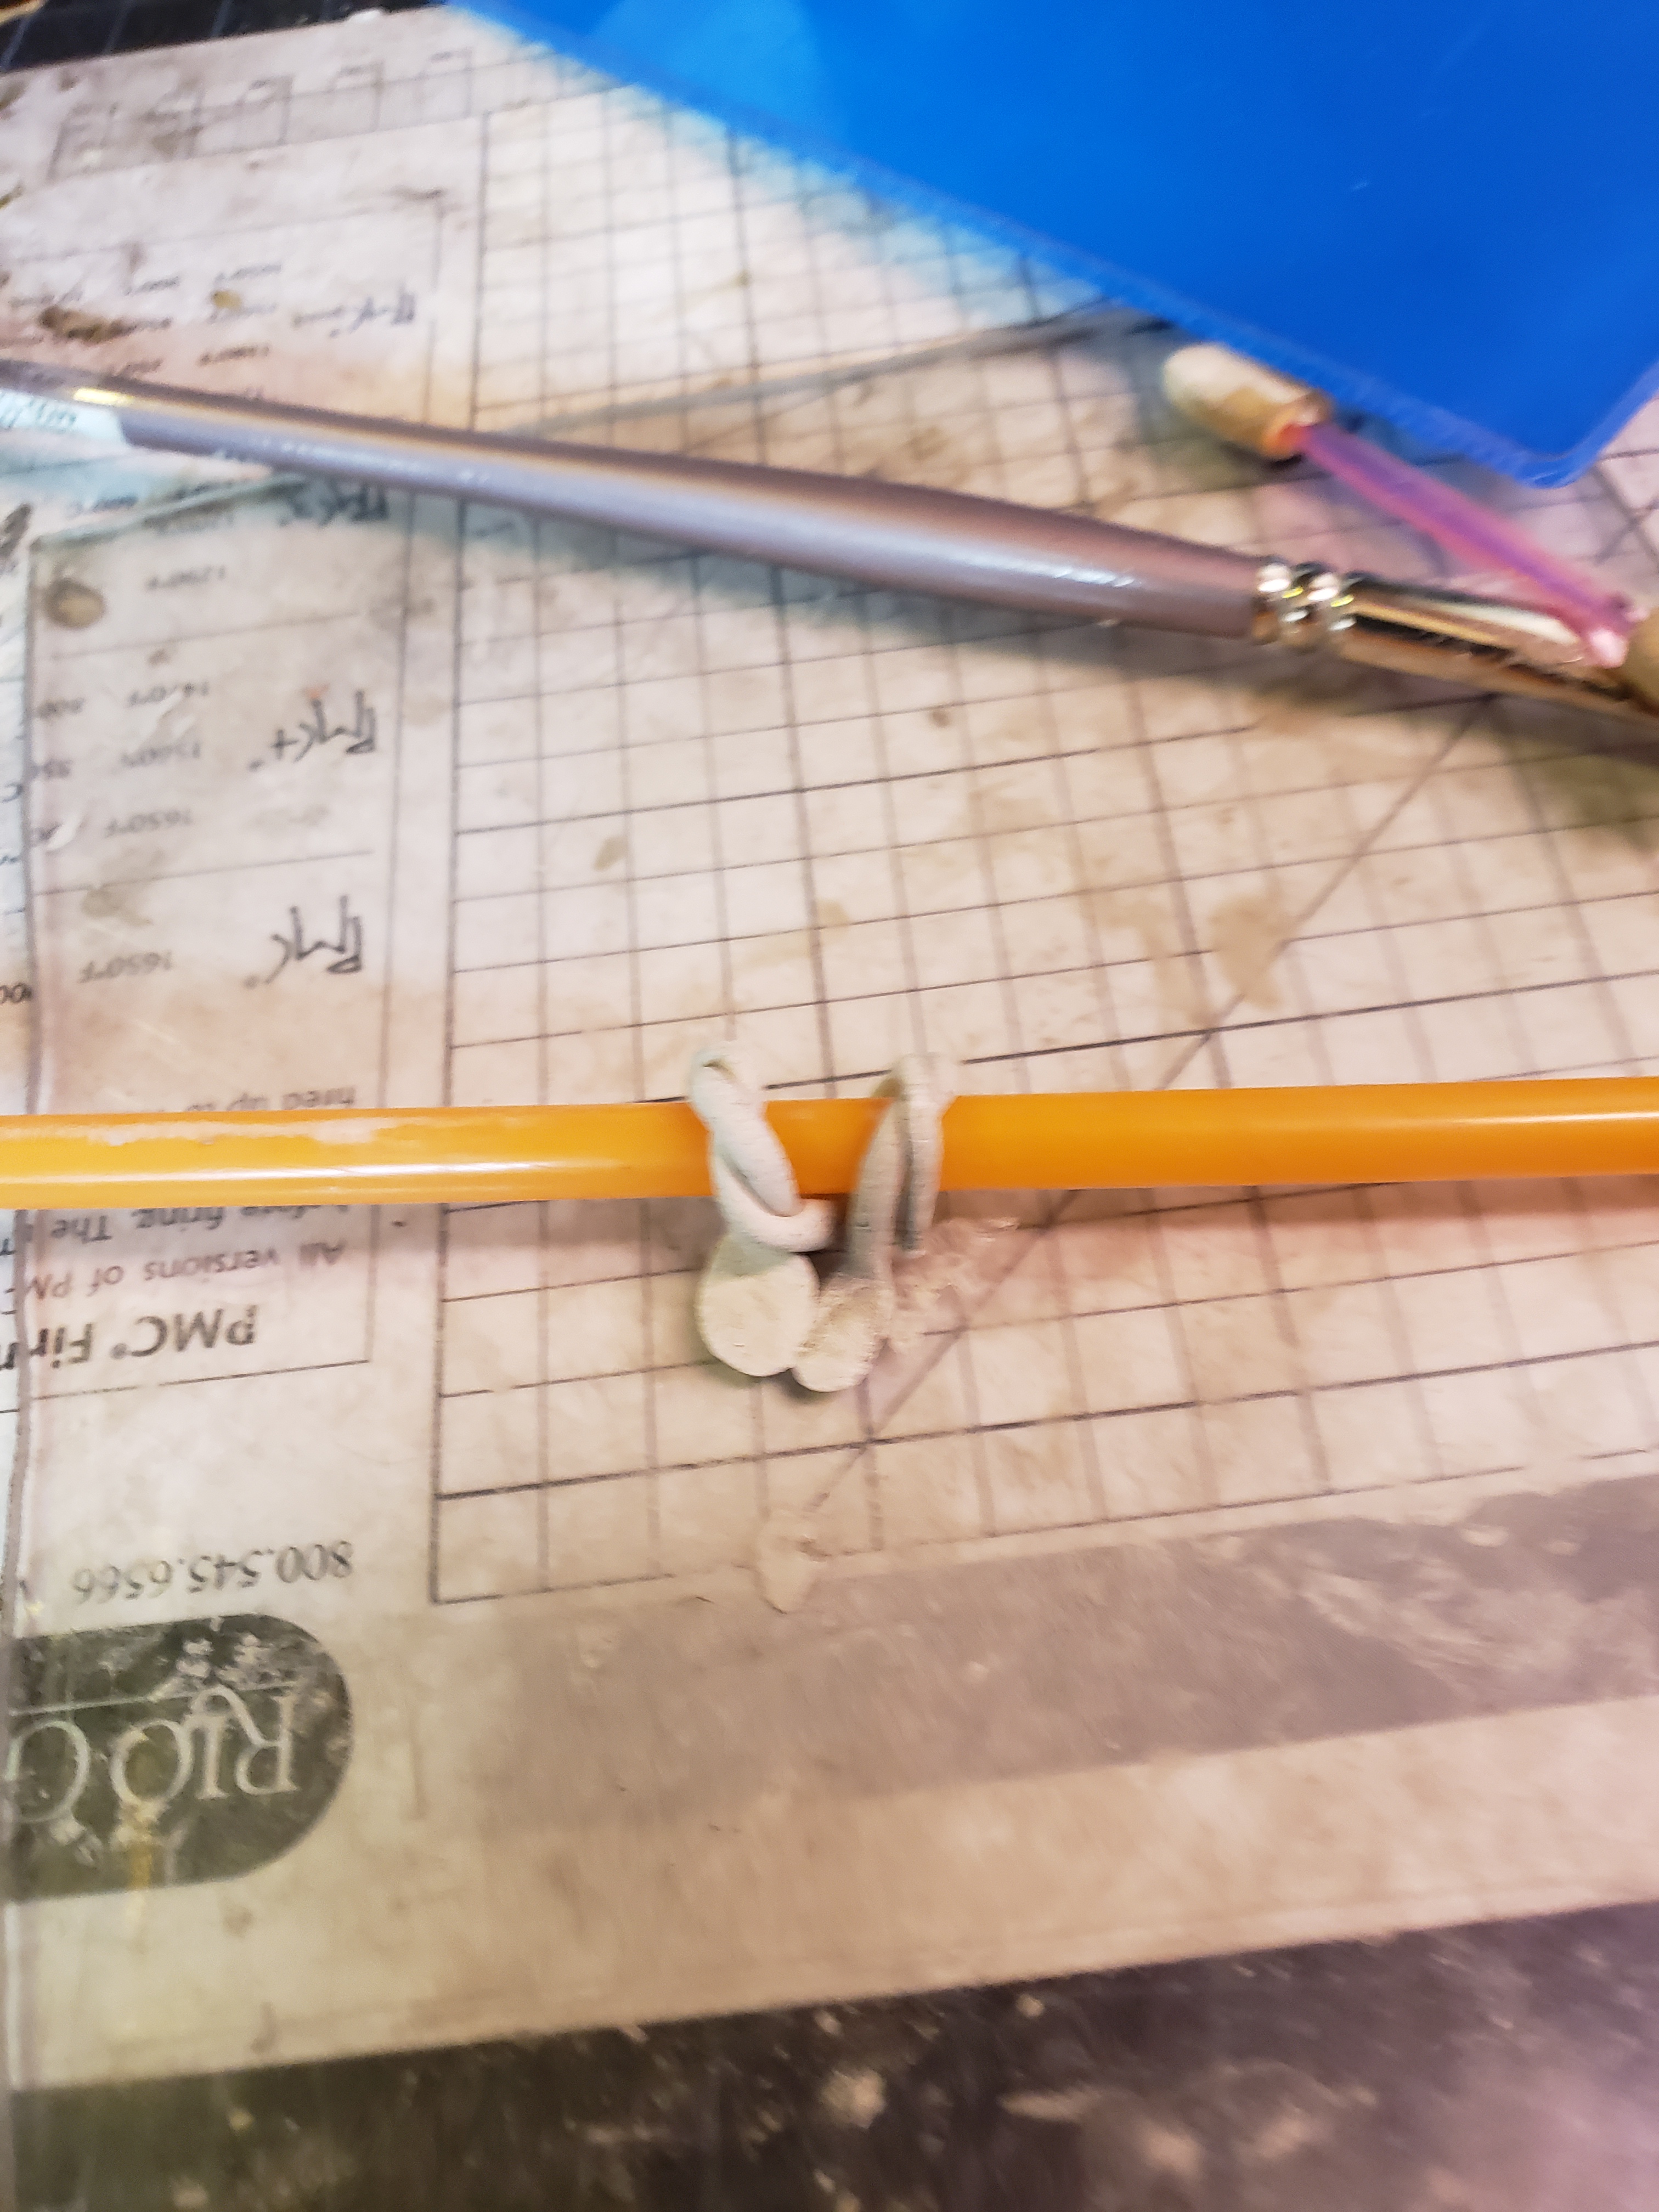
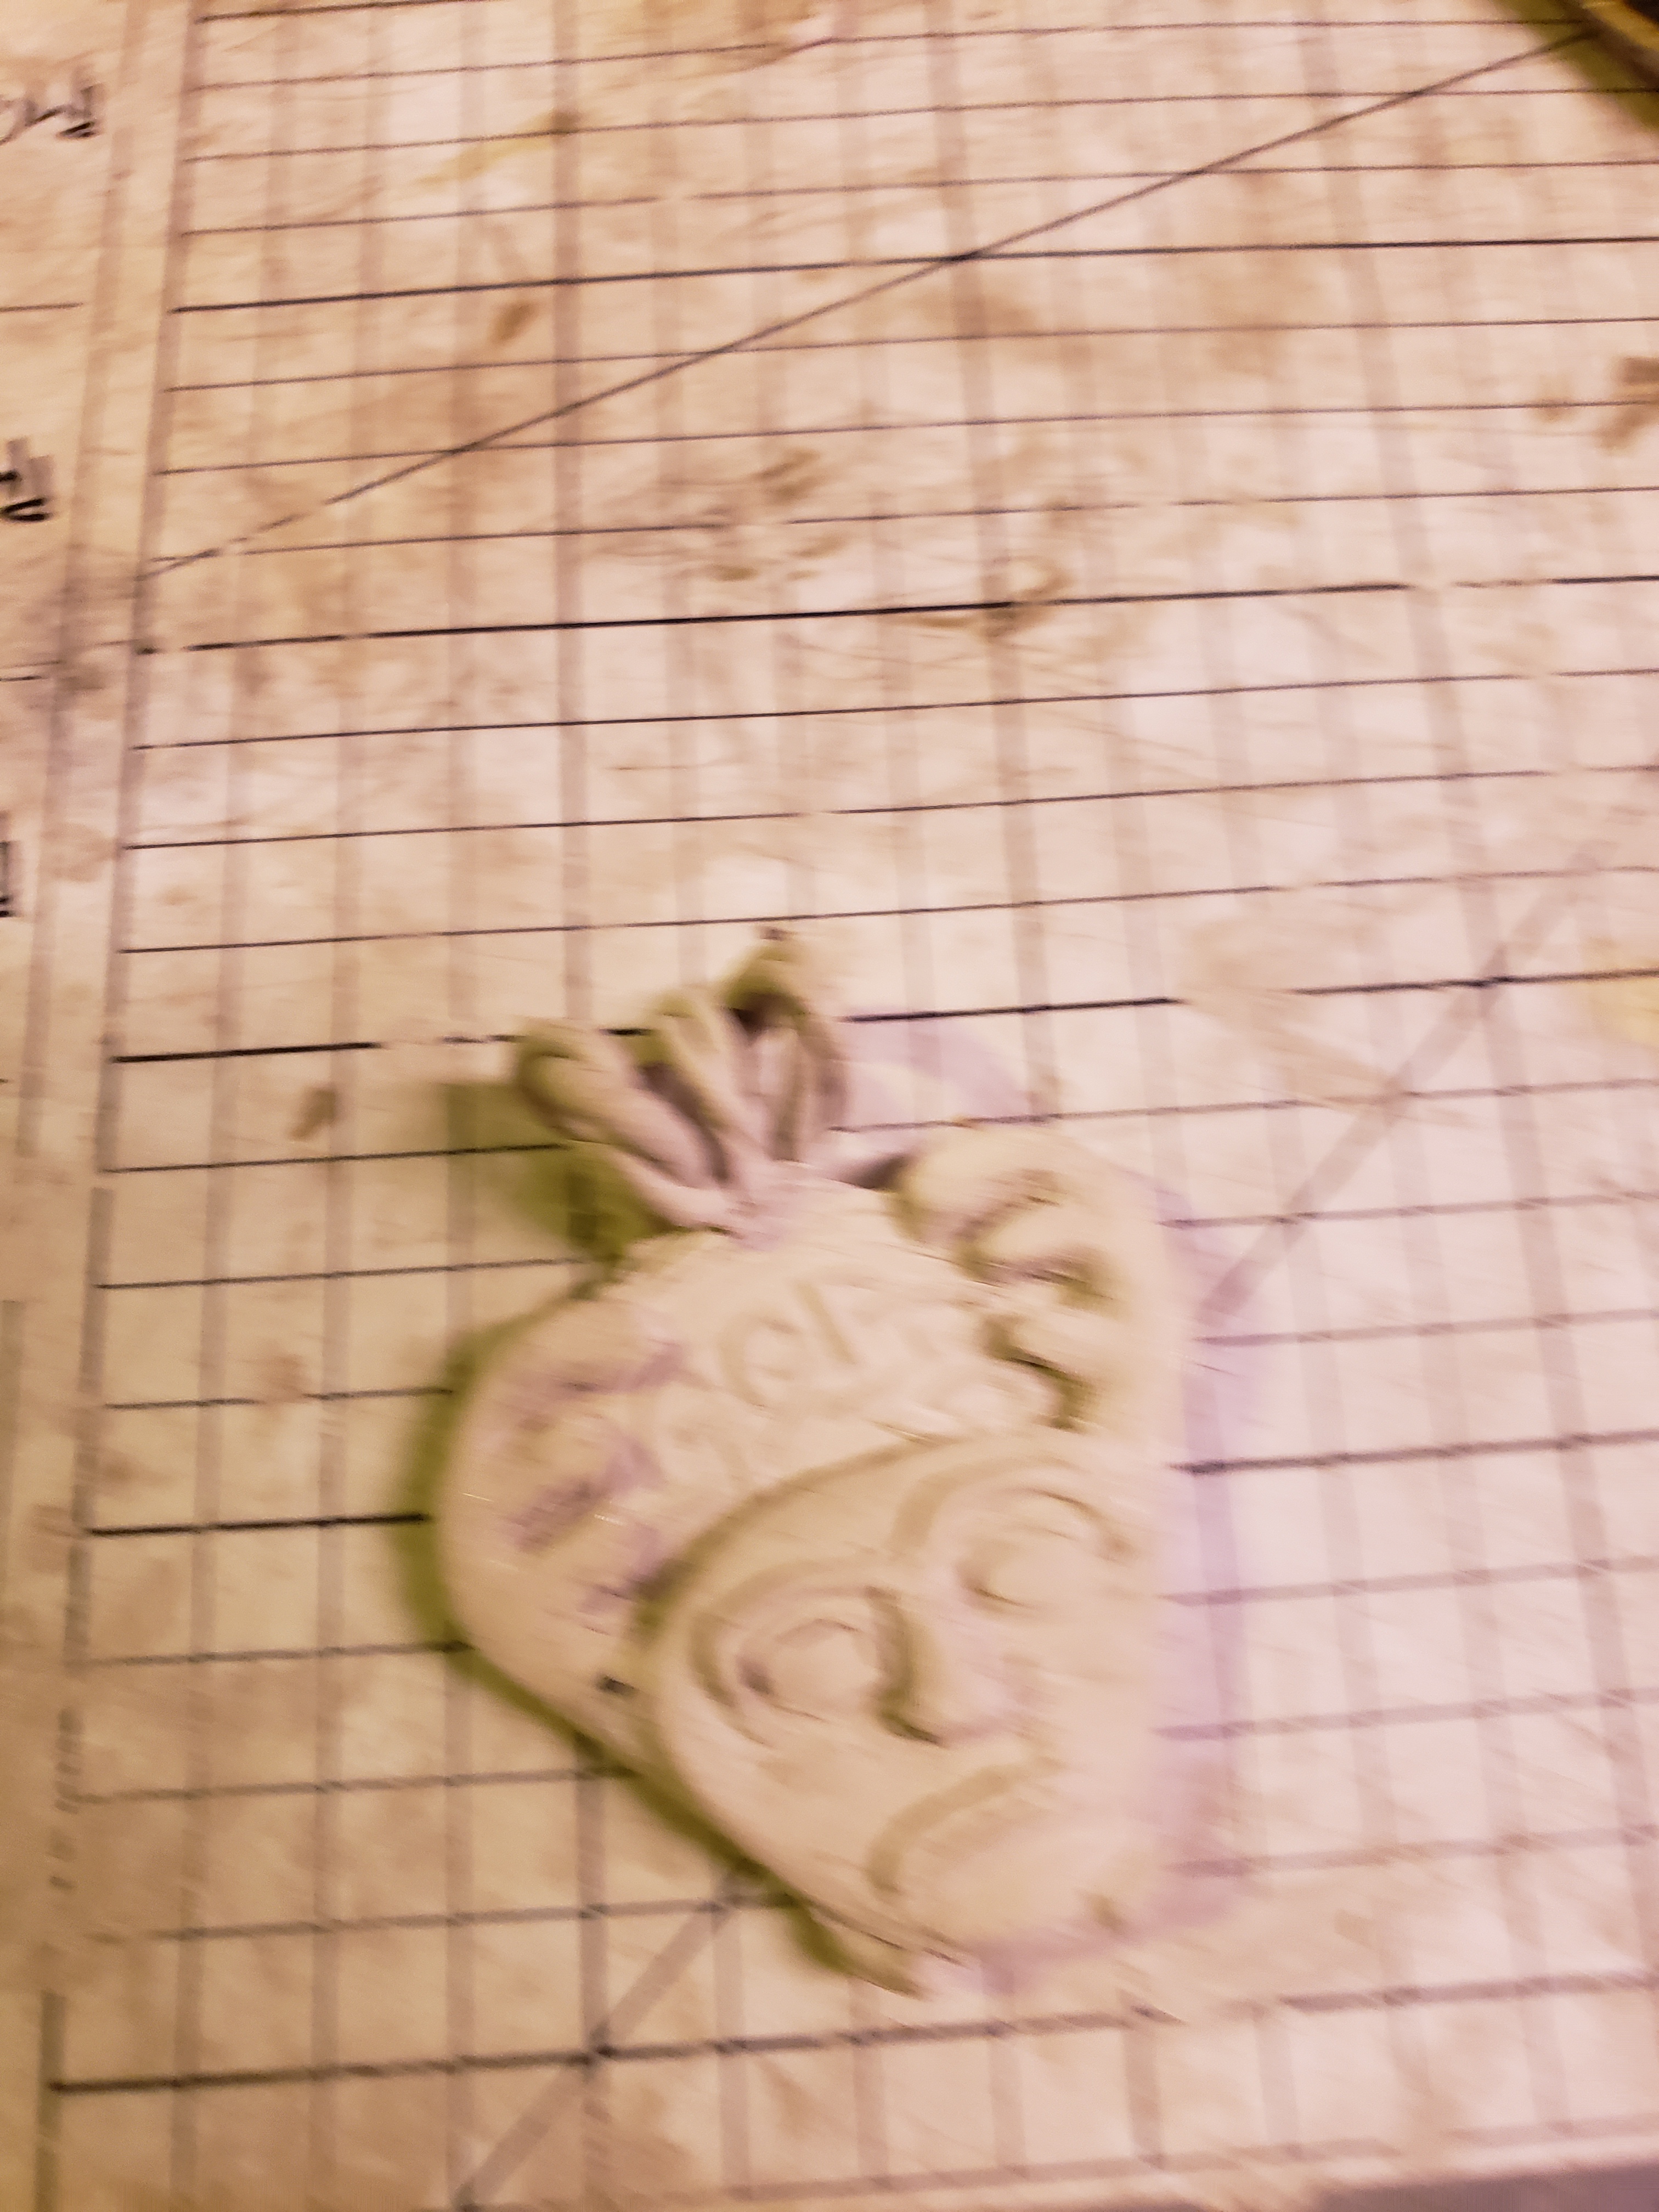
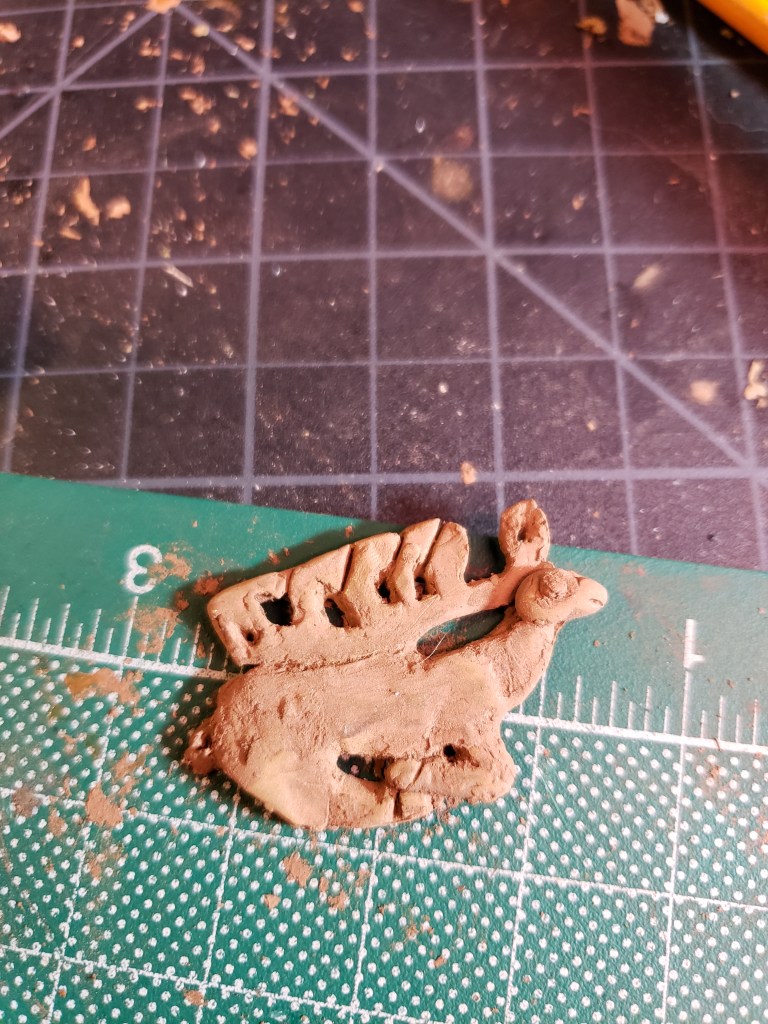
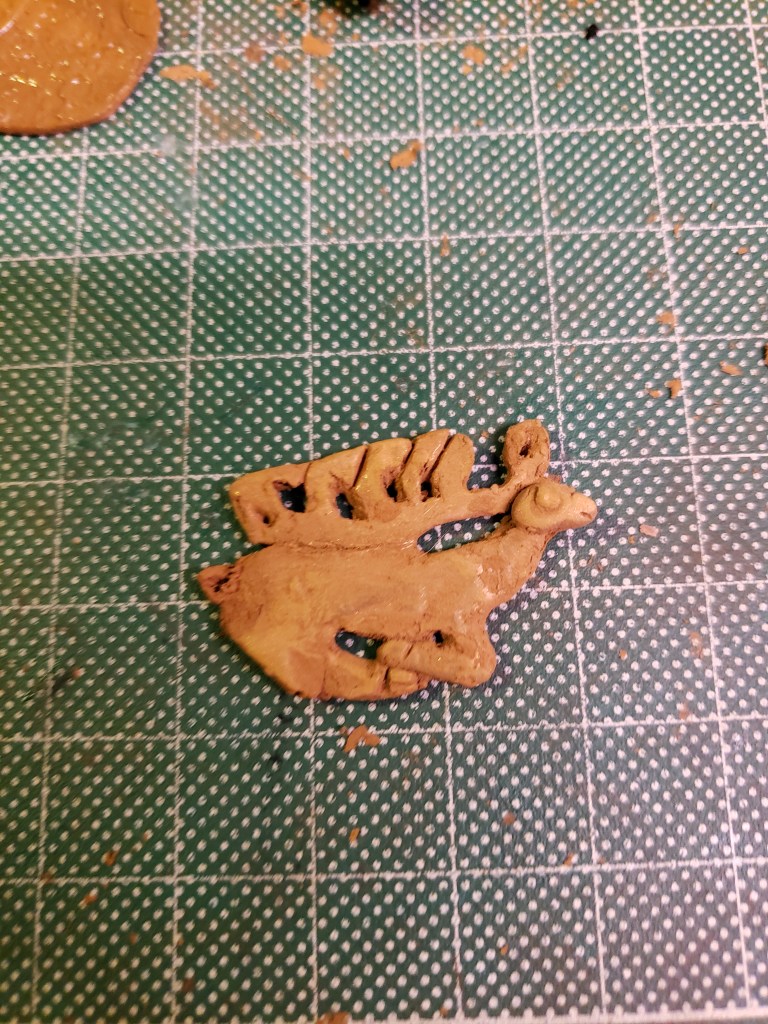
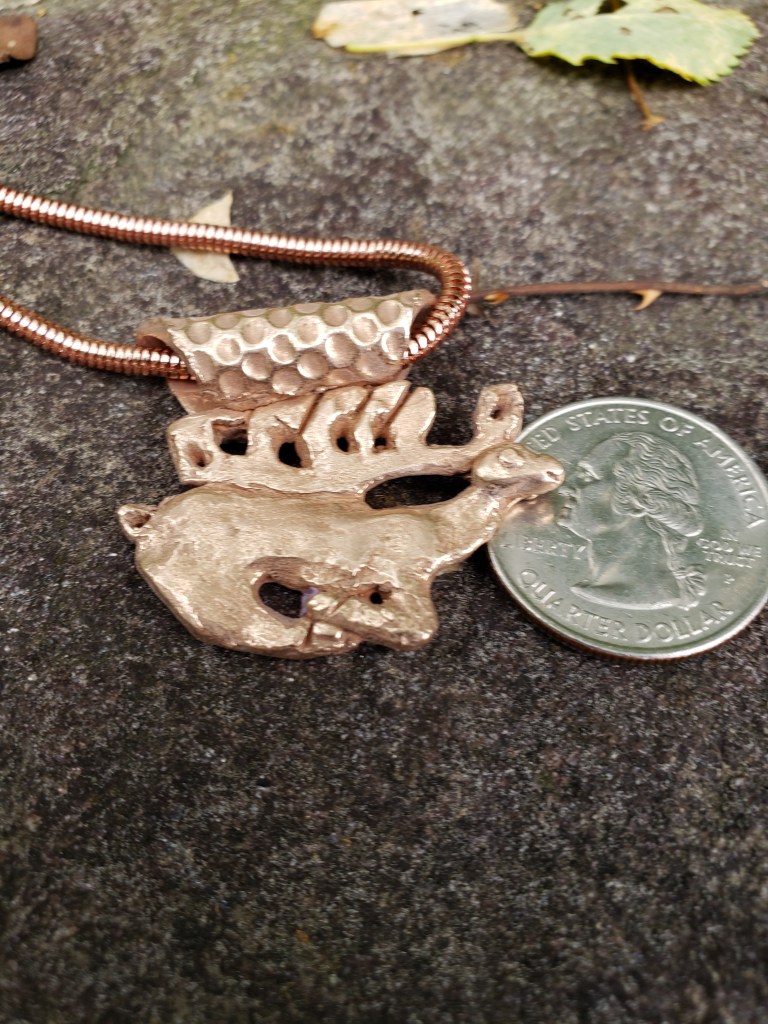
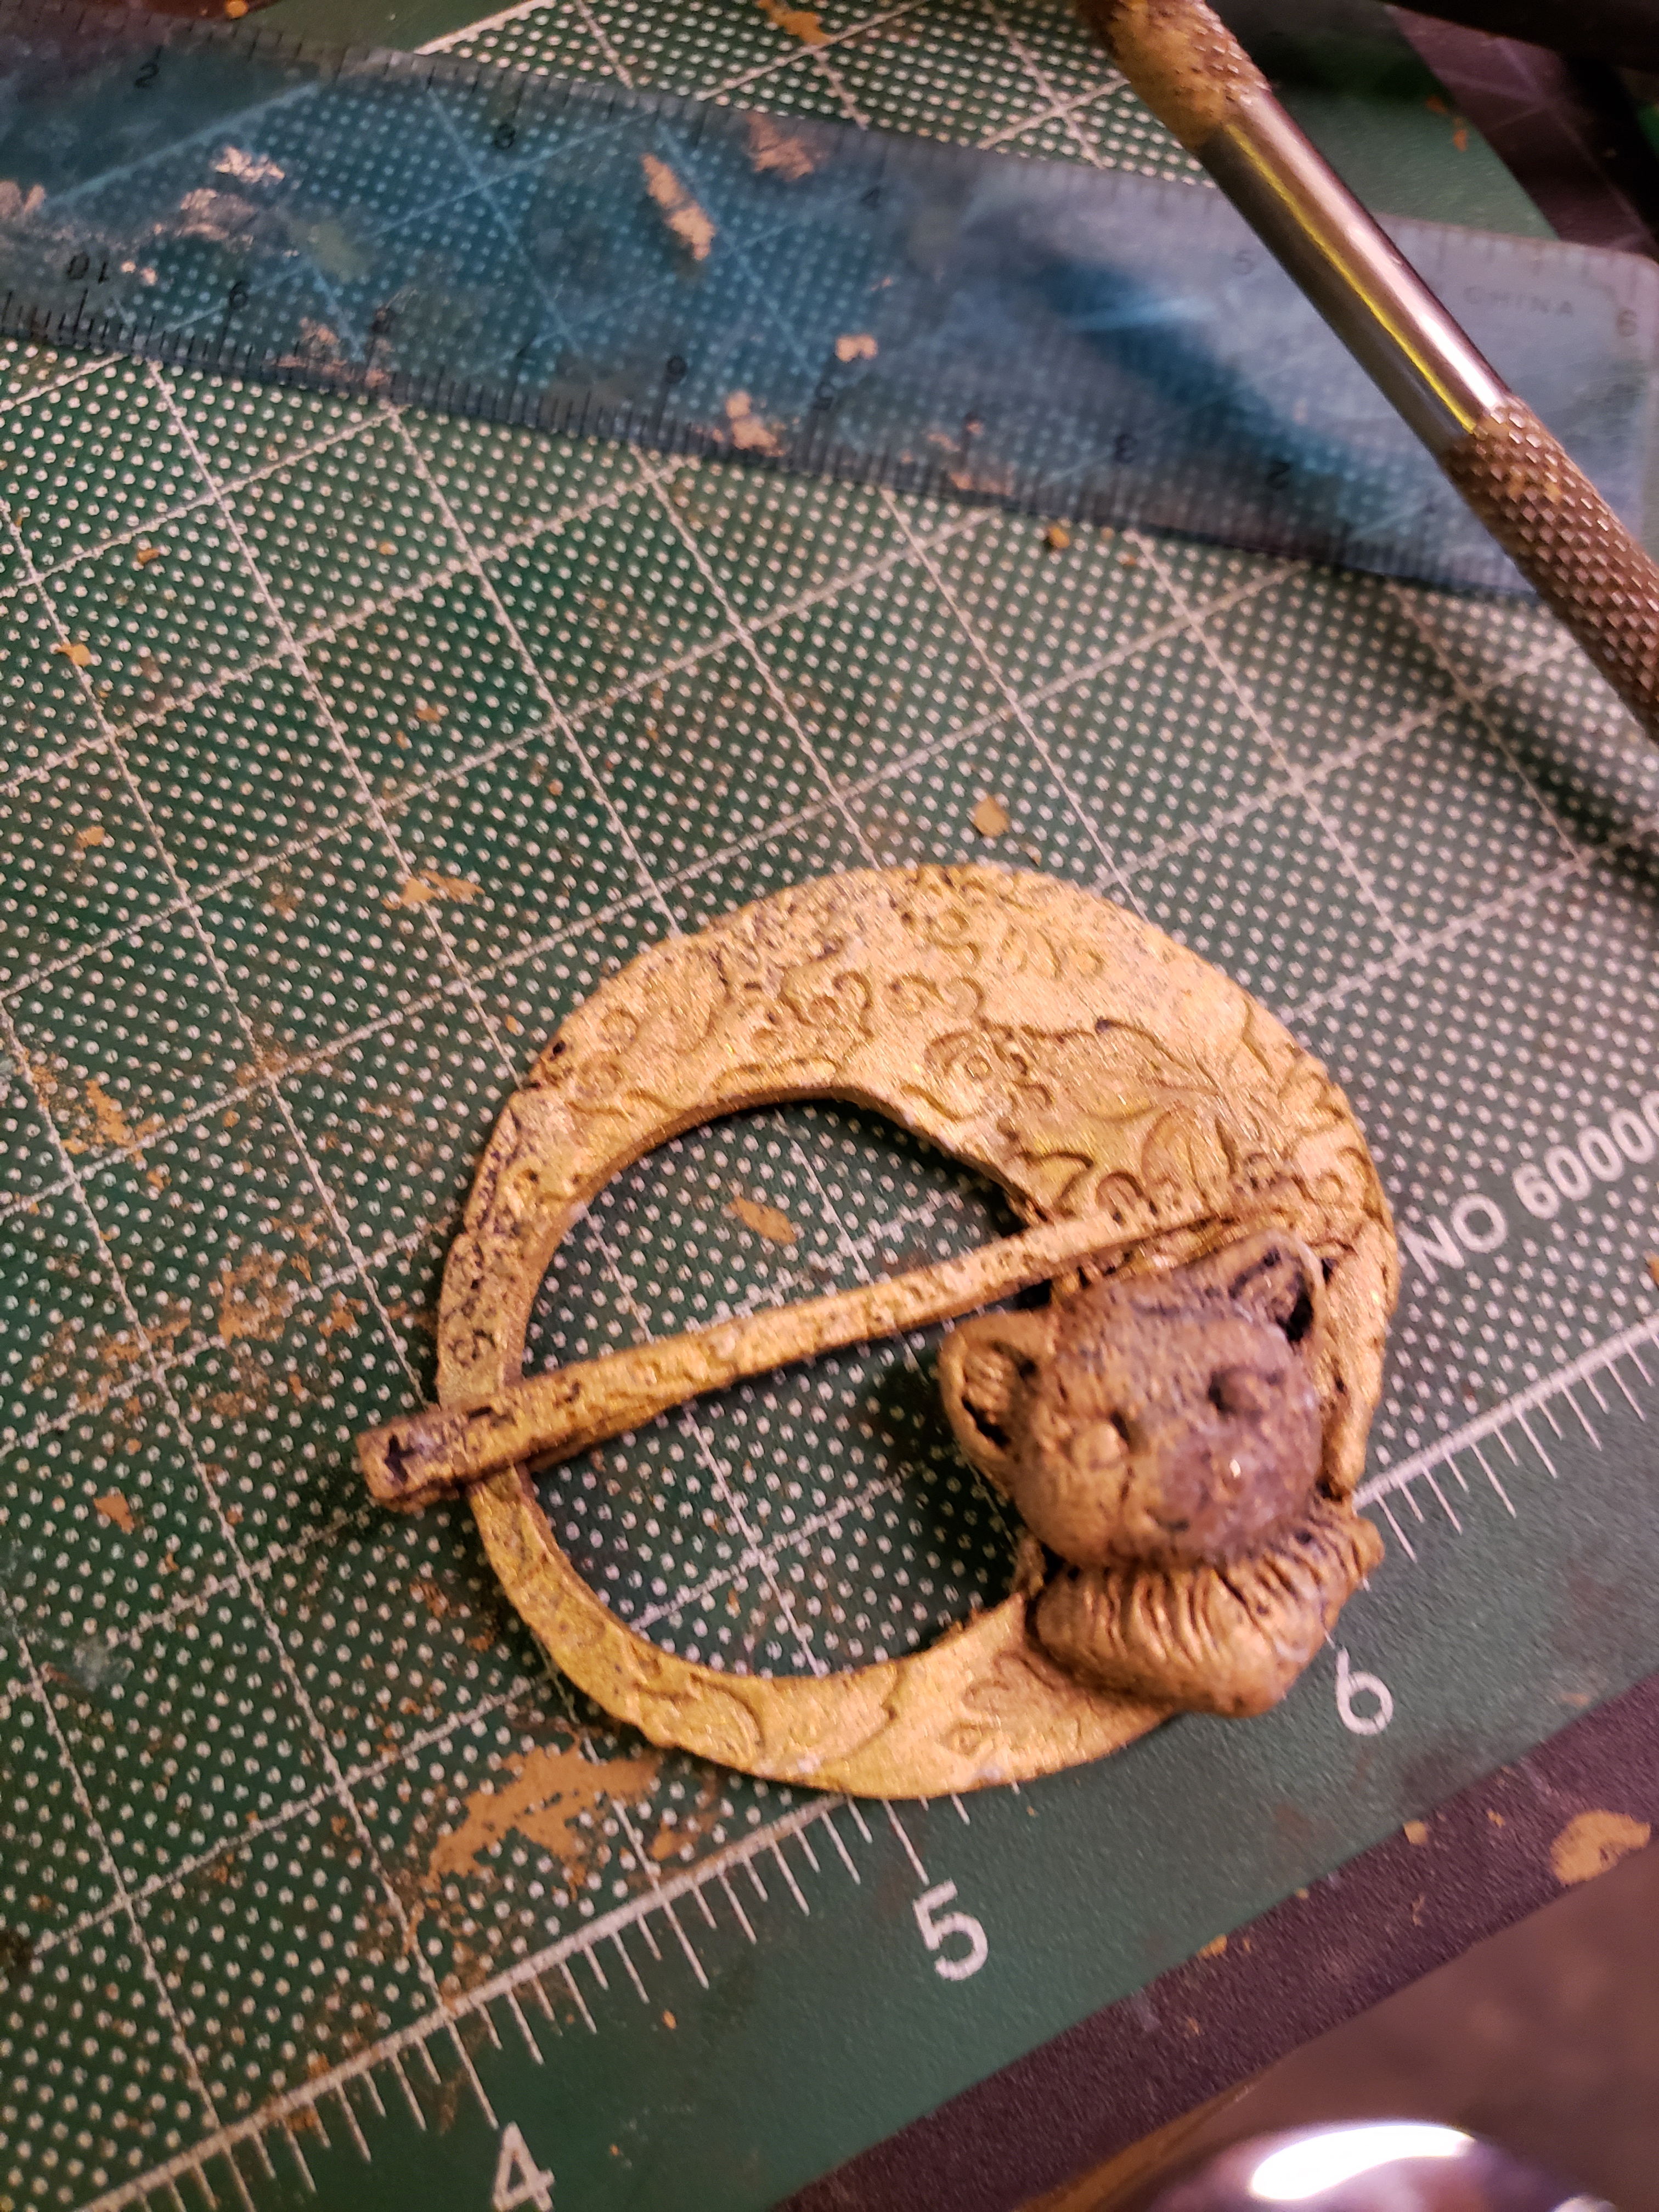
Deciding that the two strands were not enough, I made a third spiral and attached it between the two. I then attached the bail to the back of the pendant, using slip. I made a thin circle with my maker’s mark on it, and used this to cover up where the bail joined the piece. At this point, the front and back of the piece looked like (my apologies that the photo of the front is blurry):

20200404_084614

20200404_084618

I then fired the piece. Before brushing it, I applied accent rose gold to the eyes, requiring a second firing. I then burnished the eyes and brushed the rest of the piece. I tumbled until it was quite shiny.

The gold on the eyes did not show up as much as I would like, when compared to the shiny silver. Therefore, I decided to do a heavy patina. I chose LOS, since it will not color gold. I carefully cleaned the finger oils off the piece, and made a solution of hot water, salt, ammonia, and LOS. I dipped the piece until I liked the color, and then dipped it into cold water to prevent further changes. I wiped some of the patina off, so it would not be of a uniform color.

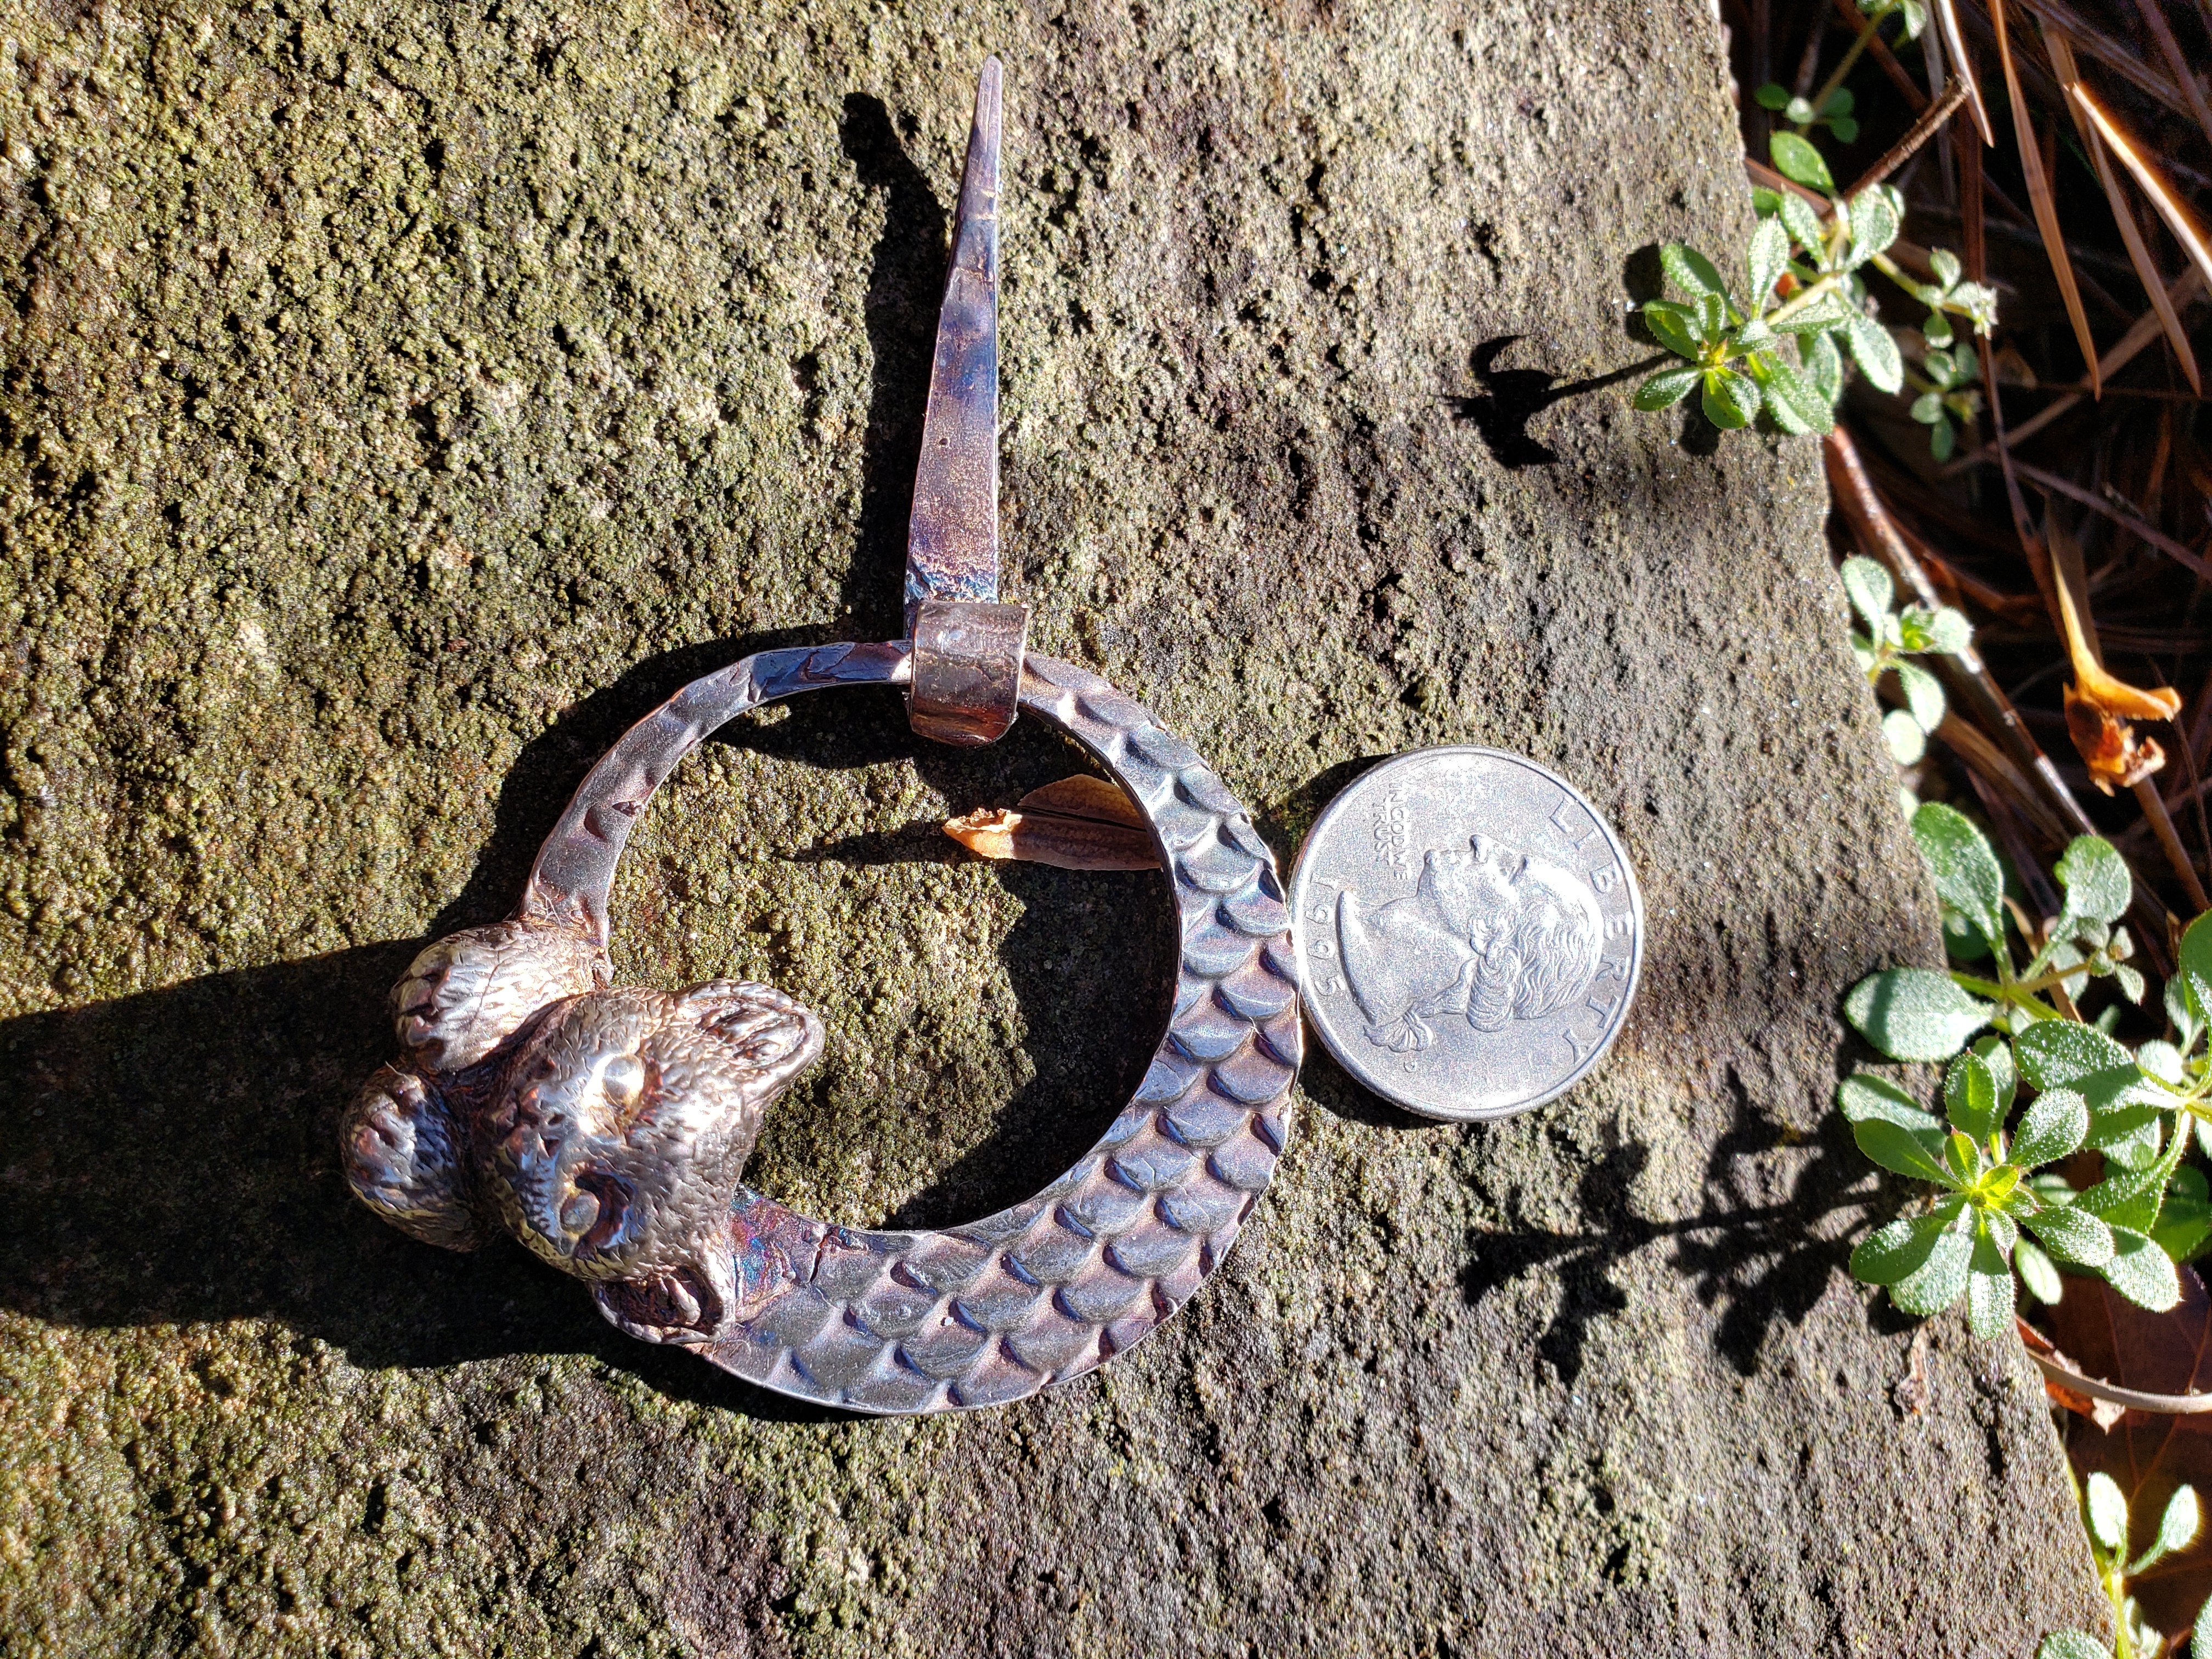
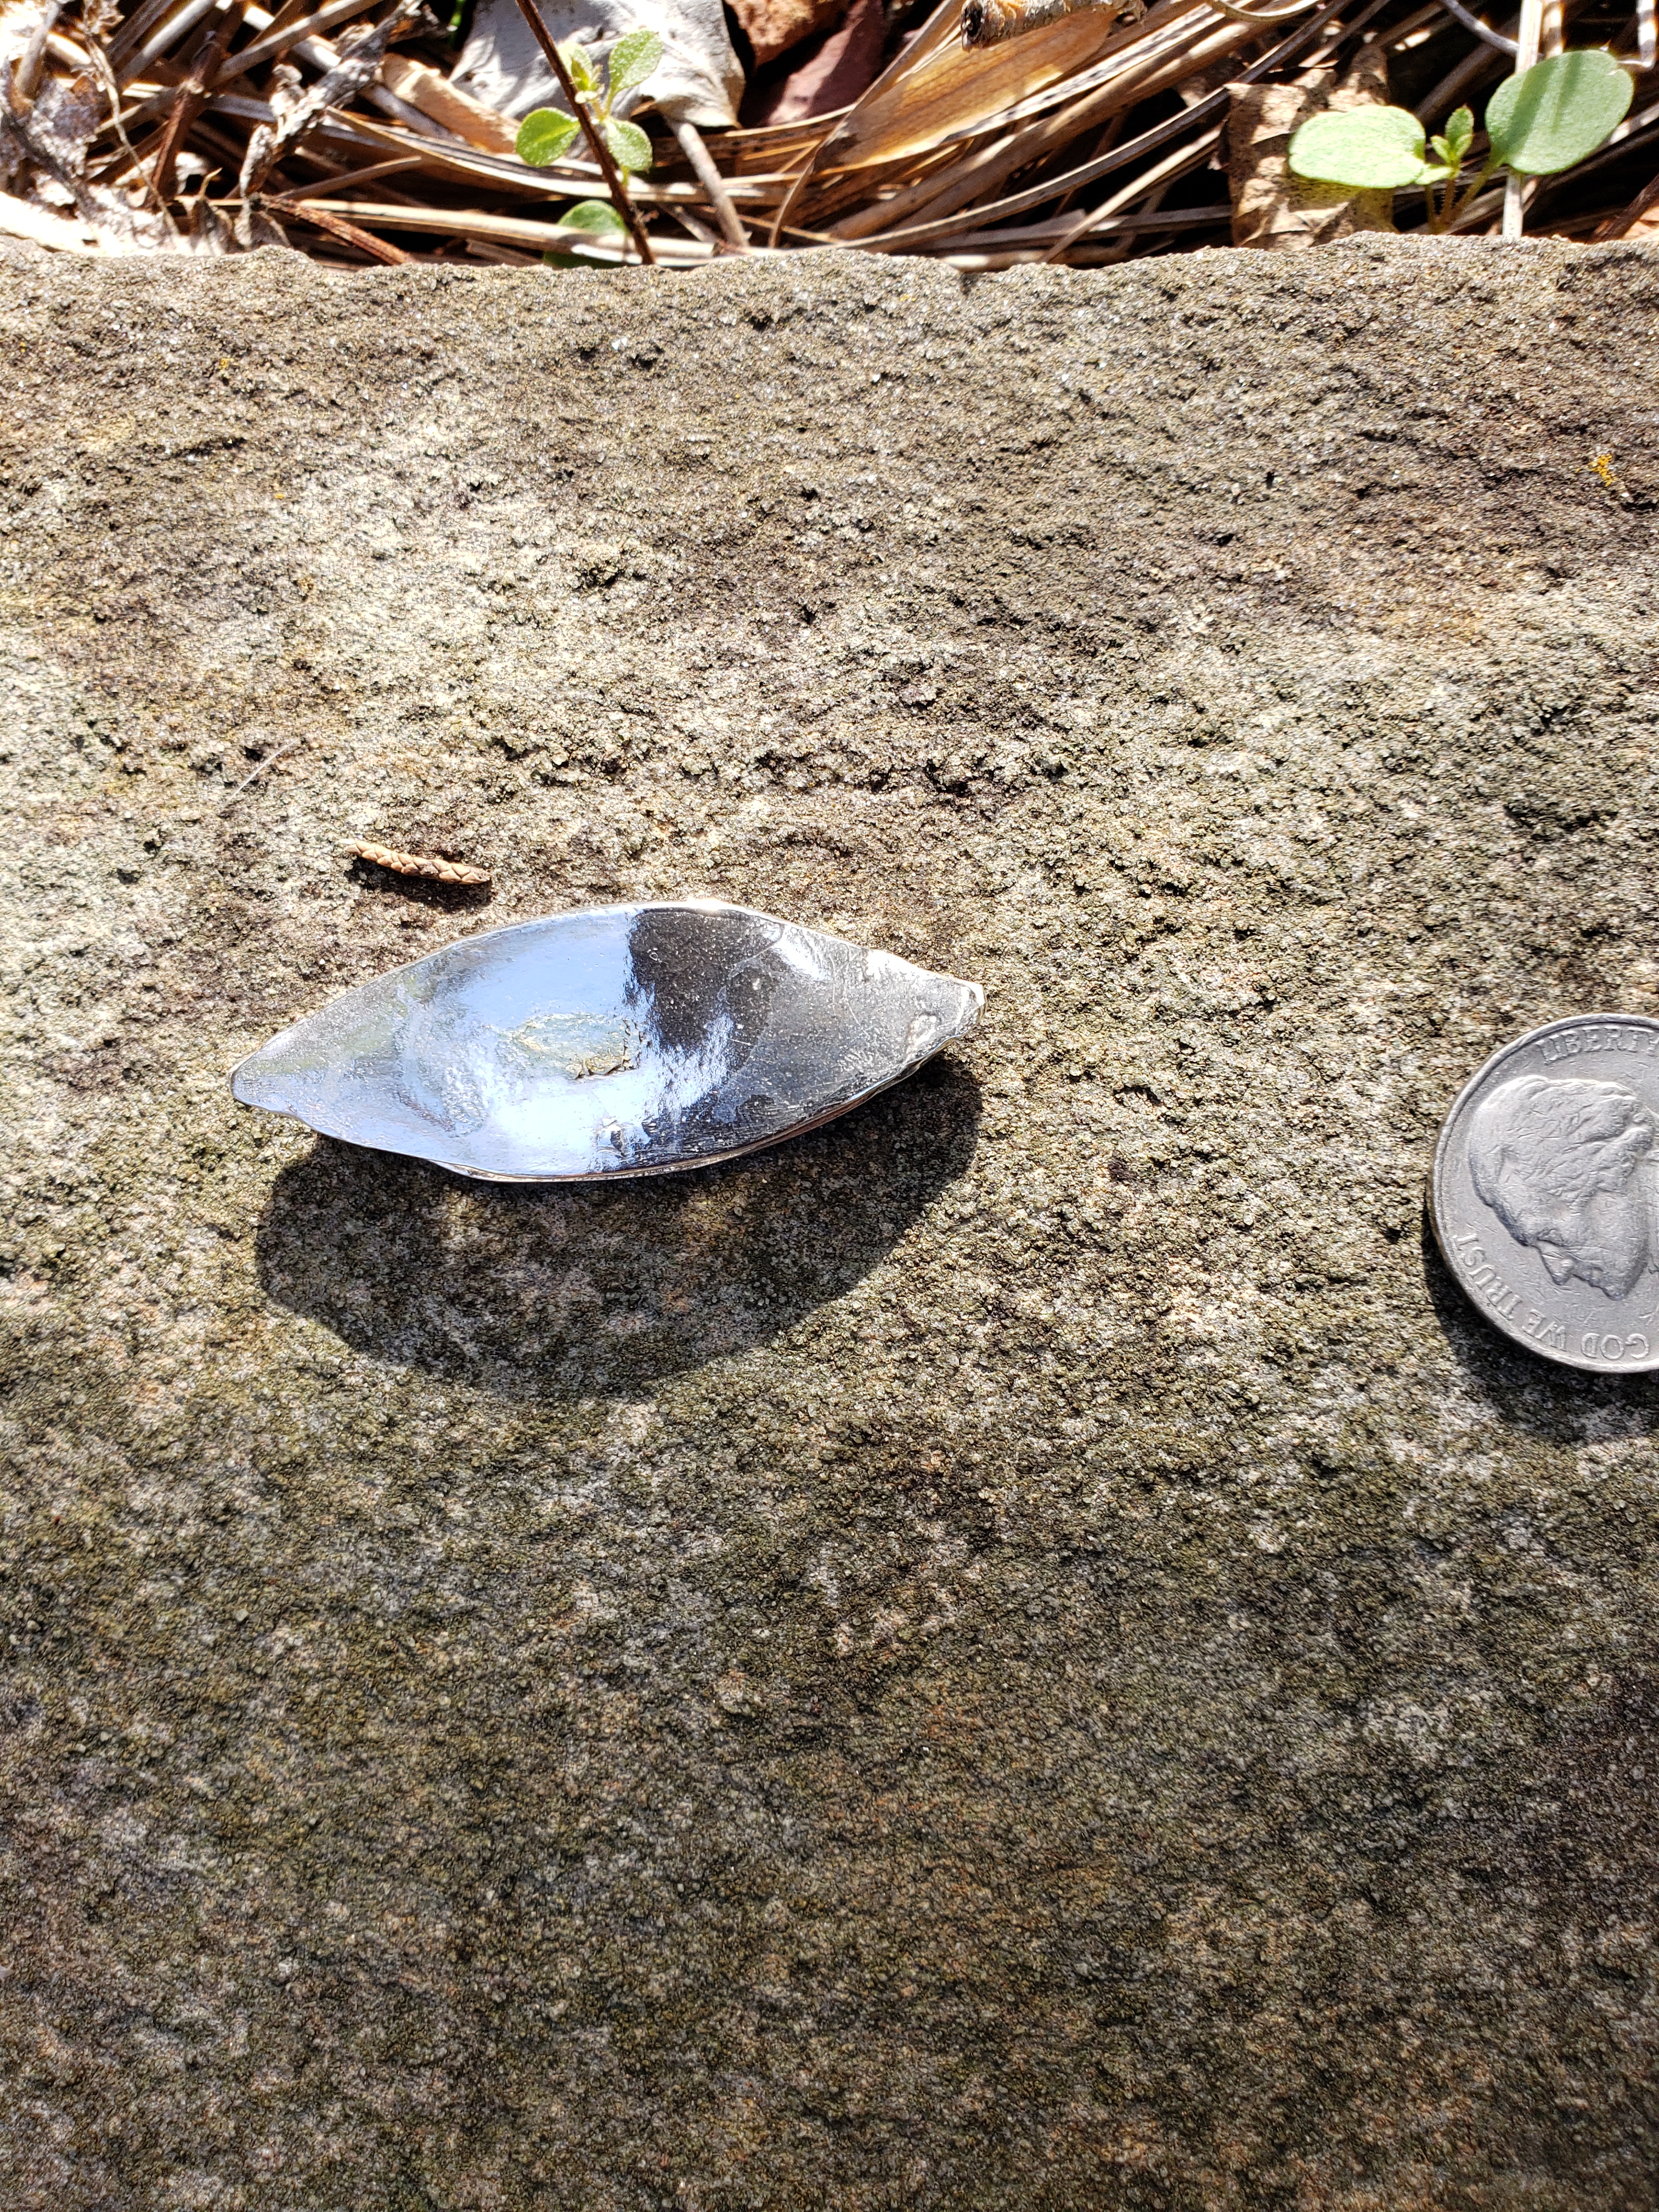
The front and back of the finished piece appear below. The coin is for scale.

20200407_120209

20200407_120215

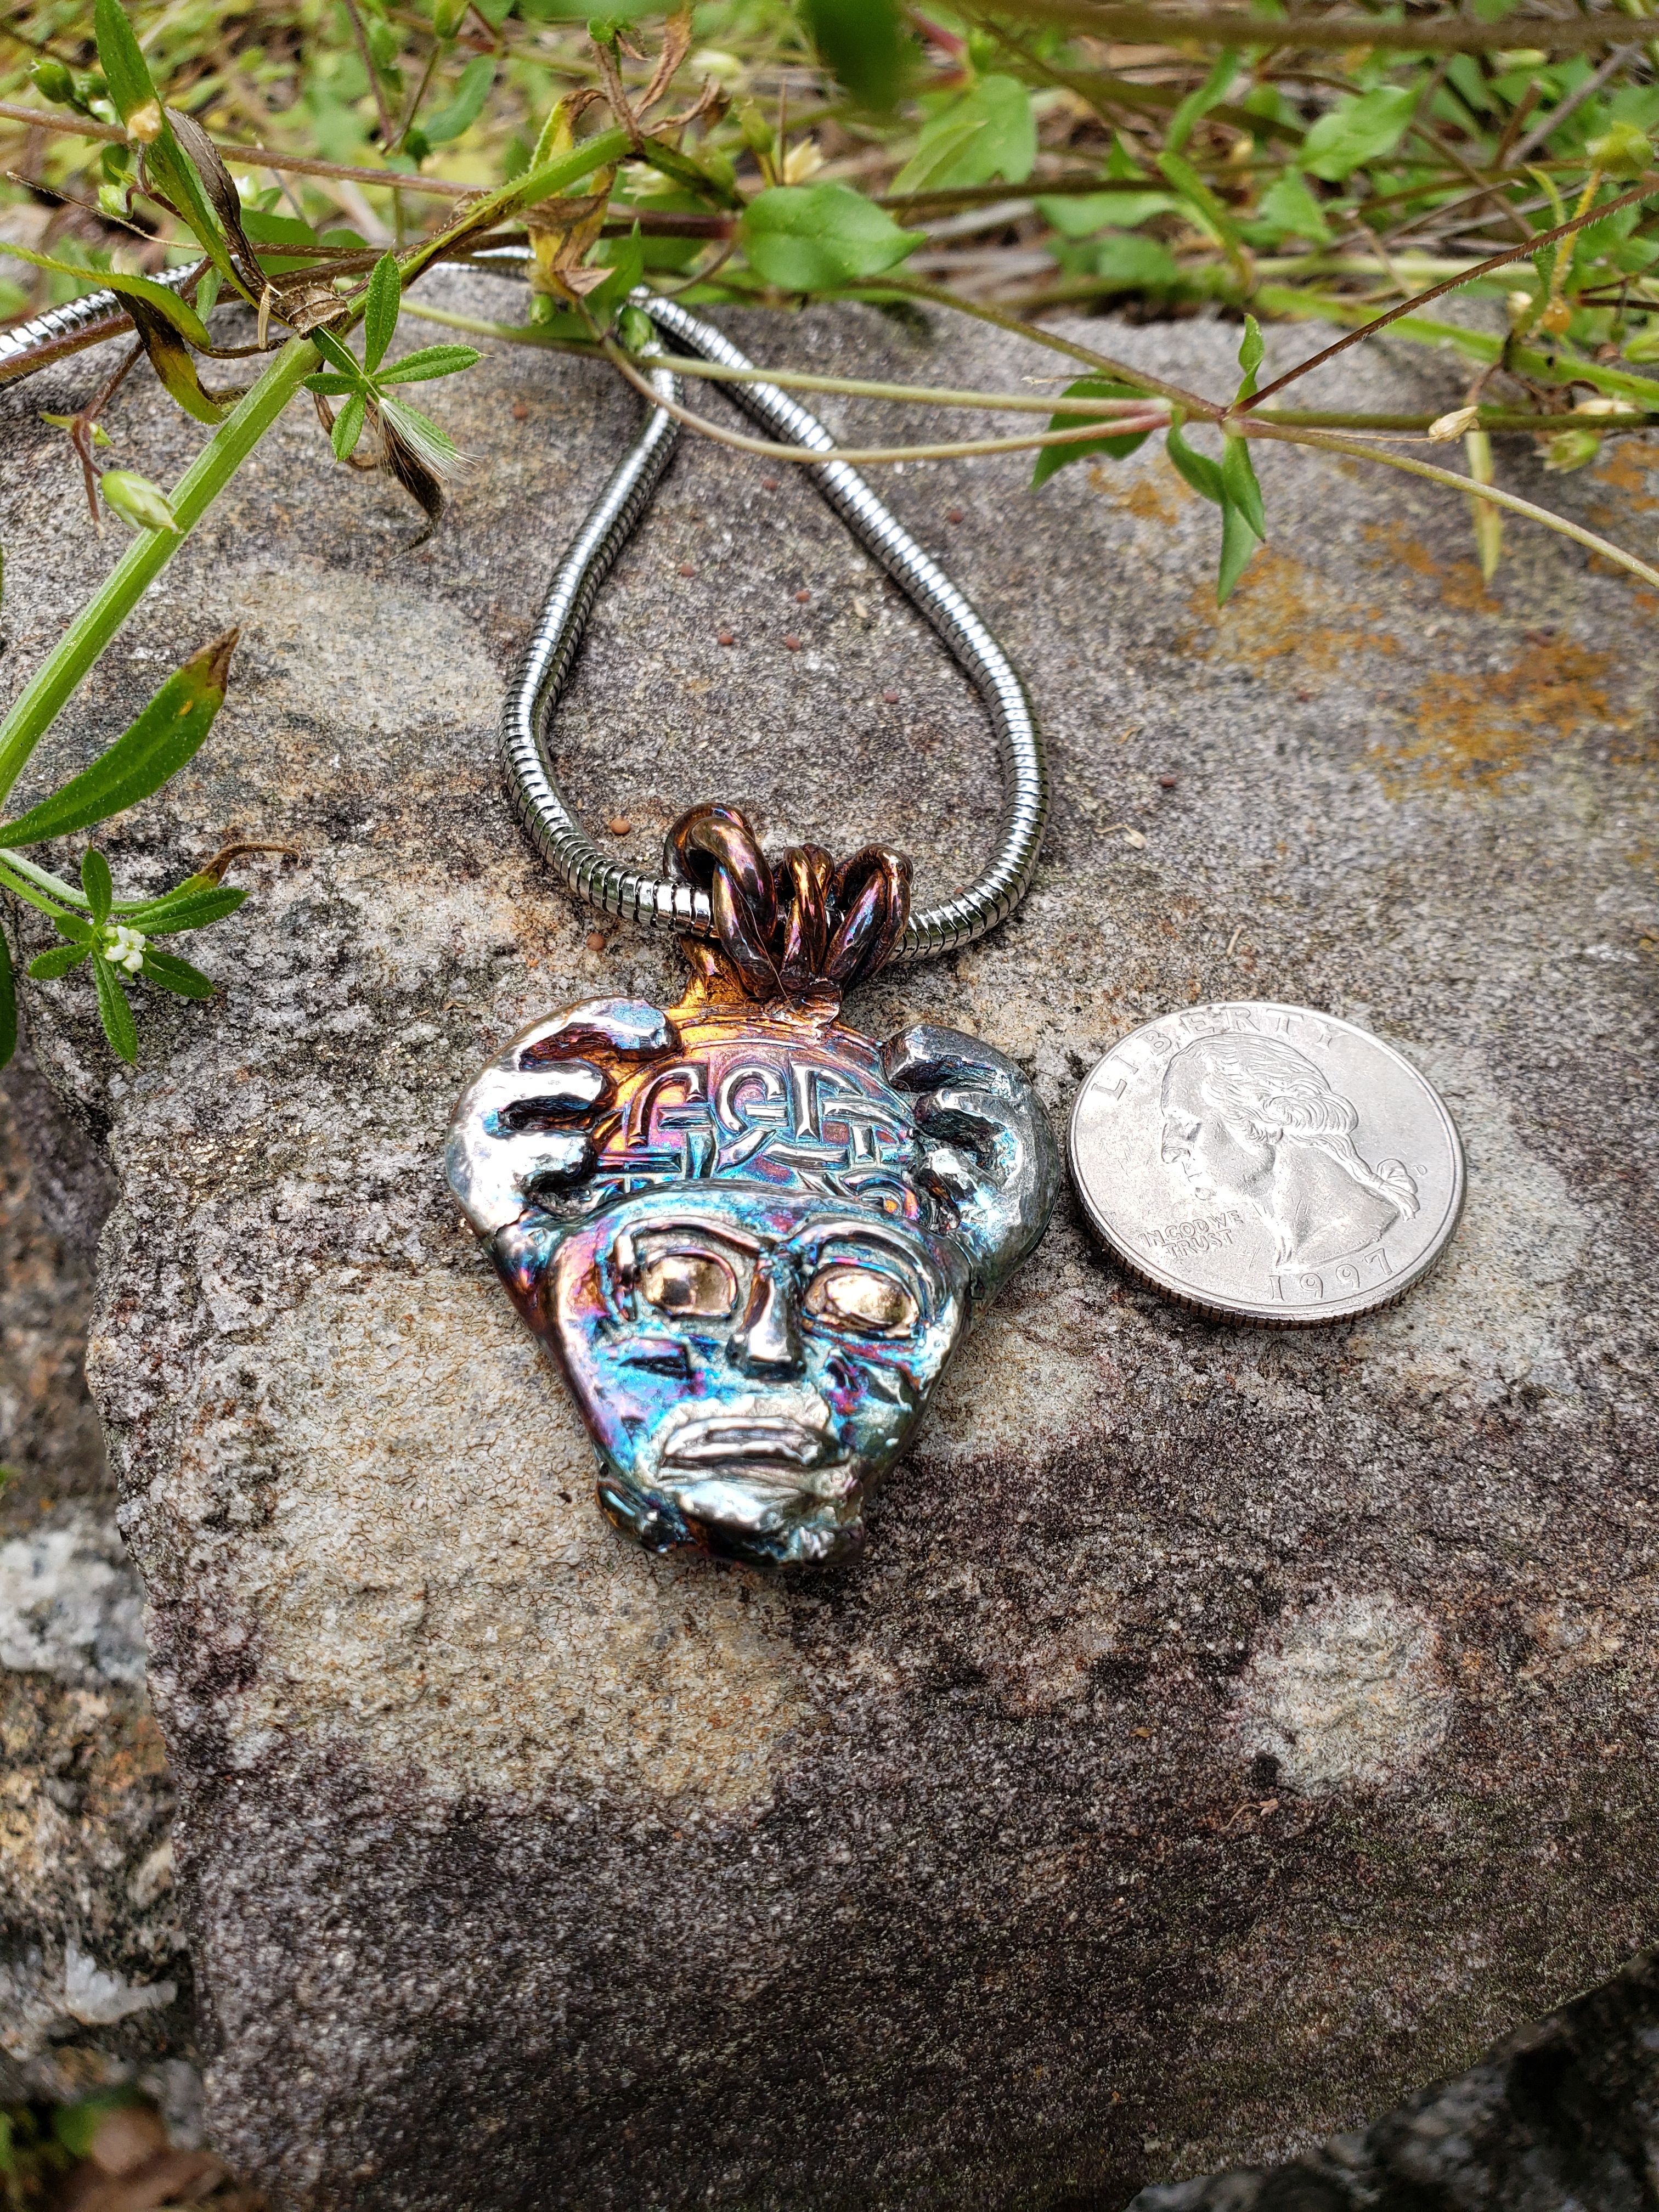
The client was quite happy with what I delivered — a stern-faced Celtic man with antlers.

If a commission gives you the chance to exercise your creativity, go for it.


Silver Whistle

Can a whistle, that produces a note, be made from metal clay? Surprisingly, it can. It’s tricky and requires a lot a trial and error, but you can do it.

I have only used silver for whistles. I have heard that base metals tend to slump, and do not work. I can’t say if this is or is not correct.

Let’s start with the ‘anatomy’ of a whistle. The mouthpiece needs to have a rectangular hole through it. This is best done by building the mouthpiece around a strip of laminated plastic, and then removing the plastic when the mouthpiece is about half dry. You need a hollow body. There are any number of ways of producing a hollow form. The method I used here was to sculpt a bird body out of silver clay, let it start to dry, then carefully slice it in two down the middle. The inside is still wet when the outside is dry. You can scoop out the wet clay, producing a hollow body. The mouthpiece need to connect to a sound hole. It is important that the sound hole be square, lined up with the mouthpiece, and of equal width to the rectangular opening in the mouthpiece.

To make a whistle work, the sound hole needs to bisect the airflow coming from the mouthpiece. This will require a combination of trial and error in placing the mouthpiece, and in filing the sound hole to make it a ramp instead of a square edge. If the whistle is going to work, it will sound in dry greenware.

If you want the whistle to produce more than one note, drill a small hole in the body. The whistle will produce one note with the hole opened and another with it closed with a finger. In firing, this hole might become plugged. If so, it can be re-opened by sticking a broom straw through it.

Whistles are challenging pieces of work. That’s why I have given a sketchy description of how to do one — explaining it in words alone is difficult. However, you now know that it can be done.

The tail is the mouthpiece. The sound hole is on the bird’s top. There is a tiny hole drilled in its stomach, so two notes can be produced. As usual, the coin is for scale.

20200216_180653

Penannular Brooch II

20200210_153855

I earlier discussed making a penannular brooch of silver. A client saw my work, and asked for a similar one of bronze. While the process is similar, it is not identical. Here, I am going to discuss making such a brooch of bronze.

Like the silver, the brooch started out by making the pieces. Laid out, they appear below.

20200204_114107

The brooch itself is  made by texturing metal clay, cutting out a circle, and then cutting out another circle, leaving a small edge. The cat face was made from a mold. The biggest differences are the pin and the pivot that holds the pin. While silver is soft, bronze is hard. Therefore, I made the silver pin somewhat broad, so it would not bend. The bronze pin is quite narrow. Since it is so narrow, I made the hinge longer, so I could blend it into the back of the pin and have a stronger attachment. Also, since untextured bronze is not as interesting as untextured silver, I put a texture on the bronze pin, while I left the silver one plain.

The pieces were assembled as before, with paper between the hinge and the pin. A sharp-eyed reader might recognize that this is not the same brooch, and they would be right. This is one that I made before I realized that bronze would allow a narrower pin.

20200202_122840

I fired the clay in coconut activated charcoal, according to package directions. I folded the pin to one side so it would not touch the brooch while firing. The paper burned away in the kiln, and left only a few ashes to be swept away.

20200207_162135

I then tumbled the brooch and patinaed it. The beginning of this post showed the finished brooch with the pin in place. The picture below shows it swung to one side.

20200210_153903

Metal clay penannular brooches are not common. However, there is no reason to avoid them. Just remember — if two pieces of greenware touch and you don’t want them to fuse, separate them with a bit of paper. It will burn away in the kiln, and your piece will emerge as you wish it to be.

Simple Projects

After doing a number of complicated projects, I thought I would take it easy and do some simple projects. Also, these projects used up the left-over copper clay from making the cuff.

From top to bottom, these are two pendants, one ring, and one pair of earrings. All were patinaed with Max Black. The patina was buffed off the sugar skull face on the ring, and Baldwin’s Patina was applied locally, giving an interesting effect.


20200127_16054020200127_16053320200105_124230 20200105_124052

Recovering from Disaster

20200112_080755

My intention was to post about making a Navajo style cuff. As you can see in the picture above, it didn’t work out. I decided to still post about the process and how I recovered from this disaster. I wouldn’t sell theopiece, but there is no reason not to keep it.

A Navajo style cuff is a cuff with geometric cut-outs, and a layer below the cut-outs. While these are traditionally silver, I chose to use copper. This was the first one I ever made, and I didn’t want to invest too much in case it didn’t work out.

The first step is cutting out the shape of the cuff. It needs to dry around a bracelet mandrel. To do this without squishing the clay, I placed it around a mandrel, then fasted plastic wrap to the mandrel with rubber bands. The clay will only dry to leather hardness this way. That’s not a problem. When it reaches that stage, take it off the mandrel and let it finish drying in the normal way. The leather hard stage will stand up by itself, so that is not a problem.

20191229_102458

The next step is to cut out another thicker form for the cuff, cut the geometrics into it, and then let it dry in the same manner, attached to the lower layer by copper slip.

20191229_111012

This layer has the same drying issues as the first layer.

Once both layers have dried, one finishes the greenware with the usual methods. The layers might not match perfectly. A bit of sanding can make them match. Any gaps between the layers can be filled with slip.

I then fired the clay according to package directions. When it came out of the kiln, the layers had separated and a piece had broken off. Had I been using a one-fire clay, I would have fixed it with slip and refired. However, I was using Cyprus brand copper, which has a two stage firing. I was afraid that fixing it with slip and then doing the first firing would result in so much firescale that I would never clean the piece.

Why did this happen? My best guess is that I did not apply enough slip along one edge. While the piece shrank from firing, the thicker and thinner pieces shrank at different rates and pulled apart. The lesson from this is, in my next cuff, to be very generous with the slip joining the layers.

I resorted to metalsmithing to bend the pieces so they matched, tumbled the two sections, redid a bit of bending to make them fit, and then used two-part epoxy to join them.

20200120_113221

20200120_113244

I wouldn’t sell a piece like this, since I don’t sell work that I have glued together. However, I can use this as a learning experience. Soon, I will try another cuff. With what I have learned from this one, I can do a better job.

Penannular Brooch

A customer asked me if I could make a penannular broach of silver, decorated with a golden-eyed cat design. It took some experimentation, but I succeeded! I’m going to walk you through the process.

A penannular brooch is, typically, a circle with a circular hole in the middle (there are other designs, but this is a common one). A pin is attached to the front of the brooch, so the pin can be slipped through loosely woven fabric (e.g. lace or loose knitting). After much consideration, I decided the best way to do this was to roll out and texture silver clay (1.25 mm thick). I made the pin 1.5 mm thick, and did not texture it. The pin needs a hinge, so it can be moved back and forth. I made the hinge 1 mm thick, with untextured clay. The three pieces, prior to firing, appear below.

20191207_141556

The hinge fit around the narrowest part of the background. To avoid the possibility that the hinge and brooch would fuse during firing, I wrapped the part of the brooch that the pin would touch in paper. This arrangement is pictured below, with the paper and hinge in place.

20191208_104749

Then I added the pin, attaching it with slip.

20191212_193034

Since the hinge allowed the pin part to swing freely, that addressed the issue of possible fusing — the pin could be swung out of the way during firing.

The customer wanted a cat to decorate the pin. I used a commercial mold to produce a cat face and attach to the pin. I attached it at the bottom, so the weight would not cause the brooch to sag, when worn.

20191213_115824

I then did standard clean-up, filing away any excess silver and patching a few cracks with syringe. In the process, I broke and had to repair the pin more than once. This was a tedious process, because the hinge and brooch got in the way of doing the repairs. I then fired the piece.

20191224_094553
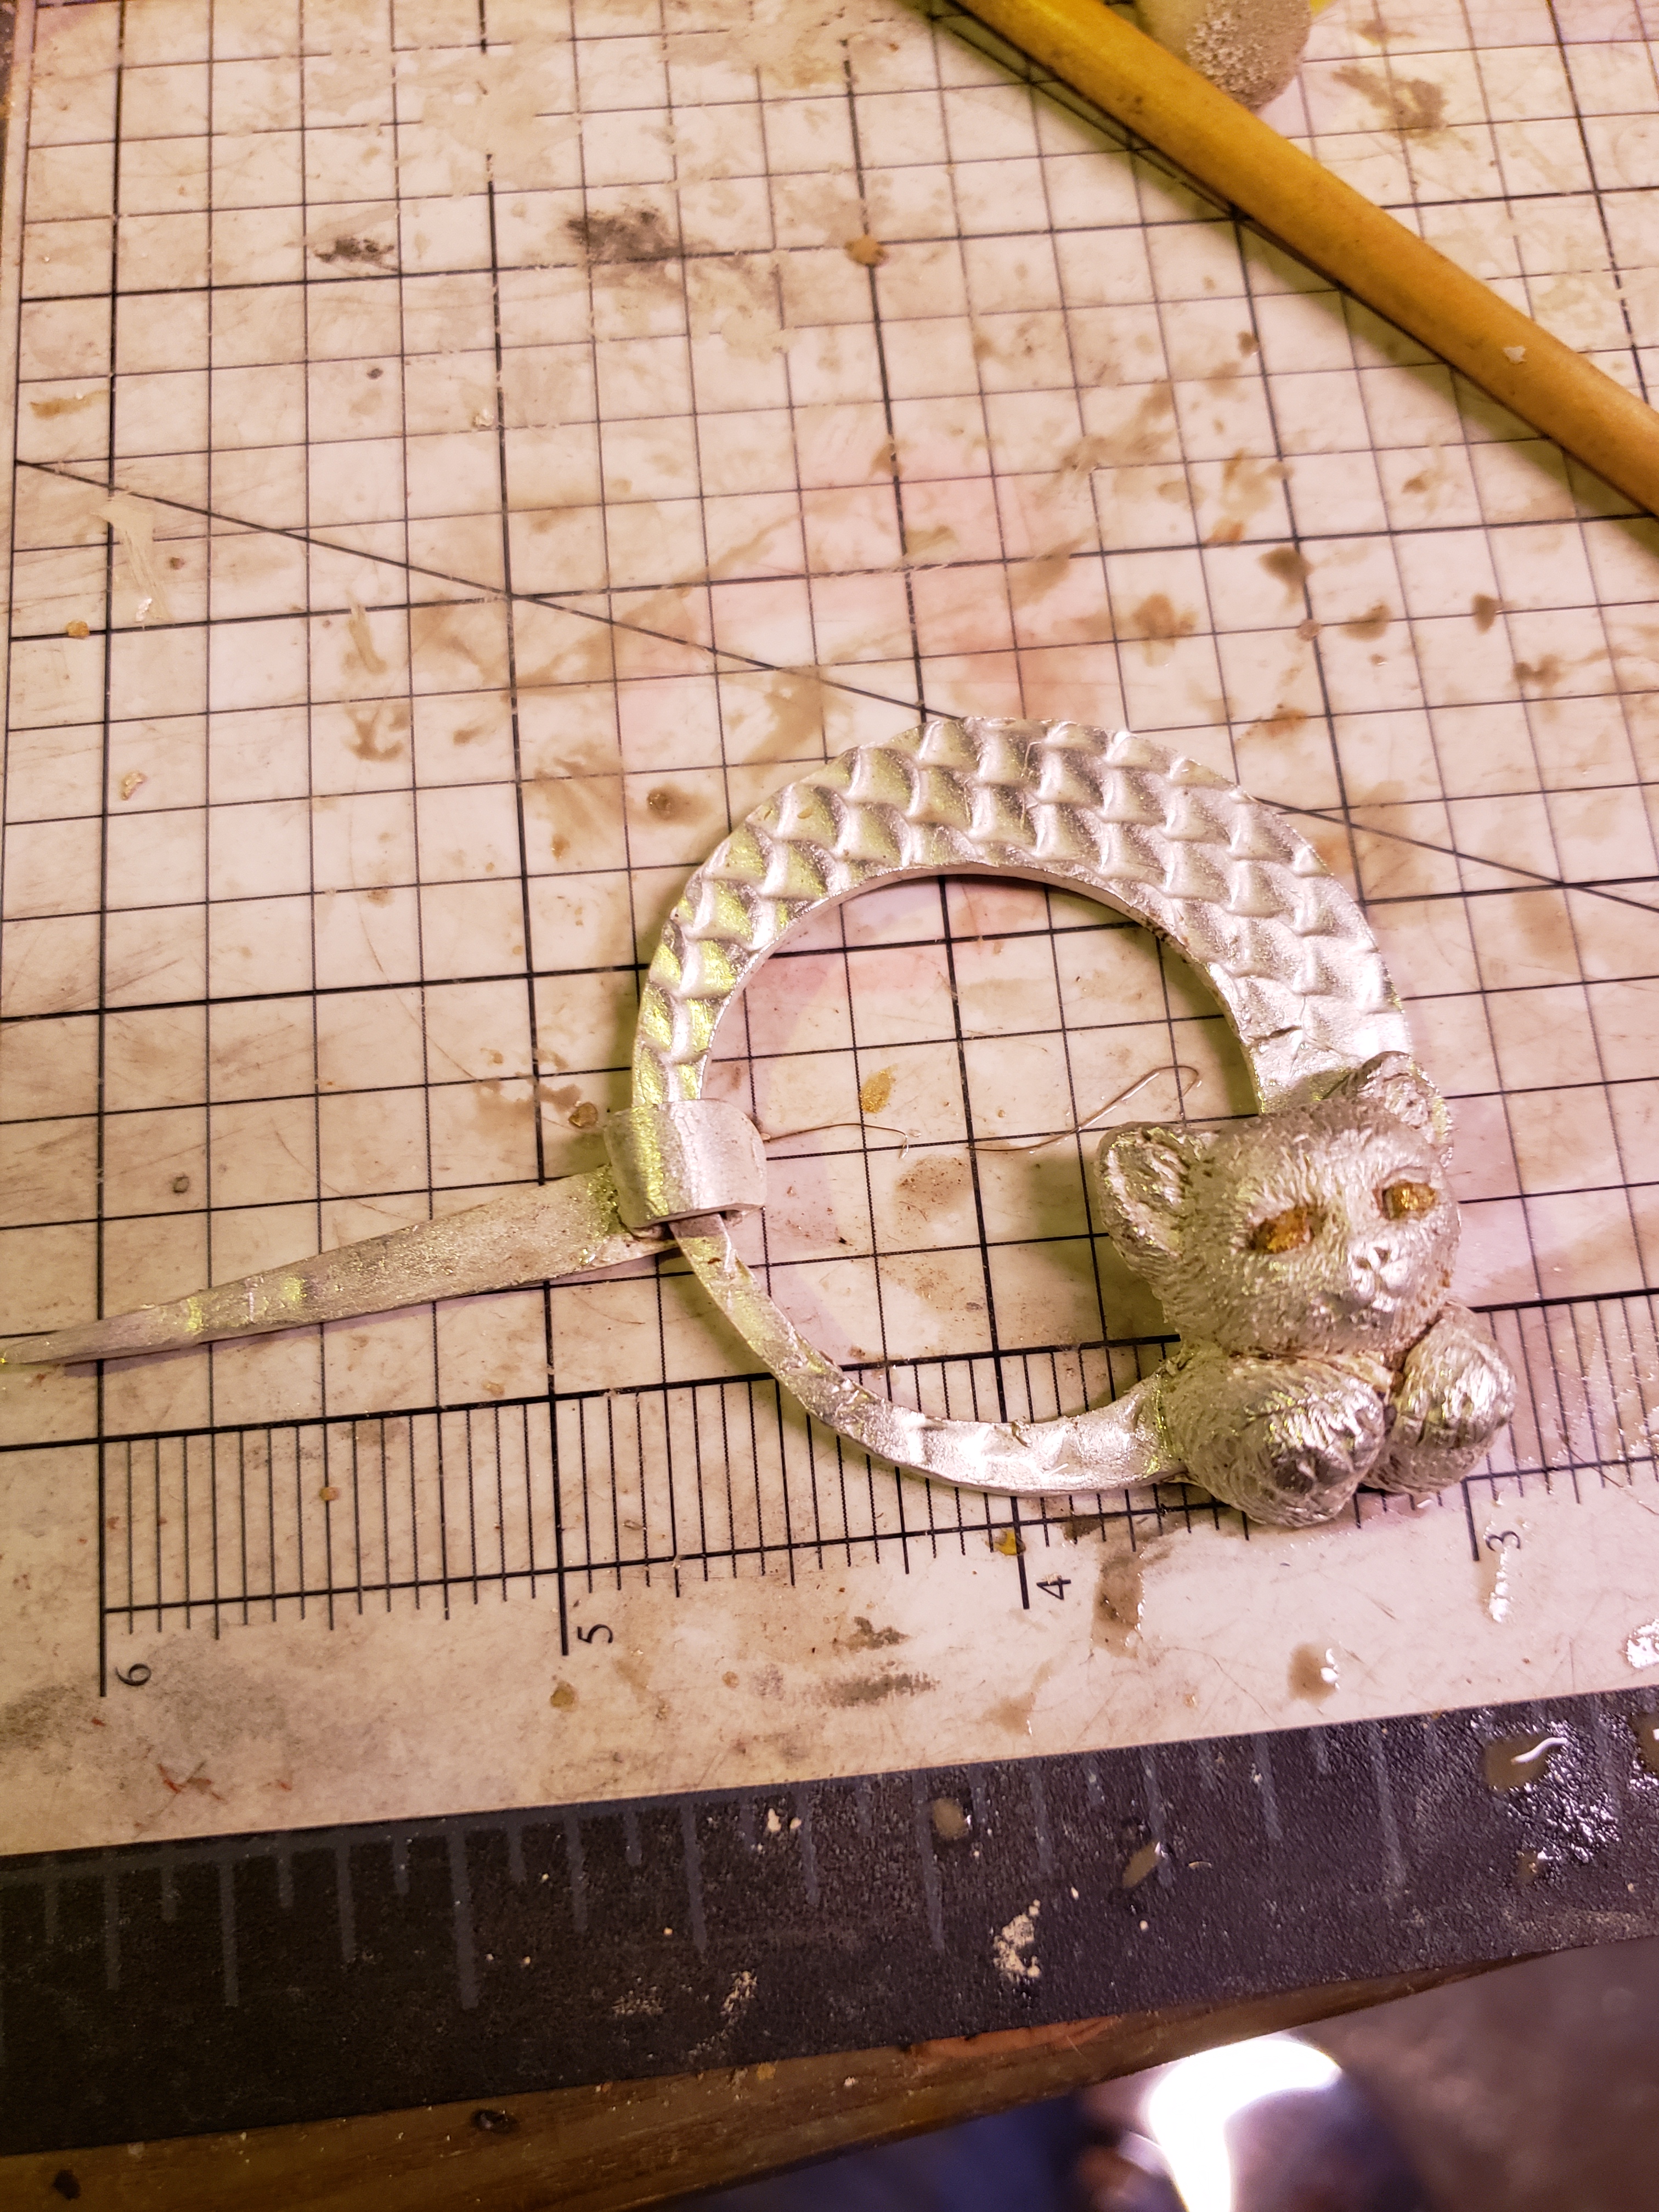
Since the customer wanted the cat to have golden eyes, I applied 22K gold paste, and refired.

20191217_195113

I then applied a LOS/ammonia/salt patina, and then rubbed most of the patina off, so the piece was not too dark. I then applied a few traces of Black Max, in an attempt to approximate the color pattern of the customer’s own cat. Two views of the finished piece appear below, one with the pin across the brooch and the other with the pin swung to one side. I included a coin in the photo for scale. The gold in the eyes does not show up well in these photos — the gold shows up best in artificial light, and the patina shows up best in natural light. Both these photos were taken in sunlight.

20191224_110558

20191224_110614

A penannular brooch is a doable metal clay project. It takes time to make one. For the pin to be large enough to support the weight, it is probably best that the brooch only be worn with loosely woven fabric. However, it is quite doable, if one is willing to put some effort into it.


Tatting Shuttle III

After making a number of bronze tatting shuttles, I was asked to make a silver one. Well, why not? At the outset, I made two design decisions: (1) Instead of texturing the shuttle, I would leave it plain. That means it can be as shiny as possible, while still looking finished. (2) Since I didn’t want it to be too plain, I decided to ornament it with a bit of gold.

Since I last posted about making tatting shuttles, I have made a discovery. Earlier, I dried the exterior of the shuttle on a dome light. That works, but it winds up having a bit more curvature than necessary. An idea for an improvement hit me: but a commercial tatting shuttle that comes in a plastic case and use that case for drying. It already has the desired curvature. The result is pictured below:

20191109_082734

When these dry, one can sand them to even them up and use paste to fix any gaps in the shape. The next step is to create the interior of the shuttle. I have tried both making one post and drilling a hole through it, and making two smaller posts side-by-side. According to the tatters I have worked with, the latter design is preferable. Thus, I had this:

20191110_131542

After it dried, I sanded out the unevenness, added a bit of clay to make the posts the same height, and added the top, attaching it with paste. After it dried, I did a bit of last-minute sanding. Then it was ready to fire. You don’t want the ends of the shuttle to fuse. I slipped a piece of paper between the top and bottom. This paper will burn out during firing.

20191114_130141

After firing (but before brushing or tumbling(, I was ready to add gold. I decided against Keum Boo, because getting something this heavy up to temperature would take a while. Instead, I used accent gold ( https://www.metalclaysupply.com/Accent-Gold-for-Silver-p/50442.htm). I decided to not make it too complicated, so I simply painted (prior to brushing, so the gold has something to cling to) a gold oval in the center of each side. The picture below shows the shuttle sitting on a cup warmer to encourage the drying of the gold paint. I then sanded away the few drops of gold paint that were not where I wanted them.

20191116_133013

I refired according to package directions. Then I brushed the silver, burnished the gold with an agate burnisher, and tumbled the piece.

At that stage, it was technically ready. I say ‘technically’ because the two leaves must be close enough together so a thread will not easily slip through, but far enough to that the thread can be pulled through without stressing the thread too much. My leaves were too close together. I solved this by a metalsmithing approach — using a jewelry saw, I sawed down between the two leaves, widening the gap by a about a quarter millimeter. That did the trick.

The completed shuttle appears below, with a coin for scale:

20191117_105208

While metal clay is wonderful for jewelry, it also can be used for a variety of other purposes. I hope I have inspired you to consider non-jewelry applications of metal clay.