Naalbinding

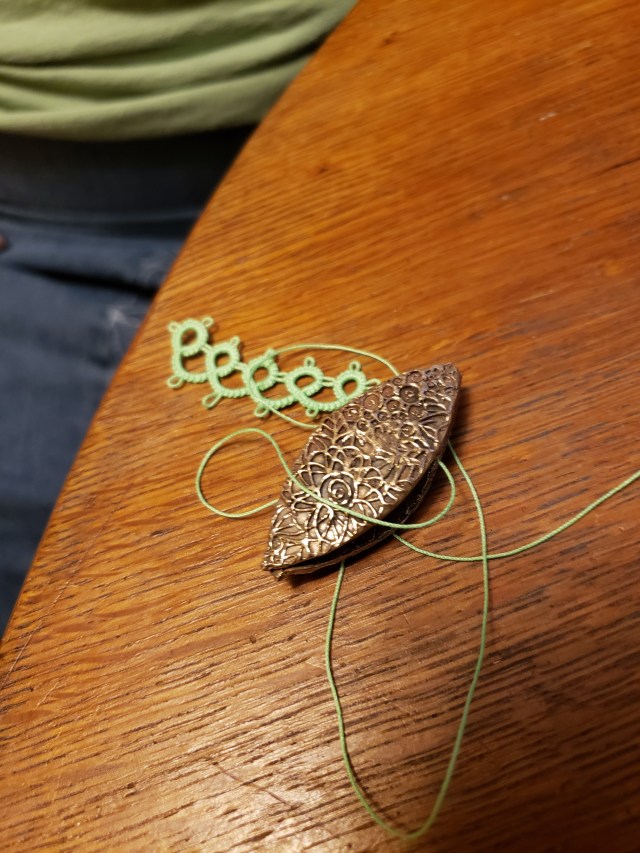
Naalbinding (https://en.wikipedia.org/wiki/N%C3%A5lebinding ) is a fiber arts technique that dates back at least 8000 years. It is done with a single needle, of a particular design. At first glance, the fabric produced by naalbinding resembles crochet. However, the fabric is much more supple than crocheted fabric. Naalbinding was generally replaced by knitting, because knitting is faster. However, naalbinding survived in Scandinavia and the Baltic states, possibly because naalbinding produces a fabric that has fewer openings than knitted fabric, and is therefore more protective against the wind. Naalbinding is undergoing a bit of a renaissance — while it is still uncommon, more and more people are learning to do it. As in ancient times, most modern practitioners of naalbinding use a needle made of bone, horn, or wood. However, other materials are possible. When a modern practitioner asked me if I could make a bronze needle, it seemed like an interesting challenge.

After studying some naalbinding needles, I decided to make two — a blunt needle for coarse yarn and a sharp one for finer yarn. I decided to use Five Star bronze for the dull needle and Five Star light bronze for the sharp, so the needles would have a different appearance. I’m going to illustrate with the dull needle. The sharp one is basically the same, except that it is thinner and the tip is made sharper.

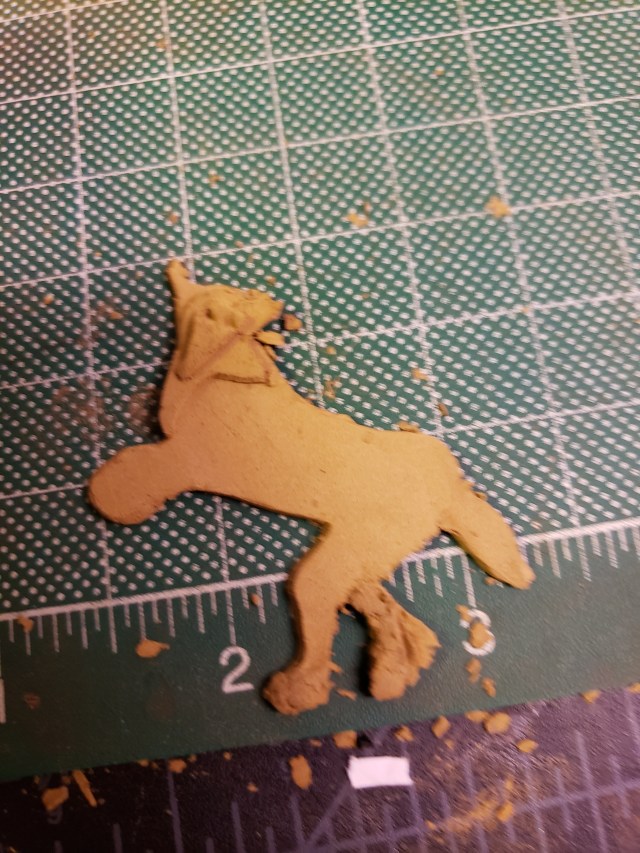
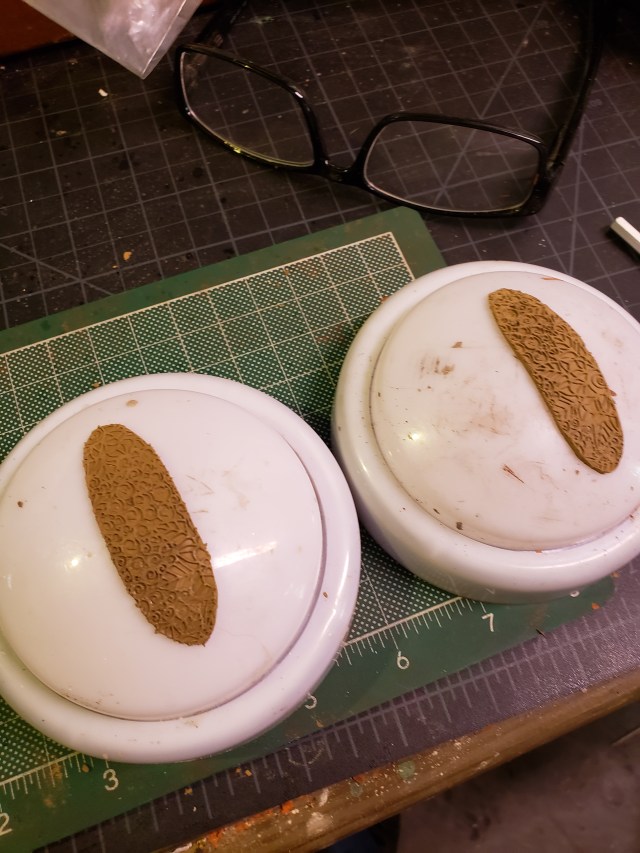
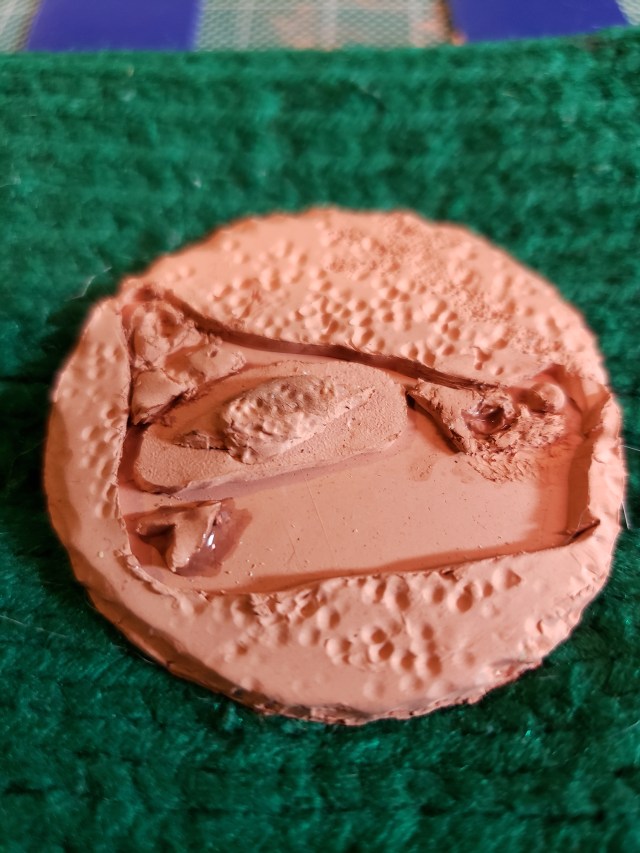
The first step is to roll out the clay to the desired thickness. I chose 4mm for the dull needle and 2 mm for the sharp. While the clay is wet, cut out a rectangle of the length you want the needle to be. Using a template, cut an oval eye in the needle. Using clay shaping tools, roughly shape the end.

20191014_103219

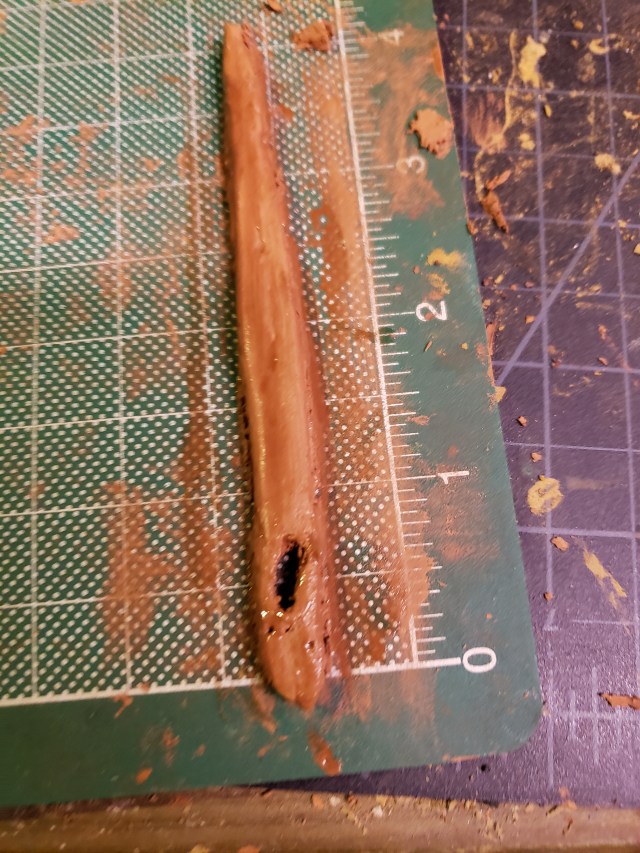
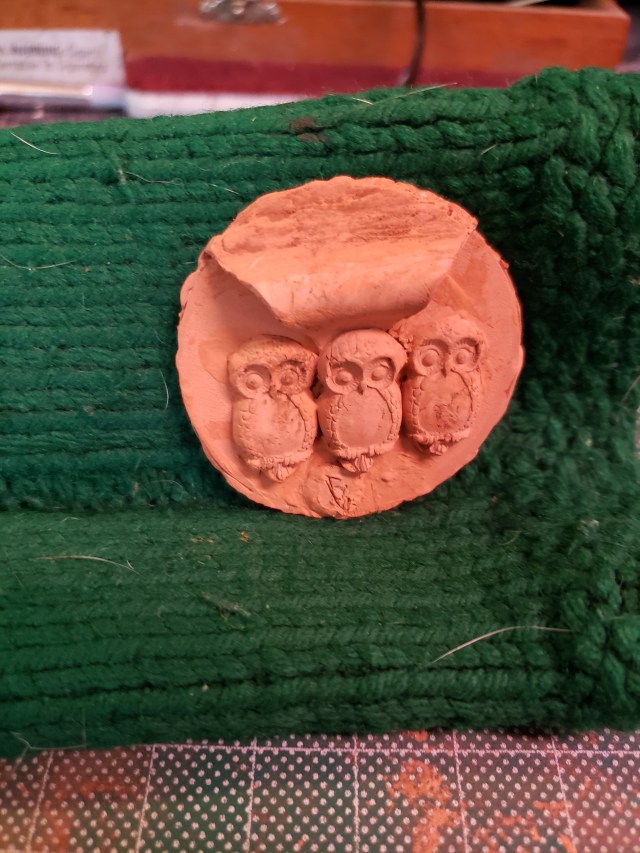
After the clay dries, begin finishing the greenware. For naalbinding, it is essential that the needle be smooth (although it does not have to be straight). This means that the greenware needs to be sanded. I used multiple grits of sandpaper, starting from a coarse grit and working toward a finer one. In each subsequent sanding, I changed the direction of the sanding — first the length of the needle, and then the width. It is very easy to break the greenware while sanding. This can be avoided by holding the needle on either side of the section where one sands. If it does break, it is easily repaired. I’m not certain if it is necessary, but my final step was to burnish the greenware with a metal burnishing tool.

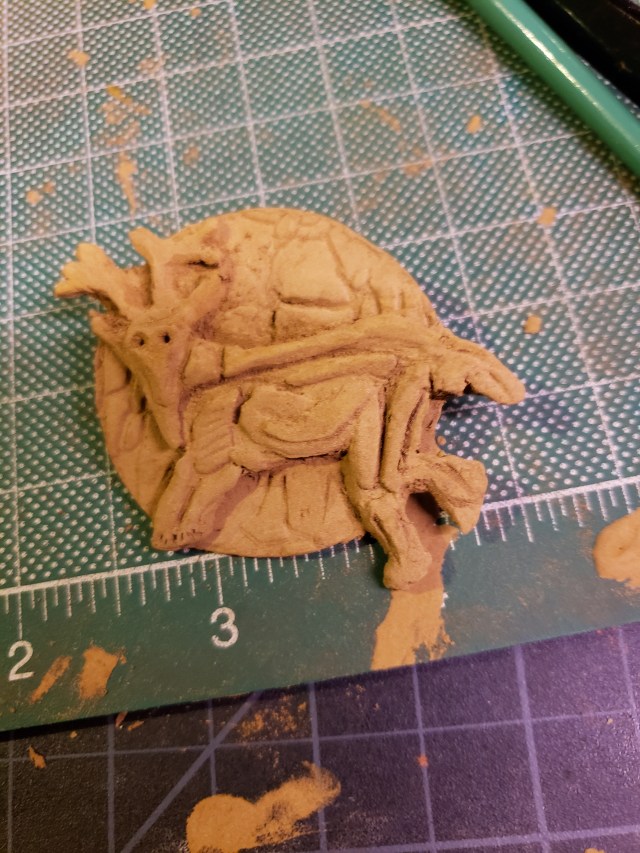
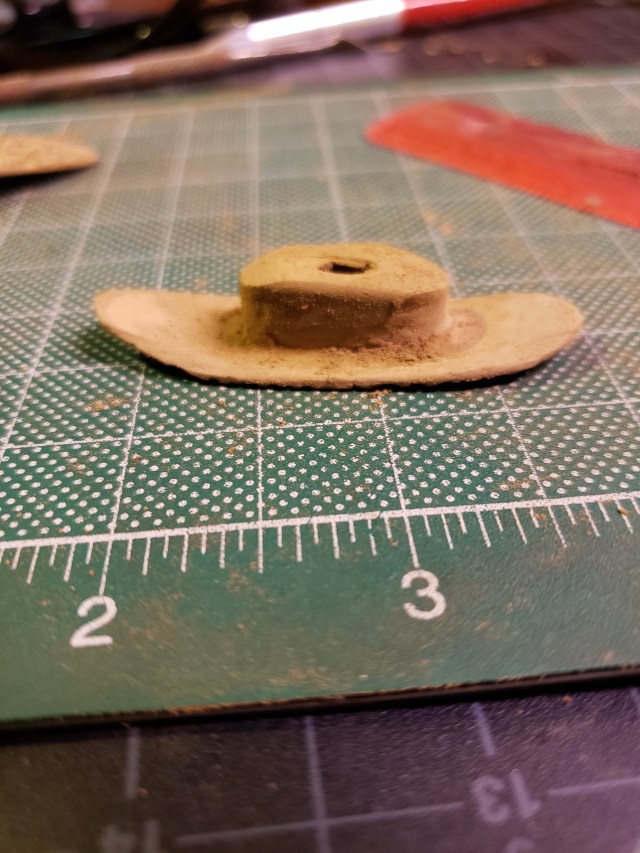
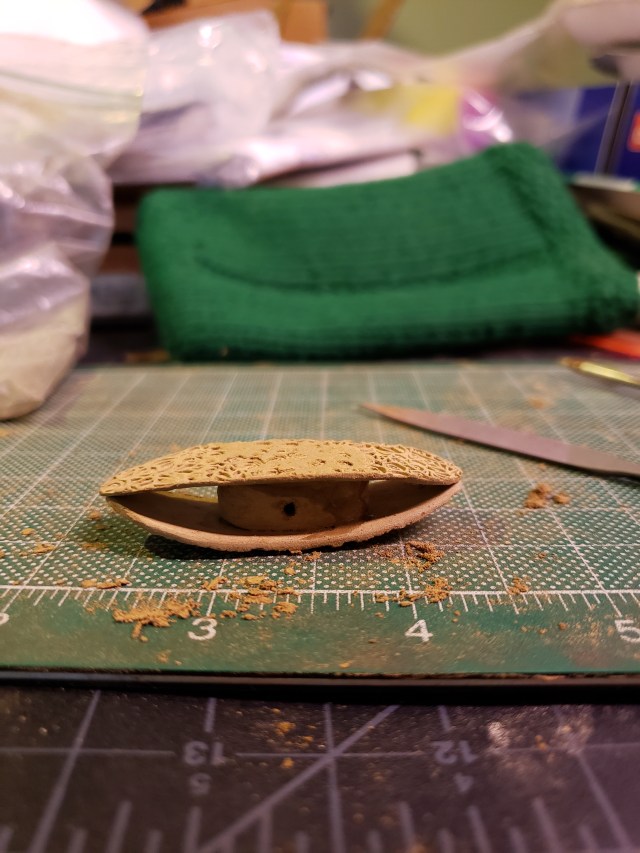
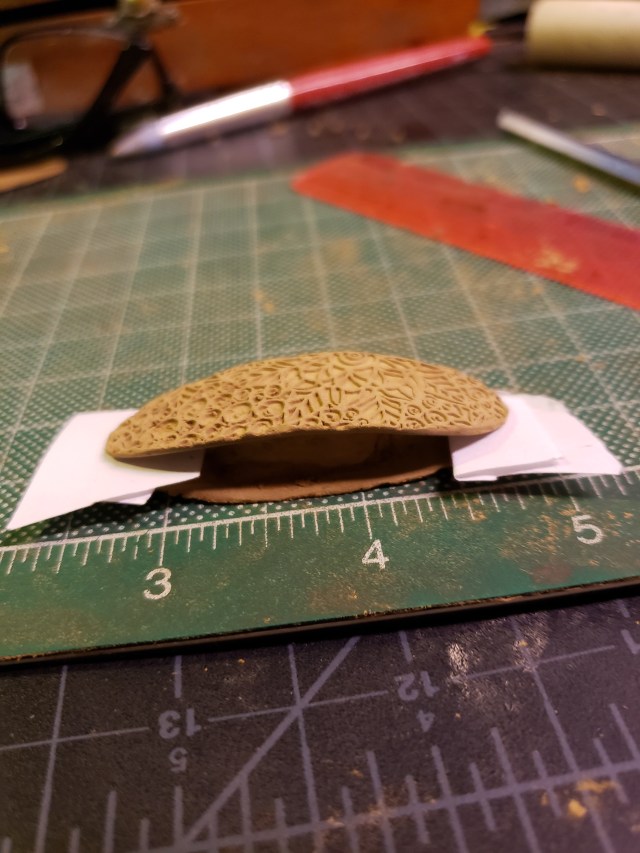
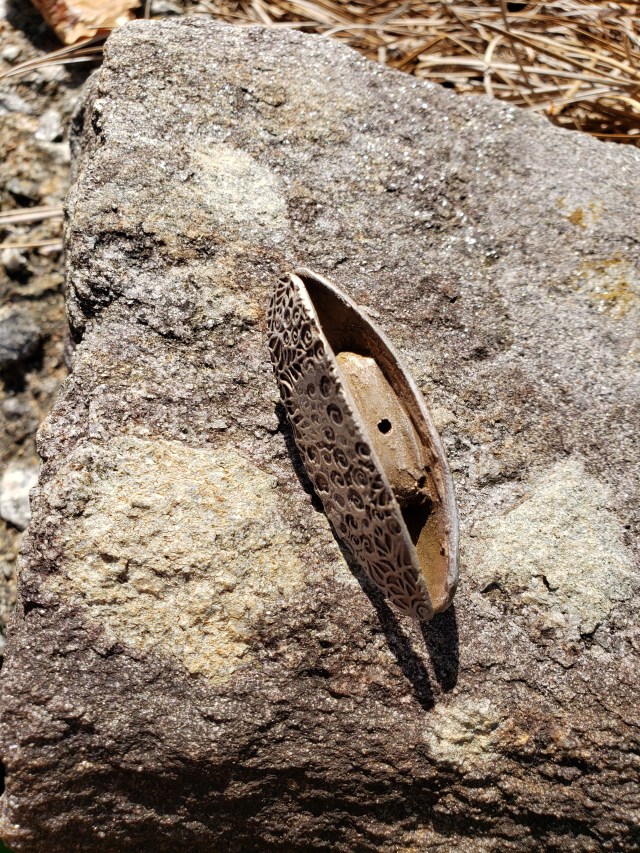
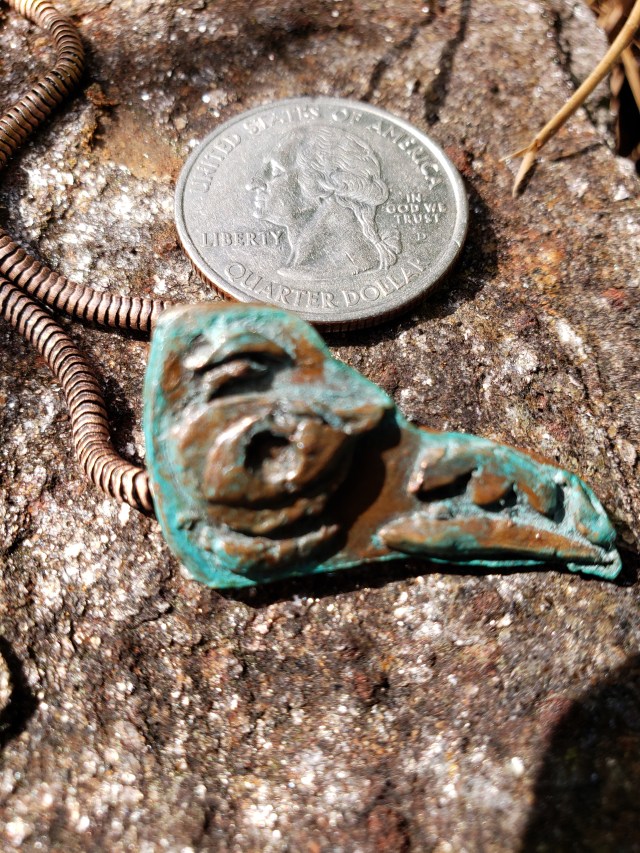
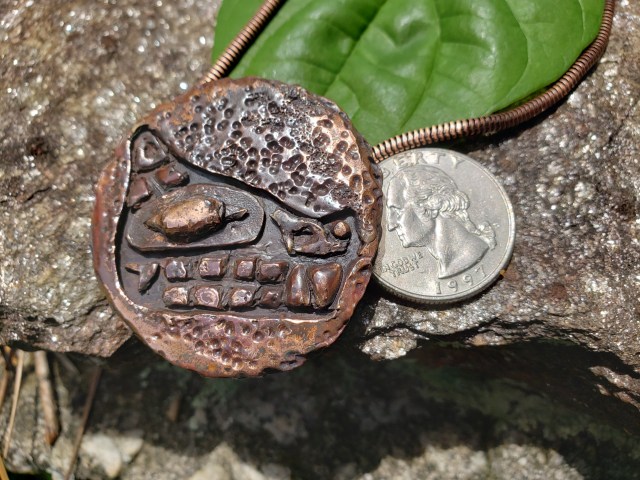
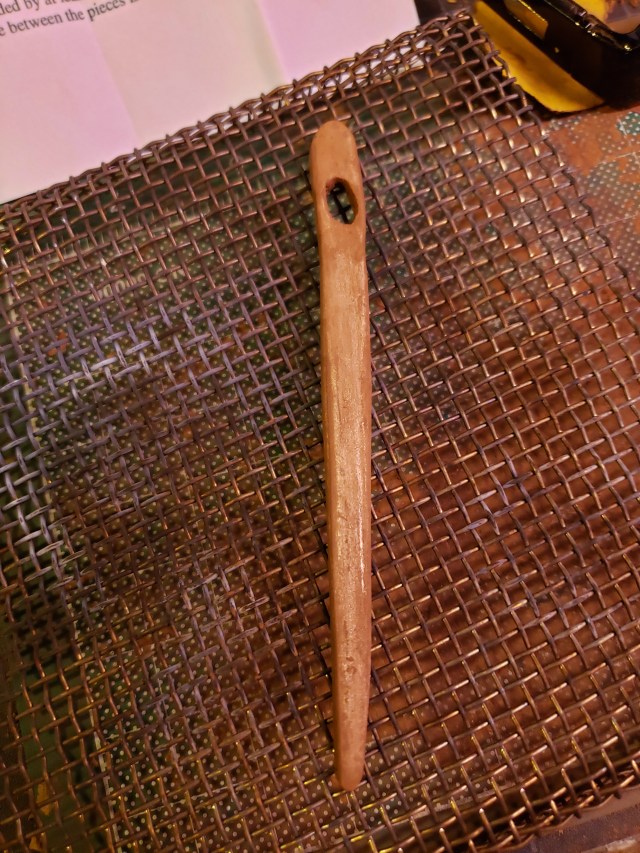
The inside of the eye must also be perfectly smooth. I achieved this by sanding with a watch maker’s file. In the absence of such a file, a piece of sandpaper, folded into a file, will work. After sanding, the piece (Five Star bronze requires two firings, the piece below is ready for that stage) looked like this:

20191019_110745

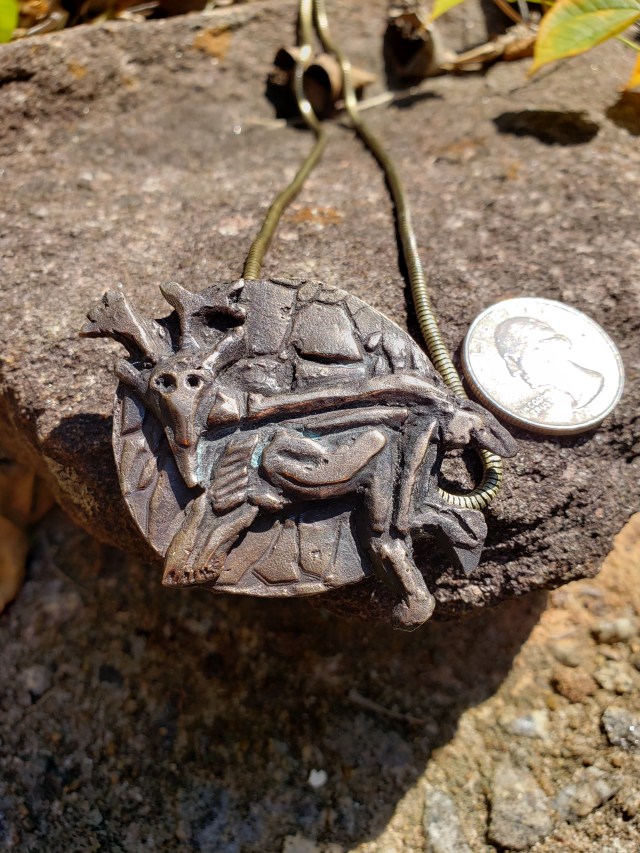
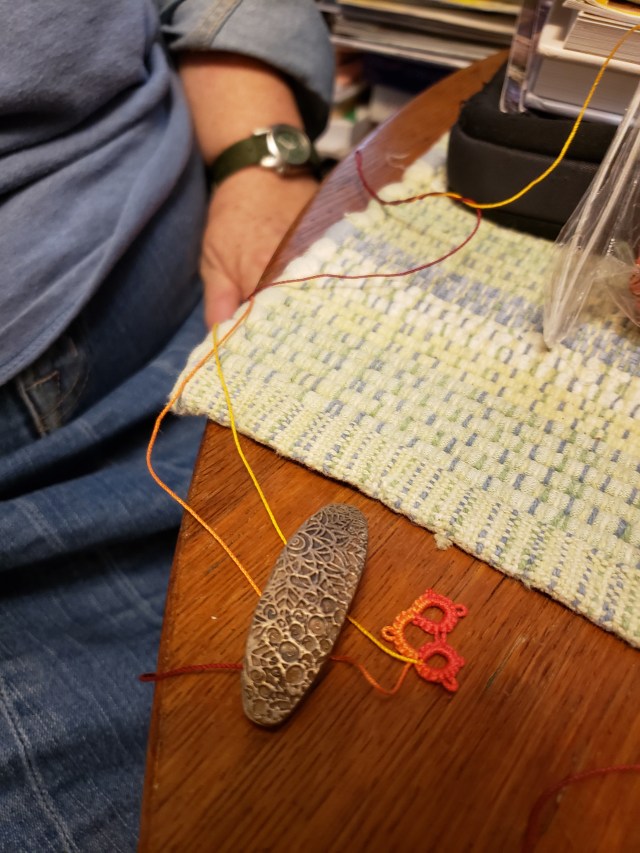
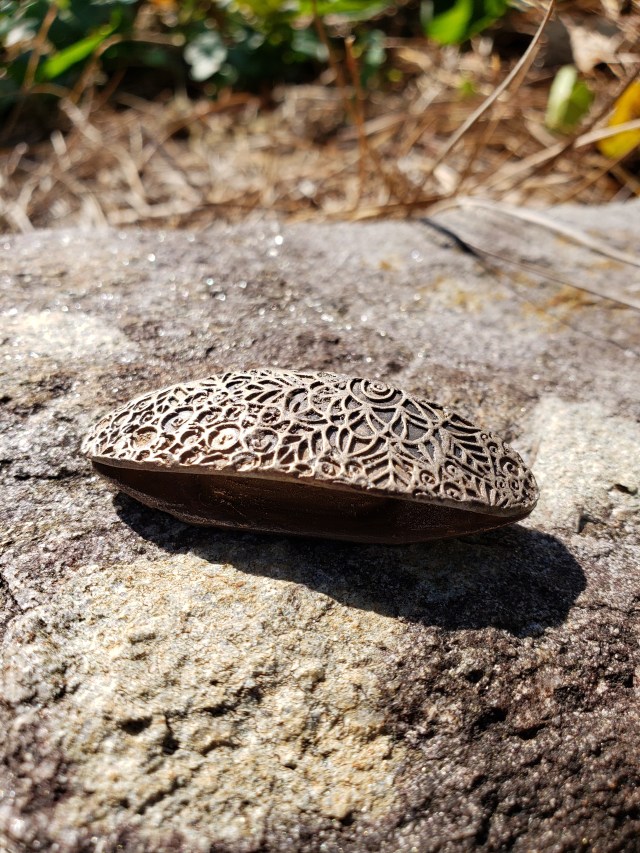
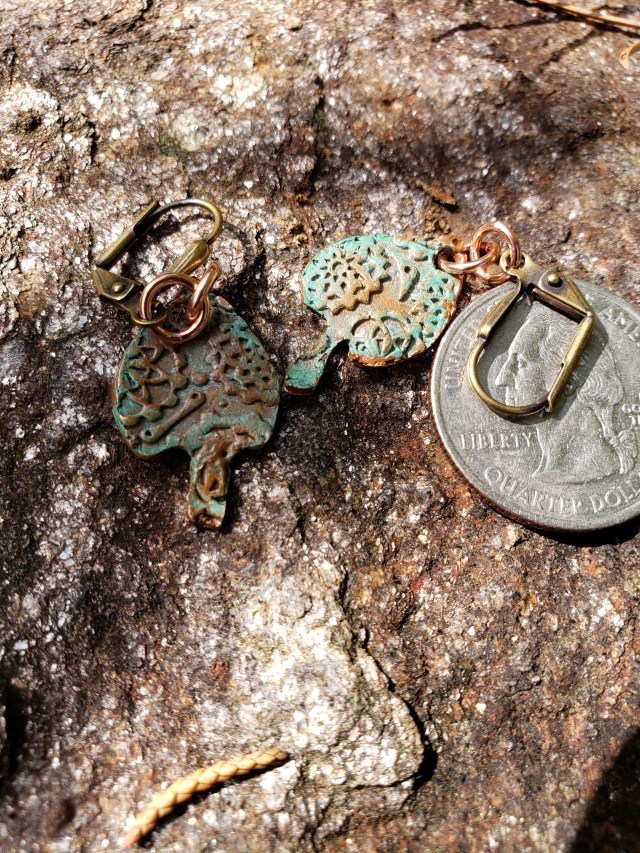
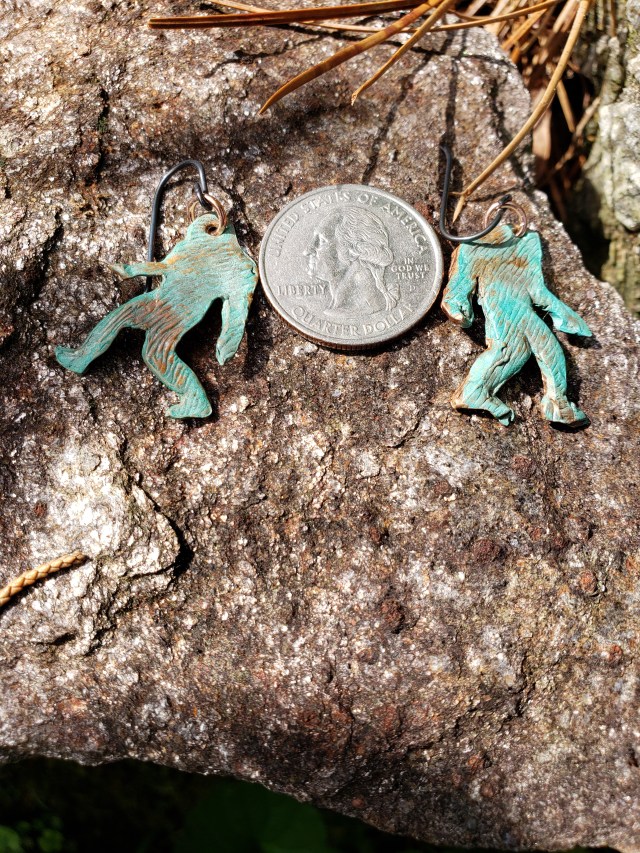
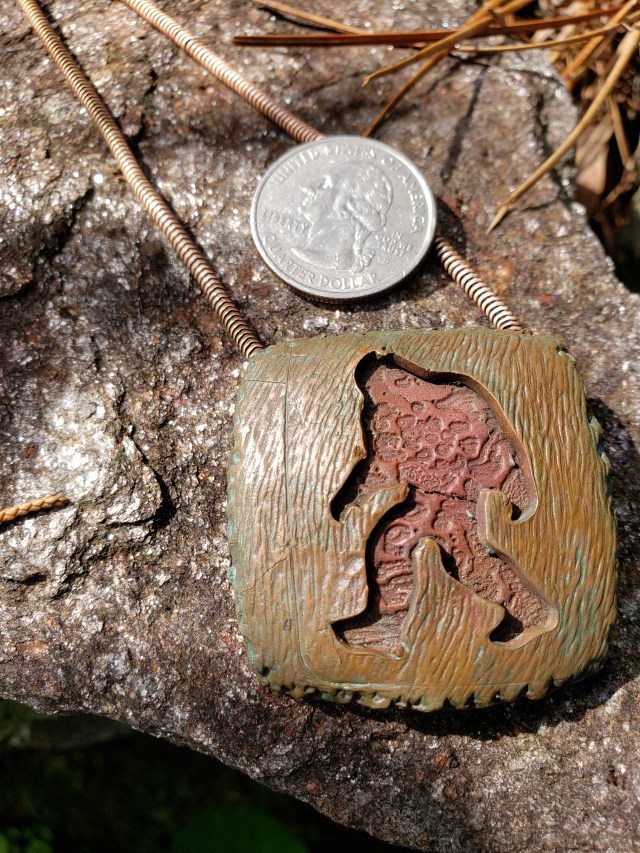
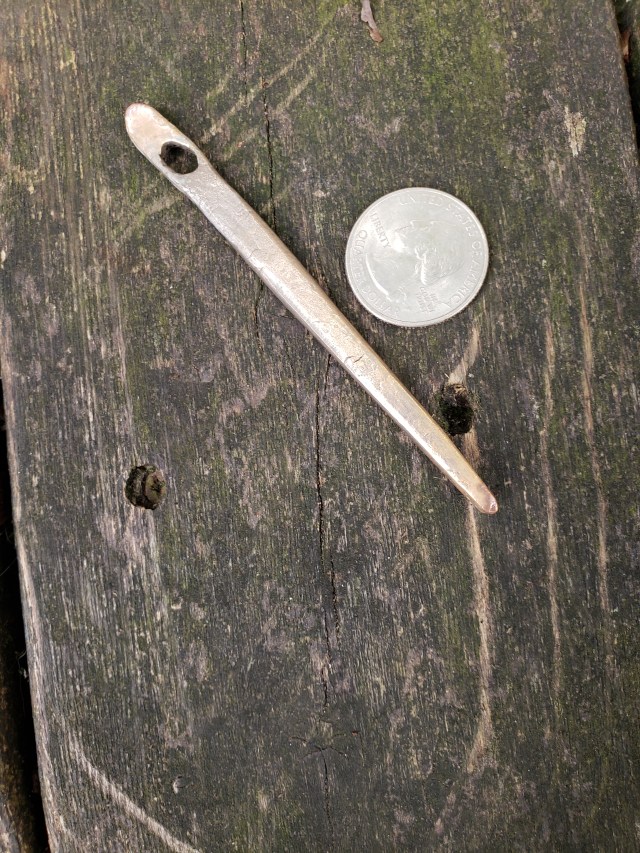
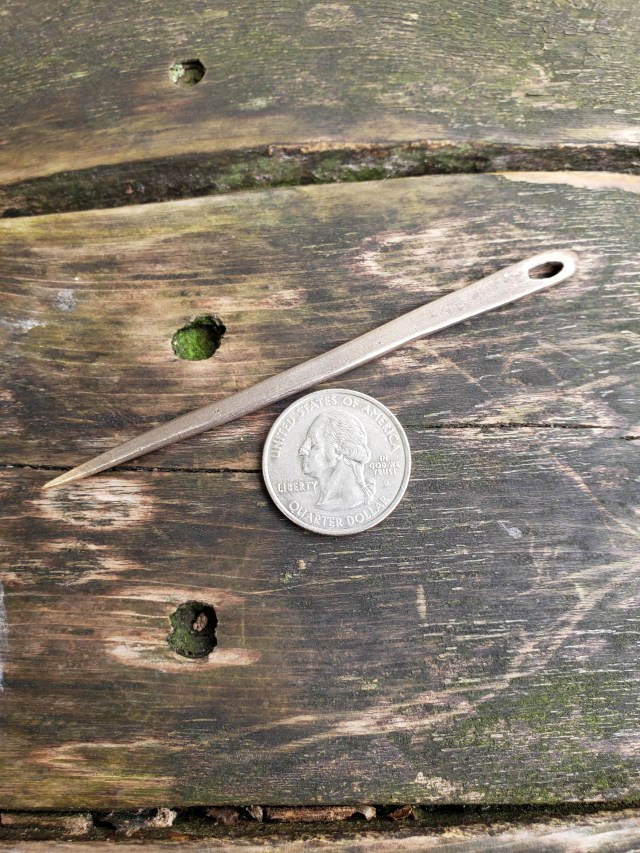
The piece was fired according to package directions, and then tumbled. To prevent the bronze from turning green, it was sprayed with a lacquer. The finished needles, blunt and sharp, are pictured below. The coins are for scale.

20191021_154806

20191029_160702

Did bronze naalbinding needles exist historically? I don’t know. If they did, they would probably have been family heirlooms, or something that would have been buried with the owner. However, bronze needles certainly work. It adds to the thrill of naalbinding to work with a needle that you have made, whether that needle is bone, horn, or bronze.


The Shaman of Trois Freres

shaman_trois_freres_176x253

Staring at us from the mists of time, the Shaman of Trois Freres demonstrates for us the artistry of our Neolithic ancestors (Trois Freres is a cave in France with many wonderful examples of Neolithic art). While Native American art has widely been used as an inspiration for metal clay, Neolithic art is rarely touched. Here is my first attempt to remedy that, the Shaman done in bronze clay.

I chose One-Fire Bronz clay because it rarely fails to sinter. I chose bronze because, to do the shaman justice, I would need to make a large piece, and bronze clay is relatively inexpensive.

20190917_071443

To start, I rolled the clay to a thickness of 0.75 mm, and cut out a rough outline of the shaman. I left out the antlers. They would be easy to break while working in greenware, and could be added earlier. I studied the image of the original shaman.

20190917_074655

I added the shoulders, 0.75 mm thick. I added the face, carving out the eyes. The original image has no details in the eyes, so I kept that feature. I suspect that the original shaman, on whom this is modeled, wore a mask to deep that the eyes could not be seen. I shortened the antlers from the original — I want this to be worn, and I do not want the antlers to poke the wearer!

20190930_195352

There are many details in the image. I cut them out of bronze clay and added them, one at a time. When all the details were added, I sanded the cleaned the figure. Then I attached the shaman to a disk, textured with a texture sheet that resembled carved stone. I attached a hidden bail, did some last-minute clean-up, and fired.

20191003_181828

The image above is the fired and tumbled shaman. I considered leaving it in this form. Then I considered how the original would have been seen. The cave would have been lit only by firelight. The fire would have been smoky. No, the Shaman of Trois Freres should not be shiny — he should be dark and mysterious.

I considered using Black Max. However, I wanted a more archaic appearance. My final decision was to go over the shaman with a torch until the figure developed a black coating of oxidation. I then polished it, so it was not a uniform black.

20191004_140253

This is my concept of how the Shaman of Trois Freres should look! Clearly, Neolithic art can inspire us, as metal clay artists. This is only my first step into the world of Neolithic art.


Tatting Shuttle II

20190915_153034

After much trial and error, I believe I have perfected making tatting shuttles with bronze clay. I am going to lay out for you what I have learned.

Start by making a template for cutting the shuttle leaves (the part you see in the photo above, plus the other one just like it on the other side) from stiff cardboard. You can trace an existing shuttle or you can draw your own. If you freehand, it doesn’t matter if you aren’t perfectly symmetric — you can fix that while finishing your greenware. Leaves can be 0.75-1.0 mm thick. It is best to use a texture, because a smooth metal shuttle is hard for the tatter to use.

Dry the cut out leaves on something curved. If you have a pre-existing plastic shuttle (or a metal one, that you can cover with plastic wrap), great. If not, you can use a dome light, which is what I did.

Instead of making a single central post, make two small central posts. Attach them with bronze slip, not quite touching, but close, symmetrically located about the center of one leaf. Make them a bit taller than you need (more about this in a moment). Use plenty of slip to make sure they hold. If necessary, sand to make the part of the leaf to which the posts attach smooth. Let this dry thoroughly.

To attach the other leaf, place the leaf (no slip yet) where it will go on the posts. Keep in mind that the tips of the shuttle need to touch. This will, almost certainly, not be the case. Start sanding the posts down. Sanding might not be symmetric — one post might need more than the other. After you have sanded a bit, replace the top leaf. Repeat this process until the tips of the leaves just touch, and the shuttle, looked at from the side, appears symmetric. Then attach the top leaf with slip. Use lots, because it is important that the leaf and posts fuse. Let this dry.

From the side, read into the greenware shuttle with a file. Remove any roughness left over from attaching the top leaf. Look at the greenware shuttle from above. Are there any assymetries (almost certainly, one leaf is a bit bigger than the other)? Sand the larger leaf down until it matches. Now turn the greenware shuttle over, and repeat the process. You might need to iterate, until you have achieved symmetry.

Now for the acid test. Place the greenware shuttle on its side. Let it rock back and forth. Then place it on its other side, and rock it in the same manner. If both rockings look the same, you are close enough to symmetry.

Now it is time to fire the piece. To keep the leaves from fusing where they touch, slip a small piece a paper between them. Since you will fire in activated charcoal, the paper will not burn. It might or might not char but, in either case, it is easily removed once it is fired. Fire the shuttle on its side. If you fire it with the leaves lying flat, charcoal might or might not surround the posts. Fire a bit longer than package directions say; since this is a tool, not jewelry, you want it to be tough.

Once firing is done, tumble and patina as you wish. Patina lightly, because the shuttle will be handled a lot, and you don’t want the patina to wear off. If you patina, be sure to apply a protective coating so the patina will not come off on the user’s hands. Also, be sure to apply the protective coating to the inside — you don’t want the bronze tarnishing and transferring color to the thread used in the tatting shuttle.

I have not yet tried silver. I believe it would work in a similar manner. I believe that sterling silver would be almost the same. I am not sure if fine silver is or is not hard enough to use. However, a small silver tatting shuttle made into a pendant would be a nice bit of jewelry for a tatter to wear.

Tatting Shuttle

20190824_113805

Tatting is a form of Victorian (although it is still practiced today) lace making. Tatting requires the use of a shuttle. In Victorian times, shuttles were made of German Silver (silver coated base metal), wood, or horn. Today, they are usually plastic. A client asked if I could make a bronze tatting shuttle. My answer was, “I don’t know, but I will try.” As the picture above, which shows the completed shuttle and a small amount of tatting shows, I was able to do so. Here, I am talking about how the shuttle was made.

Tatting shuttles consist of two curved forms (usually identical, although one end of one form can have a hook on it). I decided to omit the hook for my first try. I used heavy cardboard to cut out a template. I rolled out One-Fire Bronz clay to a thickness of 1 mm, then textured it on a commercial texture sheet at a thickness of 0.75 mm. I cut out the shapes, using the template I had made, and placed them on domed closet lights to dry, so they would have a reasonable amount of curvature.

20190817_142402

Between the two leaves that make up the shuttle, tatting shuttles have a place for wrapping thread. This is often oval in shape. It is important that the two ends of the shuttle touch, so that thread can be slipped through it, but so that the thread will not go through without being pulled. To reduce weight, I made the central post hollow. Making the post of the correct shape, so the two leaves would just touch and so there was nothing on which the thread that will be wound around the post will catch on, was a matter of trial and error. The bottom leaf, with the post but without the top leaf, is pictured below.

20190820_085519

When this had dried, I carefully attached the top leaf. I drilled a hole through the post, so that thread can be slipped through it (some tatting shuttles have this hole and some don’t). However, the piece was not yet ready to fire.

20190820_125952

While the tips must touch for the shuttle to be used. However, I was concerned that they might fuse during firing. The solution? Place a small piece of paper at the tips of each leaf, preventing them from touching each other.

20190820_090032

The piece was ready to fire. I fired it according to package directions, tumbled it, and lightly patinaed it (I used a light patina because I did not want it to come off on the user’s hands). I sprayed it with a protective coating, and the shuttle was done.

20190824_111555

20190824_111602

While this shuttle is usable, it was not ideal. For one thing, I made the post so large that not much thread could go on the shuttle. I am currently working on tatting shuttle Mark II. I will report on that when it is done.

In the meantime, keep on working in metal clay! And, if you tat, consider making yourself a shuttle 😉


Using Metal Clay for Cartoon Images

I have done a number of posts about using metal clay to make jewelry that resembled Alaskan Native art. This is done by making a basic shape, and then adding the ‘bits and pieces’ until it resembles Alaskan art. Then, one uses a damp sponge to smooth out the edges so the piece looks ‘organic’ instead of having sharp edges.

I was recently asked by a knitter if I could use the same methods to make a cartoon sheep for her from silver. Starting off from a cartoon sheep face, I used the same methods — cut out the overall shape; add the shape without ears (so the ears would recede in the background); add the shape of the face without the ears or topknot (so the face would come forward). I made the eyes by making depressions in the face and then, when the face had dried, adding small sphere of clay for eyes. I made the nostrils by making depressions with a clay sculpting tool, and then refining them after the clay dried. It resembled a sheep, but still did not look right. Then I realized the problem: to look like wool, the topknot needed some curls. I used syringe to add that. Having started on this, I used additional syringe to define the ears and muzzle. That was the look I wanted.

I fired, brushed, tumbled, and patinaed the piece as usual. I used a very light patina and polished the face, to give the impression of a light face and dark muzzle and ears. A photo of the resulting piece, with a coin for scale, appears below.

20190817_124923

I think the technique is more successful with Alaskan art, which is highly stylized. However, the client was happy with the sheep. If the client likes it, it is good enough 😉


How do you show a customer what a piece will look like?

Today’s post is a bit unusual, as it does not directly involve metal clay or jewelry. However, there is a very real indirect link.

A customer commissions you to make a piece. You plan what it is going to look like. But do your plans truly match the customer’s expectations? The only way to know that is if you can provide a drawing of what the piece will look like when it is finished. To do this, you have to learn to draw. In particular, you have to learn to draw metal, with its highlights and reflections.

I have been working on learning to draw. I have chosen colored pencil as my medium, because colored pencil is a dry medium (I have several cats, and cats and wet paintings do not necessarily mix well). While I am still learning, I decided to post two of my practice pieces.

The first is an exercise in depicting metal (a tea pot, not jewelry). I drew on dark blue paper, using the following colors of Prismacolor pencils: white, black, French gray 70%, French gray 90%, and cream. My drawing wound up as follows:

20190809_201956

Following this, I chose to go for full technicolor, and not restrict myself to metal. I copied a photograph of a rooster (you might notice the makers mark for my jewelry studio in the lower left hand corner):

20190809_201939

Learning to draw, with whatever medium you choose (graphite, colored pencil, charcoal, or painting) seems far removed from jewelry making. But learning will help you make jewelry. And it will help you sell jewelry. It sounds like a digression, but, if you learn to draw, you will be repaid for your efforts.

Using Metal Clay for Purposes other than Jewelry

The main use for metal clay is, of course, jewelry. However, one can use it for other purposes as well. This is particularly true with bronze and copper, which are relatively inexpensive.

A friend, who is a huge fan of the fiction of American horror writer H. P. Lovecraft, asked me to sculpt him a statue of Cthulhu, Lovecraft’s fictional ultra-powerful alien who has often been mistaken for a god. I carefully read the story in which Lovecraft introduced Cthulhu, titled ‘Call of Cthulhu’. An image of Cthulhu, of unspecified size but small enough to carry around in one hand, features prominently in the story. In that image, Cthulhu is seated, with arms and legs at rest — in other words, something not too hard to sculpt. I took that as my departure point.

I used copper clay because the figure would need quite a bit of clay. To do it justice, it needed to be 40-50 mm tall (it wound up, after firing, being 42 mm tall). I sculpted a hollow (to save clay) cube for the base. Then I added the figure, one feature at a time. Once I had the figure sculpted, I added texture by making a think paste of copper clay, dragging a paint brush through it until the brush was thoroughly loaded, and then dragging that over the figure. That gave it the sort of rough, primitive carving aspect the Lovecraft described in his story.

This was the largest piece I had ever fired. I let it fire an hour longer than the package directions, to make sure it sintered all the way through. It sintered! The heat had given the copper a vague purple patina. I chose not to polish or patina the figure further, since the purple look seemed to go with the image.

For benefit of those not familiar with H. P. Lovecraft’s work, Cthulhu, indeed, has three eyes on either side of his head.

You might not want a Cthulhu image. However, metal clay is not limited to jewelry. You can make anything that your imagination directs you to make, and that will fit in your kiln.

20190713_085509

20190713_085516

20190713_08552420190713_085530


Baldwin’s Patina: Yet Another Way to Add Interest to Copper

We are probably all familiar with LoS, Black Max, and other patinas that simply darken. These can certainly be used on copper. Last post, I talked about using heat to add interest to copper. However, there are still other ways to deal with copper. Have you ever seen (or seen a picture of) the Statue of Liberty? The statue is made of copper. Sea breeze, with its salt, oxygen in the air, and pollutants in the air have turned it a quite attractive shade of blue-green. We can achieve this color on copper jewelry without leaving our work out for months by the sea! 😉

Baldwin’s Patina is a patina that only works on copper. The packaging says that it also works on bronze, but that has never worked out for me. Therefore, I limit myself to copper. Baldwin’s Patina is different from other patinas in two key manners: (1) you need to heat the copper jewelry before applying and (2) the patina develops over time (although the hotter the piece, the quicker the patina develops). Before applying Baldwin’s Patina, I place copper jewelry on a cup warmer. When it grows hot enough so that touching it is uncomfortable (not at the level of burning, just hot enough to say ‘ouch’), transfer the jewelry to a working surface. I use a paper plate for this purpose; since it is disposable, I don’t have to worry about the patina injuring it. Baldwin’s Patina, as it comes from the bottle, is a blue liquid. I apply it with a cotton swab. Then I replace the jewelry on the cup warmer. In about a half hour, the jewelry is the color of the Statue of Liberty. Like any patina, you can wipe off the patina from parts of the jewelry, giving it an aged appearance. Like any copper piece, a fixative should be applied to prevent the patina from changing further.  I use the same spray that brass instrument players use to preserve their instruments. If you don’t have this, hair spray or clear nail polish will work.

Some examples appear below. As always, a coin is included for scale.

A pair of steampunk earrings:

20190714_103353

Another pair of steampunk earrings:

20190714_103413

A pair of bigfoot-themed earrings:

20190714_103321

A Northwest Pacific inspired pendant:

20190714_103339

Finally, I want to show you how I combined Baldwin’s Patina and a heat patina. I made a bigfoot-themed pendant by placing one texture on a copper disk, putting another texture on another copper disk, cutting a bigfoot outline of the upper disk, and joining them. The lower piece was colored by a heat patina, using a directed torch until it turned red. The upper piece was patinaed using a very light hand with Baldwin’s Patina (e.g. a few spots of color, not covered). The effect is a ghostly figure slipping through the woods.

20190714_103303


Heat Patina: Another Way to Add Color to Copper

20190625_123118

We are probably all familiar with chemical patinas: LoS for silver, copper, or bronze, salt, vinegar, and ammonia for copper, Baldwin’s patina for copper, etc. However, when working with copper (and, to a lesser degree, bronze), there is yet another alternative, the heat patina.

Heat patina’s are achieved by making your piece out of copper clay in all the usual ways (forming, cleaning greenware, firing, brushing, tumbling). With heat patinas, it is best to make certain your work is perfectly clean (that is, no finger oils remaining). This can be achieved by using some form of prenamel (a produce for cleaning metal clay prior to applying enamel) — but, if you don’t have prenamel, lemon juice will work. Just be sure that, once the piece is perfectly clean, you only touch it by the edge (or, better still, just use tongs!).

One the piece is clean, it is placed on a heat-proof surface. Run the flame of a torch lightly over the surface. If you have a jeweler’s torch, great. If you don’t, a kitchen torch will work just as well. It just takes a little longer. As  you run the flame over the surface, you will see colors begin to appear (e.g. bronze, red, blue, purple). You can run the flame in circles, or in waves, or in lines — each will produce a different effect. When you have achieved a degree of color, you can go in one of two routes: (1) pick the piece up with tongs, place it in a heatproof container, and place it in the freezer. This will preserve the color more or less as you see it. (2) Just let the piece sit and cool naturally. This gives unpredictable results, often a brown with hints of the earlier bright color. There is no right or wrong answer here — it’s the effect you want to achieve.

I’m going to talk about making a wolf’s head pendant in the Northwest Pacific style in copper, and then applying a heat patina. Since clients often look at the back of a piece before buying it, I made the back interesting too (details to follow).

First, I cut out a thin (0.5 mm) circle of clay. Then I cut out a thicker (1 mm) circle of the same size. I textured the thicker circle (by hitting it with the bristles of a pet’s hairbrush!) and cut out the shape of the wolf’s head. I then attached the pieces to one another, so that the piece had a cut-out of the head. I added a first-draft eye and nostril.

20190614_135009

I added more pieces of copper, building up the look of Northwest Pacific art.

20190616_103828

I finished by adding the teeth and doing some refinement on the eye.

20190621_194636

As you can see, this piece is fairly rough. There was a great deal of sanding and going over the piece with a damp sponge to smooth out all the rough edges. Once that was done, I added a bail to the back. To keep the back interesting (and hide the bail, which wasn’t that attractive), I molded three owls (using a commercial mold made for polymer clay) and stuck them together.

20190622_150329

I added my maker’s mark by attaching a small circle of thin clay, with the mark inscribed into it. The back, like the front, needed lots of sanding and smoothing.

Once the greenware was done, I fired, brushed, and tumbled. I then applied a heat patina, both to the front and back. The piece turned a shade of deep purple which, while attractive, did not fit the Northwest Pacific aesthetic. Therefore, I decided to let the piece cool naturally, so it became a brown with a hint of purple. That color matched the Northwest Pacific design perfectly.

After the piece cooled, I polished it, removing the patina from the high spots and leaving it in the recesses, making the piece look as though it had existed for centuries.

The back and front of the finished piece appear below. The coin is for scale.

With any copper piece, it is best to coat the finished work with some protective substance (e.g. renaissance wax, the spray used to protect brass instruments, etc.). Without this, the copper can develop a green that can be transferred to skin or clothing.

I encourage you to give heat patina a try. It opens up a new world of colors for copper.


Signing your Work

You do sign your work don’t you? If not, I strongly encourage you to do so (in some inobtrusive place). The simplest way to do this is not with a true signature, but with a symbol that you design. For example, noted metal clay artist Pam East signs her work with the Chinese character for ‘east’ (the direction). My symbol is a bindrune (a combination of two or more runes into a single glyph).

The symbol can go on the back of a pendant, inside a ring, or on the back of one earring or cufflink (if someone owns one member of the pair, they probably own the other).

The simplest way to do this is by inscribing your symbol with a tool (not the pick or needle tool, which might bend, but with something made for this purpose). However, there is another way — place your symbol on the back with a small amount of clay. This is particularly easy with silver — use syringe to place your symbol after everything else is done.

Below is a very simple, very basic pendant and earring set, made of silver clay (texture done with a texture sheet, from done with a template, shaped by drying over a plastic Easter egg, stone [quartz, with inclusions] set in a bezel cup). I am posting it to show how I placed my maker’s mark on the back, with syringe.

The image on the left is the part that shows. The image on the right is the back, with a syringe maker’s mark on the back of the pendant and on one earring.