

We are probably all familiar with chemical patinas: LoS for silver, copper, or bronze, salt, vinegar, and ammonia for copper, Baldwin’s patina for copper, etc. However, when working with copper (and, to a lesser degree, bronze), there is yet another alternative, the heat patina.
Heat patina’s are achieved by making your piece out of copper clay in all the usual ways (forming, cleaning greenware, firing, brushing, tumbling). With heat patinas, it is best to make certain your work is perfectly clean (that is, no finger oils remaining). This can be achieved by using some form of prenamel (a produce for cleaning metal clay prior to applying enamel) — but, if you don’t have prenamel, lemon juice will work. Just be sure that, once the piece is perfectly clean, you only touch it by the edge (or, better still, just use tongs!).
One the piece is clean, it is placed on a heat-proof surface. Run the flame of a torch lightly over the surface. If you have a jeweler’s torch, great. If you don’t, a kitchen torch will work just as well. It just takes a little longer. As you run the flame over the surface, you will see colors begin to appear (e.g. bronze, red, blue, purple). You can run the flame in circles, or in waves, or in lines — each will produce a different effect. When you have achieved a degree of color, you can go in one of two routes: (1) pick the piece up with tongs, place it in a heatproof container, and place it in the freezer. This will preserve the color more or less as you see it. (2) Just let the piece sit and cool naturally. This gives unpredictable results, often a brown with hints of the earlier bright color. There is no right or wrong answer here — it’s the effect you want to achieve.
I’m going to talk about making a wolf’s head pendant in the Northwest Pacific style in copper, and then applying a heat patina. Since clients often look at the back of a piece before buying it, I made the back interesting too (details to follow).
First, I cut out a thin (0.5 mm) circle of clay. Then I cut out a thicker (1 mm) circle of the same size. I textured the thicker circle (by hitting it with the bristles of a pet’s hairbrush!) and cut out the shape of the wolf’s head. I then attached the pieces to one another, so that the piece had a cut-out of the head. I added a first-draft eye and nostril.

I added more pieces of copper, building up the look of Northwest Pacific art.
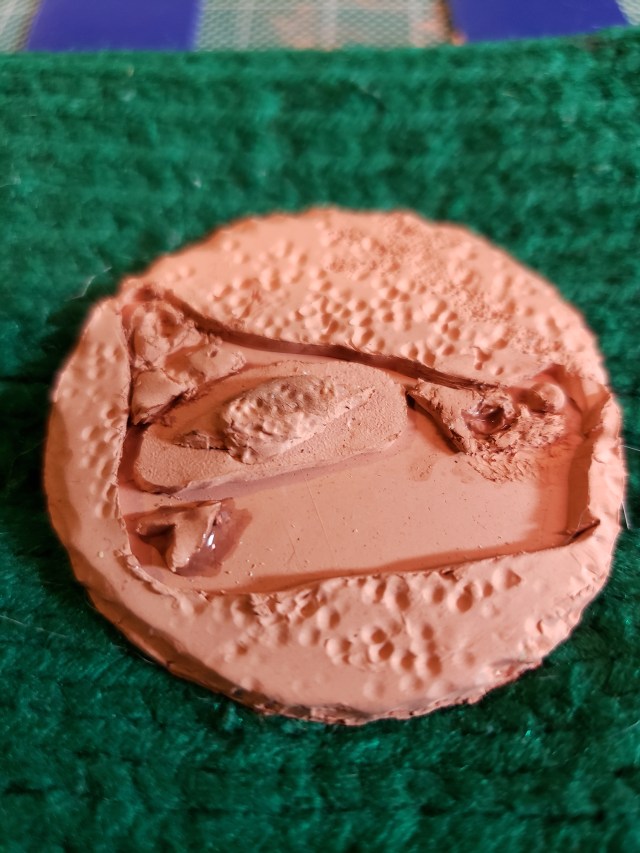
I finished by adding the teeth and doing some refinement on the eye.

As you can see, this piece is fairly rough. There was a great deal of sanding and going over the piece with a damp sponge to smooth out all the rough edges. Once that was done, I added a bail to the back. To keep the back interesting (and hide the bail, which wasn’t that attractive), I molded three owls (using a commercial mold made for polymer clay) and stuck them together.
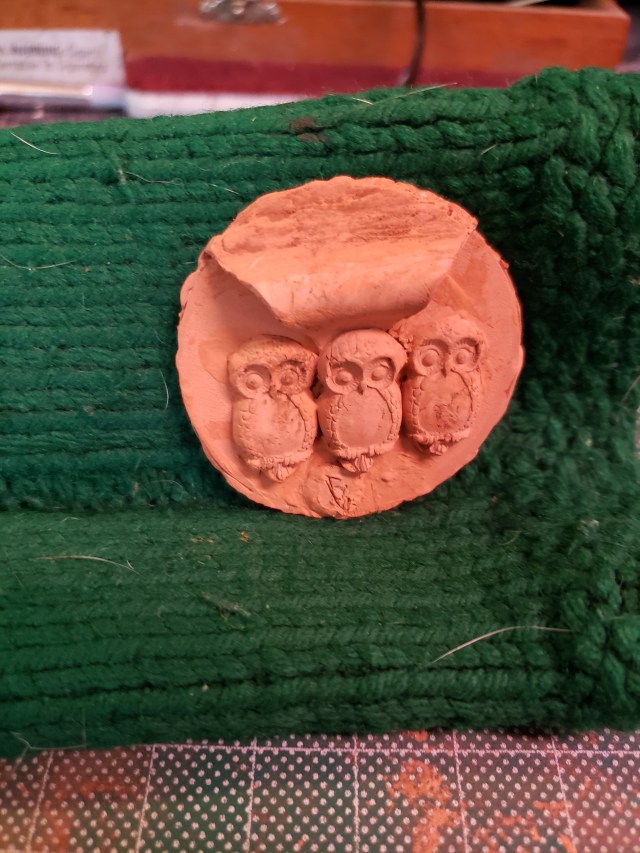
I added my maker’s mark by attaching a small circle of thin clay, with the mark inscribed into it. The back, like the front, needed lots of sanding and smoothing.
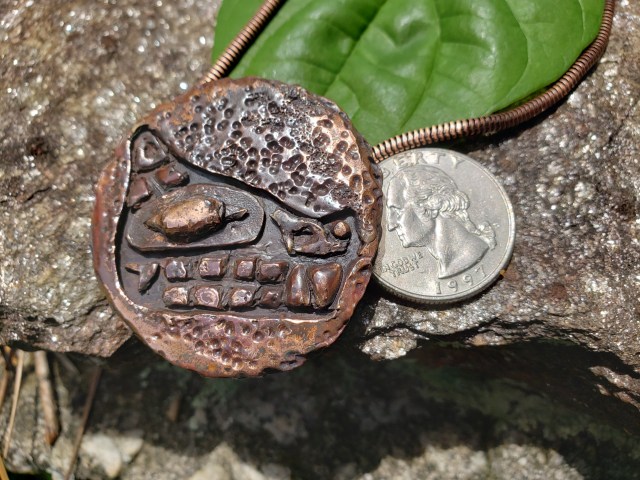
Once the greenware was done, I fired, brushed, and tumbled. I then applied a heat patina, both to the front and back. The piece turned a shade of deep purple which, while attractive, did not fit the Northwest Pacific aesthetic. Therefore, I decided to let the piece cool naturally, so it became a brown with a hint of purple. That color matched the Northwest Pacific design perfectly.
After the piece cooled, I polished it, removing the patina from the high spots and leaving it in the recesses, making the piece look as though it had existed for centuries.
The back and front of the finished piece appear below. The coin is for scale.


With any copper piece, it is best to coat the finished work with some protective substance (e.g. renaissance wax, the spray used to protect brass instruments, etc.). Without this, the copper can develop a green that can be transferred to skin or clothing.
I encourage you to give heat patina a try. It opens up a new world of colors for copper.
