Basse-taille

This post is a little different, because I’m not including much in the way of instructions. I recently took a class in basse-taille, an enameling technique in which translucent enamel is placed over a texture. This means that the texture can still be seen through the enamel. The class was taught by Pam East (pameast.net). I’m not being terribly specific about methods because teaching is part of her livelihood, and it would be unfair of me to say what she taught in the class.

The class worked with Thompson enamels. They have the advantage that their numbering system (all enamels have a four digit numerical code) provides actual useful information. If the first digit is 1, the enamel is opaque. If the first digit is 2, the enamel is translucent. The second digit tells the color; for example, 3s are greens. The third and fourth digit tell how dark the enamel will be — the higher the number, the darker the enamel.  Thus, 2310 is a translucent green enamel, and so it 2340, but the latter is darker.

We learned that blues, greens, and browns fire consistently clear, and the other colors can sometimes have a bit of muddiness to them.

We learned two forms of basse-taile. In both, textured pieces are made with metal clay. The fired pieces must be tumbled a long time, as much as overnight, to be burnished enough to take the enamel. In one technique, a shadowbox is made — a rim of silver is placed over a textured background. In the other, syringe is used to build up a bezel around a flat piece.

While most people chose to work with a raised texture, so that silver would shine through the enamel, I only did that with one of the two pieces. With the other, I chose an incised design. I filled the recessed design with one color of dark enamel, and then put a layer of pale enamel of another color atop it. This gave a wonderful appearance of depth.

The two pieces I made in the class appear below.

20170314_19063420170314_190656As I said, it would be unethical for me to give step by step directions on how to do basses-taille. However, I hope these pictures have inspired you to seek out someone who can teach you. And, if you have the opportunity to take the class from Pam, she is a wonderful teacher.

Icelandic Bind-Runes: A Source for Design Ideas

Runes are the alphabets of the ancient Norsemen; because runes were meant to be carved, and not written, they were usually made up of straight lines. In addition to being used for writing, runes were also used for divination and other magical purposes. The Icelanders expanded this idea: they created bind-runes, multiple runes put together in a single glyph, usually for a magical purpose. Whether one does or does not believe in the effectiveness of bind-runes, they can provide the modern jeweler with a source of inspiration. Because runes are made of straight lines, bind-runes are easy to carve. But bind-runes give one’s work an exotic appearance.

Here, I’m going to talk about making a pair of earrings that contain a relatively simply ‘charm for good luck’ bind-rune. It combines a G rune (resembles an X) which with an F rune (resembles a modern F with the arms lowered and tilted up). The G rune symbolizes a gift and the F rune symbolizes money or success. Thus, combined, they serve as a ‘good luck’ sign.

The first step is to carve the bind rune in a block of linoleum. Since one is making earrings, one needs to make two versions of the bind-rune that are mirror images of each other. Obviously, if one is using a design that is symmetric, so the original and mirror image are the same, one can skip this step.

20170210_185723

This can be treated like any texture sheet for metal clay. Lubricate with something that will cause the metal clay to not stick, roll the metal clay to the desired thickness, and then cut out the shapes for the earrings, including making holes for the earwires. Because these are to be earrings, I made them 0.75 mm thick (so they weighed less). I chose to put the bind-runes on circles, although any other shape would have done as well. I chose to use bronze, to carry the ‘archaic’ feel. Finally, I dried my metal clay on a plastic dome (half of a plastic Easter egg), because I like my work to have some three-dimensionality to it. Obviously, none of these choices are mandatory. If you want to use silver, make your earrings flat, or make them ‘puffy triangles’, there is no reason your design choices should match mine!

After firing and tumbling, the earrings looked like this.

20170226_122049

All that remains is applying the patina of one’s choice and attaching earwires. I chose a light patina.

Two views of the finished earrings appear below, with a coin for approximate scale.

20170226_134342

20170226_135804

The number of possible bind-runes is immense. Discussing them is well beyond the scope of what I have to say here. However, finding new designs (and creating your own, if you are so inclined) is easy with a bit of internet research into runes. You don’t need to be an Icelander (or even a Viking) to find artistic inspiration in Icelandic bind-runes.


Make your own texture sheets!!

Texture sheets are a major part of the metal clay world. I would never advocate that anyone stop using them. But … what if you want a particular texture and it just isn’t out there? You can mold some textures (I’ll discuss molding in another post). But suppose what you want exists only in your imagination? I’m going to tell you how to make your imagination a reality.

First, your texture sheet needs to be made on something. I used a block of linoleum. However, hard rubber works just as well (caveat: If you use rubber, scrub it thoroughly with a toothbrush before using it with metal clay — this step is not needed with linoleum). And you need a set of carving tools, of the sort used for woodcarving. You don’t need very many tools, just a few. My set is pictured below.

20170204_131008

Four tools, that’s it. Two wide and two narrow blades, one that carves a U shaped valley and one the carves a V shaped valley. And, truth be told, I only used one tool in this project, so you don’t even have to have all four.

I could have done an abstract or semi-abstract background. Instead, I wanted a representational image — a cartoon sheep (I was making this for a knitter). I drew a cartoon sheep on my linoleum.

20170204_131409

If you don’t draw, don’t worry. I could just as easily have traced a copyright free image. I drew the image in pencil and then went over it with pen so I could see it better. Next comes the carving.

You might be tempted to hold your carving tool like a pencil. Don’t. That will gouge the background material instead of carving. Hold the blade as close to parallel to the surface as you reasonably can. Take your time, particularly if you are not used to carving. If you want to practice, I suggest using a cheap rubber eraser. And, if you make a mistake, linoleum and rubber are cheap — just start over.

20170204_141043

Here is my carved figure. At the bottom of the picture, you can see a carving that I abandoned when it started to go wrong. Once the carving is done, you have a texture sheet (although, if you used rubber, you will have to be careful to remove all the small pieces clinging to your sheet before you use it.) Not sure how it will look with metal clay? There’s an easy fix — Silly Putty. If you push Silly Putty into your sheet, you will get the same image that you will get with metal clay.

Now treat your texture sheet exactly like you would treat a commercial product. Lubricate it, roll out your clay, and roll the clay onto the sheet. I used silver for this project.

20170212_131409

I chose to apply an invisible bail (meaning that it won’t show when the piece is word) to the back.

20170212_131404

After I had done that, I realized that my bail was a bit too big. This is potentially bad because, if there is too much room for the chain to move, the pendant can flip over. I fixed this by adding a bit of silver clay to the bottom of the bail.

20170214_070517

After finishing the greenware, I fired and tumbled the piece.

20170217_071622

I decided it needed some color. I patinated with liver of sulfur. While liver of sulfur can give you a lovely aged look, there are ways to make it give you bright colors. A dash of salt and ammonia added to the water will give bright colors. When using this technique, I prefer to use water that is moderately warm instead of hot. The reason is that warm water gives you slow color changes, and you can stop the color changes by dipping the piece in cold water.

Caveat: I have heard many people say that the colors from the liver of sulfur, ammonia, and salt treatment don’t last. I suppose that is true. However, my experience is that the color change is gradual (meaning that the color can last for years) and that, when the color changes, it changes in an organic manner to a different attractive color. Also, if you don’t have stones or glass in your piece, you can always remove the patina with heat and then repatina.

Second caveat: As you silver sits in the patinaing liquid, it changes color in the following order: gold, bronze, blue, purple, red (requires near perfect timing to achieve), gunmetal, black. The idea is that you watch you piece closely, and remove it the instant it turns the color you want. The problem is that you can’t guarantee the color you will get. Sometimes the patina gods smile and sometimes they don’t. That is, sometimes the color is really nice and sometimes not. Again, if you don’t like what you have, you can remove the patina and start over.

20170217_081228

This piece turned out a lovely shade of purple with some blue. I removed the patina from the sheep itself, so the silver would be shiny and the sheep could be easily seen.

So there you have it. If you want a texture sheet that is not on the market, make your own!

Final remark: While I was making this piece, I also made a star sapphire ring. Just as a bonus, I include a picture of the ring below:

20170217_081246


Using Wire as Prongs: Metal Clay plus Wire Wrapping Equals Creativity

Sometimes you have a stone that will not go through the kiln, and with a shape so that a bezel cup or bezel wire just doesn’t look right. Is there a way forward? Sure there is! Take a tip from wire wrapped jewelry and combine wire and metal clay! If done correctly, this opens up a new frontier.

To show you where we are headed with this, I’m starting off with the finished product — a pendant with an aventurine stone. While this particular stone could have been set with a bezel cup, I chose to go the wire prong route instead. The coin is for scale.

20170122_140839

It is important that the wire you choose be compatible with your clay. If the metals are not the same, they could react while the clay sinters. Also, remember that the wire will go through the kiln. It is important to use jewelry grade wire. While the example here is silver, there is no reason you could not use copper. But, if you do, be sure you have jewelry grade copper wire — wire from the hardware store, while usable for wire wrapping, contains enough impurities that it might react with your clay in the kiln.

I chose square wire. Half-round wire would have worked just as well. However, I would advise against using round wire. Round wire doesn’t necessarily fit closely enough against your stone to hold it in place, as it suffers the daily jostling of being worn.

The first step is to cut the wire and choose a texture sheet. Cut more wire than you think you need. You can shorten it later if you need to, but you can’t add to it. The picture below shows the texture sheet, the three wires, and the stone. Note that the wires all have a spiral at the end that will go around the stone. I could have done this later, but I did it now. Also, there is a small L-shaped bend in the end that will go into the clay. A bend like this gives the clay something to hold onto after it fires. Had I left the wires straight, they could have pulled out.

20161218_101936

Texture a background piece larger than the stone. Insert the wires, making sure that the L-shaped curves are buried in the clay. It is important to remember that the clay will shrink when it is fired. Thus, the wires need to be placed so they leave space to spare around the stone. Although the stone itself will not be fired, put it in place on the wet clay to be certain that you will have enough space after shrinkage.

20161218_102752

Remove the stone and fire the piece normally. I fired in a layer of vermiculite to give the wires support while firing. I’m not sure if that was necessary, but it certainly could not hurt.

After firing and tumbling, my piece looked like this. You might notice a break in the texture near what is, in this picture, the bottom prong. It results from having to reinforce one of the prongs with a bit of syringe. That small imperfection in texture is not a problem. When the stone is in place, it will be hidden.

a

I chose to do a very light patina, one that more hints of coloration than really darkens the piece.

b

The next step is to place the stone. If you have ever done traditional metalsmithing, you have heard the expression, “Metal on metal leaves a mark.” Well, it applies here too. Use pliers with a plastic coating (of the sort used in traditional metalsmithing) to gently bend the wires so they encase your stone. Gentle bends will neither damage the wires nor pull them from the silver, so don’t worry — just don’t be in a hurry. Also, the wire prongs might need a bit of flattening to lie smoothly on the stone. The same pliers can be used to gently push the wire into place.

20170122_100135

Now all you need to do to finish the piece is to add a chain. So there you have it — wire wrapping and metal clay, with a bit of creatively, can be combined! While I did a pendant, there is no reason you could not use the same methods for earrings, cuffs, or rings. As always, be creative!


Silver Clay and Glass

Did you know that you can incorporate glass into your silver clay? It takes a bit of additional work (for example, making sure that the glass doesn’t shatter in the kiln), but the results can be well worth it. Below is a pendant I recently made that combines glass and silver clay. The steps that went into making it will be described below.

20170116_141553

Before I go further, there is one caveat: bronze and copper clay are not good for this purpose. They fire at temperatures that are high enough for the glass to melt, producing a blob, instead of the lovely piece you envisioned.

Now, on to how to work with silver clay and glass. First, find a piece of glass that you would like to incorporate. I used slumped glass, with a dot of dichroic in the middle and a dot of opaque glass atop that. That glass was slumped in the same kiln that was used with the silver clay, but glass slumping is another discussion. You could, of course, use a lampwork glass bead, a bit of beach glass, or any other glass that catches your attention. The piece I chose looked like this:

20161215_145508

I then cut out and textured a piece of silver clay to make the background. The background was 1.75 mm thick, which is thicker than most people work. The extra thickness is needed, to hold the glass.

20161215_150136

Before the clay dried, I placed the stone where it would eventually go and cut a hole around it so that the glass would just fit. After the clay had dried, I went back in with a file and enlarged the hole. This is extremely important — clay shrinks when it is fired, and the glass does not. To prevent the glass from cracking, you need to make allowances for shrinkage. How much depends on the brand of silver clay you are using — the more the clay shrinks, the more allowance you will need to make.

I finished the greenware in the usual way, and attached a bail. I placed the glass in the opening, and put down a bit of syringe as insurance. I expected the glass to tack fuse to the silver, but a bit of mechanical reinforcement never hurts.

When it was done, the greenware, with the glass included, looked like this:

20161231_130305

Next came firing. Firing of metal clay with glass is complicated in a number of ways. It is best to lay the piece on a blanket of fiber paper, not a kiln shelf. Without fiber paper, the glass can stick to the kiln shelf. Firing itself must be done in stages. If the glass heats or cools too quickly, it can shatter. I let the kiln ramp up at 1000 degrees F per hour to 1300 degrees, let it rest there for one hour, then ramped down at 1000 degrees per hour to 800 degrees. After that, I turned the kiln off and let it cool naturally. Note that various people advocate various firing schedules for glass. I’m just reporting the one that I used.

After the piece cooled and came out of the kiln, I tumbled and patinaed it. You might notice that one of the lines of syringe came off while brushing. This was not a catastrophe — the glass had tack fused, and therefore was firmly in place.

20170115_155057

After that, all that remained was threading a chain.

20170116_141725

I hope this will inspire you to consider using glass with your silver clay.


Darwin Fish!!!

I was recently commissioned to make a very small silver Darwin Fish pendant. I have always preferred to work large. If it can be done, it can be overdone! However, a commission is a commission. I’m going to tell you how I did it and how you can make a similar pendant. It obviously doesn’t need to be a Darwin Fish — the same techniques will work for whatever design you choose.

I initially planned on sculpting the fish and then adding legs using syringe. Then I discovered the existence of a commercial template of Darwin Fish. The smallest one was almost as small as the client wanted. I usually work with Art Clay ™. However, PMC3 ™ shrinks a bit more. The two brands are somewhat different in their working characteristics, but not so much that you can’t switch from one brand to the other. So I used PMC3 ™.

20161126_090310

To produce the fish itself, I rolled metal clay to a thickness of 1.75 mm. Thinner than that, and the three dimensionality that I wanted would have been in peril. Thicker than 2.00 mm, and the fish would have been too thick for the rest of the design.

I covered the template with plastic wrap and pulled it tight. Then, placing the template and plastic wrap over the metal clay, I pressed down around the template. I used my fingers around the larger curves and a metal tool around the smaller ones. The result was a three dimensional Darwin Fish that, after it dried to greenware and I sanded the greenware, looked sculpted but without the work of sculpting.

20161126_090457

I then rolled some metal clay to a thickness of 0.75 mm. I textured it and cut out a shape for the background of the fish. The reason this was thinner than most pendants is that the fish will give the piece additional mass, and I didn’t want it to be too heavy.

20161126_145848

I then attached a the fish to the background. I added a standard bail (same texture as the background). Then I added a line of syringe, so the fish had something to walk on 😉

I20161204_140938

I fired the pendant and tumbled it.

20161207_084347

Of course, most pieces look unfinished coming right out of the tumbler. I patinaed the piece with liver of sulfur. However, I carefully wiped all the patina off the fish itself and actually polished it with silver polish. After all, the fish has no features for the patina to accentuate and, by polishing it, I made it stand out.

20161207_090947

All that remained was to attach a chain. The picture below shows the piece with a coin, for scale.

20161207_093343

That was what I was after! A happy client and a shiny Darwin Fish!

I hope this inspires you to try your own design, no matter how far removed from a Darwin Fish it might be 😉

Acrylic and Metal Clay, a World of Possibilities

Acrylic has many virtues as a jewelry element. It magnifies the design beneath it. It sparkles on its own. It allows perishable items, such a dried flowers or seeds, to be incorporated into jewelry. But, best of all, it is highly compatible with metal clay.

The project I will discuss here used silver clay; any other metal clay will work as well. The acrylic I used was Lisa Palevka’s Magic Glos,(http://store.lisapavelka.com/Magic_Glos_s/1869.htm ) a liquid acrylic that hardens upon exposure to UV light. There are other acrylics on the market, some of which do not require a UV lamp to harden. However, my experience is that the UV lamp is worth the extra effort — it produces a harder acrylic, that is less subject to scuffing from everyday wear.

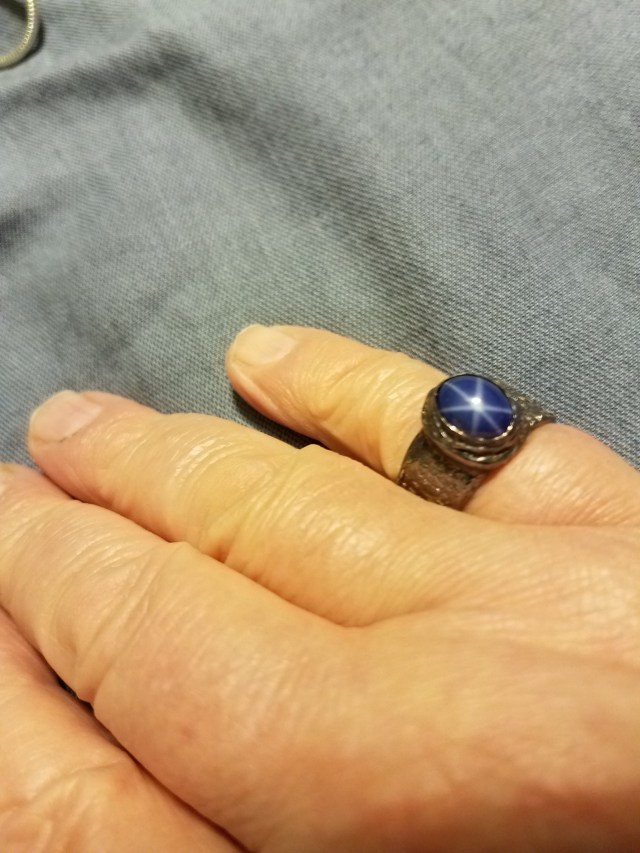
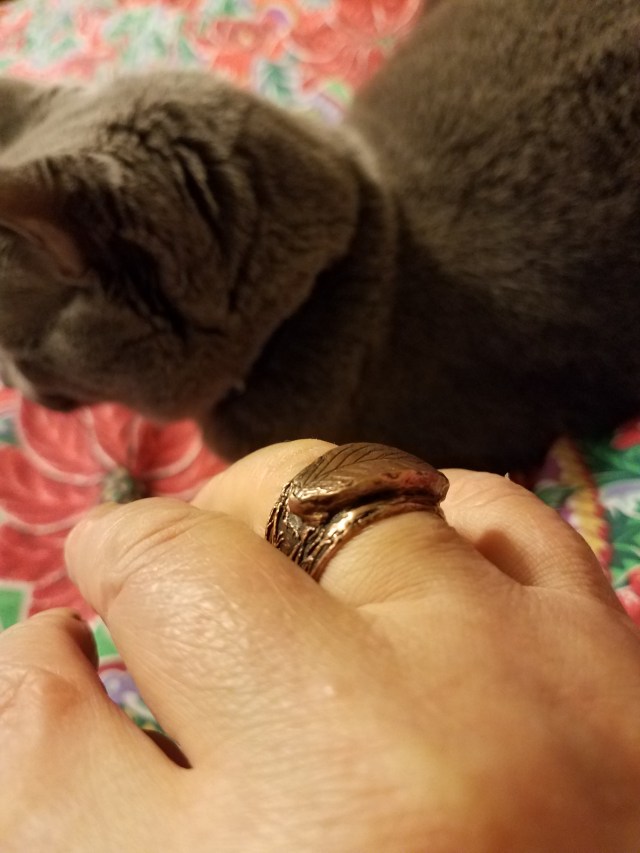
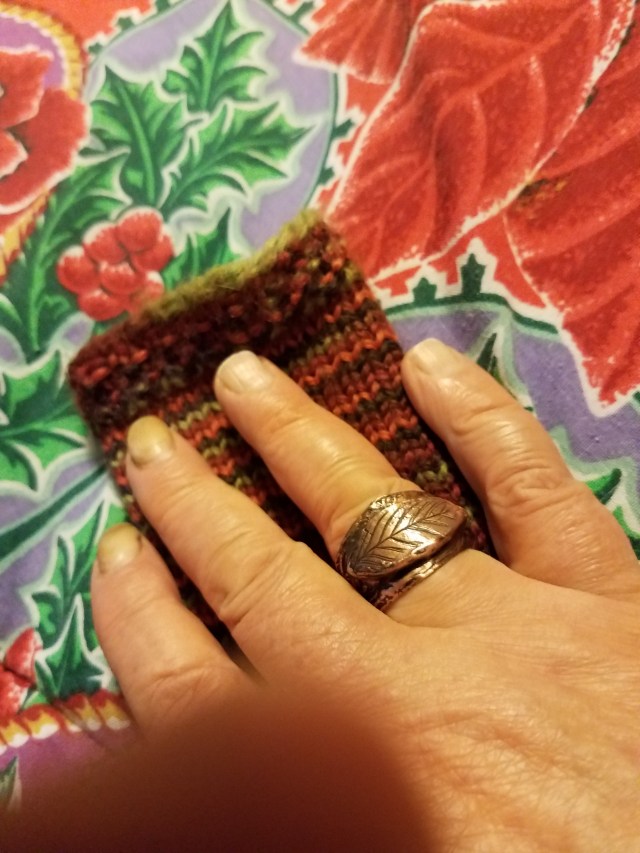
I chose to make a pendant. Earrings work well too. One can even use acrylic in a ring, although such a ring should not be for everyday wear — although acrylic is tough, it can scratch.

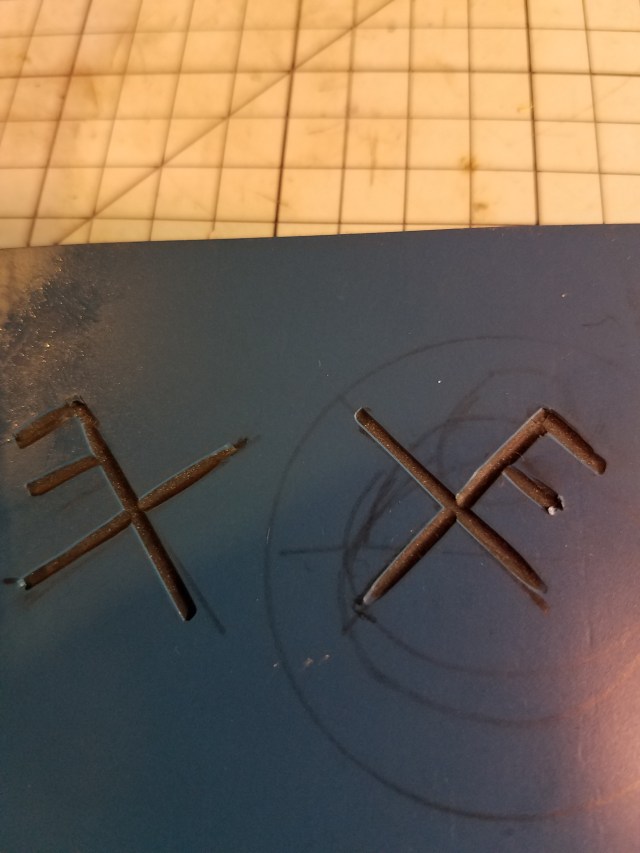
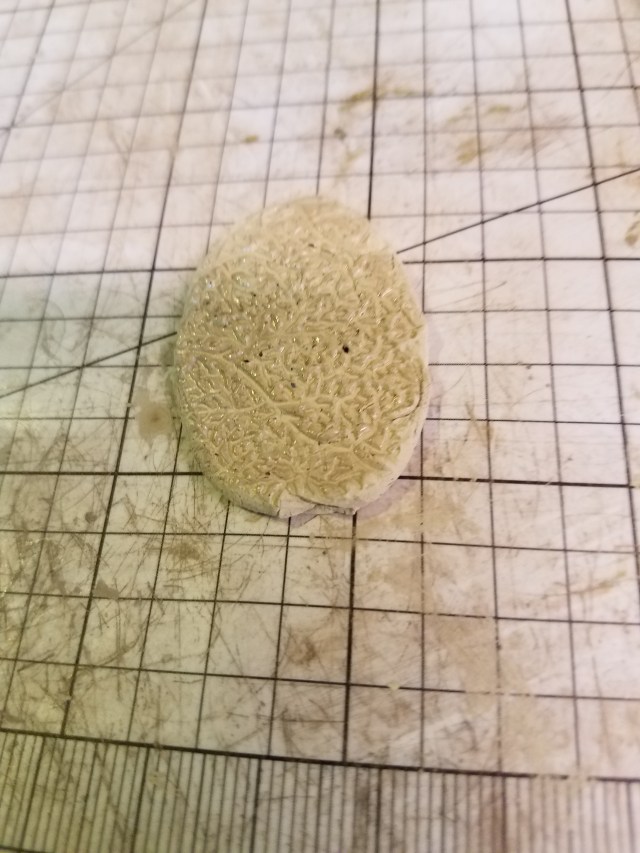
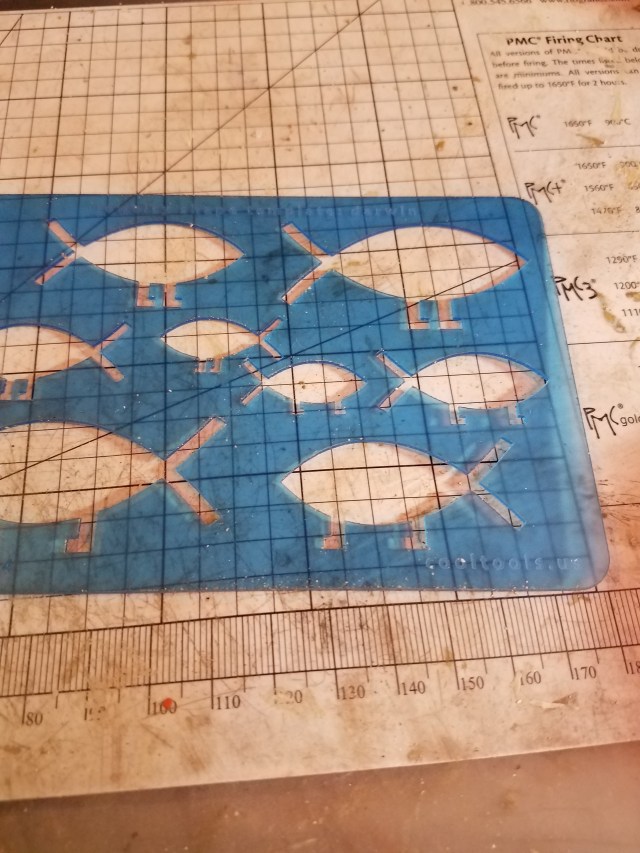
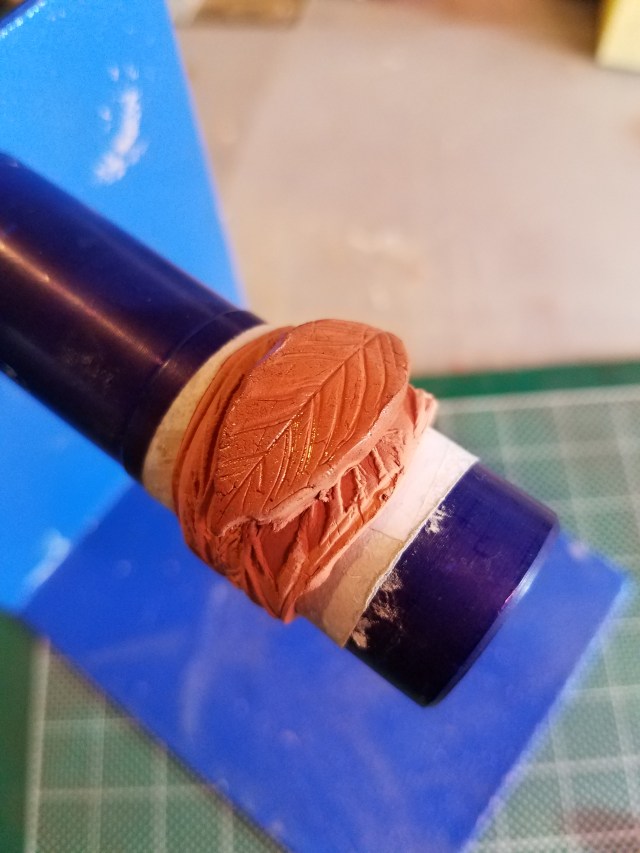
The first step in making my pendant was to cut two shapes from silver clay. The shapes need to be identical, both in shape and size. One needs an opening cut in its middle. That piece is 1.25mm thick; you need the thickness to hold the liquid acrylic, that will be applied later. The other piece can can be thinner (I rolled the silver clay to 0.5 mm).

20161126_091745 
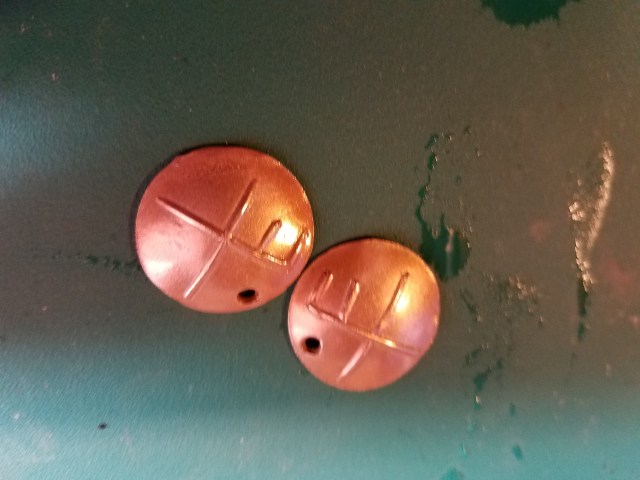
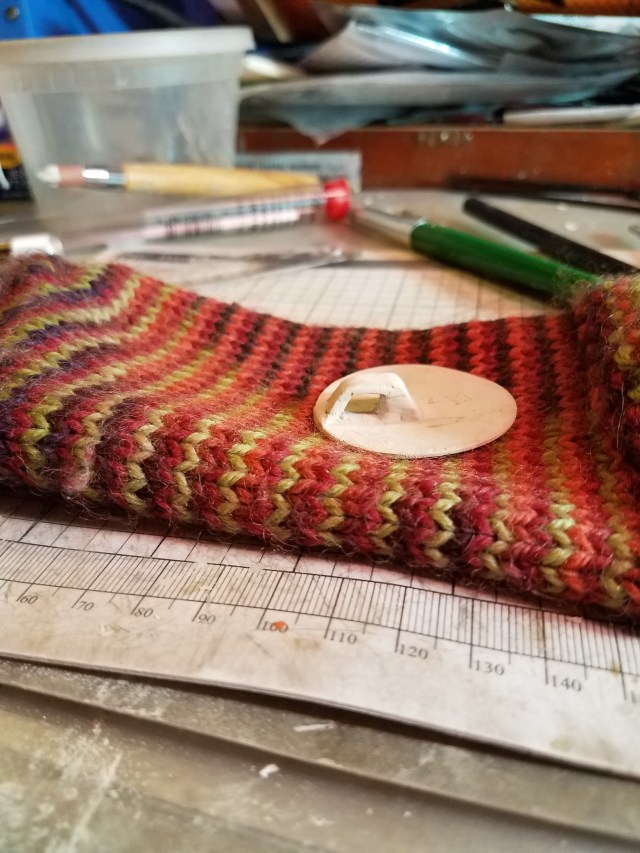
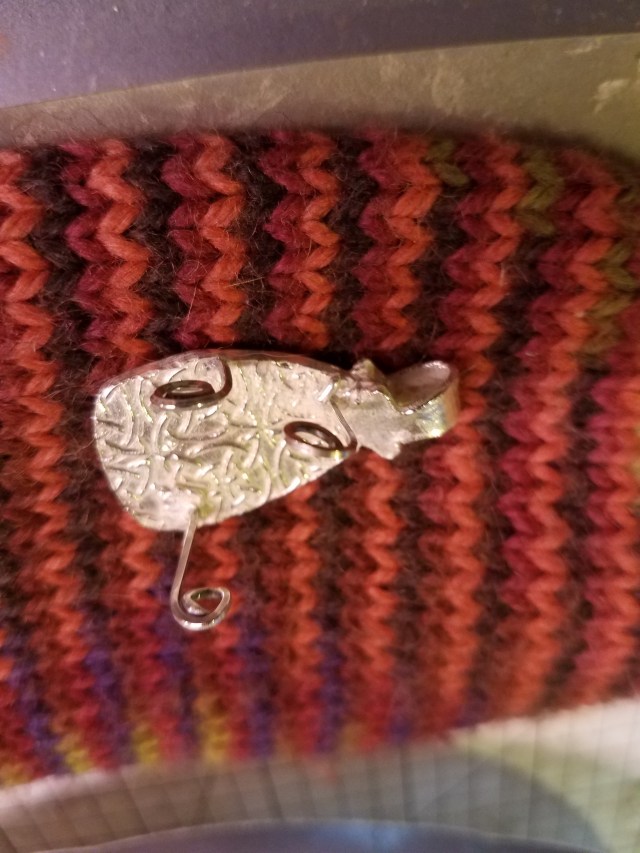
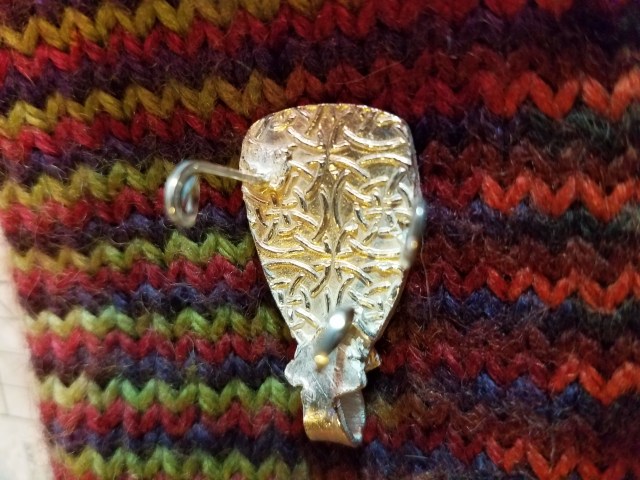
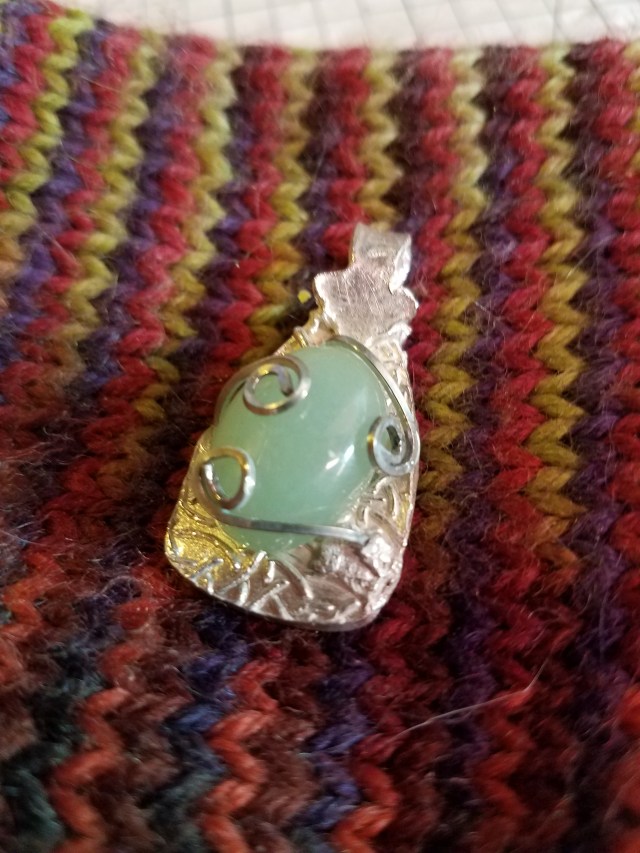
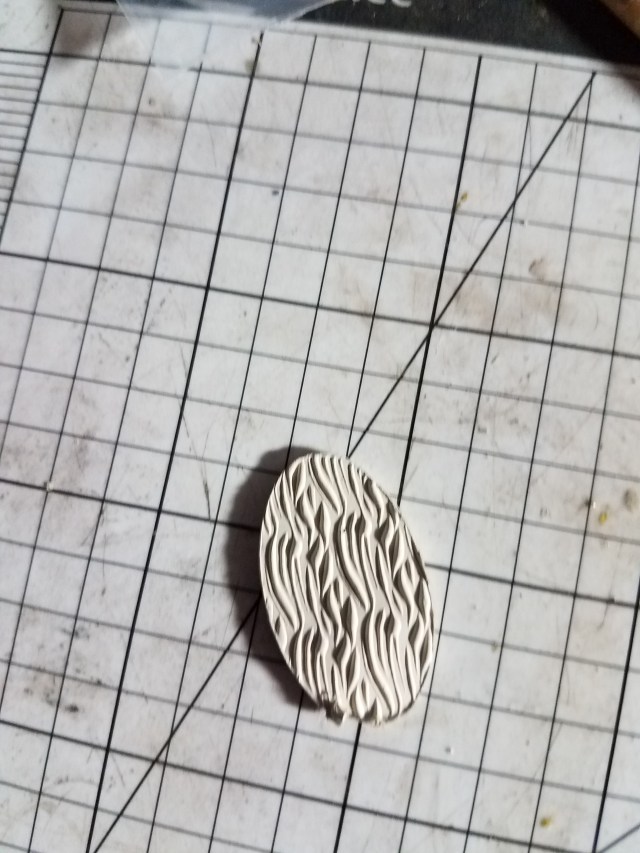
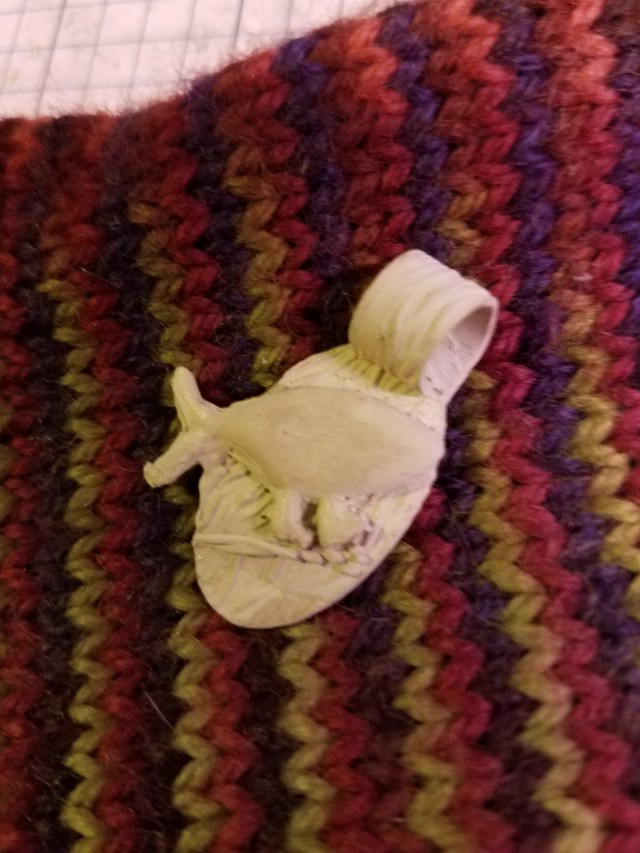
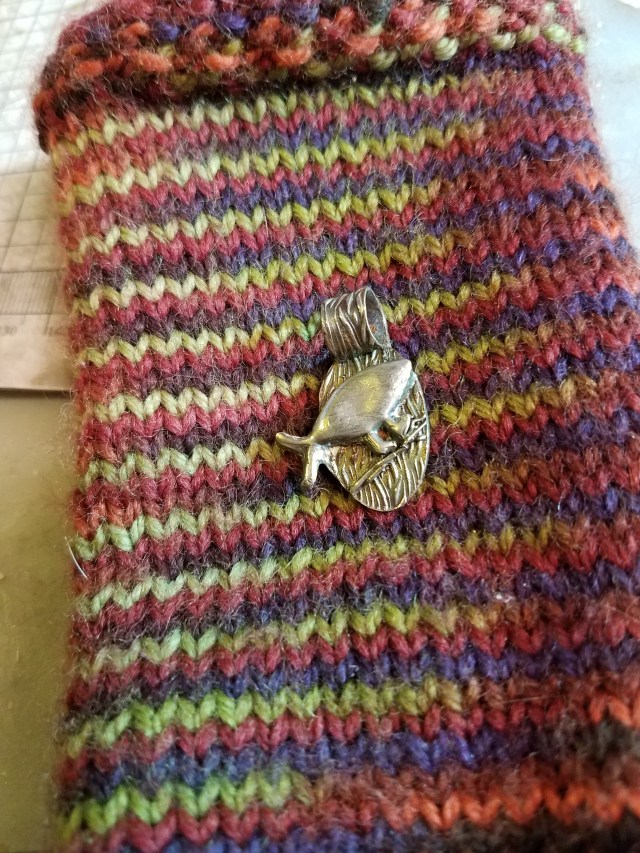
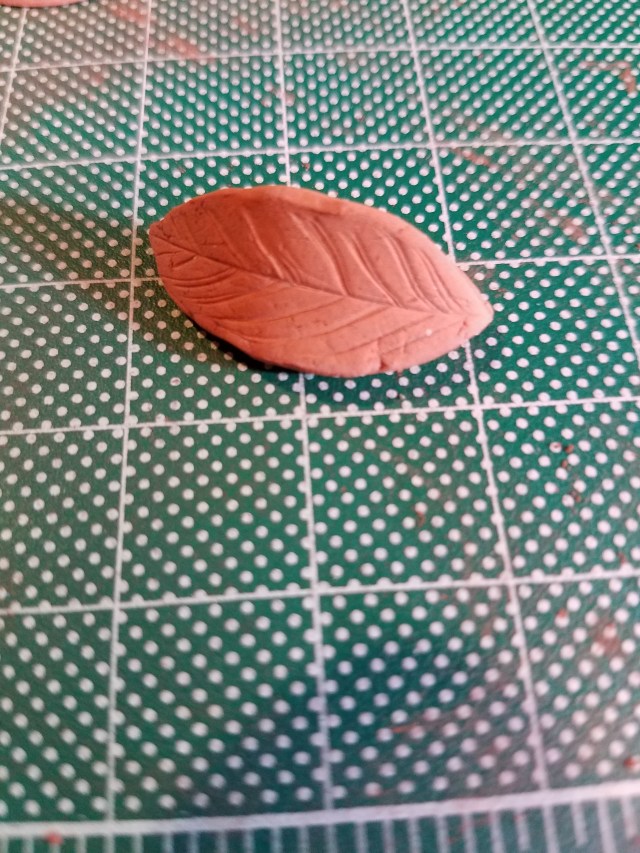
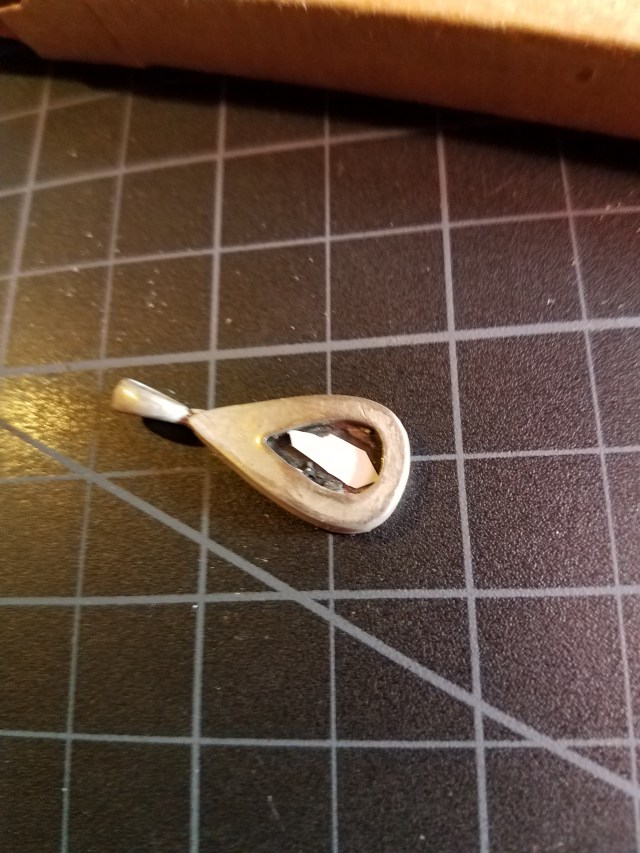
Then one needs to attach the two pieces. I used an embeddable bail, because it allows the piece to lie flat until the acrylic has hardened. If you choose to use some other type of bail, I encourage you to join it in a way that will allow the piece to lie flat. Note that the greenware below has not been finished; there are still rough edges. However, the seams have been sealed. This is important for reasons discussed below.

20161126_145856On the surface, it seems that standard greenware finishing techniques are sufficient. In reality, there is a bit more involved. One must carefully make sure that the seams between the two pieces do not show. Even more importantly, one must be sure that the seams are tight enough so that liquid cannot flow through.

20161204_122325

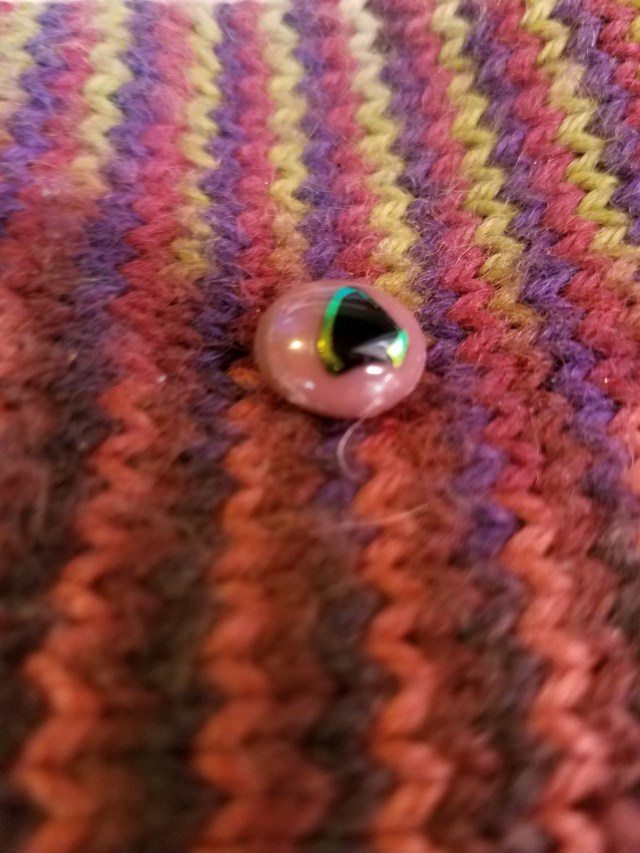
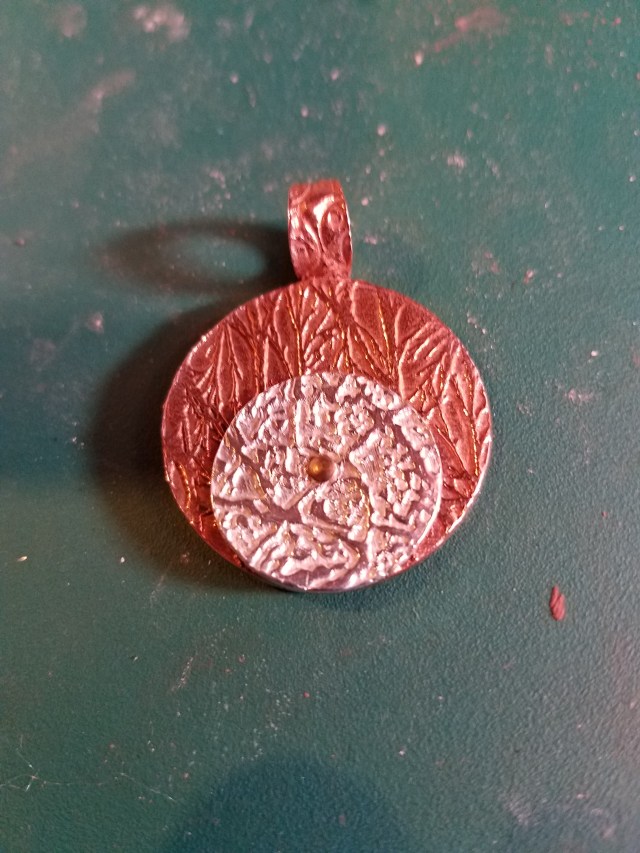
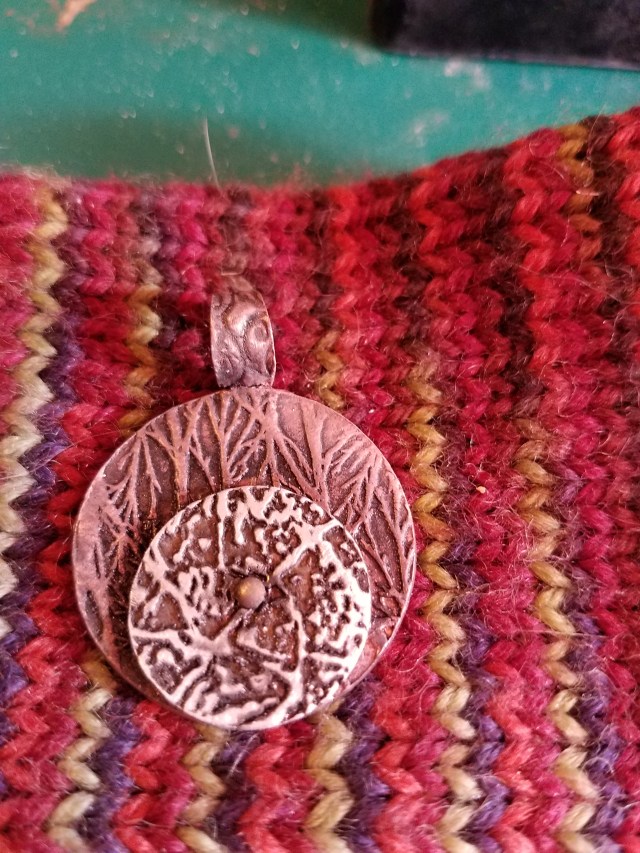
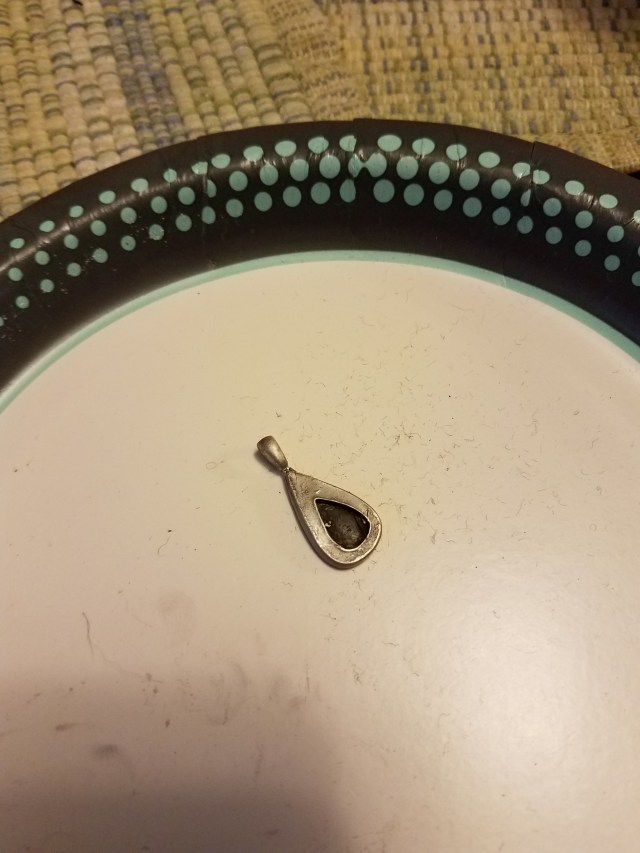
After finishing, the greenware is fired, brushed, and tumbled in the standard way. I used a chip of mother-of-pearl, left over from another project, to be the focal point. Since mother-of-pearl is bright and shiny, I pained the interior black. If you plan on using a dark focal piece, consider painting the interior white or yellow, colors against which a dark focal will show.

It is best to use acrylic paint. There are many forms of coloring that one could use. For example, I have used alcohol inks, although with mixed success. However, I recommend acrylic paint.  Acrylic paint is cheap, easy to clean up, and it will not lose or change its color when exposed to UV light.

Finally, during painting, you might get some paint on the outside of the piece. If you do, don’t worry. Acrylic paint can easily be removed with a damp paper towel while it is wet, and with a fine-grained sand paper after it dries.

20161207_081606

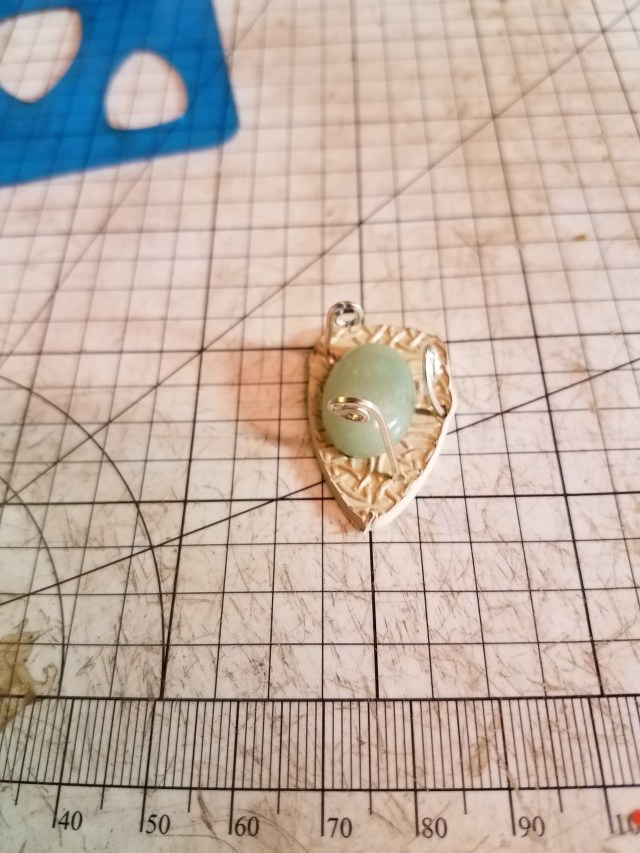
Now, add whatever you wish to be  your focal piece to the well in the silver. As mentioned earlier, I chose a chip of mother-of-pearl. Be sure that the focal piece is completely below the level of the well. If you use something flexible, you can force it down with a toothpick or similar tool. If not, you might have to trim some of it away. By the way, that means that if you use something that will not deform or trim, like a small gem, you must be sure from the first that the well is deep enough.

20161207_091612

Once you have done that, decide if you are going to patina the piece. I did not, but there is no reason you can’t. In fact, I have done so on other pieces. However, if you do patina your work, do so before going on to the next stage. Patinas and acrylic might or might not react well, and it is best not to take the change.

Now, put the liquid acrylic into the well. Go slowly, one drop at a time. You do not want to overflow, because removing acrylic, once it has set, is very difficult. In fact, it is acceptable to underfill. After the acrylic has hardened, you can go back and add more acrylic. Acrylic paint will retain its color through many applications of UV light.

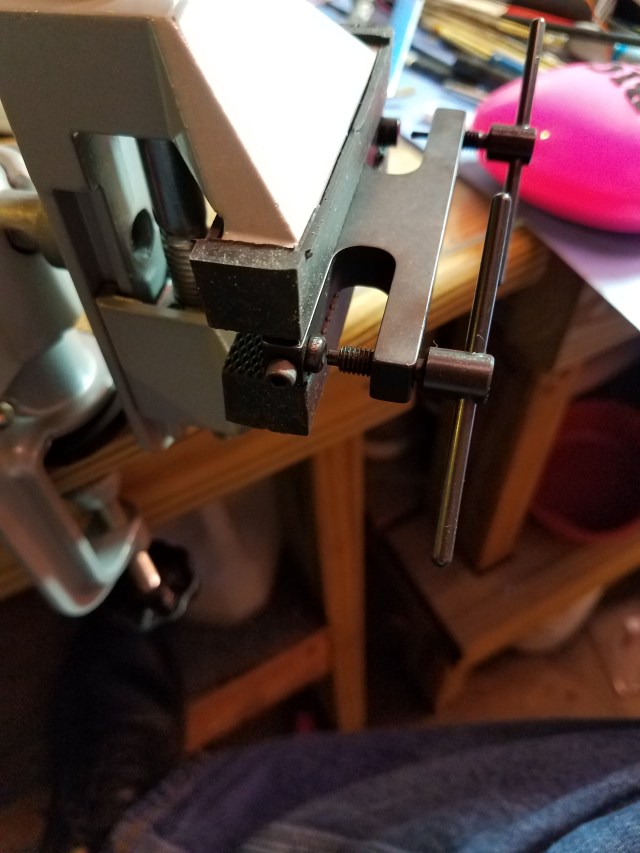
When the well is full, expose it to UV light. It is possible to use sunlight, but that takes a long time, and a UV lamp is very fast. However, if you use a UV lamp, do not look at the lit bulb. UV light is potentially hazardous to one’s eyes. I simply cover the lamp with a towel before turning it on, and then turn it off before I remove the towel, which reduces exposure to potentially harmful UV light to almost nothing.

If your acrylic did not harden, or is sticky to the touch, expose it to a bit more UV light (this is rarely needed). If it doesn’t come up to the edge of the well, add some more liquid and repeat the process. Again, be careful to not let the well overflow.

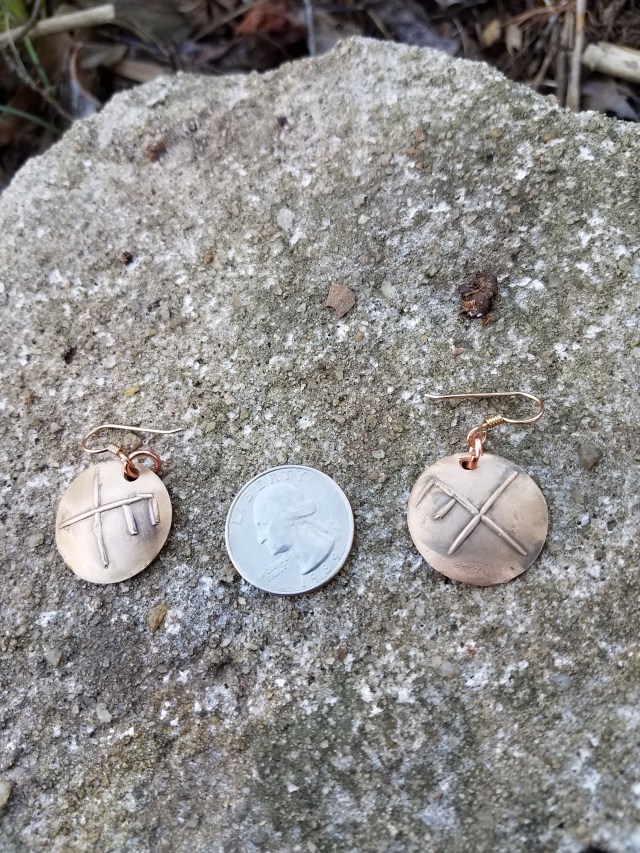
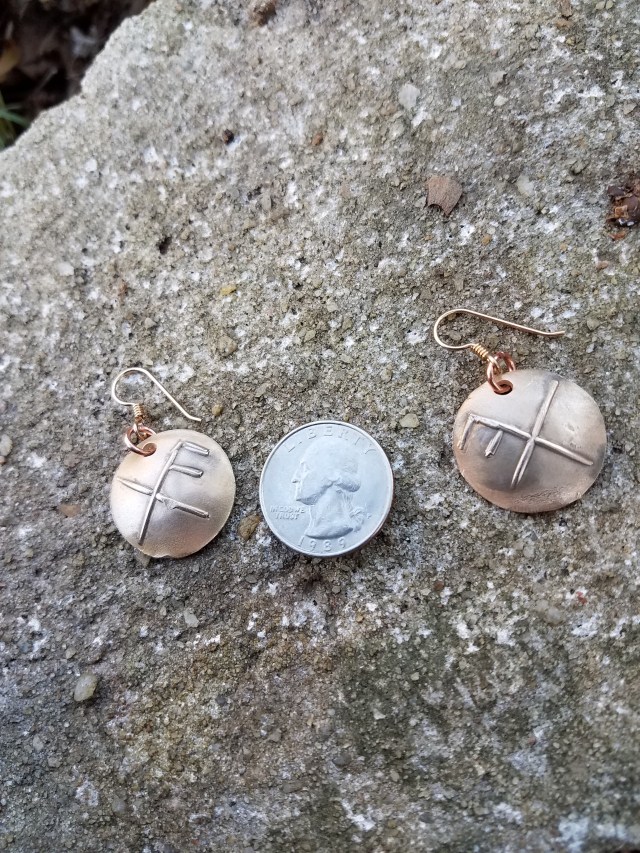
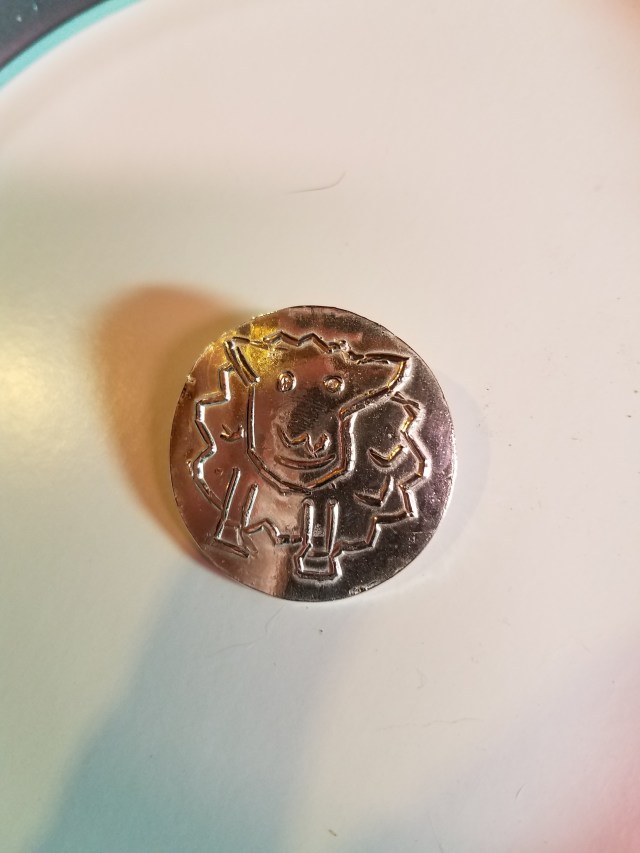
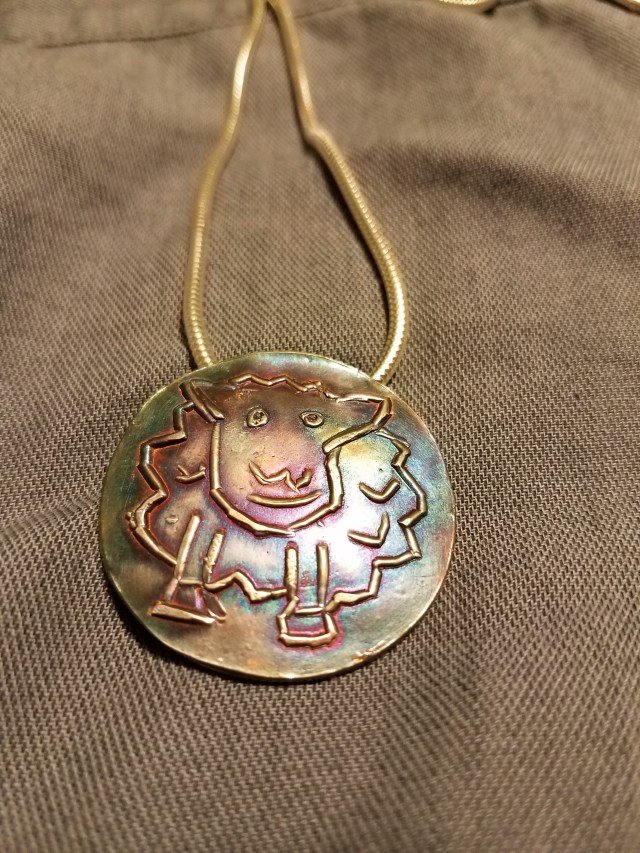
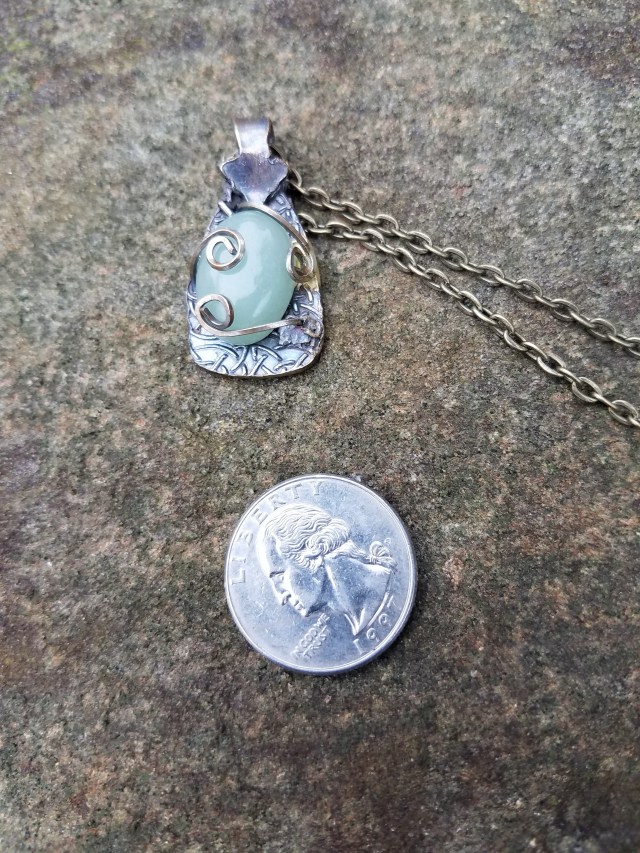
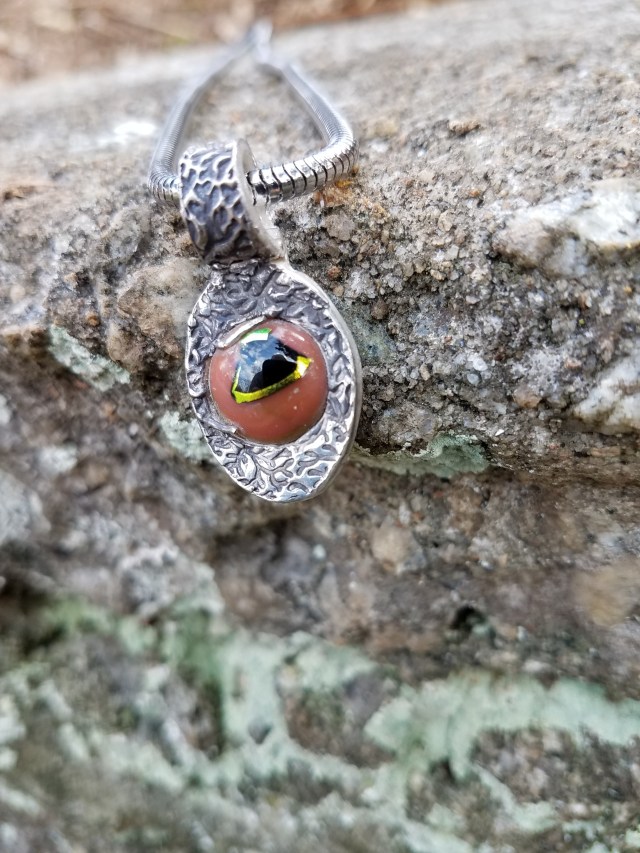
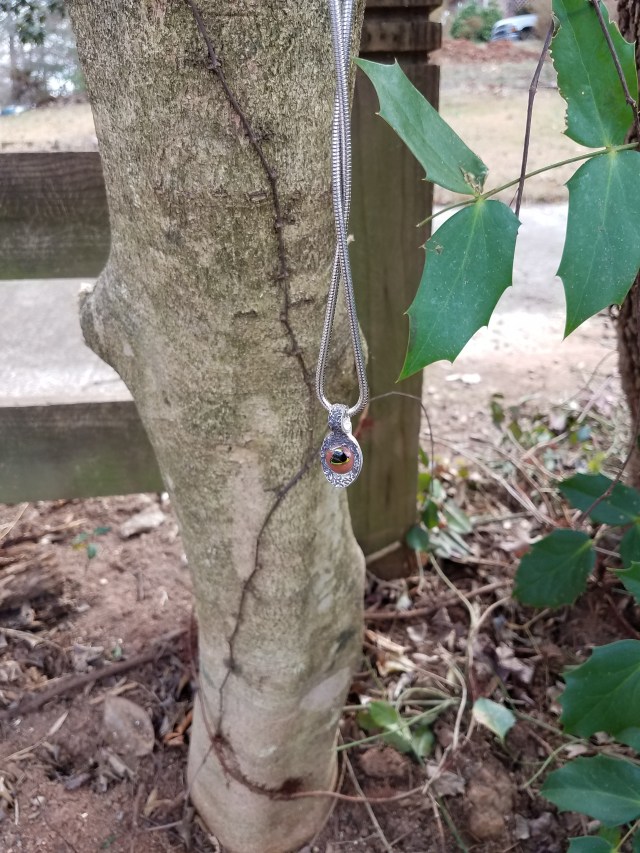
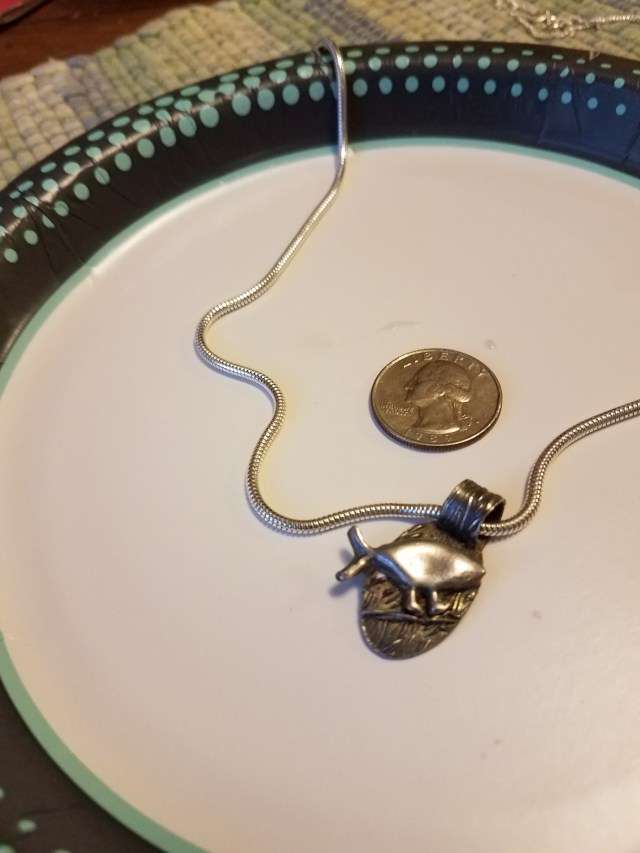
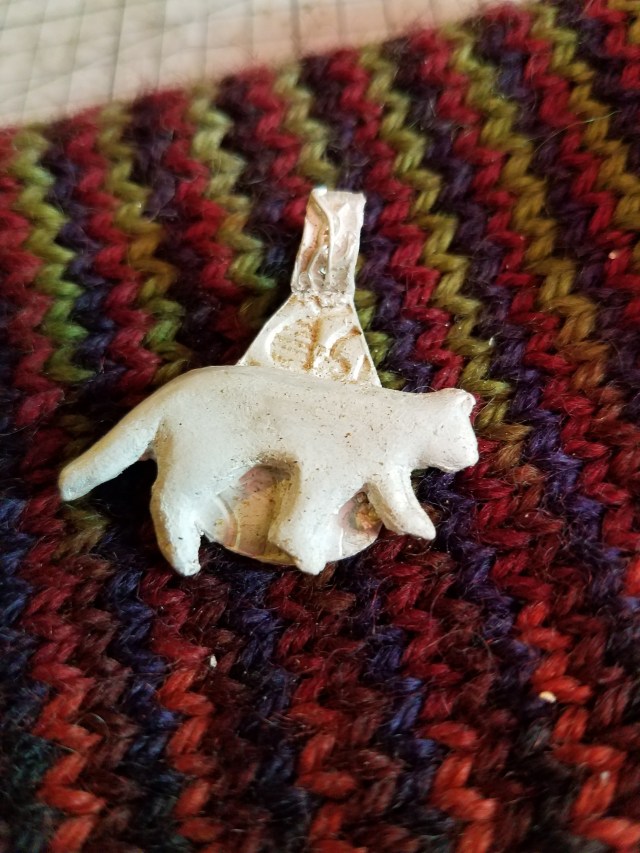
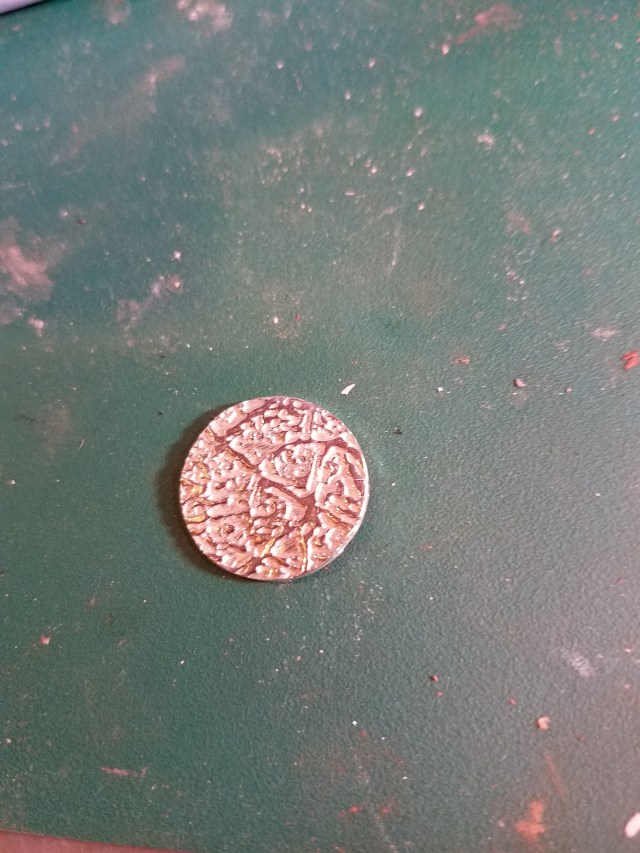
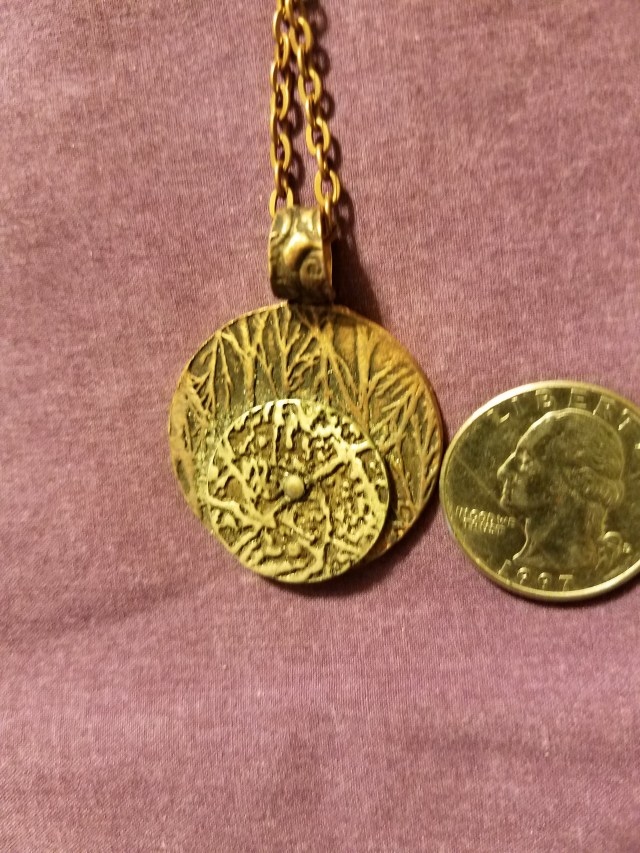
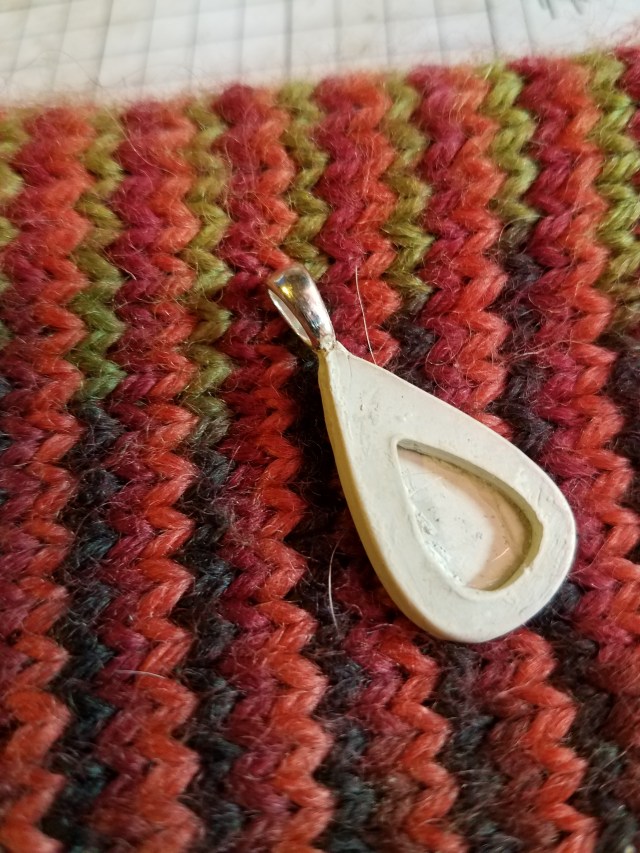
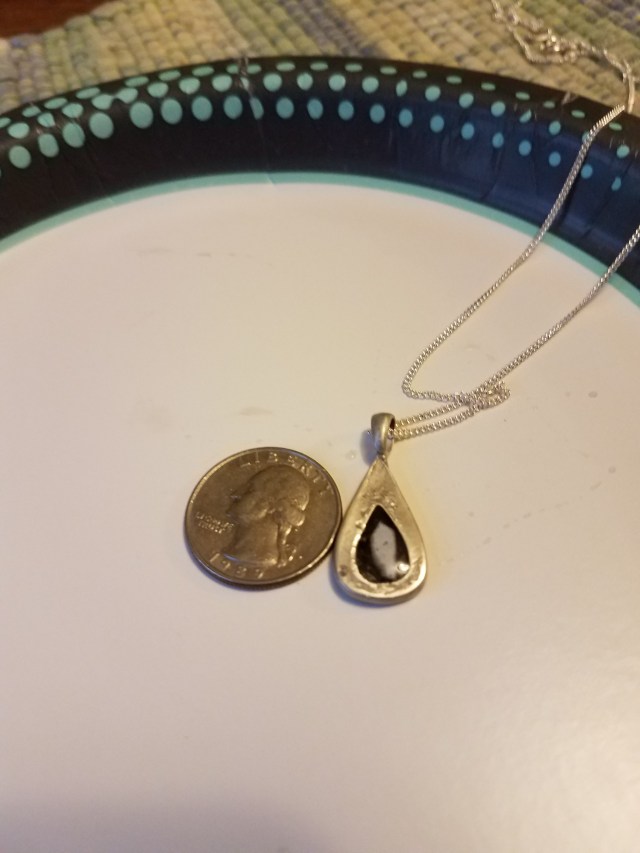
After the acrylic has hardened, you now have your piece. The picture below shows the  pendant on a chain. The coin is for scale.

20161207_093401 Finally,  although I used a chip of mother-of-pearl, do not feel constrained. Many display centers can be embedded in acrylic — dried flowers, seeds, small gemstones. In fact, if one makes a large enough piece, one can even embed a ticket stub from some memorable event.

I hope this has helped you consider the possibility of using acrylic in your metal clay work. The possibilities are as large as your imagination.

For Cat People

There are, of course, may templates available for use with metal and/or polymer clay. These are great, but you don’t need to limit yourself to them! I recently found a stencil for wall paining of cat images. Most were far too large to be practical for use with metal clay. But one of the images, of a running cat with its tail extended, was about an inch and a half. This is not too large for metal clay at all!

My first step was to roll silver clay out to a depth of 2 mm. Then I covered the clay with plastic wrap and placed the stencil atop it. Pushing down, partly with fingers and partly with a metal tool, I flattened the edges of the stencil around the cat. The plastic wrap caused the resulting cat to be naturally rounded (or at least close enough so that it can be finished during greenware finishing).

20161119_130006

The cat, not yet finished, appears above. The next step was to make a background for it. I rolled silver clay to a thickness of 1 mm, then textured it to a thickness of 0.75 mm (there is lots of silver in the cat, so making the backing thinner both reduced the weight and the cost.

20161119_134608

I chose a teardrop and a rather abstract design. Of course what shape and what pattern one uses is completely up to one’s own taste in the matter.

Next, I attached the cat the to background with slip and finished cleaning the greenware. I made a bail, and decorated it with syringe. The greenware, ready to fire, looked like this:

20161124_110241

I fired it and tumbled it. The result appears below. It is almost ready now. However, I thought the background could use a bit more definition.

20161124_141125

I used Blackmax ™ to patina the background. I got as little Blackmax as possible on the cat. Then I carefully polished the piece by hand, removing all the patina from the cat while leaving enough on the background to make it interesting. I still thought it needed a bit more contrast. To address this, I polished the cat (but not the rest of the piece) with Wenol ™ silver polish. That completed the piece! I then added a chain and photographed it with a coin, for scale.

20161124_144459

The result, a lovely piece for a cat lover! And, more importantly, an example of how one does not have to limit one’s self to the templates that are made for metal clay. Other templates, whether original or repurposed from some other use, can serve quite well!!


Riveting Mixed Metal Jewelry

Metal clay gives you many opportunities to work with mixed metal. You can easily combine copper and bronze. You can fire a piece of copper and then set it in silver. You can combine silver and gold. However, if you fire a piece of silver and then want to set it in copper, there’s a problem. The copper probably won’t sinter and, even if it does, it is likely to take several firings. Of course you could solder the pieces together, but one of the joys of metal clay is not needing to solder (of course I can do it — I just don’t like to). However, that doesn’t mean you are out of luck. There are still cold connections.

The most basic form of cold connection is riveting. However, rivets can be tricky. If the rivets and the holes aren’t just the right size, they don’t work. I recently ran into a device that is supposed to make riveting a snap. And, to be honest, it almost does.

Metal Clay Findings’ riveting device (http://www.metalclayfindings.com/Catalog/standard.aspx) lets you rivet metals together with almost no difficulty. What’s the ‘almost’? I can’t see how to use the tool without a vice to hold it. To demonstrate, I’m going to walk through a simple mixed=metal project, a pendant with a silver piece attached to a copper piece.

20161112_085740

To start with, I made a textured silver circle, 1 mm thick. The picture above depicts the disk, without any patina. The texturing is asymmetrical, a design choice on my part. Next I made a textured copper disk, also 1 mm thick, and attached a bail to it.

20161112_085759

This is a picture of the riveting device. You line up the pieces to be riveted on one side, and turn the handle. That makes a hole just the right size for the rivet (which Metal Clay Findings also sells). Then you insert the rivet into the hole, move the piece to the other side, and turn the other handle. That splays the open end of the rivet so the two pieces are firmly joined.

20161112_091356-002

Here are the pieces, riveted together, but without a patina.  The asymmetrical placement of the silver disk was a design choice. In fact, I started to center it, but then I decided I liked the asymmetrical placement better. The fact that I had already made a hole in the center of the copper caused no difficulty, because the silver disk covered it.

The rivet was just a tiny bit rough on the back. I did not want it to be uncomfortable for the wearer, so I ran a file over the back of the rivet. One pass, and the metal was smooth enough to wear comfortably.

20161112_091643

I then applied Maxblack ™ patina, and rubbed the piece in the standard way to make the texture show. The rivet took the patina in an unexpected and, I think, quite attractive way.

That finished the piece. All that was lacking was to add a chain. (I confess the photo wasn’t very well lit, but the coin beside it provides scale).

20161113_112543

If you want to expand your metal clay work to include riveting but don’t like the traditional method of drills and special purpose hammers, Metal Clay Findings’ riveting tool might be for you.


A Copper Ring

20161022_164427

Most of us make rings from silver (soft, but will work if you don’t wear them every day) or sterling (more resilient, but a bit harder to work with). Well, why not copper? Here, I’m going to talk about making a copper ring, making it a bit less vulnerable to denting/bending, and making it wearable without discoloration of the skin.

My experiments with pure copper rings found them to be a bit too soft. However, bronze is much sturdier than copper. After some experimentation, I found that mixing one part fast fire bronze clay with six parts of copper clay yields a metal that looks like copper while being more resilient. How do you fire such a chimera? I confess that I did not do extensive experiments. I fired at bronze temperature (1525 degrees in my kiln, although you need to determine the right temperature for bronze in your kiln my experimentation), in coconut charcoal. I held the temperature for three hours. That resulted in fully sintered metal. Could it have been fired less? Could I have used another form of charcoal? I do not know. I’m only reporting what I did, and that it worked.

20161015_134915

Since this was an early experiment in making a copper ring, I did not try to set a stone. Instead, I made a decorative piece that would serve as a stone by using a mold of a leaf.

20161010_151235

I made a ring shank by the usual methods. This picture shows the ring shank, with the decorative leaf atop it, in the wet clay state. The ring shank was textured using a commercially available texture sheet. It’s a matter of taste, but to me, untextured copper isn’t visually appealing. With silver and gold, you can get by without texture. You probably can with bronze, it depends on the piece. But I believe copper really needs a texture.

20161020_191436

After the clay dried, I attached the leaf by making a paste of copper clay. The picture above is the ring prior to greenware clean-up.

Greenware cleaning, the most laborious part of any metal clay project, was done in the usual manner. The ring was fired, as described above. I tumbled it in a shot tumbler for four hours. The reason for the relatively long tumble is that it just didn’t seem shiny enough after two hours. Leaving for another two did the trick.

I used Blackmax brand patina to color the copper, and used a nail block (reserved for that purpose) to remove most of the black, leaving the raised parts of the metal to show.

20161022_164257

One step remains before the ring becomes wearable. Copper will tarnish and discolor the skin. There are at least two ways to avoid this. The most reliable is to buy a spray bottle of the substance that musicians use to prevent brass instruments from tarnishing. Taking the spray bottle and the jewelry outdoors (because the spray smells terrible), spray and then let dry. Repeat the process. Turn the jewelry over. Spray and let dry twice more. However, you might not have access to this spray. There is a lower-tech solution. Coat the copper jewelry with clear nail polish, and let dry thoroughly. The nail polish will eventually wear through and have to be replaced, but it takes a while. Also, the nail polish, to my eyes, slightly dulls the color of the metal. The difference is small, and it might or might not matter to  you.

20161022_164306

So there you are, a copper ring. I hope this encourages you to add copper to your list of ring making materials, if it isn’t already there.