

Metal clay gives you many opportunities to work with mixed metal. You can easily combine copper and bronze. You can fire a piece of copper and then set it in silver. You can combine silver and gold. However, if you fire a piece of silver and then want to set it in copper, there’s a problem. The copper probably won’t sinter and, even if it does, it is likely to take several firings. Of course you could solder the pieces together, but one of the joys of metal clay is not needing to solder (of course I can do it — I just don’t like to). However, that doesn’t mean you are out of luck. There are still cold connections.
The most basic form of cold connection is riveting. However, rivets can be tricky. If the rivets and the holes aren’t just the right size, they don’t work. I recently ran into a device that is supposed to make riveting a snap. And, to be honest, it almost does.
Metal Clay Findings’ riveting device (http://www.metalclayfindings.com/Catalog/standard.aspx) lets you rivet metals together with almost no difficulty. What’s the ‘almost’? I can’t see how to use the tool without a vice to hold it. To demonstrate, I’m going to walk through a simple mixed=metal project, a pendant with a silver piece attached to a copper piece.
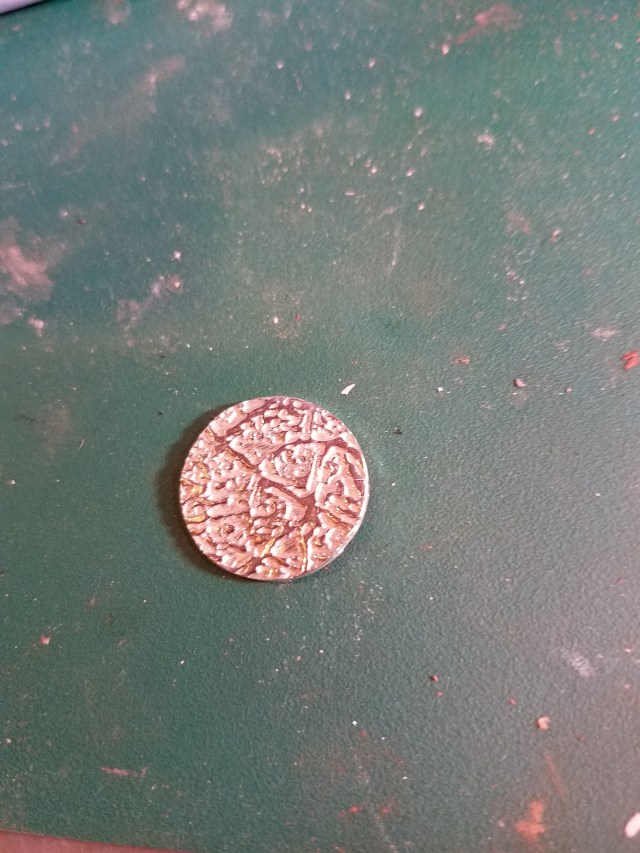
To start with, I made a textured silver circle, 1 mm thick. The picture above depicts the disk, without any patina. The texturing is asymmetrical, a design choice on my part. Next I made a textured copper disk, also 1 mm thick, and attached a bail to it.
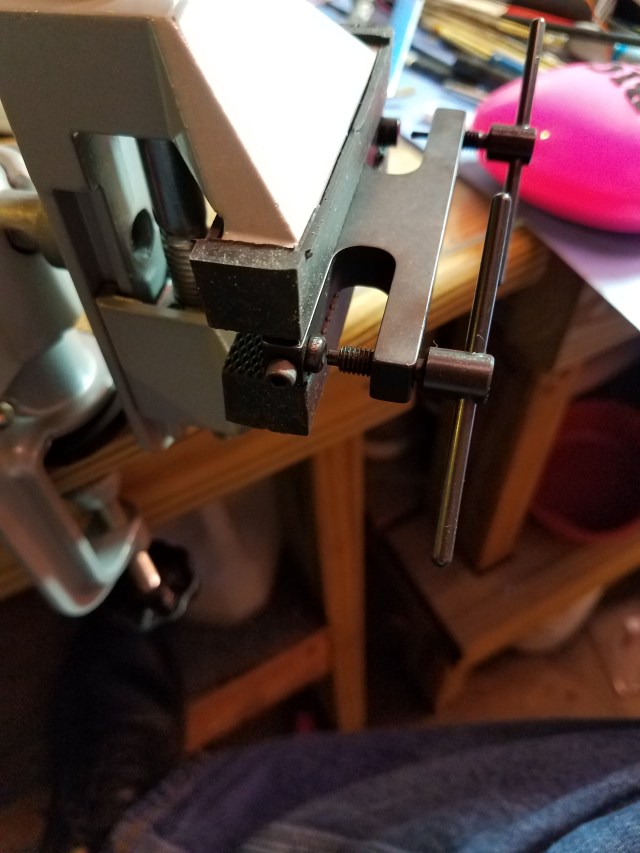
This is a picture of the riveting device. You line up the pieces to be riveted on one side, and turn the handle. That makes a hole just the right size for the rivet (which Metal Clay Findings also sells). Then you insert the rivet into the hole, move the piece to the other side, and turn the other handle. That splays the open end of the rivet so the two pieces are firmly joined.
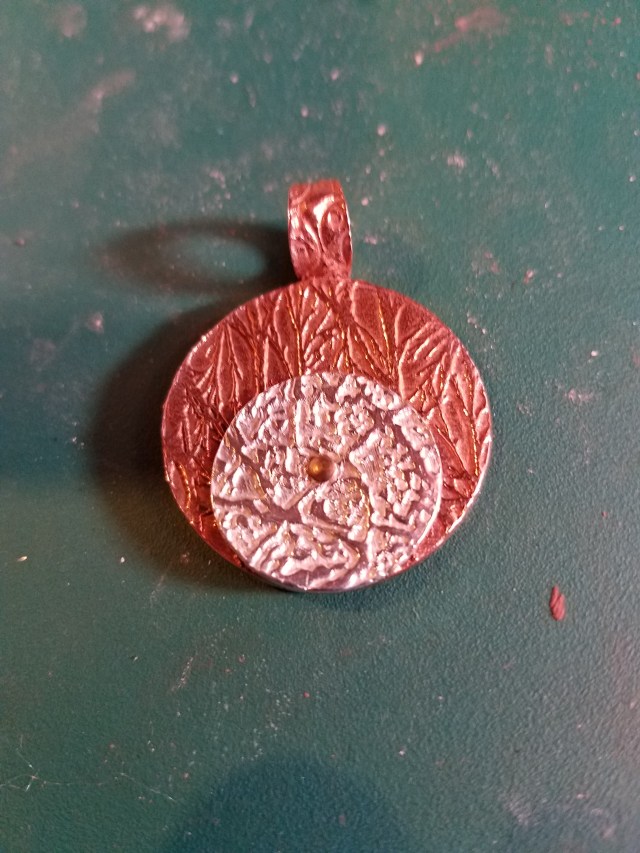
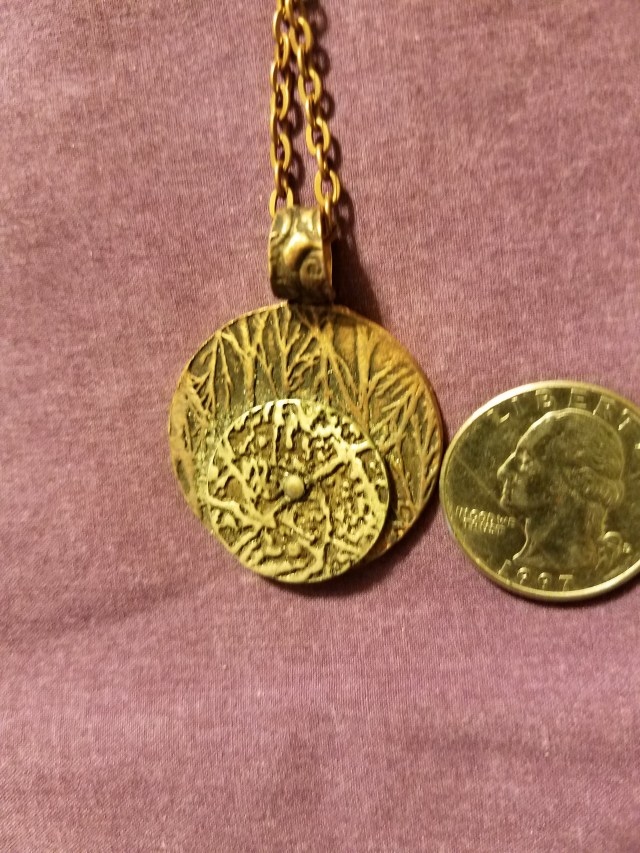
Here are the pieces, riveted together, but without a patina. The asymmetrical placement of the silver disk was a design choice. In fact, I started to center it, but then I decided I liked the asymmetrical placement better. The fact that I had already made a hole in the center of the copper caused no difficulty, because the silver disk covered it.
The rivet was just a tiny bit rough on the back. I did not want it to be uncomfortable for the wearer, so I ran a file over the back of the rivet. One pass, and the metal was smooth enough to wear comfortably.
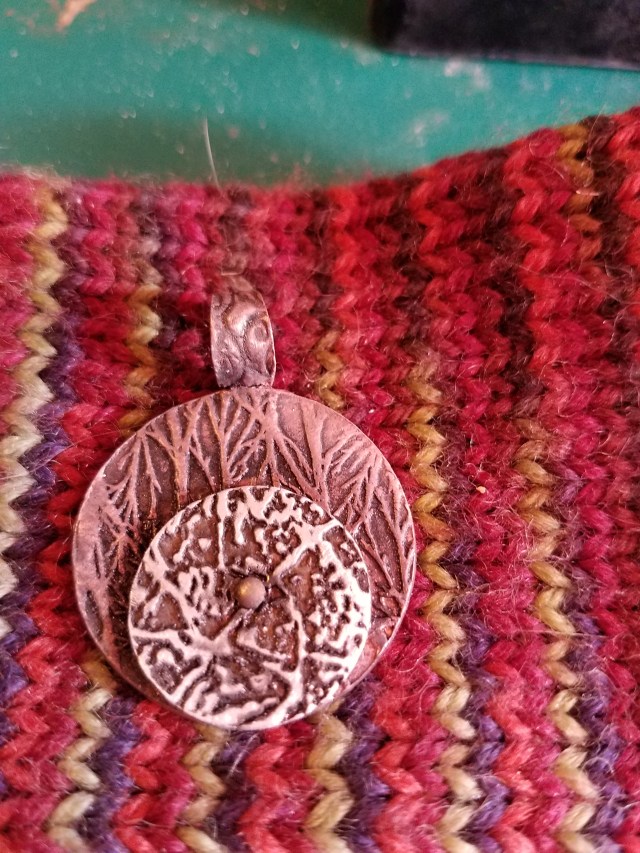
I then applied Maxblack ™ patina, and rubbed the piece in the standard way to make the texture show. The rivet took the patina in an unexpected and, I think, quite attractive way.
That finished the piece. All that was lacking was to add a chain. (I confess the photo wasn’t very well lit, but the coin beside it provides scale).
If you want to expand your metal clay work to include riveting but don’t like the traditional method of drills and special purpose hammers, Metal Clay Findings’ riveting tool might be for you.
