Sculptural Rings

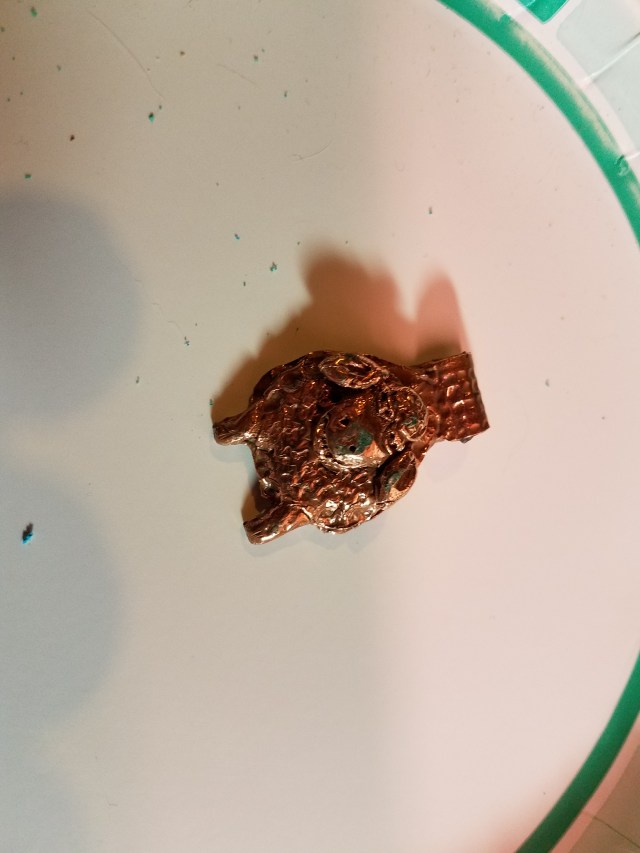
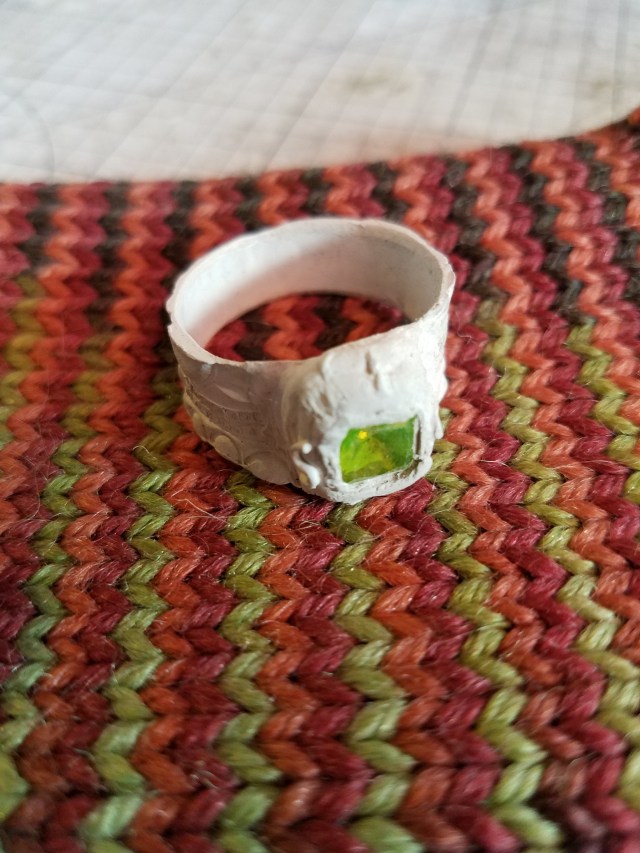
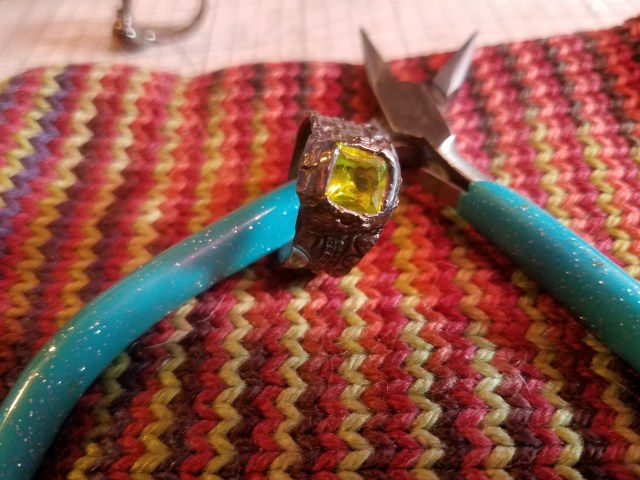
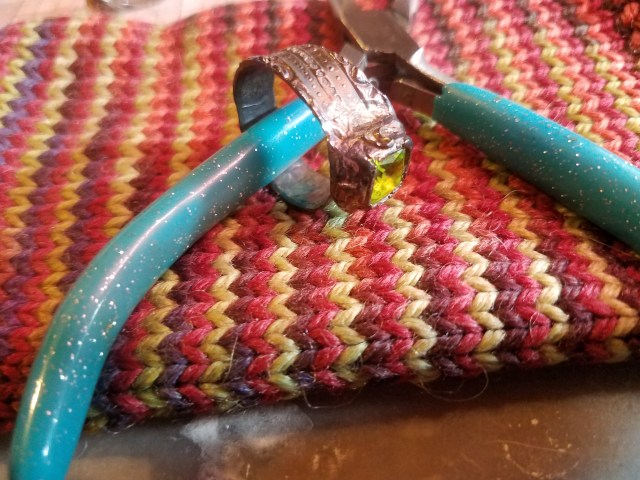
Metal clay rings are relatively easy to make — make a band, texture it, dry it on a ring mandrel, add a setting and there you go. However, it is possible to make quite interesting, organic looking sculptural rings.

20180722_155024

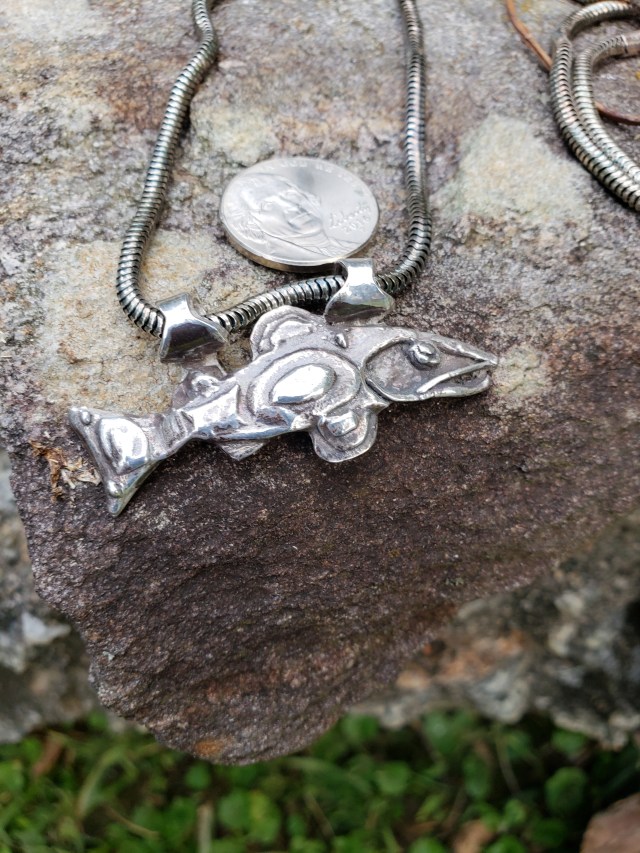
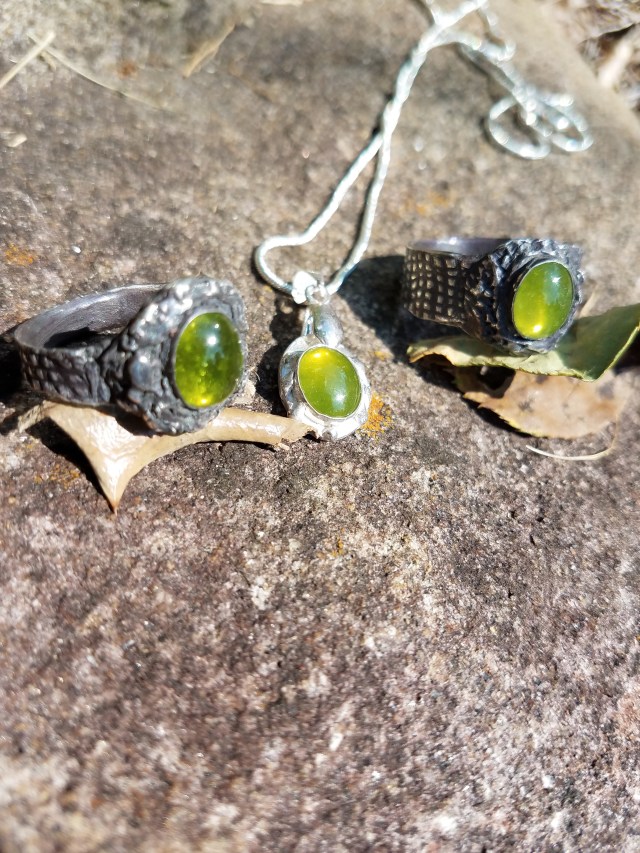
The rings above are made of silver. They are set, from left to right, with a colorless CZ, a garnet, and a malachite. Each is a basic metal clay ring with some sculptural detail added to give it an organic look. The stone in the ring with the face was deliberately set off-center, to provide visual balance. The other two stones are centered. I will discuss the additions from right to left (so the face, the most technically demanding of the three embellishments I discuss, can come last).

Leaves. Leaves are remarkable easy to make. Using a clay shaping tool (or even one’s fingers), form a small sphere of metal clay. It doesn’t have to be perfect. In fact, it doesn’t have to be very good at all. Then, using one’s fingers, roll one end of the sphere so the whole thing becomes a teardrop. Now flatten it. There you go, instant leaf. It can be made more leaf-like by adding veins. This can be done with a needle tool or by adding small amounts of clay shaped into veins.

Vines. Vines are even easier than leaves. Obtain two small pieces of clean plexiglass. Role a small amount (it will probably take less than you think) of metal clay into a sausage. Place this on one of the pieces of plexiglass. Tilt the other piece at a slight angle. Then roll the metal clay between the two, not too fast and not too slow. As you roll, the clay will transform into a long narrow rope. If the two pieces of plexiglass are parallel, the width of the rope will be constant. If there is an angle, the rope will be narrower at one end than the other. With this narrowing, you wind up with a vine. Pieces can be attached to greenware with slip.

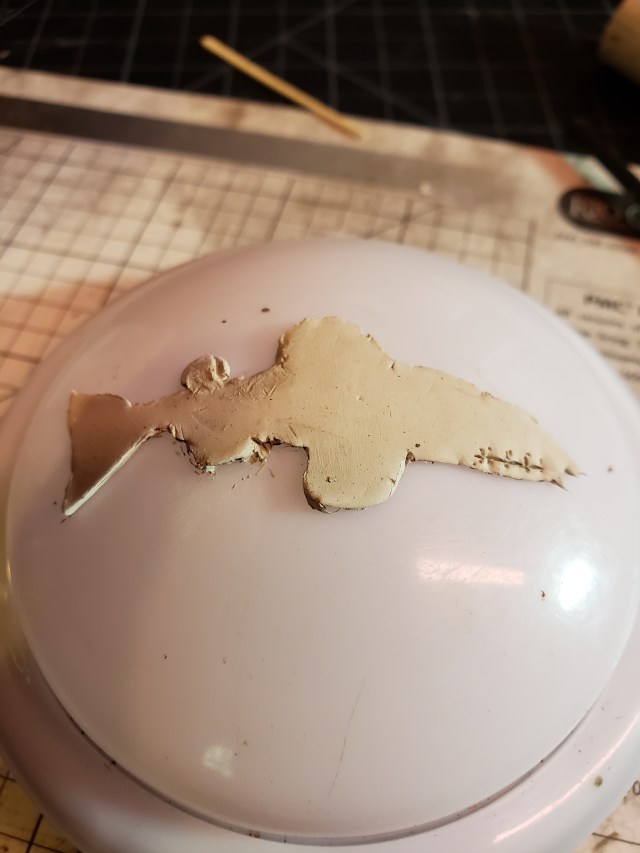
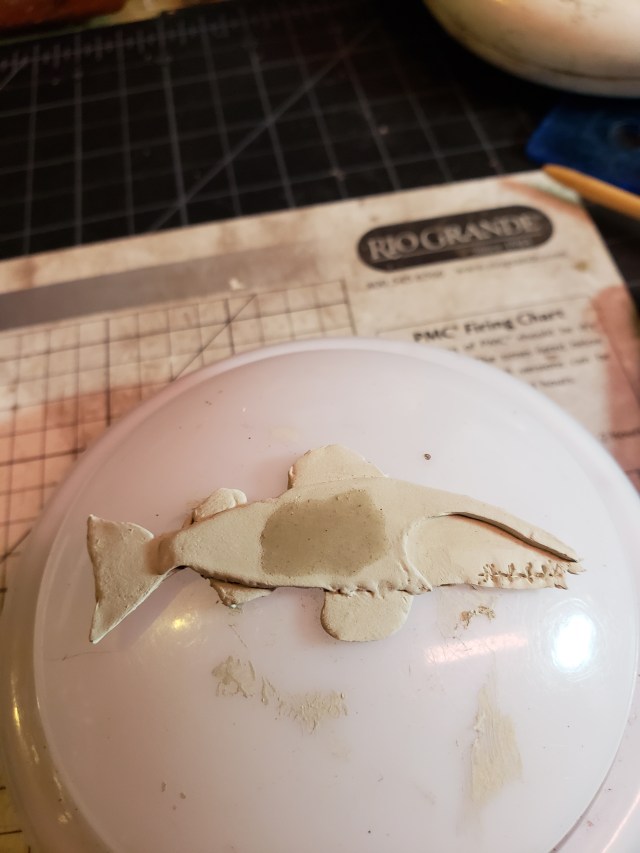
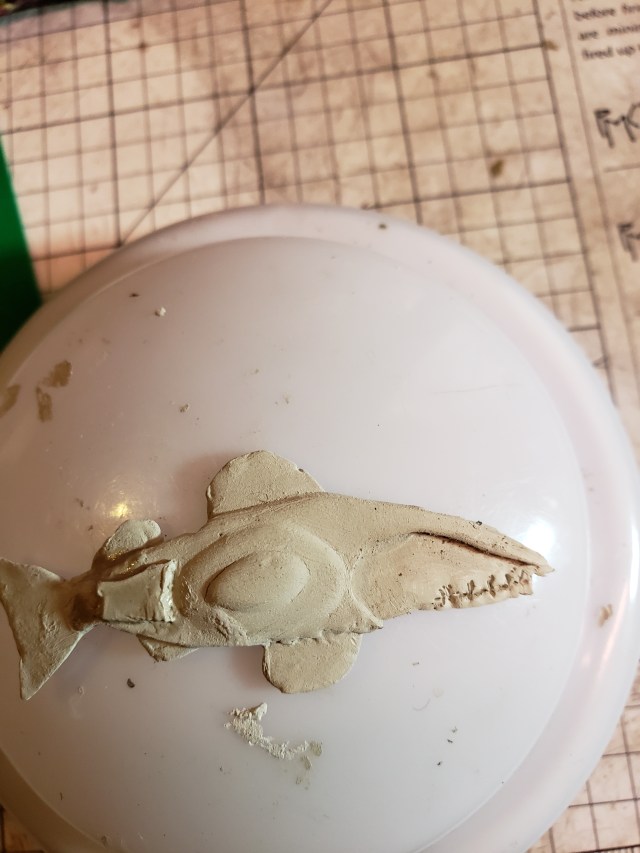
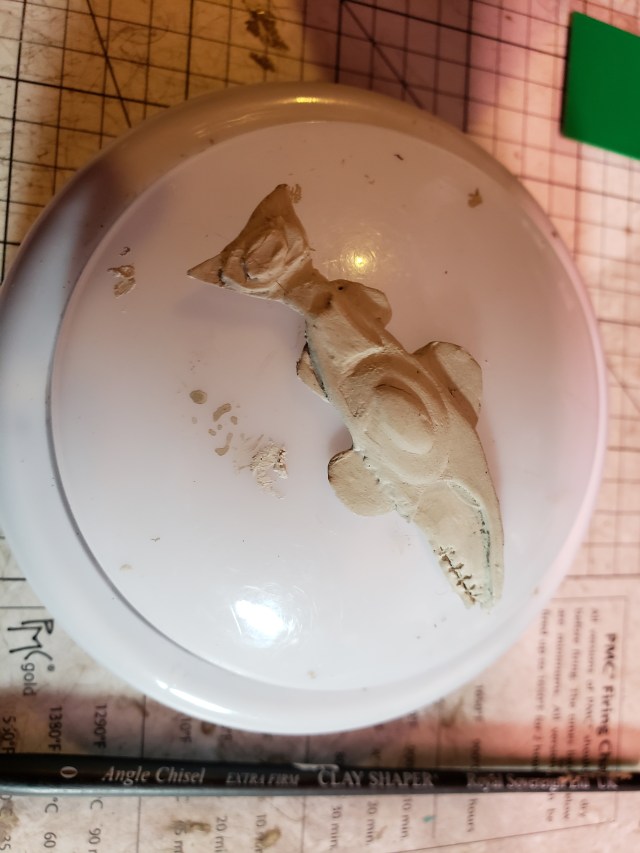
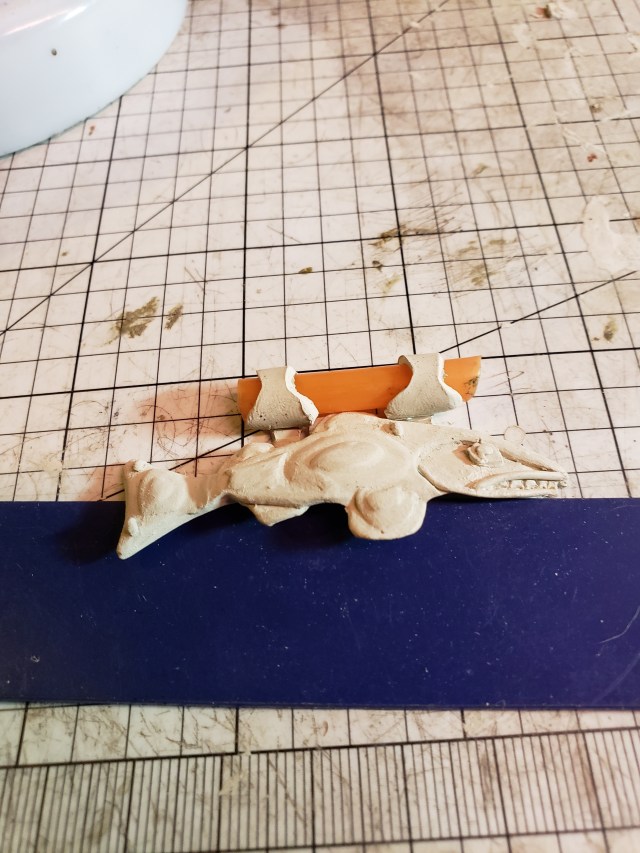
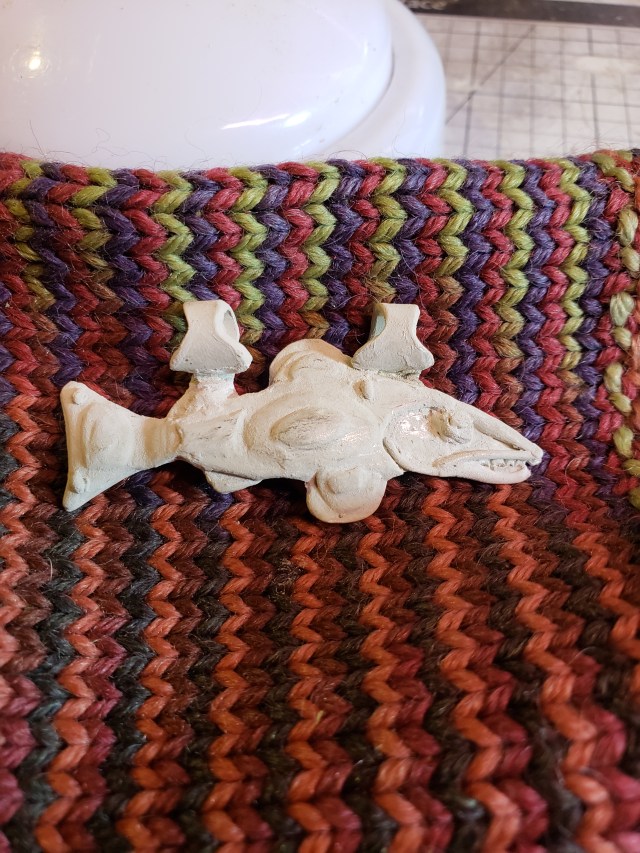
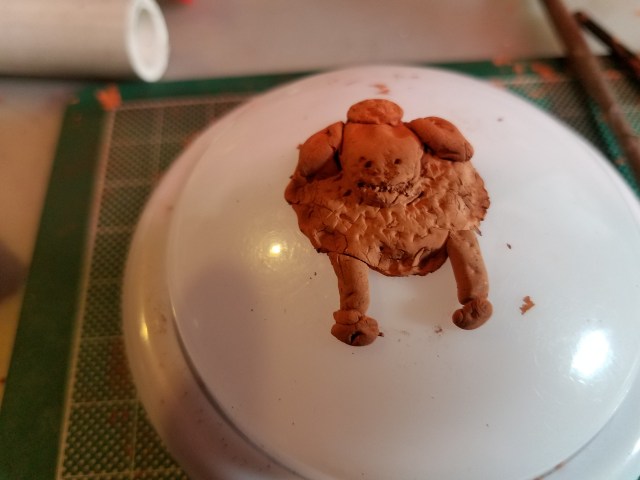
Face.  To make a face, have a piece of wet clay where the face it to be located. While I used a rounded rectangle, any shape you choose — circles, triangles, whatever — will work just fine. Using a tool, make two indentations that will eventually be the eyes.

To make the eyes, create two tiny spheres of metal clay, about the same size. Place them in the indentations, attaching with slip. These will be the eyeballs. When the eyeballs dry, make four very small vines (as above). These are then attached to become the eyelids.

If you want bug-eyes, make the spheres larger than the indentations are deep. If you want more normal looking eyes, make them smaller.

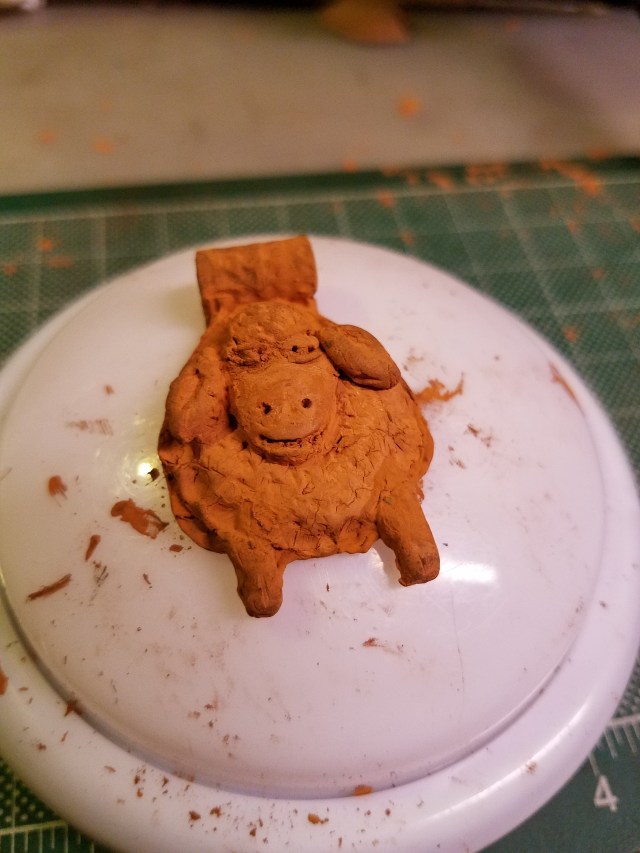
To make a mouth, make two more vines, or two ropes. If the two pieces of plexiglass are parallel, you get a rope. If they are angled, you get a vine. Both are fine, although they give you different looks. Attach them with slip to form lips. While it is possible to create teeth, they will not be visible unless the mouth is very wide open. So, if you want teeth to show, make a big, wide open mouth.

Finally, to make the nose, roll a small ‘sausage’ of metal clay. Attach it with slip. When it dries, make two small ovoids of metal clay, flattening one side with a clay shaper. Attach them to the bottom of the ‘sausage’, giving the nose a bulb. If you want to, you can add nostrils using a needle tool or very fine clay shaper.

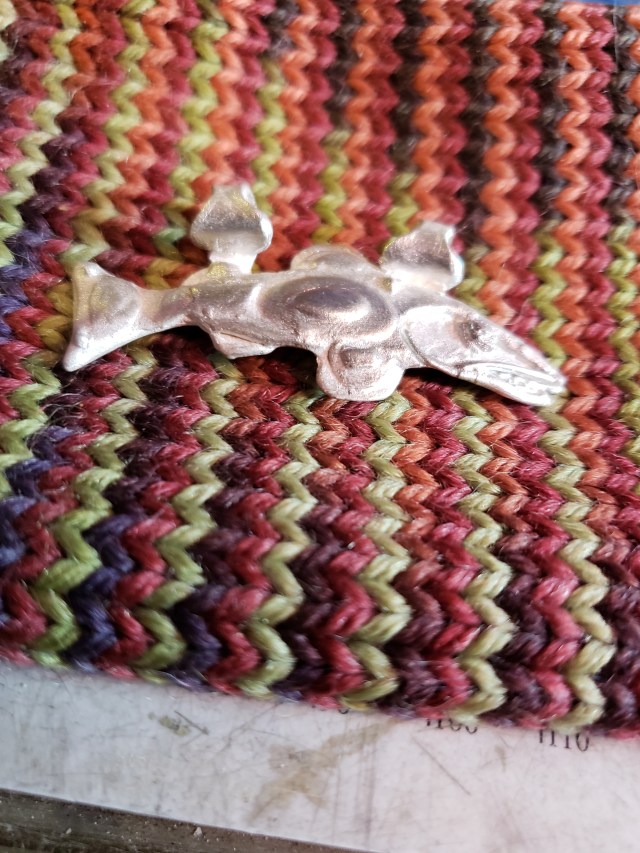
Finally, as mentioned above, I used a colorless cubic zirconium cabochon in the face ring. Before faceting was common, most stones were cut as cabochons — including diamonds. Diamond cabochons, because they are rarely seen, give your work an exotic look. Real diamond cabochons are, obviously, expensive. However, a transparent cubic zirconium is a remarkable good approximation.

I hope I have inspired you to experiment with sculptural rings.  They aren’t particularly difficult to make, and produce some eye-catchingly unique jewelry.


Northwest Pacific Art in Metal Clay

The Native peoples of the Pacific northwest of the United States have a unique art style ( https://en.wikipedia.org/wiki/Northwest_Coast_art); actually, there are several styles, because there are differences among peoples. Many of these Native people feel it is cultural appropriation for non-Natives to use their art style. I agree with them, in that a non-Native who sells art based on a Native style has stepped outside appropriate boundaries of behavior. However, if one is making art for one’s one use or for a gift, it is not as clear to me that it is inappropriate for a non-Native to make Native style art. With that provision, Northwest Pacific art made in metal clay can be truly beautiful, and is rarely done. I’m going to talk about doing it, and provide an example of a salmon made from silver clay.

First, Northwest Pacific art focuses on animals, with certain features redefined as flattened ovals and with some other features made to resemble humans. The flattened ovals can be produced by creating the outline of the figure in one layer of clay, and then adding other layers as needed. Similarly, the human-like features can be carved. To get a feel for Northwest Pacific art, study examples made by Native peoples; nothing beats studying the real thing. Now, onto the salmon.

20180701_095413

I started by cutting a salmon shape from silver clay. Salmon, in Native art, often have human-like teeth; I incised those into the metal clay with a straight pin (spoiler: the teeth really didn’t show when the piece was finished).

20180703_152936

I did the typical sanding and smoothing; freshly cut metal clay never looks right.  Then I started adding the types of features that define Northwest Pacific art.

20180703_211729

20180704_095708

Then more, layering as need be. The sharp edges were rounded out by using a damp make-up applicator. Rubbing it over the silver clay rounded out the edges.

20180706_091202

Bails, as well as more decorative elements, were added.

20180707_191405

The finished greenware appears above.

20180709_193141

The piece was fired and tumbled like any silver clay.

The finished product appears below. I chose a very light patina. The coin is for scale.

20180713_192247

As stated earlier, I am uncomfortable with non-Natives selling work based on Native art. However, this piece was made as a gift. With that in mind, there is a wide world of Northwest Pacific Art for the metal clay artist to explore.


Brass Clay: Expanding Beyond the Familiar Metals

Silver, copper, and bronze clay are familiar to most of us. There are other metals on the market. I’m going to describe my experiences with Goldie Brass clay. Note that yours, should you decide to give it a try, might differ.

20180611_093230

First of all, Goldie clays come as powders, not premixed. This is both an advantage and a disadvantage. The disadvantage is that it adds an extra step. The advantage is that you can make the clay you need, and not be left struggling trying to figure out what to do with what is left over, which can happen with premixed clay.

To mix the clay, pour a small amount of the powder into a clean bowl. Add a few drops of water, using an eyedropper or spray bottle. Using an appropriately sized metal spatula, stir until the powder and water are thoroughly mixed.

The instructions say you do not have to use distilled water. Since distilled water is cheap, I decided to use it anyway – inexpensive insurance. How much water to add is subjective. However, it isn’t as challenging as it might sound. Does what you have look too dry? Add more water. Does it look too wet? Add more powder. Does it look like metal clay? You are close enough to right to go ahead. The picture above depicts the envelope the power came in, and a small amount of mixed clay.

After the clay is mixed, let it sit (wrapped in plastic wrap) in an airtight container. This allows the clay to become smoother and easier to work with. Because it is important not to have air bubbles, roll it out very thinly. Repeat this process several times. You are then ready to work with the clay.

Working the clay is, essentially, little different from working with bronze clay. I’m not going to go over texturing, shaping, sanding, etc. Instead, I will simply describe the differences I observed between brass clay and other clays.

First of all, if I tried to make something thinner than 1 mm, it cracked during drying. Since I usually make earrings 0.75 mm thick, this was originally problematic. However, I had no trouble drying items that were 1mm or thicker. Since the brass turns out (getting ahead of myself) to be quite light after firing, 1 mm thick earrings do not pose a problem.

Since I had no experience with this metal, I chose to make extremely simple pieces (texture and cut or mold). That was to keep things simple.

I found firing not to be particularly simple (spoiler: I finally figured it out). Goldie bronze has a two stage firing process. This, in itself, is not problematic. However, even after adjusting for my kiln’s tendency to fire a bit cooler than it says it is firing, pieces were still not sintering. It took some trial and error to find a firing schedule that will work. The schedule that worked for me (something else might work for you) was: first stage, fire 40 minutes instead of the 30 the directions say; second stage, fire three hours instead of the two the directions say. For me, nothing sintered at two hours, some pieces did and some didn’t at 2.5 hours, and everything did at 3 hours.

Brass is an alloy of copper and zinc. After firing and cooling, there was a crumbly white residue inside my firing container (zinc oxide?). It might look alarming, but it comes off easily.

I dried the earrings on a tap light, so they would be curved. However, post-firing, they were completely flat. That was easy to fix by dapping, but I learned that one might as well work flat with brass and add curvature later.

After firing, the pieces needed a bit of brushing. Getting them shiny required quite a bit of tumbling. I will describe the three pieces I made, with pictures, below and describe how I finished them. In all pictures, the coin is for scale.

20180622_154324

Earrings:

These pieces were heavily patinaed with Black Max. In fact, I turned them completely black. I tried polishing them with a polishing cloth. It did not work. To get the texture to show, I needed to polish with a rotary tool. The rotary tool resulted in a nice finish. The photo does not do justice to the contrast between the shiny and the dark.


20180622_154336

Butterfly pendant:

This was supposed to be a pair of earrings. However, this piece came out of the 2.5 hour test firing. One butterfly sintered and the other did not. I could have made another one and kept the piece as earrings, but I decided to go ahead and make it a pendant. I used a brass jumpring as a simple bail.

For the finish, I applied a tiny amount of Black Max. This could be removed with a polishing cloth. It made the texture visible, but did not give the strong contrast of the deeper patina.


20180622_154349

Button pendant:

The third and final piece is made from a mold that seems to be derived from a button. Attaching a bail was easy, essentially no different from attaching one to a copper or bronze pendant. For this piece, I decided to leave it as it came out of the tumbler. The photo does not do how shiny it is justice.

If you feel inspired to tackle brass clay, don’t be intimidated by it. It’s a bit more challenging than bronze, but not by all that much. Polished brass gives you a shiny appearance

Stone Setting

Stones add interest to jewelry, and open up many design possibilities. They can just be focal points of color, or they can be part of a design. However, stone setting for the metal clay artist and stone setting for the metalsmith are different. I’m going to discuss a few of the ways metal clay artists can set stones.

20180607_155526

First of all, fired metal clay and sheet metal are different. They might look alike, but they are different at a molecular level. Sheet metal has long chains of molecules. Metal clay has very short ones. Accordingly, sheet metal can bend a great deal. Metal clay can bend a little. However, if you bend it too far, it is likely to break. That means that some methods of stone setting, such as the use of tabs, that are available to the sheet metal worker are (almost) impractical for the metal clay artist.

Directly Setting the Stone in Metal Clay. The short version — be cautious about what stones you put in your kiln. Some will, simply, be destroyed from the heat — actually, most. Some will discolor — an example is moonstone, which can emerge just fine, or can emerge from the kiln a dull gray. Be careful of published lists of stones that can be fired — many mean ‘will not be destroyed, but still could emerge discolored’.

Some stones that I have directly fired and have had good results with: synthetic ruby; synthetic emerald; natural sapphires; and diorite.

Most cubic zirconia will fire safely. However, some colors are heat sensitive, and must be low fired. Most manufacturers of cubic zirconia recognize the metal clay market, and tell you how heat resistant the stones are.

In any case, when  you set a stone directly in metal clay, you must remember that metal clay shrinks. If the stone has nothing to hold it in place, it can be spit out like a watermelon seed.

Also, if there is any metal clay dust whatsoever on the stone when it is fired, the dust will adhere to the stone, turning it cloudy. Once it is fired, the cloudiness is impossible to remove. However, the dust can be removed, pre-firing, using a cotton swab and denatured alcohol. Just be sure you get every last drop of the dust!

The other options listed below require you to set the stone after the metal clay has fired. This has the advantage that you can use any stone  you like. For example, the stones in the photograph above are vesuvianite. Vesuvianite will not fire. However, it can be incorporated post-firing.

Prongs. Prong settings that can be directly fired with metal clay are commercially available. Follow package directions, and things will generally work. However, most of these settings are not strong enough for rings. That means, as a metal clay artist, you will be limited to jewelry that will take less stress than rings.

Wire settings. It is possible to embed jewelry grade wire in metal clay (warning: if  you use copper, be sure it is jewelry grade, not from the hardware store) (second warning: be very careful about mixing fine silver and sterling silver — sometimes it works and sometimes it doesn’t). If you make sure that the wire is bent over so it has ‘feet’ for the metal clay to grab onto as it shrinks, you can firmly attach the wire. The wire can then be bent over stones to produce a sort of wire-wrapping.

Bezel wire. Bezel wire is flat wide wire used to make bezels. Some of it has prongs, or ‘feet’, that prevent the metal clay from shrinking out of shape. Some does not. If you use the prong type bezel wire, you need only form a bezel of the size and shape of  your stone. If you use the other type, you must calculate and account for shrinkage. This might be your only option with an irregularly shaped stone.

Note that bezel wire must be bent to firmly grasp the stone. This is quite easy, if you use a metal burnisher.

Bezel cup. Bezel cups are cups, of the same metal as the clay, that are of the size of the stone to be fired. Like bezel wire, the edge of the cup must be bent to grasp the stone. Like bezel wire, this is easy with a metal burnisher.


Think Outside the (Cat)box

I hesitated about making this post. Some people might find the topic somewhat unpleasant. However, it concerns a way to obtain a lovely color in your copper jewelry. If done properly, there is nothing unsanitary about it. Therefore, I decided to go ahead.

We all know how to apply a black patina to our copper jewelry (BlackMax works wonders, although there are other approaches).  Baldwin’s Patina gives a lovely brown. Salt and ammonia produces a vivid green. But how about blue? Surely you have seen some copper architectural detail or a copper piece in a museum that has a vivid blue color. I’m going to tell you a way to get that color (caveat: I’m sure there are others, but this is the one I tried and it worked for me).

To start off, I made a pair of copper earrings, with an Andean design of a two headed condor. I’m not sure what the two-headed condor symbolized to the ancient people of the Andes. I would be curious to know if anyone can tell me. In any case, the earrings, fired and tumbled, appeared as follows:

20180520_094148

There is already a touch of a green patina on one of them. That sometimes appears on copper jewelry, and I do not know how to predict or control it.

Now for the step that produces the vibrant color. Do you have a cat? Do you ever use the silica litter? If you do, and you haven’t changed the litter box in several days, a layer of ammonia-smelling grunge develops at the bottom. I don’t have to tell you what produced it. When you change the cat box, scoop some of this out and transfer it to a container. It would be best to not touch the used cat latter. You can either wear disposable gloves or simply be careful when you transfer the cat litter. I used a resealable plastic bag as a container, but any container to which you are not too attached will work.

Then, using a pair of long tweezers, I submerged the copper earrings in the used cat litter. I left them in place approximately 24 hours. I removed the earrings from the cat litter using the same long tweezers. The process had worked — the earrings were deep blue! The patina had grown to such an extent that it had closed off one of the openings in one earring. This was easily fixable by inserting a copper wire into the opening, removing the patina that had sealed the opening.

I then washed the earrings in running water until no trace of the ammonia smell remained (and washed the tweezers). Be sure not to scrub the copper, because the layer of patina is still somewhat fragile. Leaving the copper under a stream of running water for a few minutes is quite sufficient.

The patina covered the whole of the earrings, making the pattern invisible. I fixed this by gently rubbing with a fingernail sponge (available from any beauty supply store). This removed the patina from the condor, while letting the patina remain as a background. The patina did not want to come off the condors’ eyes. I removed this part of the patina with a metal burnisher.

To make the patina permanent, I sprayed the earrings with a fixative. I generally use the same metal fixative the players of brass instruments use to keep their instruments from tarnishing. However, any protective surface that can be applied with a spray (so you don’t remove any patina) will work.

The finished product, with a coin for scale, appears below.

20180526_135637

The person for whom I made these loved the color. There was no trace of smell, and the client had no idea how I had colored the earrings (until I told her).

What if you want to try this and you don’t have a cat? Surely someone you know has one. Other species would probably work as well, but cats (due to their use of a litter box) are easy to deal with.

I encourage you to try applying this bright blue patina to your copper work. Don’t be squeamish about the source of the color. There is a bit of work involved, but the results are well worth it.


Baldwin’s Patina

LOS is the workhorse patina for metal clay. It can give a lovely aged appearance to silver. It can, with the addition of ammonia and salt, give lovely colors to silver. It can age bronze. However, when applied to copper, it gives … black. There is nothing wrong with black. However, Baldwin’s Patina (available at https://www.riogrande.com/Product/baldwins-patina/335020) provides an alternative. Baldwin’s Patina (hereafter BP) gives copper a blue-green-brown look otherwise unavailable with decades of aging. I am going to describe a project done with BP.

A fiber artist (mostly a knitter, but someone who also spins wool) wanted a sheep pendant. Once I determined that she wanted a cute, cartoon sheep (as opposed to a real one), I was ready to go.

I sketched a cartoon sheep and sculpted it from Art Clay Copper. At this stage, the eyes were just pits — that gets fixed later. The sheep was formed on a tap light dome so it would have some curvature.

20180415_112221

Next came refining the sheep. The eyes were made by creating two tiny sphere and placing them in the pits. The eyes were finished by making eyelids of tiny ropes of copper clay and putting them in place. The wool, mouth, ears, and hooves were shaped used standard clay shaping methods.

I placed the sheep on a backing and attached a bail.

20180503_061649

Then the piece was ready to fire. Sculptural pieces tend to take longer to fire. I usually ramp at a rate of around 900 d F/hour to 1800 d F, and then leave in the kiln for two hours. I tried using coal, instead of the usual coconut charcoal, hoping for a nice heat patina. It didn’t happen — sometimes it does and sometimes it doesn’t. Then I tumbled the piece for two hours.

20180508_074929


Now came the patina. BP only works when it is warm. I placed the piece on a mug warmer and left it about 20 minutes. Then, using a cotton swab, I covered it with BP. Then I waited. The effect of BP is almost magic. First there is nothing. Then, all at once, the color changes. After that, it is a matter of polishing off the patina that you don’t want (I knew the end recipient wanted a light patina, so I rubbed most of it off). I attached a chain, and the piece was done. The coin is for scale.

20180508_090957

BP is just another tool in your toolbox. If you want your copper to turn black, there is good old LOS. If you want an intriguing blue-green-brown color, BP is an option you should consider.

Water Spider

Water Spider is a key figure in the mythology of the Cherokee Nation. In some versions of the myth, Water Spider separates dry land from water by bringing up bits of mud from the bottom of the primordial lake. In others, Water Spider introduces humans to fire. While there is quite a bit of variation in the iconography, Cherokee images of Water Spider almost always have certain traits: three distinct body parts; two staring eyes; a cross or cross-like symbol on the thorax; and large, rounded abdomen. That sounds like a good inspiration for the modern jeweler!

20180402_190849

I started with a tap light dome, so the piece would not be flat or too rounded. Using Art Clay copper clay, I embossed (used a template with a piece of plastic wrap over the clay, then pushed the template down so the clay emerged in a rounded way) three body parts. I made impressions for a place that the eyes would go later, using the handle of a clay shaper. I used the clay shaper to create a cross-like design on the thorax (although I modified it later). I used a needle tool to put a texture on the abdomen. I hand rolled eight legs. In the picture above, all the parts in their approximate position, although nothing is finalized.

I attached the legs to the thorax. This involved some fiddling, until I found a position that suggested swimming. I made mandibles. I put a copper bezel cup in between the mandibles, so I could later put a stone there. I made two tiny spheres of copper clay, and placed them in the eye depressions, so the spider would have eyes that resembled Cherokee iconography.

Then I made a background, using a texture sheet (the pattern in the texture sheet suggested waves to me), and gave it a bail.

20180408_082834

I adjusted the cross-like design, making it deeper and adding some texture around it by dragging copper slip about its edges. After some finishing, the spider was ready to fire.

A piece with this much variability in thickness is harder to fire than most copper clay pieces. Although some people open shelf fire copper, I prefer firing in charcoal — that is what I did here. To make sure it heated all the way through, I ramped up at 900 degrees F per hour to 1800 degrees F. Then I fired the piece for an hour and 20 minutes at 1800 degrees F.

After firing, the piece was brushed, tumbled, and patinaed. I filled the bezel cup with a vesuvianite cabochon. That reflects both versions of the mythology — the green mirrors the earth and, since vesuvianite is a volcanic stone, it matches the fire. Then I was done, lacking only a chain for finishing.

20180411_162110

The coin is for scale.

One final word: I’m not Native American. When I started this piece, I worried if I was inappropriately using someone else’s culture. I decided that I was not. First of all, Water Spider is a mythical figure, not a sacred image. Secondly, the Eastern Band of Cherokee operate a museum of tribal history, and they sell images of Water Spider in the museum gift shop. I decided that, as long as I made it clear that this work was not done by a Native artisan, I was not guilty of cultural appropriation.

How does this apply to the metal clay artist? Much of my work has a mythological or historical inspiration. As long as it does not trivialize any living person’s culture, I feel that using such inspiration pays tribute to the sources. I hope you will take the same vie of your metal clay work, and seek inspiration in mythic sources.


Rose Gold Accent

I recently decided to try rose gold accent (http://www.metalclaysupply.com/Accent-Rose-Gold-p/56532.htm) on fine silver. I’m going to report on how it came out, both good and less good.

First, a word of explanation. Rose gold accent is a powdered form of rose gold clay. One adds water to make it a thick paste, applies it to fired silver clay, and then fires it according to package directions. The gold initially comes out a muddy brown. However, after burnishing and tumbling, it indeed comes out looking like rose gold.

I chose two projects, a pair of earrings (partially made from a texture sheet and template, partially sculpted) and a pendant (made from a mold). These pieces, in greenware, appear below.

20180329_143731


20180329_143741

In accordance with package directions, I added distilled water to the rose gold powder, stirred, and let it sit. Then I painted it on the pieces.

20180331_075211

I then fired the pieces, again according to package directions. Firing involves a ramp up and a hold time. I know that my kiln runs about 25 degrees F cool, so I fired at 25 degrees hotter than the directions said. After coming out of the kiln, and without brushing the silver, the pieces looked like this:

20180331_133655

Why did the pendant, which had as thick a coating as the earrings, come out looking so much less changed by the gold? I honestly don’t know.

What I had was what I had. I chose to keep going. I then brushed the silver. I wasn’t sure if the gold would or would not stand up to brushing. To be safe, I covered the gold with my thumb while brushing the silver. I then tumbled and patinaed. The resulting:

20180401_094020

20180401_112124

In both pieces, the gold photgraphs in a fairly weak way. In person, the gold on the earrings shows up very nicely, while the gold on the pendant shows up mostly in the recessed areas (although it is quite lovely in the right light, when the gold sparkles beautifully as the piece moves).

Why did the gold cover the leaves on the earrings nicely, while the pendant only has it in recessed areas? I honestly don’t know. I’m guessing that the rose gold powder works better as an accent, as the name says.

Final verdict: The rose gold accent seemed to work as an accent, but was less successful in covering a larger area. Am I going to use it again? I’m not certain. Keum boo gives you a better gold appearance. However, the accent powder gives you much more control. On the other hand, keum boo cannot produce rose gold. If you are interested in fine control of gold, and want only a small accent, then the accent powder could be a good way for you to go.

Nano-gems

Some natural gemstones will safely fire. Some won’t. Some man-made gemstones will safely fire. Some won’t. However, the workhorse (and the man-made gem that most of us start with) is CZ, cubic zirconium.

CZs can let you produce nice work. However, they could be shinier. Also, a few CZs, like the green ones, can be problematic — they can change color (and never in a good way) in the kiln.

A potential fix to this is a new type of stone called the nano-gem (https://www.cooltools.us/Nano-Gems-s/2594.htm). Nano-gems are very shiny, and (with a few exceptions) are supposed to survive being fired at a fairly high temperature. I decided to put this to the test by making a ring with a green nano-gem and firing it at 1600 degrees F. I chose green because that is the color that has, in the past, been the most problematic with CZ.

The ring itself was a standard silver clay ring (Art Clay, although I’m sure any other brand would have done as well), so I won’t go into detail about how it was made. The ring, in greenware, appears below.

20180303_151257

After standard filing and preparation, I fired it at 1600 degrees F for 1.5 hours (let’s give that stone an acid test). Then I tumbled it and applied a patina. What happened? See the two pictures below.

20180306_191219


20180306_191231

These photos don’t do it justice. The stone is just as shiny after firing as it was before. I now give nano-gems my unrestricted approval.

There is one small drawback. The website says that a small opening must be left behind the gym, or the stone can turn cloudy. Since putting an opening behind the stone is easy, that isn’t too much of a drawback.

Finally, for no particular reason, I am including a photo of some opal earrings I made at the same time I made the ring. Why? Because they are shiny. 😉

20180306_191134

Raven Steals the Moon

When I last posted, I had sculpted, but not fired, my piece based on the Tlingit legend ‘Raven Steals the Moon’. Since then, I have fired, polished and patinaed. Although I have no new ideas or techniques concerning metal clay to post today, I thought I should share the finished piece.

As always, copper coming fresh out of the kiln is somewhat discolored. The piece, as it first came from the kiln, appears below.

20180224_133548

After about four hours of tumbling, it was all shiny.

20180225_112853

To finish the piece, I patinaed it. I have an invisible bail on the back. Getting such an assymetric piece to hang straight can be a challenge. I accomplished this by making a wide triangle of copped, rolling it over a soda straw, and then attaching it to the piece with the rolled end near the top. Since it goes from the back of the neck to the eye, the piece now hangs straight.

The coin is for scale.

20180225_135631

I hope to explore sculptural techniques further, both in my own art in in later postings.