Steampunk!

Steampunk is a science fiction sub-genre, a sub-culture, and a style. In short, steampunk fiction is based on the notion of ‘what would have happened if certain technology had been invented earlier than it actually was?’ Think 20,000 Leagues Under the Sea (movie), The Difference Engine (novel), or The Wild Wild West (Movie and TV series). In the subculture, people (among other things) wear clothing appropriate to a Victorian or Edwardian era where technology came much easier. Steampunk style, in addition to be derived from Victorian/Edwardian dress, features images of gears, clock faces, locks and keys. Today, I’m going to talk about how easy it is to make steampunk jewelry.

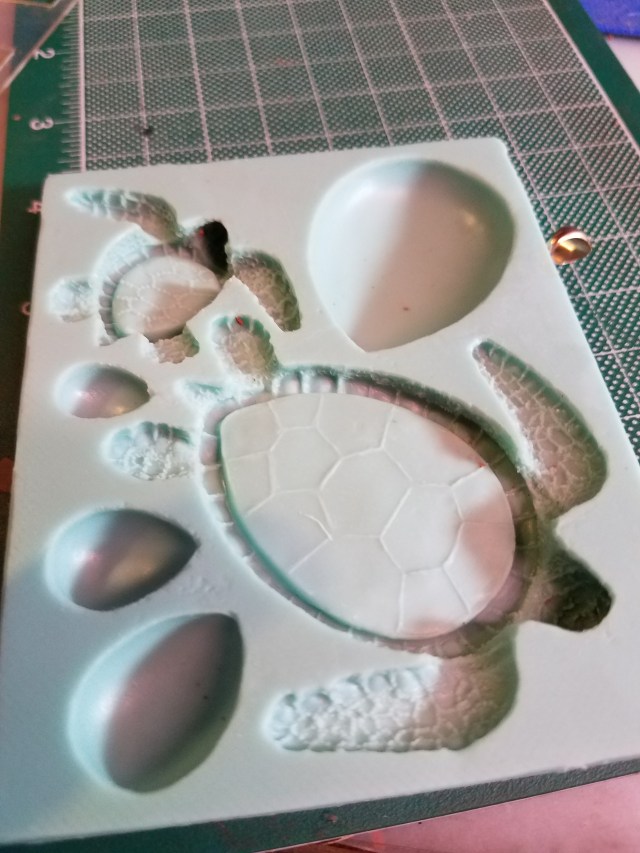
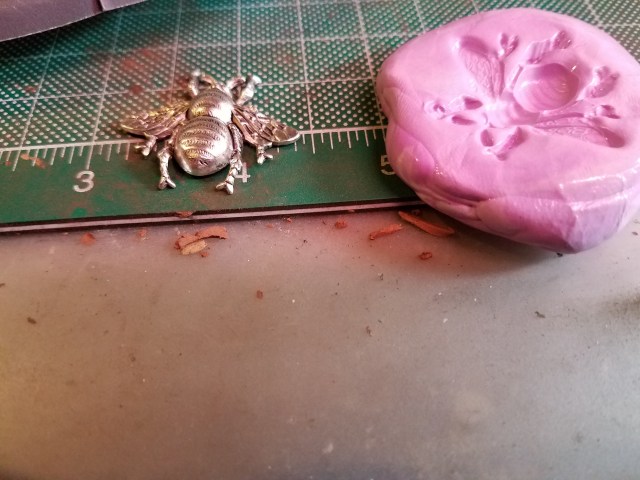
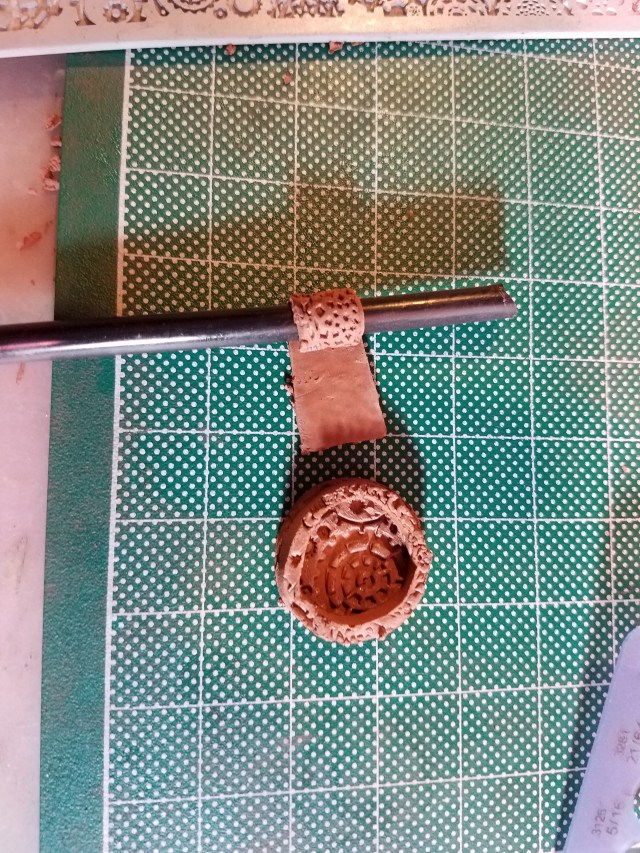
I started out with a mold that contained various steampunk imagery. There are many such molds available. You can either buy one or make you own from two-part molding compound and parts of old clocks.

20170719_193300

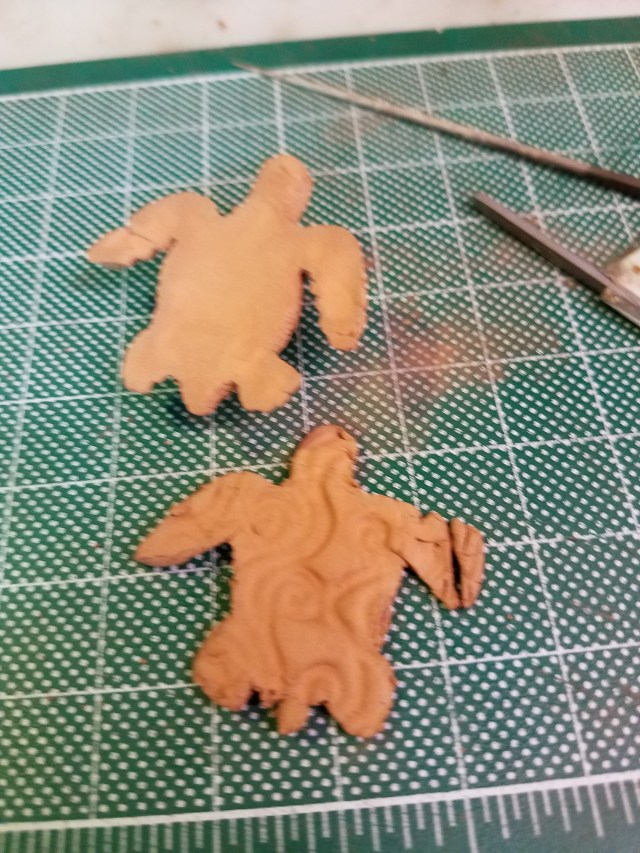
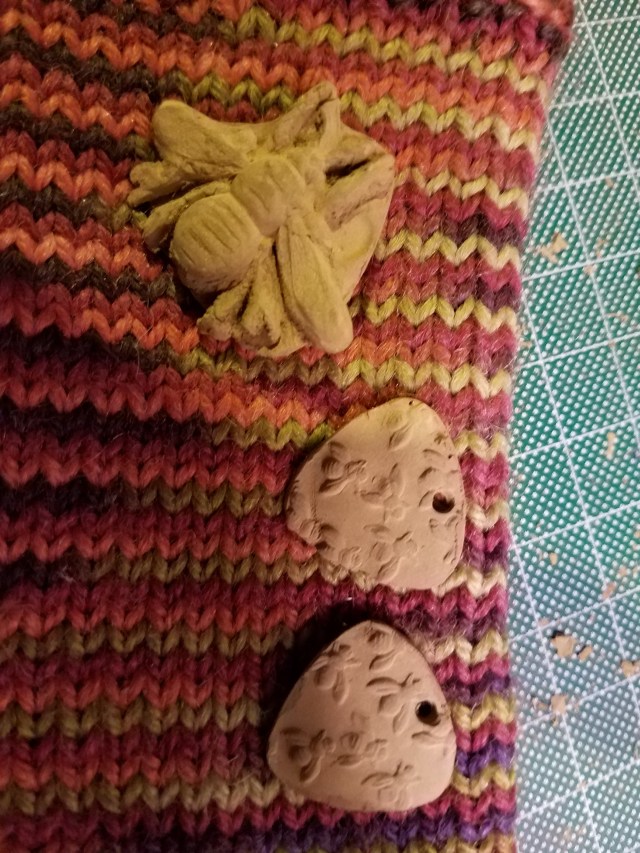
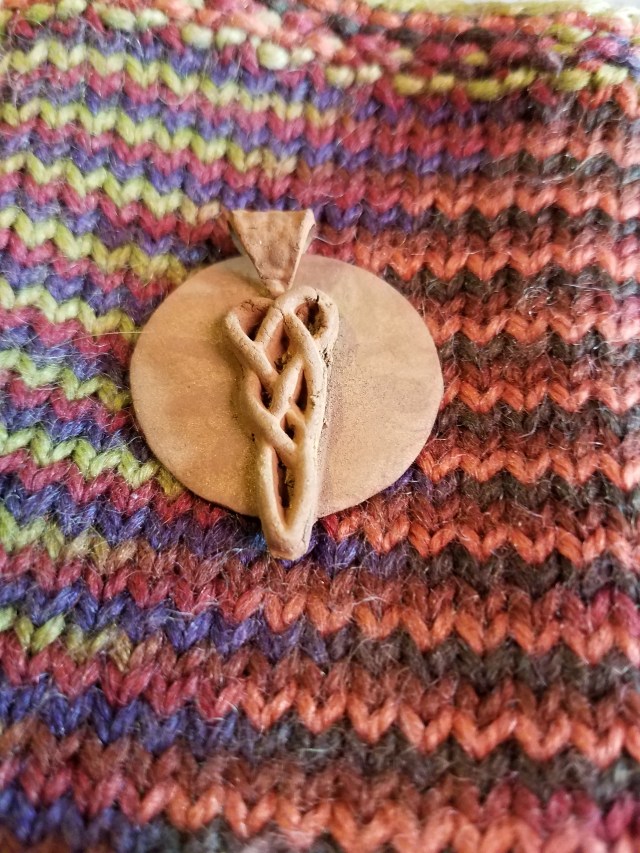
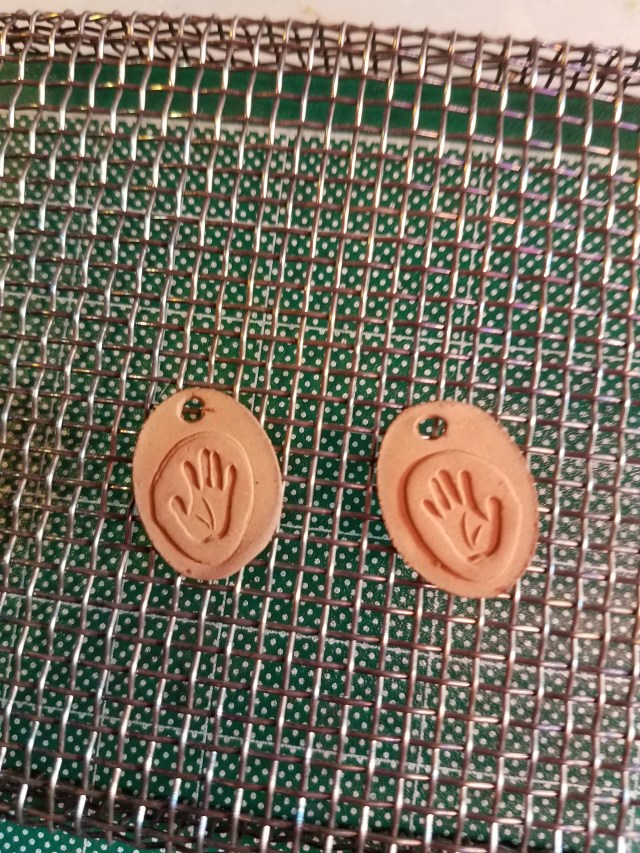
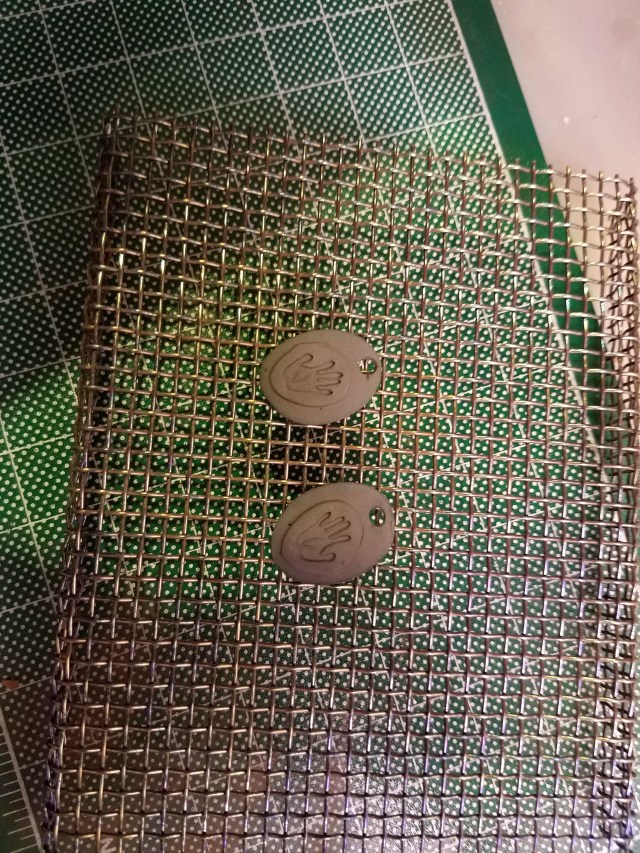
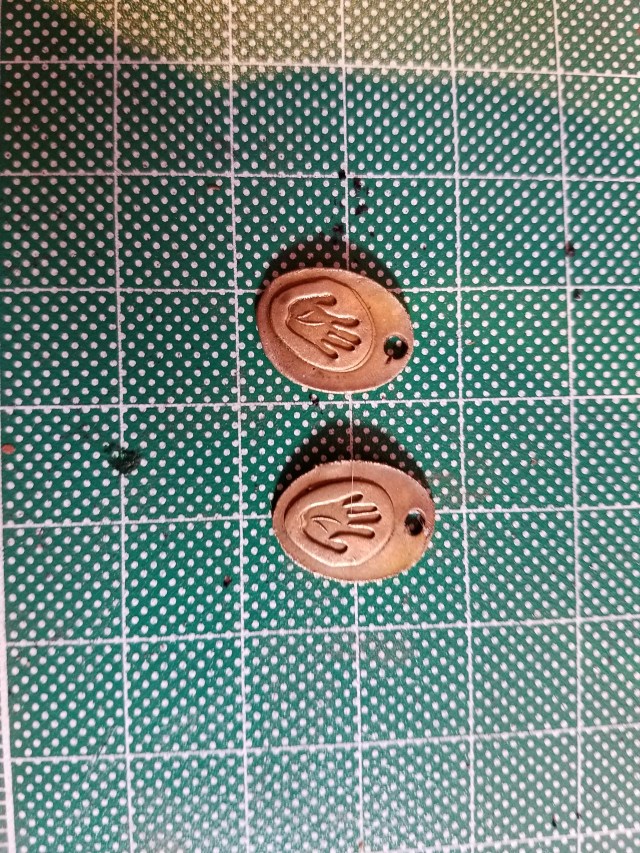
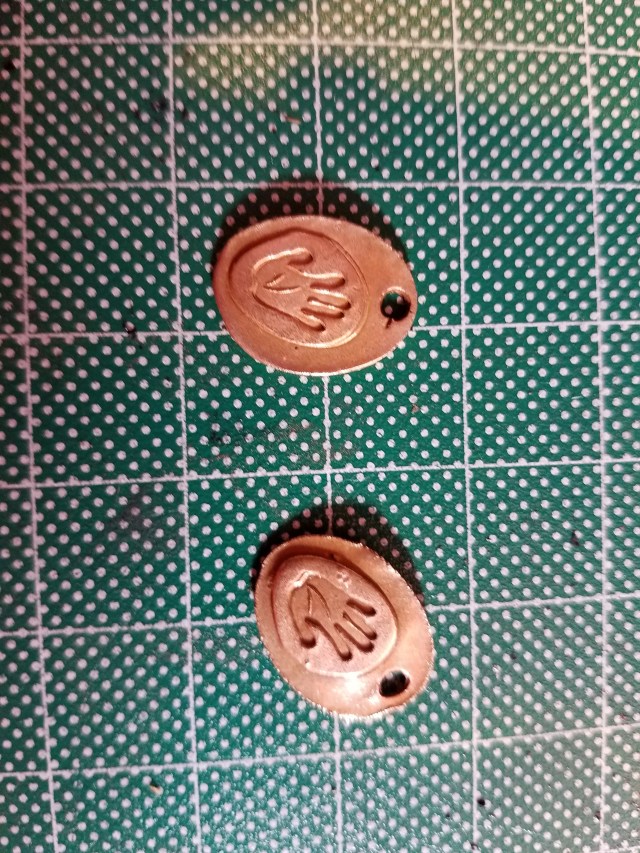
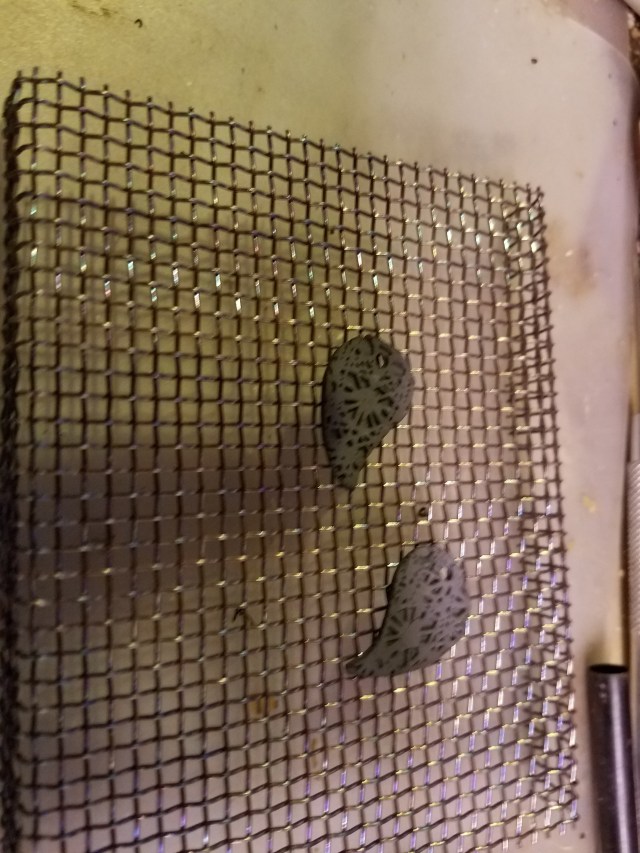
Using standard metal clay technique, I made bronze (some pieces were Five Star bronze, some were Five Star light bronze) versions of two of these images.  I made textured geometric backgrounds to attach them to. This resulted in two greenware pendants. To make the pendants a bit more interesting, I drilled a small hole in the bottom of each. Then I made bronze pieces that could been attached to the bottom with a jump ring, allowing the bottom pieces to have some movement. One of these included a bronze bezel cup, the other was just a piece of bronze with gear imagery. I will come back to these pieces in a moment.

For now, I want to say something about what you can do without a mold.

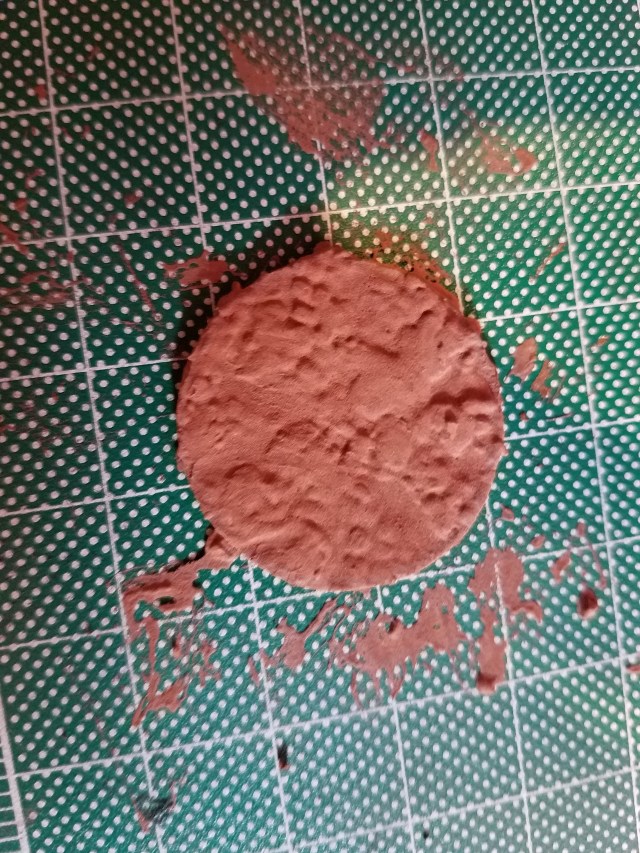
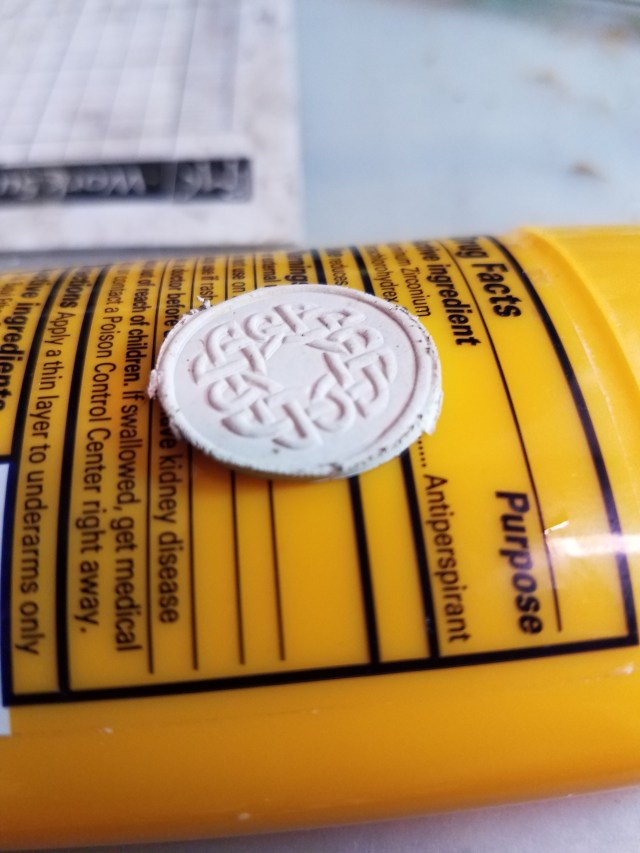
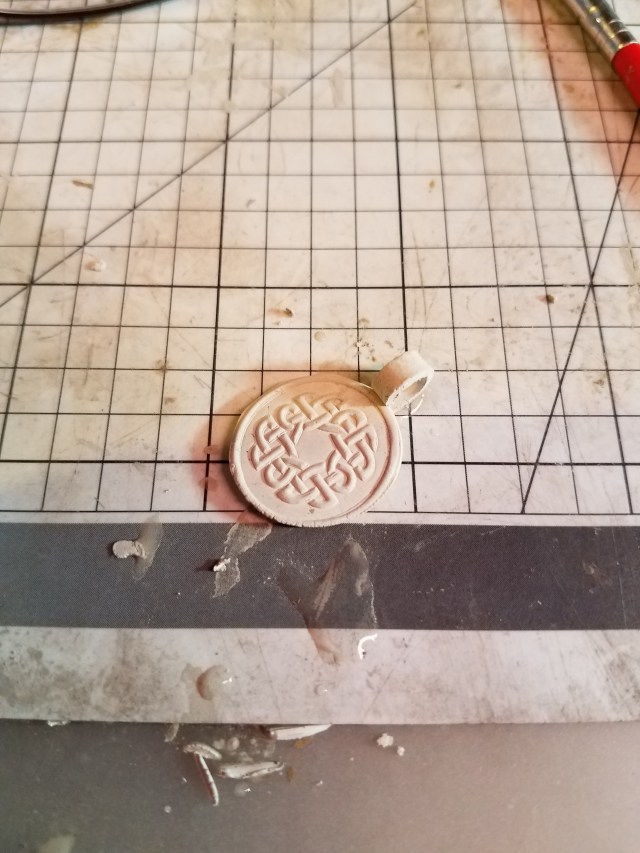
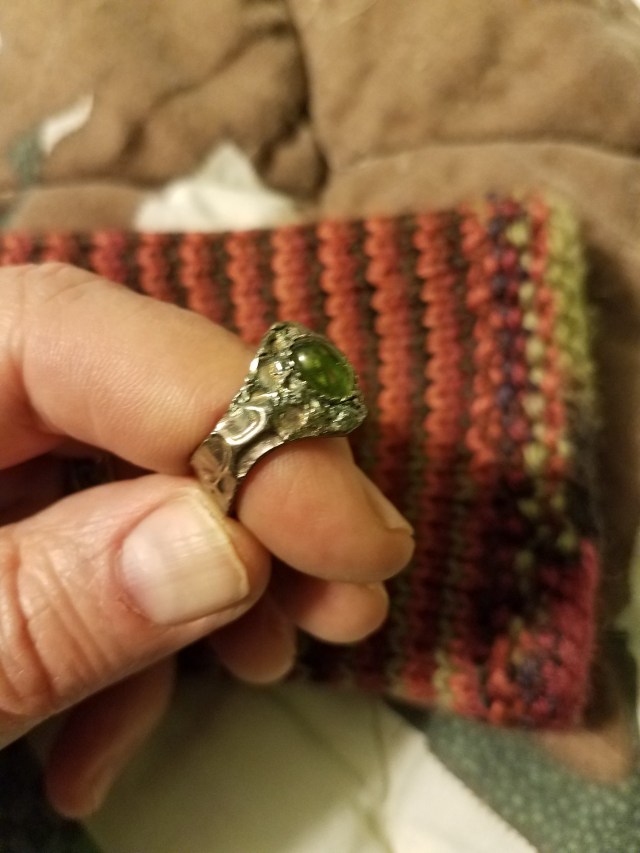
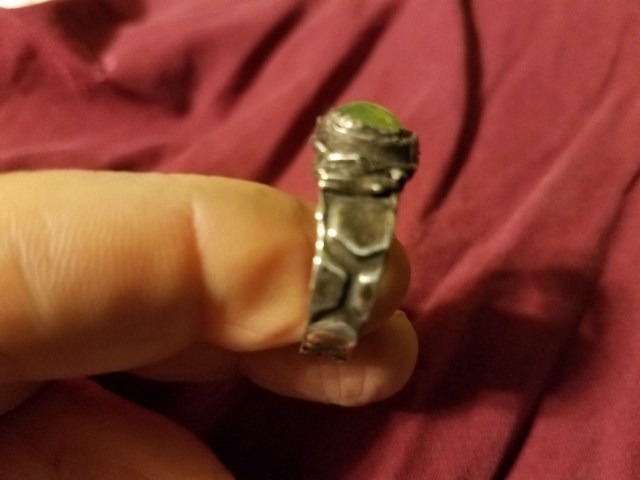
I made a thick (2.5 mm circle) of bronze clay. I cut the center out of it. I then made a thin (0.75mm) circle of the same diameter, and attached it to the back. I wasn’t sure if the inside was or was not going to show, so I textured it. I made a bail that included gears in part of its design.

20170729_125948 (002)

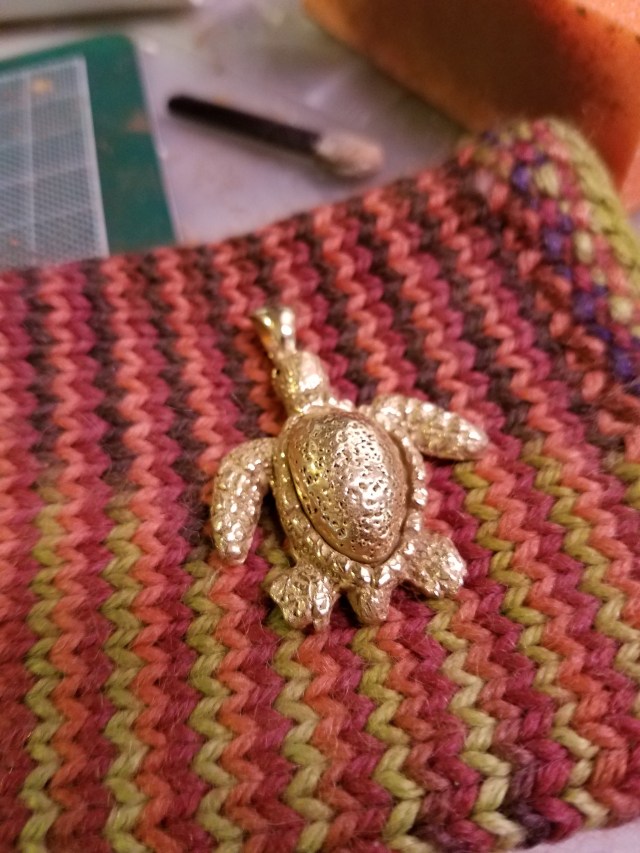
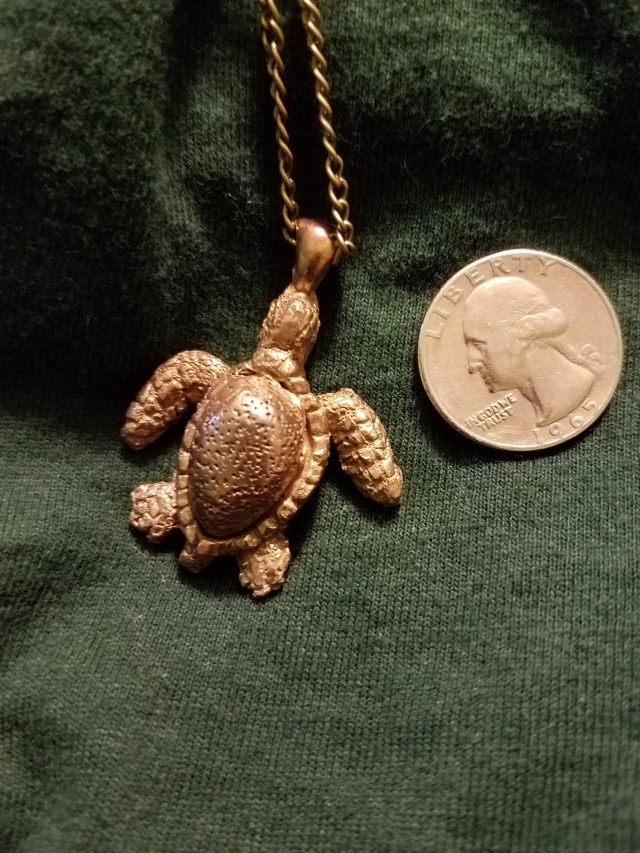
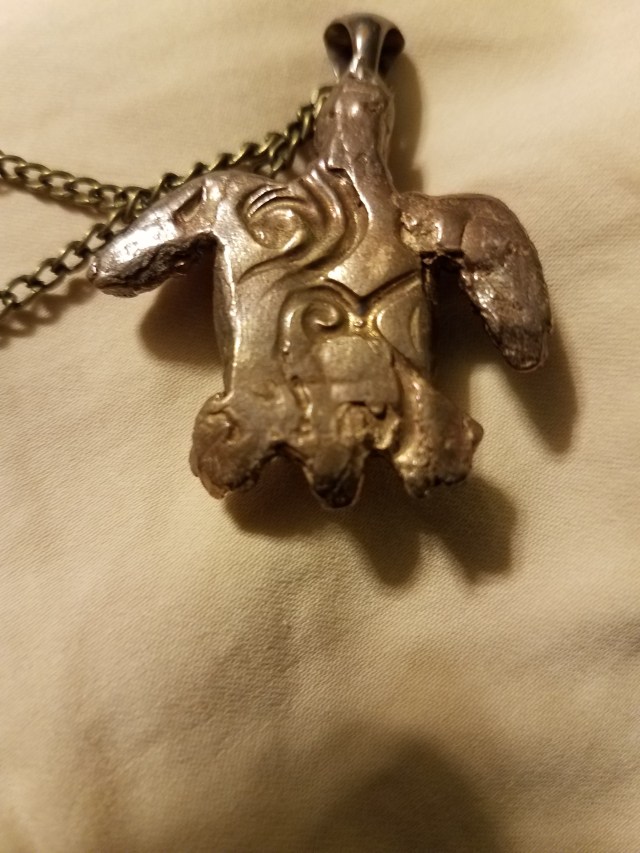
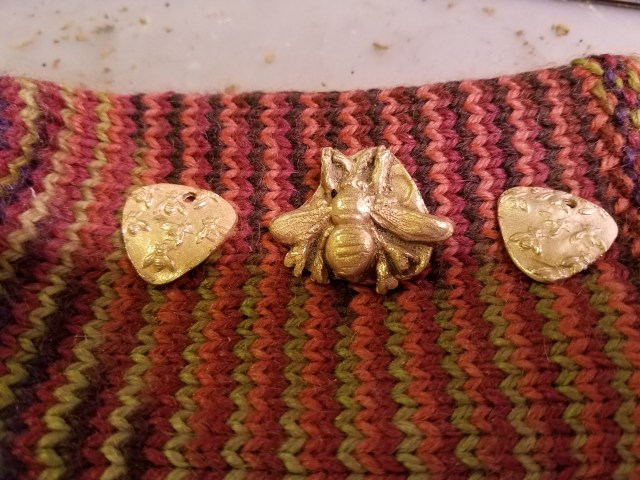
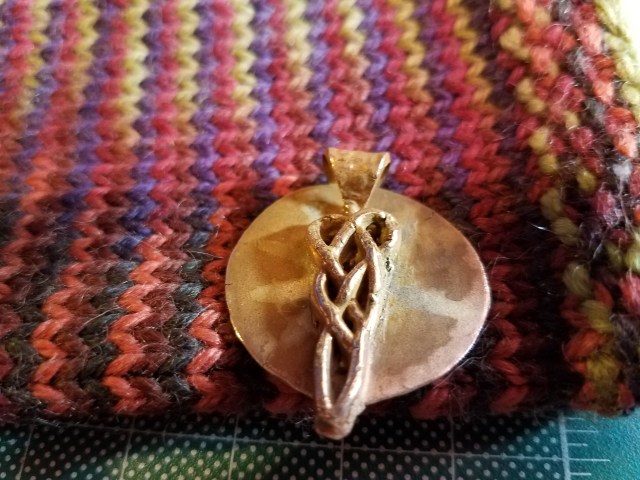
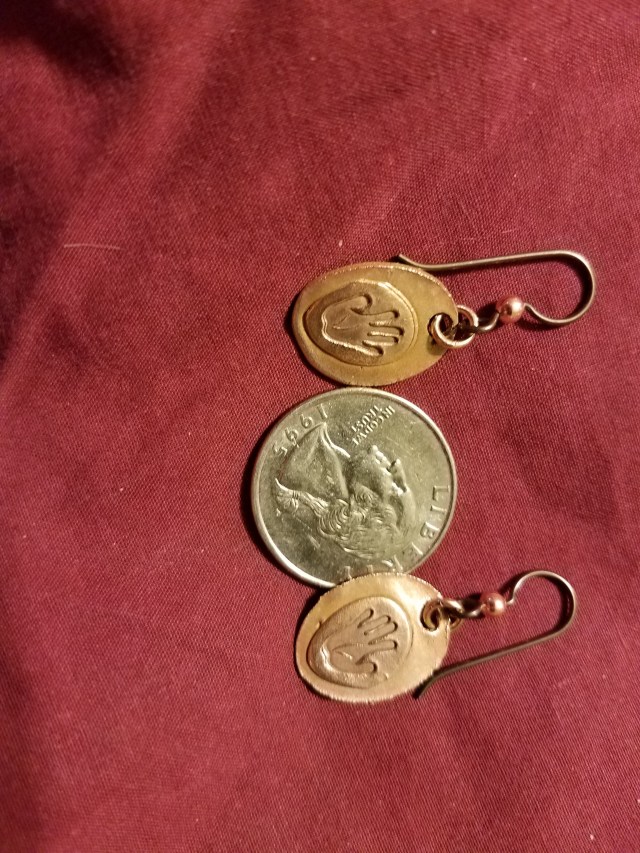
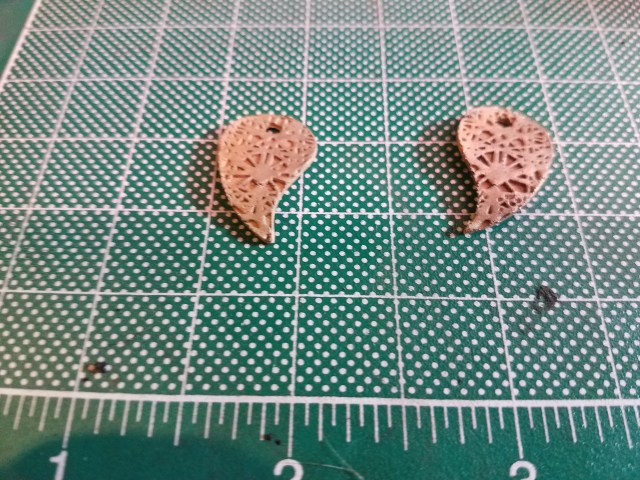
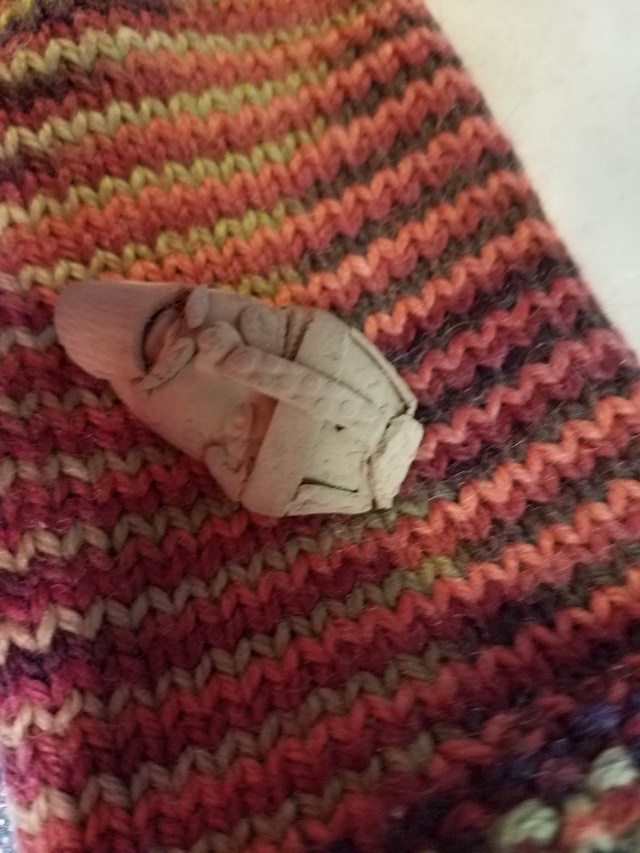
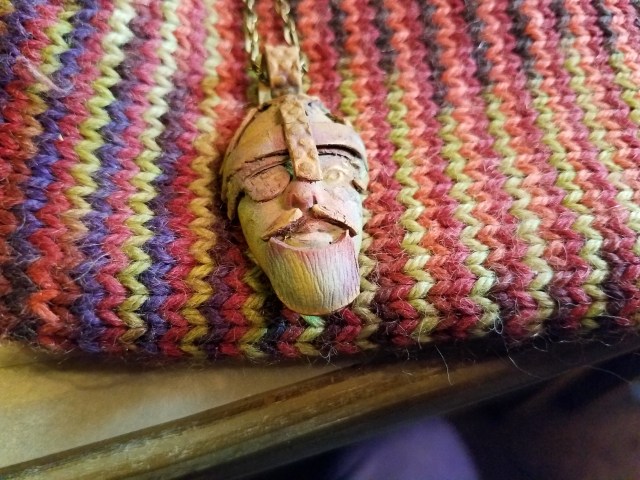
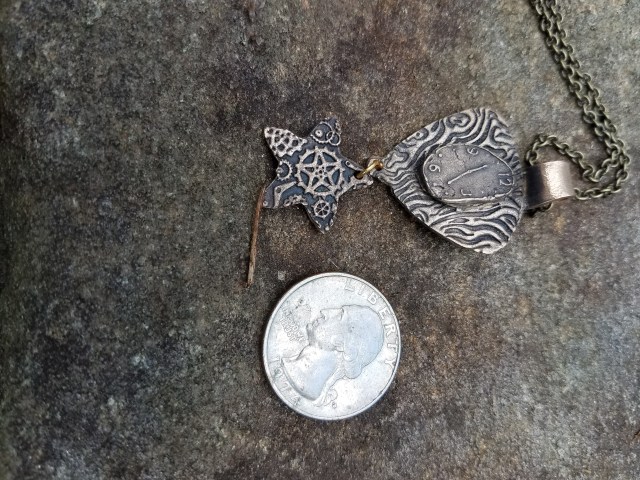
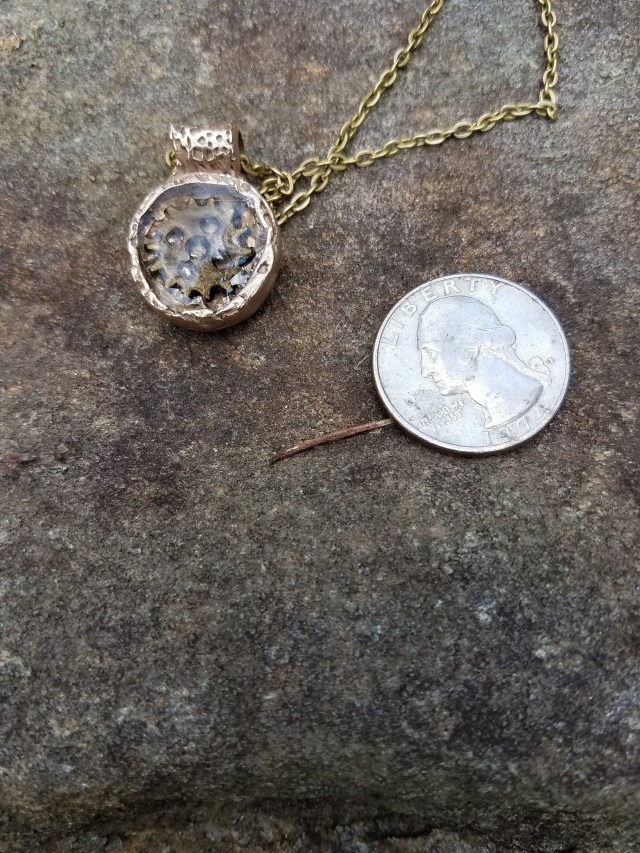
After firing and polishing the three pendants looked like this:

20170805_140312

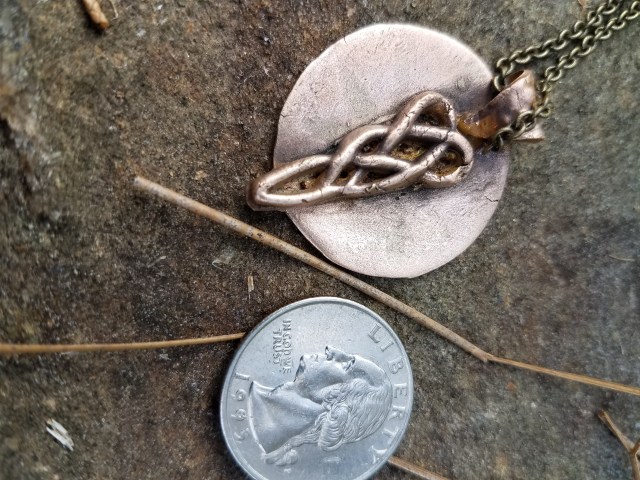
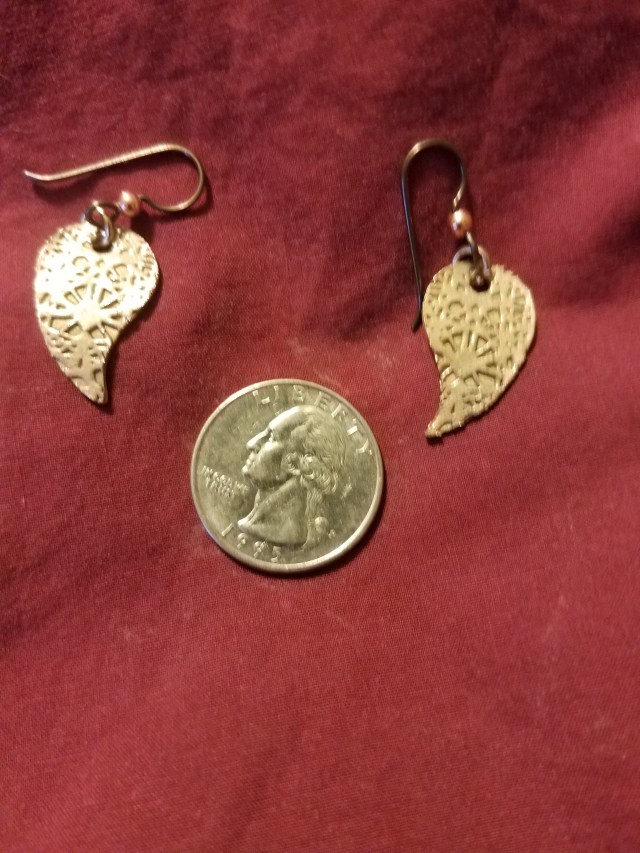
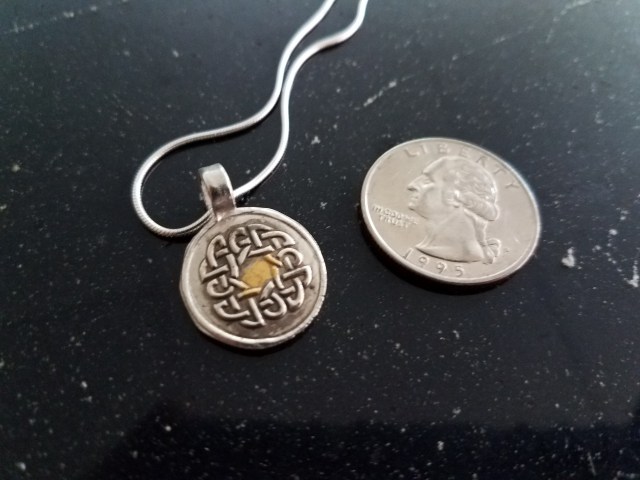
For the piece with the twisted clock face, I simply patinaed and joined the pieces together with a jump ring. All pieces are pictured with a coin to provide scale.

20170805_153414

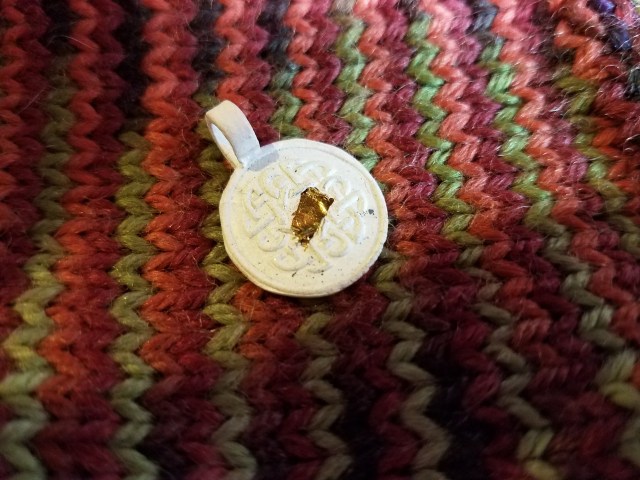
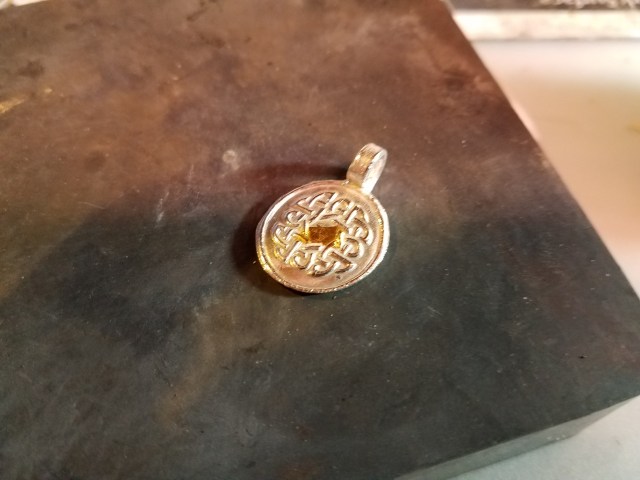
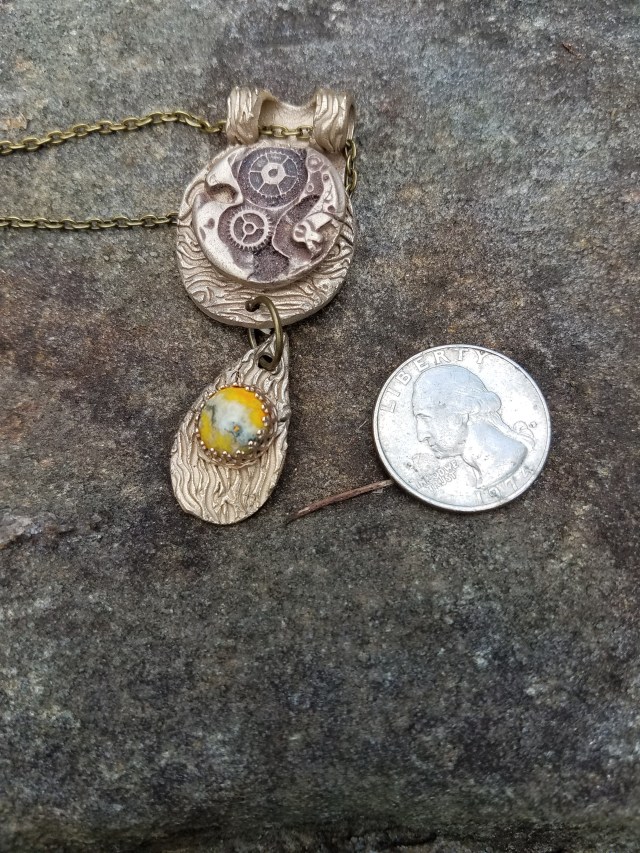
For the piece with the watch workings, I patined the pieces, added a bumble-bee jasper cabochon to the bezel, and attached with a jump ring.

20170805_153404

For the open disk, I found a gear from an actual old clock that would fit inside it. Then I encased the gear in acrylic. I used Lisa Pavelka (LisaPavelka.com) acrylic. This acrylic requires UV light to set, but I find it easier to work with than other brands of acrylic.

20170805_153356

The essence of steampunk culture is creativity. I hope I have inspired you to try it yourself. Whether you are creating the pieces to wear yourself, for a gift, or to sell, steampunk themes provide many design opportunities. Enjoy exploring them!


Three topics in one!

In this post, I decided to cover three topics in one project: (1) Using molds intended for polymer clay with metal clay (2) decorating the back of a pendant and (3) patinaing Five Star bronze.

Polymer clay molds tend to be larger than metal clay molds. That makes them impractical for many purposes. However, there are two steps you can take to make polymer clay molds more artist friendly. The first is to use copper or bronze clay. Copper and bronze are much less costly than silver. This brings down the project’s cost. Secondly, there is the issue of weight. This can be addressed by making your project partially hollow.

I say ‘partially’ because a completely hollow piece of metal clay often needs internal support while firing. That is another topic, to be discussed later. However, small hollow spaces within a pendant or earrings can save considerable weight and generally do not need support.

For this project, I chose Penni Jo’s mold of a sea turtle (http://www.bluewhalearts.com/best-flexiable-mold-by-penni-jo-sea-turble-bezels-cabs.html).

20170701_081959

I chose the smaller turtle. Even with some hollowing out, the larger turtle might be too heavy to wear (although it would make a really nice paper weight!).

The first step is molding the body. Because the head is undercut, it is necessary to work the clay into the mold using one’s fingers. It might take several tries to get it right. The shell is molded separately. However, by forcing a laying of clay 1 mm thick into the shell mold, and then trimming the excess, one can produce a very light shell. The shell can be decorated as one wishes (more on that later).

I used Five Star bronze clay. Five Star bronze clay has a really nice property — if you place two wet pieces of clay together and let them dry, they tend to bond. I placed the shell in the turtle’s back, with the intention of making sure they dried to the same shape (clay can distort slightly in the drying process, so two pieces that fit perfectly as wet clay might not fit as greenware). However, by the time the pieces dried, they had bonded as tightly as they would have if I had joined them with slip.

Because the shell was so thin, I did not want to put much pressure on it. One option would have been to decorate it after it dried. However, I chose another route. While it was still wet, I punched many small holes in the shell, using the needle tool. That gave it the look of an almond shell, and I liked that look.

The unfinished greenware looked like this:

20170701_082005

When pendants are offered for sale, customers often turn them over and look at the back. One way to deal with this is to decorate the back. I chose to texture a thin (0.5 mm) sheet of clay, cut it in the approximate shape of the turtle, and, after it dried attach it. There are a number of ‘bobbles’ in the wet clay (the pieces are not precisely the same shape, there are some gaps in the clay). All of these are fixable in the greenware stage.

20170701_153118

I attached the back and sanded the greenware. I attached an embeddable bail. I had originally planned on attaching it to the tail, but was not able to get a solid bond — presumably because the tail gave less material to bond to. Five Star bronze requires two stage firing, one short firing open shelf and a longer hotter firing in charcoal. Before the greenware went into the kiln, it looked like this:

20170704_113222

This is what it looked like after being fired and given a long ride in the tumbler.

20170705_143846

I decided to patina the piece. Since there were so many small curves, I decided to use liver of sulfur — a dip will allow the patina to enter all the small crevices. This is where I learned that Five Star bronze does not take liver of sulfur particularly well. The piece only slightly darkened. However, it acquired a faint purple tinge that, unfortunately, did not show up in the photo. You’ll have to imagine it ;-). I decided that I liked the purple tinge and did not change the patina. The coin in the photo below is for scale.

20170705_145406

Finally, the back of the piece looks like this. I deliberately gave it a primitive look in the greenware finishing — the more I worked with the texture, the more it looked like a Polynesian petroglyph, and I thought that was an appropriate motif for a sea turtle.

20170705_194413

So there  you have it. I will continue to explore Five Star clays and how they can be used. I hope you will too.


Molding

Sure, there are lots of commercial molds out there. I use them. But that limits you to what you can find on the market. You can make your own molds, too. The example I give here involves using commercial decorative beads (which limits your ability to sell the pieces, since it involves someone else’s work). However, the exact same methods work for natural items, such as shells, leaves, and flowers.

First, we need to talk about two part molding compound. Although it is not the brand I used in the examples here, the brand I often use is available at: http://www.metalclaysupply.com/Quick-Sil-Silicone-Rubber-Molding-Compound-p/54936_base.htm. Two part molding compound is just what it sounds like: there are two jars of a putty-like substance, one white and one colored. Using two different spoons (this is important, because you do not want to inadvertently mix the compounds), scoop out two approximately equal lumps of each kind. Now you mix them. Roll them over and over, kneading until they are a uniform color, paler than the colored compound. This mixture will remain pliable for about five minutes. In that time period, you can use it to create your own molds or texture sheets.

Now, on to how I used commercial decorative beads: I found two related decorative beads, one of a relatively large bee and another a group of small bees. I used the large bee to make a large bee mold, and the small bees to make a mold of a group of small bees.

20170611_101116

20170611_101124

These were then the logical equivalent of any commercial mold you might buy. I used bronze clay to make images from these molds. After molding, allowing to dry, and finishing, they looked like this:

20170615_172934

To give some thematic unity (beyond bees), I made a textured piece of the same shape as the earrings and mounted the large bee on it. I then attached a bail to the back of the large bee, so there would be a way to hang it.

I fired the pieces in charcoal and tumbled. (Caveat: A small piece of charcoal clung to the leg of the large bee. I did not notice it at the time I took these pictures. It was simply brushed away later. Don’t look at it 😉 ).

20170618_125543

I have, in the past, covered all my bronze work with a heavy patina. I recently had a customer ask me if bronze could be shiny. Recognizing that nature will eventually add a patina, I decided to leave these pieces shiny. All that remained was to attach findings.

The coins in these pictures are for scale. These pictures capture an intriguing feature of bronze without a patina — its color can depend strongly on the angle from which the light hits it. From some angles, the pieces look almost the color of amber, and from others, they are golden and shiny.

With two-part molding compound, you can make your own molds and texture sheets. Look around the house. I am sure you will find something that will make lovely jewelry!


America’s Stonehenge

I haven’t posted for a while because I was on a business trip to New England. Don’t worry. I’m back now, working on metal clay again, and preparing another entry on metal clay techniques.

In the meantime, I thought I would share something about my trip to New England: an American archeological anomaly.

Atop a hill in the town of Salem, New Hampshire (not the Salem famous for witch trials, but not that far from it either) stands a collection of stone structures that resemble  megalithic architecture. Was it build by Native Americas? Possibly, but no other structure that strongly resembles it has been found in New England. By colonists? Certainly, some of the stones were used by colonists (one family even lived on the site). However, the amount of work required to construct such an apparently useless structure would have been enormous. Travelers from the Old World? Unlikely, because, if they did, they left no Old World style pottery shards, arrowheads, clothing fasteners, or other ‘mundane necessities’ that they would have required to build such a structure. Ultimately, the structure is a mystery.

It was once known as Mystery Hill (and was called by this name in an episode of the 70s TV show ‘In Search Of’ , if you remember that). It has been run as a tourist attraction for a long time (visitors included American writer H P Lovecraft — Lovecraft fans often identify the ruins with Lovecraft’s fictional ‘Sentinel Hill’.) It is now known as ‘America’s Stonehenge’  (http://stonehengeusa.com/ ). This name is given because some of the stones align with sunrise and sunset on the solstices. This might have been the intention of whoever built it or it might be a coincidence — there are lots of prominent stones, many of which have been moved. Finding stones that line up with almost anything would probably not be too hard.

Now, some photos:

20170528_13301320170528_13343120170528_13530020170528_13531820170528_135643

The last stone is the one that has caused the most controversy. It is called ‘the sacrificial stone’ because of the grooves. It might have been that. It also might have been part of a wine-press for all anyone knows.

My point here is that, if you are near Salem, New Hampshire, you should visit. Do you choose to interpret it as an odd structure built by early settlers, a Native American archeological site, a mystic wonder, or, as I did, something that inspired H. P. Lovecraft? In any case, it is well worth a few hours of your time.

Combining Five Star Bronze Clay Colors: A Tale of Success and of Failure

I have been experimenting with Five Star brand bronze. Up until now, I have only worked with one color at a time. However, Five Star bronze clays allow co-firing and have the same shrinkage rates. Therefore, it is possible to combine both clays in one piece. I’m going to tell you about two experiments, one of which worked and one of which didn’t. That way, you can avoid my mistakes.

Success: I started off with the notion of including splashes of light bronze in a red bronze piece. My way of doing this was to roll out some light bronze to a thickness of 0.5 mm and some red bronze to a thickness of 1.5 mm. I then cut some strips from the light bronze. The colors of the wet clays are quite similar, but you can tell which is which from the description.

20170512_145529

I then placed the red bronze atop the light bronze, and rolled to a thickness of 1.0 mm.  I packed this into a mold, making sure that the strips of light bronze made up some, but not all, of what would come out of the mold. This takes a leap of faith, since you can’t see what is going on inside the mold, and cannot tell much difference in the color of the clay once it dries. The greenware, after finishing and attaching a red bronze bail, was as follows:

20170514_082019

Five Star clay says to fire the piece at the lowest temperature of the clays, but to increase the firing time to 2 hours. I did this. After tumbling, the dragon looked like this. It might be difficult to tell the difference in the bronzes from the highlights, but the light streak down the dragon’s face and back are, indeed, the light bronze.

20170518_082030

I chose to patina the piece, using a very light patina of Maxblack ™. After doing so and adding a chain, it looked like this:

20170518_083016

The patina somewhat obscured the difference between the two bronzes. However, the difference is much more apparent in person than it is in the photo. I’m not sure why that is, but, in reality, the light and red bronzes are quite distinguishable.

In short, this produced a nice piece that highlighted both bronzes.

Failure: Now I am going to briefly describe something that did not turn out as well. It is possible to inlay copper and bronze by making one clay into a paste, covering the piece, and then sanding away most of the upper layer. This is supposed to leave the paste filling the depressions on the clay. It works great with copper and bronze. Why not two colors of bronze, I asked myself? Well, I found out.

I made a disk of red bronze clay and textured it with a radiating pattern. I then make a paste of light bronze and covered it.

20170511_185026

I sanded the paste away, until the disk was smooth, with the light bronze filling the depressions and the red bronze covering where the original pattern did not have depressions. To decorate it a bit more, I made a Celtic design of red bronze and added it on. The greenware looked like this:

20170514_082027

At this stage, the faint distinction was not alarming. After all, the copper and bronze pieces don’t look impressive at this stage either. I fired the piece.’

20170518_082040

Now you can see the difference, but the difference is subtle. Also, I do not know why one edge came out so different in color from the other. It was a bit discouraging, but you never know what patina is going to do. I tumbled the piece. Then I  patinaed it with Blackmax ™.

20170518_083038

While the Celtic decoration looks OK, the mixed bronze was totally lost. That’s how one learns — don’t do that again.

Bottom line:  Red and light bronze can work very nicely together — particularly when the light strikes the piece so that the red bronze is bright red. However, do not do something that depends on contrast. The contrast is there, but it is subtle, and can easily be lost.


Five Star Brand Red Bronze

After trying Five Star brand light bronze clay, I decided to try Five Star red bronze clay. I will describe my short and simple project (since I had never used this clay before, I didn’t want to put a lot of effort into something that might not work) below.

In short, red bronze clay has many of the same good properties as light bronze clay — it isn’t grainy, and it has a really long working time. Like the light bronze, the red bronze requires two firings, a short one at a low temperature and a longer one at a higher temperature. Like all two-fire clays, the work becomes very fragile after the first firing. This is not an issue if you are cautious in how you handle the work — because it can crumble if handled too roughly and shatter if dropped.

I started out with a pair of simple earrings, textured with a commercial texture sheet. I chose a pair of hands, based on an extant Native American petroglyph. The picture below shows the greenware, resting on the steel mesh on which it will receive its first firing.

20170507_080116

After firing (five minutes at 1000 degrees F) the pieces are very dark.

20170507_112401

Then the pieces are fired in charcoal. The temperature required is higher than for light bronze. The red bronze is supposed to be fired for an hour at 1600 degrees F; of course  your kiln might fire a bit hotter or cooler, so  you will need to experiment a bit.

After coming out of the kiln, the pieces looked like this:

20170508_164246

I was a bit concerned that they would not be distinguishable from copper. After all, if it is going to look like copper, you might as well use copper. However, those fears were allayed after tumbling the pieces. The color somewhat resembles that of copper, but it is easy to tell the difference.

20170508_191118

Finally, before attaching findings, I added just the lightest trace of a patina. I was concerned that the hands would not be visible from a few feet away with out. The final produce, with a coin for scale, appears below.

20170508_192243

The bottom line is that both light bronze and red bronze are easy to use, and give a bit more range in colors for those of us who like to work in bronze. The only drawback is the two stage firing, which isn’t nearly a scary as it sounds.


Five Star Brand Light Bronze Clay

I have recently tried Five Star brand light bronze clay for the first time. I want to post a description of it’s good and bad points, so you can decide if using it is for you.

I have no commercial interest in any company that produces or sells Five Star metal clay. However, I will say that I bought mine from http://www.clayrevolution.com/clay.html. The delivery was fast, and the package contained exactly what I ordered.

Five Star makes a variety of clays. I chose to start with light bronze because it has a sintering temperature substantially lower than most bronze clays (the directions say 1400 degrees F).

Five Star light bronze clay is remarkably easy to work with. Most bronze clays are somewhat grainy, and require a bit of working before you can texture them. Five Star light bronze did not. It was almost as smooth as silver clay, and required no working prior to texturing.  Also, Five Star light bronze clay has a remarkable working time. I did no quantitative measures. However, I can say that I worked it a long time, and noticed none of the stiffening that one often sees with metal clays.

I chose to start simple — a pair of earrings with a commercial texture. The greenware version of the earrings, which were given a slight doming by drying on a curved surface, looked like this:

20170430_080351

Five Star light bronze requires two firings, a five minute one at 1,000 degrees F and an hour one at 1,400 degrees F. This complicates things somewhat. First of all, very few of us have a kiln that fires at exactly the temperature we set it at. That means that some trial and error is required to determine the firing times and temperatures that make things work. I’m only going to report the successful version here. However, multiple less successful versions were discarded along the way. That is a warning that probably applies to any bronze clay you have not used before.

The first firing burns out the organic matrix, and must be done on a steel mesh. After this stage, the pieces are extremely fragile. That shouldn’t frighten you. It just means that you need to be very careful in transferring the pieces between first and second firing, because they will break if you drop them.

After first firing, the earrings looked like this:

20170430_165522 (002)

The second firing requires activated charcoal. After firing, but before tumbling, the pieces looked like this:

20170506_085552

As mentioned, there were several failures before I found a temperature that would work for my kiln. I tested the fired earrings by dapping them very, very slightly. If they bent without breaking, they were properly sintered.

Finally, after tumbling, I attached ear wires. I made the choice to not patina the earrings, because I wanted to show you what the light bronze looks like.

20170506_153526

As you can see, it comes out with a very nice color that could be used in a variety of settings.

So what is the verdict? If you are not worried about firing your metal clay twice (and you shouldn’t be, it isn’t difficult), Five Star light bronze clay is easy to work with and gives you extremely attractive results.

Limited Patina

Usually, one patinas the entire piece and then polishes the patina away from the regions where it is not desired. However, no matter how much one polishes, a trace of the darkness remains. Here, we will discuss what to do it you want most of your piece to remain shiny but want to include a patina on a part of it.

I’m going to describe a small, not terribly elaborate, pendant I recently made. The idea of applying patina to only part of the piece is the key notion — it can be used with any work you have done.

To start with, I molded a bit of Celtic knotwork, contained within a circle, from silver clay. I decided that I didn’t want it to be flat, but I also didn’t want very much doming. While one can shape a piece after it is fired, it is easier to do it while the clay is still wet. In my bathroom, I found a bottle of roll-on antiperspirant that had just the right curvature. By the way, that is a secondary message of this post — be creative in what you use to dry metal clay! Any plastic or glass surface will work.

20170420_142945

After the clay had dried, I sanded the pendant and added a bail. Since the piece is quite small (a later picture will give you the scale), I was careful to make an appropriately small bail.

20170420_145145

After firing, I decided that the piece needed something to brighten up the center. Keum boo (a Korean technique for bonding thin layers of gold to silver) seemed the ideal approach. I have discussed, in another posting, how one does keum boo, so I won’t repeat it here. However, I will observe that, the more layers of gold you attach (gold will bond with itself just the same as it bonds with silver), the shinier the gold part is. In many cases, multiple layers of gold would be expensive. Here, the gold is going on such a small surface area that I could apply four layers of gold.  That gave an extremely shiny center to the piece.

20170423_121332

Next came brushing. I don’t know if brushing can remove the gold from keum boo. I don’t want to risk it. Therefore, I cover the gold part with my thumb while brushing.

20170423_163158

The next step is the one I discussed at the start. I wanted to patina the knotwork, but leave the rest of the silver shiny. I trimmed a cotton swab, to better control where it goes, dipped it in Black Max (c), and applied it to the knotwork. Since one can’t easily patina gold, one does not have to worry about the keum boo — any patina that spills onto it can be wiped away and leave no trace. Then, using a polishing cloth, I wiped away much of the patina, only leaving enough darkness to outline the knotwork.

I attached a chain, and I was done.

The photo below shows the final piece, complete with a US quarter for scale.  Don’t feel obliged to patina a whole piece! Sometimes, just a touch of patina is just what you want.

20170423_163931

Wanderer

I haven’t posted in a while because I have been busy with a commission. However, I’m going to talk about that commission and how it was made. That will allow us to discuss both building complex forms from simple components and heat patina on bronze.

My commission was to make a figure of the Norse god Odin that looks like it has spent centuries in the earth. (The title ‘Wanderer’ is one of Odin’s names.) Let’s start with a look at the finished product. Note that this is a depiction of what a real Viking helm would have looked like. The horned helms are a 19th Century notion, and have no historic precedent.

20170414_083914

Bronze seems the obvious metal to use in a Viking age piece. I used Fastfire Bronzclay., my favorite form of bronze clay. There are no commercial molds that would do. I did not want to sculpt the figure. Therefore, I built the figure up from simple components.

I started out with a mold for a male face. The mold was probably intended for polymer clay, but a mold for one can be used for the other.

20170326_092221

Next I made an eye patch and a band that would hold it in place, if it were a real eye-patch (the Norse god sacrificed one of his eyes for wisdom). Then I made the base of the helm. I started out with the helm having runic letters on it. As you can see from the finished project, I changed my mind about that later.

20170327_192030

Next I put on a band around the base of the helm. Then I made a beard and mustache. There were done by texturing clay with a hair pattern, and then cutting out the pieces with a clay cutter. I did not use any form of template for the beard and mustache, but simply eyeballed it.

20170401_093117

I then added a tuft of hair hanging out from under the helm, to cover where the ear would be on a real person.

20170401_143824

I put on the reinforcing bands of the helm and the nasal (the piece of metal that sticks down to protect the nose in a real helm).

20170402_103859

Here it is after some clean-up, but before attaching the bale.

20170403_190742

Here it is after firing, with a bale attached. I used the same texture on the bale that I used on the nasal and reinforcing bands on the helm.

20170414_083820

I had planned a conventional tumbling and then patinaing with Black Max (c). However, the heat patina turned out quite nicely. There are patches of red, green, and purple (the photo does not do it justice — the actual colors are lovely). Therefore, I decided to leave it with a heat patina, with only a light polishing of the left eye, so that the details would not be obscured by the patina.

Heat patina can be a wonderful addition to bronze or copper. You heat the metal, and it develops nice colors. The problem is that it is difficult to impossible to control what the colors will be. You simply take what you get.

There are at least two ways to do heat patina. One is to heat the piece with a torch after you are done. Care must be exercised to not get the piece so hot that it melts. The other approach is to use the heat of the kiln. However, if you fire in charcoal (which you must for bronze), the patina gets re-absorbed into the charcoal as the piece cools. Therefore, to preserve heat patina, you must remove the piece from the charcoal while it is still warm. This takes care — you want it to be warm enough to work, but, if you use your hands to remove the metal from the charcoal, not so hot so that you get burned. With some practice, you can learn to do this.

Finally, I will note that, if you don’t like the heat patina, you can simply refire the piece. The patina will vanish somewhere around 1000 degrees F.

Use this as you inspiration for making your own pieces by combining simple forms! It takes time and effort, but it is worth it!


20170414_083914

American Jade

This time, I’m going to talk about a gemstone that I have recently learned about: American Jade aka Vesuvianite  aka Californite.  What I say here is not limited to metal clay enthusiasts, but applies equally well to any jewelry maker.

American Jade is a translucent yellow-green mineral, of moderate hardness, that flashes in an intriguing manner as the light falls on it. The name ‘American Jade’ originates because it resembles jade, but is more translucent. The name ‘Californite’ originates from the American state of California having rich deposits of it (which is fortunate, because that makes it inexpensive to purchase). The name ‘Vesuviante’ originates from the fact that the mineral was first found near Mt. Vesuvius, in Italy. However, the term ‘vesuvianite’ also covers the blue and brown forms of the mineral, caused by various impurities.

Why am I talking about this mineral?  Simply because it is both beautiful and inexpensive! That’s a winning combination if I ever heard one!  While, as far as I know, you can’t fire it in place, it can be set in metal clay (or traditional metalsmithing) jewelry by using bezel wire or bezel cups. I wanted to call your attention to this lovely stone, and encourage you to consider using it in your creations.

I’m wrapping up with photographs of two rings I recently made, set with American Jade cabochons in bezel cups. I hope you will choose to explore this lovely stone!

20170309_14554620170309_14554620170323_14440920170323_144351