

Sure, there are lots of commercial molds out there. I use them. But that limits you to what you can find on the market. You can make your own molds, too. The example I give here involves using commercial decorative beads (which limits your ability to sell the pieces, since it involves someone else’s work). However, the exact same methods work for natural items, such as shells, leaves, and flowers.
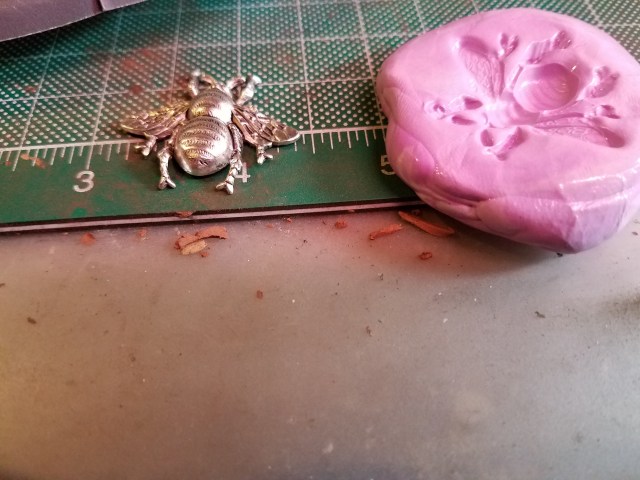
First, we need to talk about two part molding compound. Although it is not the brand I used in the examples here, the brand I often use is available at: http://www.metalclaysupply.com/Quick-Sil-Silicone-Rubber-Molding-Compound-p/54936_base.htm. Two part molding compound is just what it sounds like: there are two jars of a putty-like substance, one white and one colored. Using two different spoons (this is important, because you do not want to inadvertently mix the compounds), scoop out two approximately equal lumps of each kind. Now you mix them. Roll them over and over, kneading until they are a uniform color, paler than the colored compound. This mixture will remain pliable for about five minutes. In that time period, you can use it to create your own molds or texture sheets.
Now, on to how I used commercial decorative beads: I found two related decorative beads, one of a relatively large bee and another a group of small bees. I used the large bee to make a large bee mold, and the small bees to make a mold of a group of small bees.

These were then the logical equivalent of any commercial mold you might buy. I used bronze clay to make images from these molds. After molding, allowing to dry, and finishing, they looked like this:
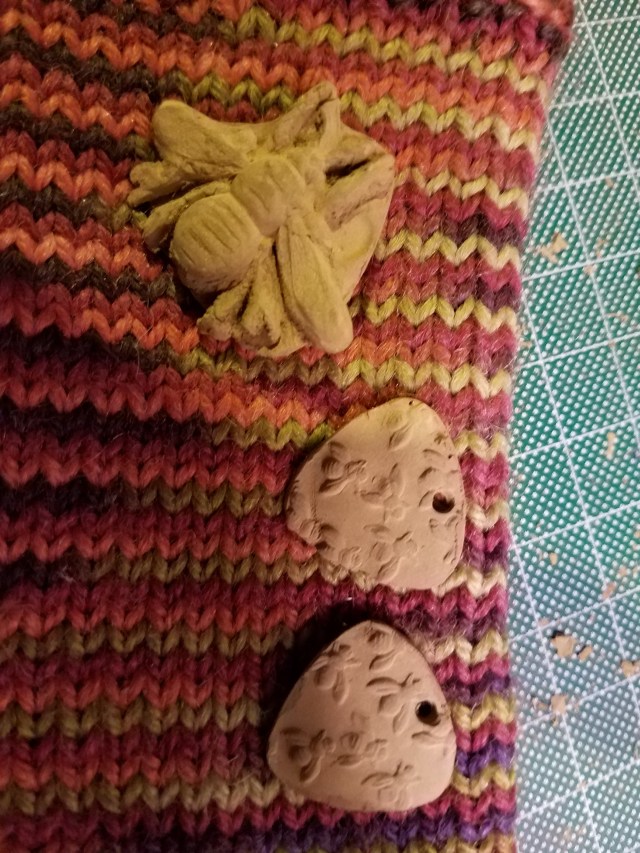
To give some thematic unity (beyond bees), I made a textured piece of the same shape as the earrings and mounted the large bee on it. I then attached a bail to the back of the large bee, so there would be a way to hang it.
I fired the pieces in charcoal and tumbled. (Caveat: A small piece of charcoal clung to the leg of the large bee. I did not notice it at the time I took these pictures. It was simply brushed away later. Don’t look at it 😉 ).
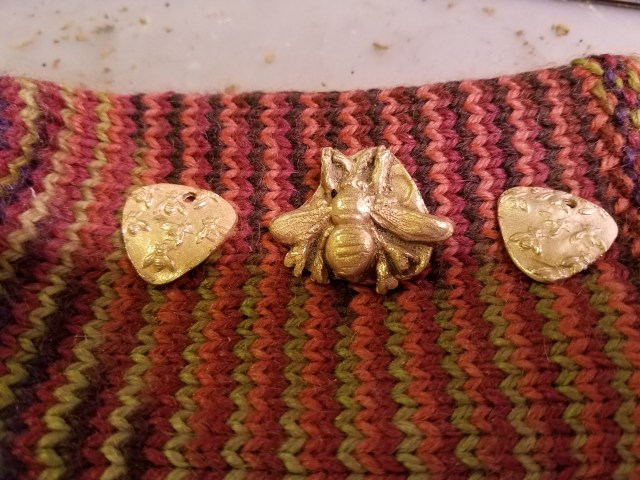
I have, in the past, covered all my bronze work with a heavy patina. I recently had a customer ask me if bronze could be shiny. Recognizing that nature will eventually add a patina, I decided to leave these pieces shiny. All that remained was to attach findings.


The coins in these pictures are for scale. These pictures capture an intriguing feature of bronze without a patina — its color can depend strongly on the angle from which the light hits it. From some angles, the pieces look almost the color of amber, and from others, they are golden and shiny.
With two-part molding compound, you can make your own molds and texture sheets. Look around the house. I am sure you will find something that will make lovely jewelry!
