A Mixed Metal Pendant

This mixed metal piece is made from silver, copper, and goldstone. The color is from an application of colored pencils to the unfurnished silver.
This mixed metal piece is made from silver, copper, and goldstone. The color on the border is from an application of colored pencils to the unfurnished silver. Instructions for making this piece, or a similar one, appear below.
I used a bezel cup for the stone. Extrude a long 'rope' of metal clay, a little longer than twice the distance around the cup. Hold up by the middle. Twist the two ends around themselves to from a twisted pattern. Wrap the bezel in this. I added a bit of decorative syringe work.
I used a fine silver bezel cup for the stone. Fine silver bezel cups will fire with silver clay with no issues. Extrude a long ‘rope’ of silver clay, a little longer than twice the distance around the cup. Hold up by the middle. Twist the two ends around themselves to from a twisted pattern. Wrap the bezel in this. I added a bit of decorative syringe work, just to make it a bit more intricate.
Roll the clay 0.75 mm thick. Cut out a window (I used a 'puffy square' template). Cut out the same shape on a larger scale. Fire, but do not brush or burnish.
Roll the silver clay 0.75 mm thick. Cut out a window (I used a ‘puffy square’ template). Cut out the same shape on a larger scale. Fire, but do not brush or burnish. Be sure to leave a hole for a bail (if you intend to use a pinch bail, as I did). Otherwise, you can simply make one as a part of the piece.
Using colored pencils on the unbrushed silver (caveat: once brushed, colored pencils will not take) make a blue mark in the center. I chose to only go three quarters of the way around. This was a choice. One could obviously go more or less.
Using colored pencils on the unbrushed silver (caveat: once brushed, colored pencils will not take) make a blue mark in the center. I chose to only go three quarters of the way around. This was a choice. One could obviously go more or less of the way around the border.
I used several shades of green to go to the edge.
I used several shades of green to go to the edge. Multiple shades make the piece more visually interesting.
To eliminate the harsh edges of the colored pencil, wad up a paper towel and rub the colors vigorously. They will blend and smooth nicely. After this is done, using an agate burnisher, burnish the parts that have not been colored (if any). Spray with the fixative that artists generally use on colored pencil. Be sure to hold your breath while spraying -- that stuff is vile!
To eliminate the harsh edges of the colored pencil, wad up a paper towel and rub the colors vigorously. They will blend and smooth nicely. After this is done, using an agate burnisher, burnish the parts that have not been colored (if any). Spray with the fixative that artists generally use on colored pencil. Be sure to hold your breath while spraying — that stuff is vile!
I patinaed a piece of 24 gauge copper with used cat litter. Yes, it sounds gross, but, once it is done, you can wash it and there is no trace of smell and you get a nice color. I cut out the copper to match the back of the piece. It is important to saw the copper -- if shears are used, the patina will pell off. The corner is missing because of the shape of the copper sheet I had. Since it will be hidden, it does not matter.
I patinaed a piece of 24 gauge copper with used cat litter. Yes, it sounds gross, but, once it is done, you can wash it and there is no trace of smell and you get a nice color. I cut out the copper to match the back of the piece. It is important to saw the copper — if shears are used, the patina will pell off. The corner is missing because of the shape of the copper sheet I had. Since it will be hidden, it does not matter.
A snapped a goldstone cabachon into the bezel. I used two part epoxy to attach the bezel to the copper, and then the copper to the frame. Solder would not work, because one would lose the patina. Once two-part epoxy is thoroughly dry, it will stand up to normal wear. Attach a pinch bail. The piece is complete!
A snapped a goldstone cabachon into the bezel.  The stone should stay in the bezel by friction, especially if you bend the bezel edge over the stone a bit. If it does not, two part epoxy can be used. I used two part epoxy to attach the bezel to the copper, and then the copper to the frame. Solder would not work, because one would lose the patina. Once two-part epoxy is thoroughly dry, it will stand up to normal wear. Attach a pinch bail. The piece is complete!

Making a pair of colored metal clay earrings

Finished product
Finished product

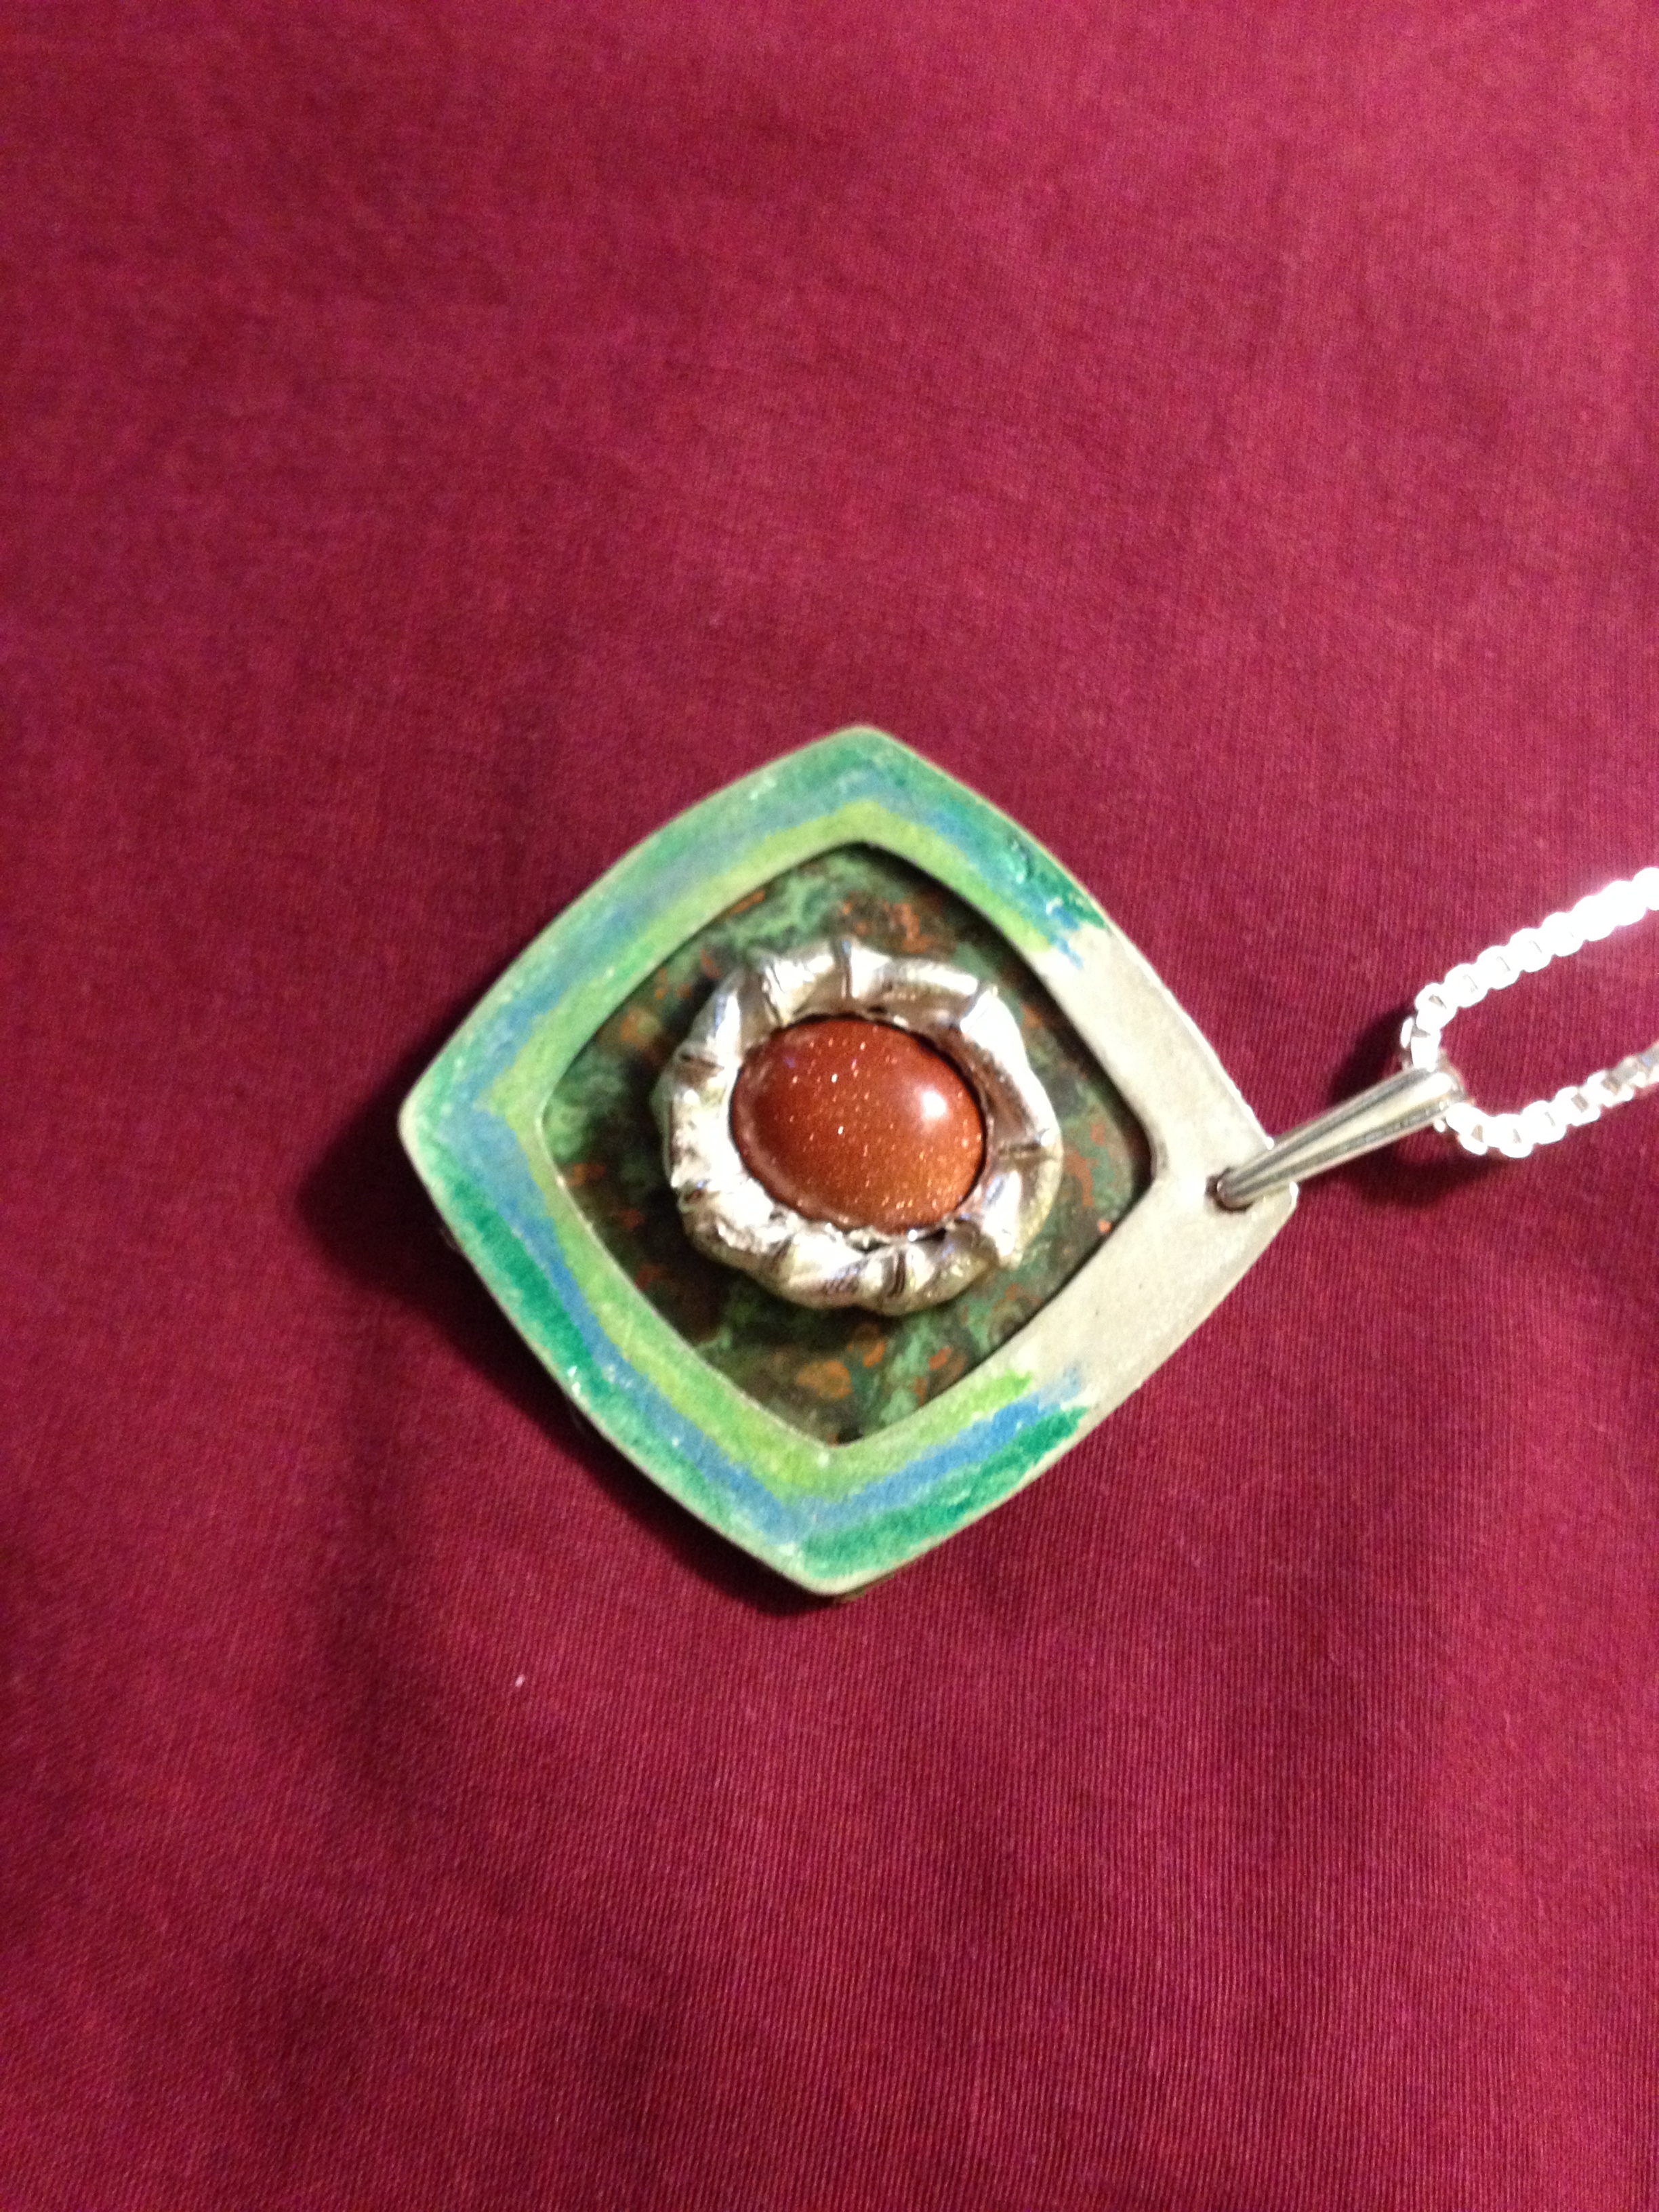
Metal is great. Patinaed metal is great. Enameled metal is great. But sometimes you want a drop of color that is not quite enamel. These earrings are an example of how to do that. The pattern was a throwback to my hippie youth of many decades ago. Of course the same idea works with any pattern.

Figure 1. A raised texture on a smooth background.

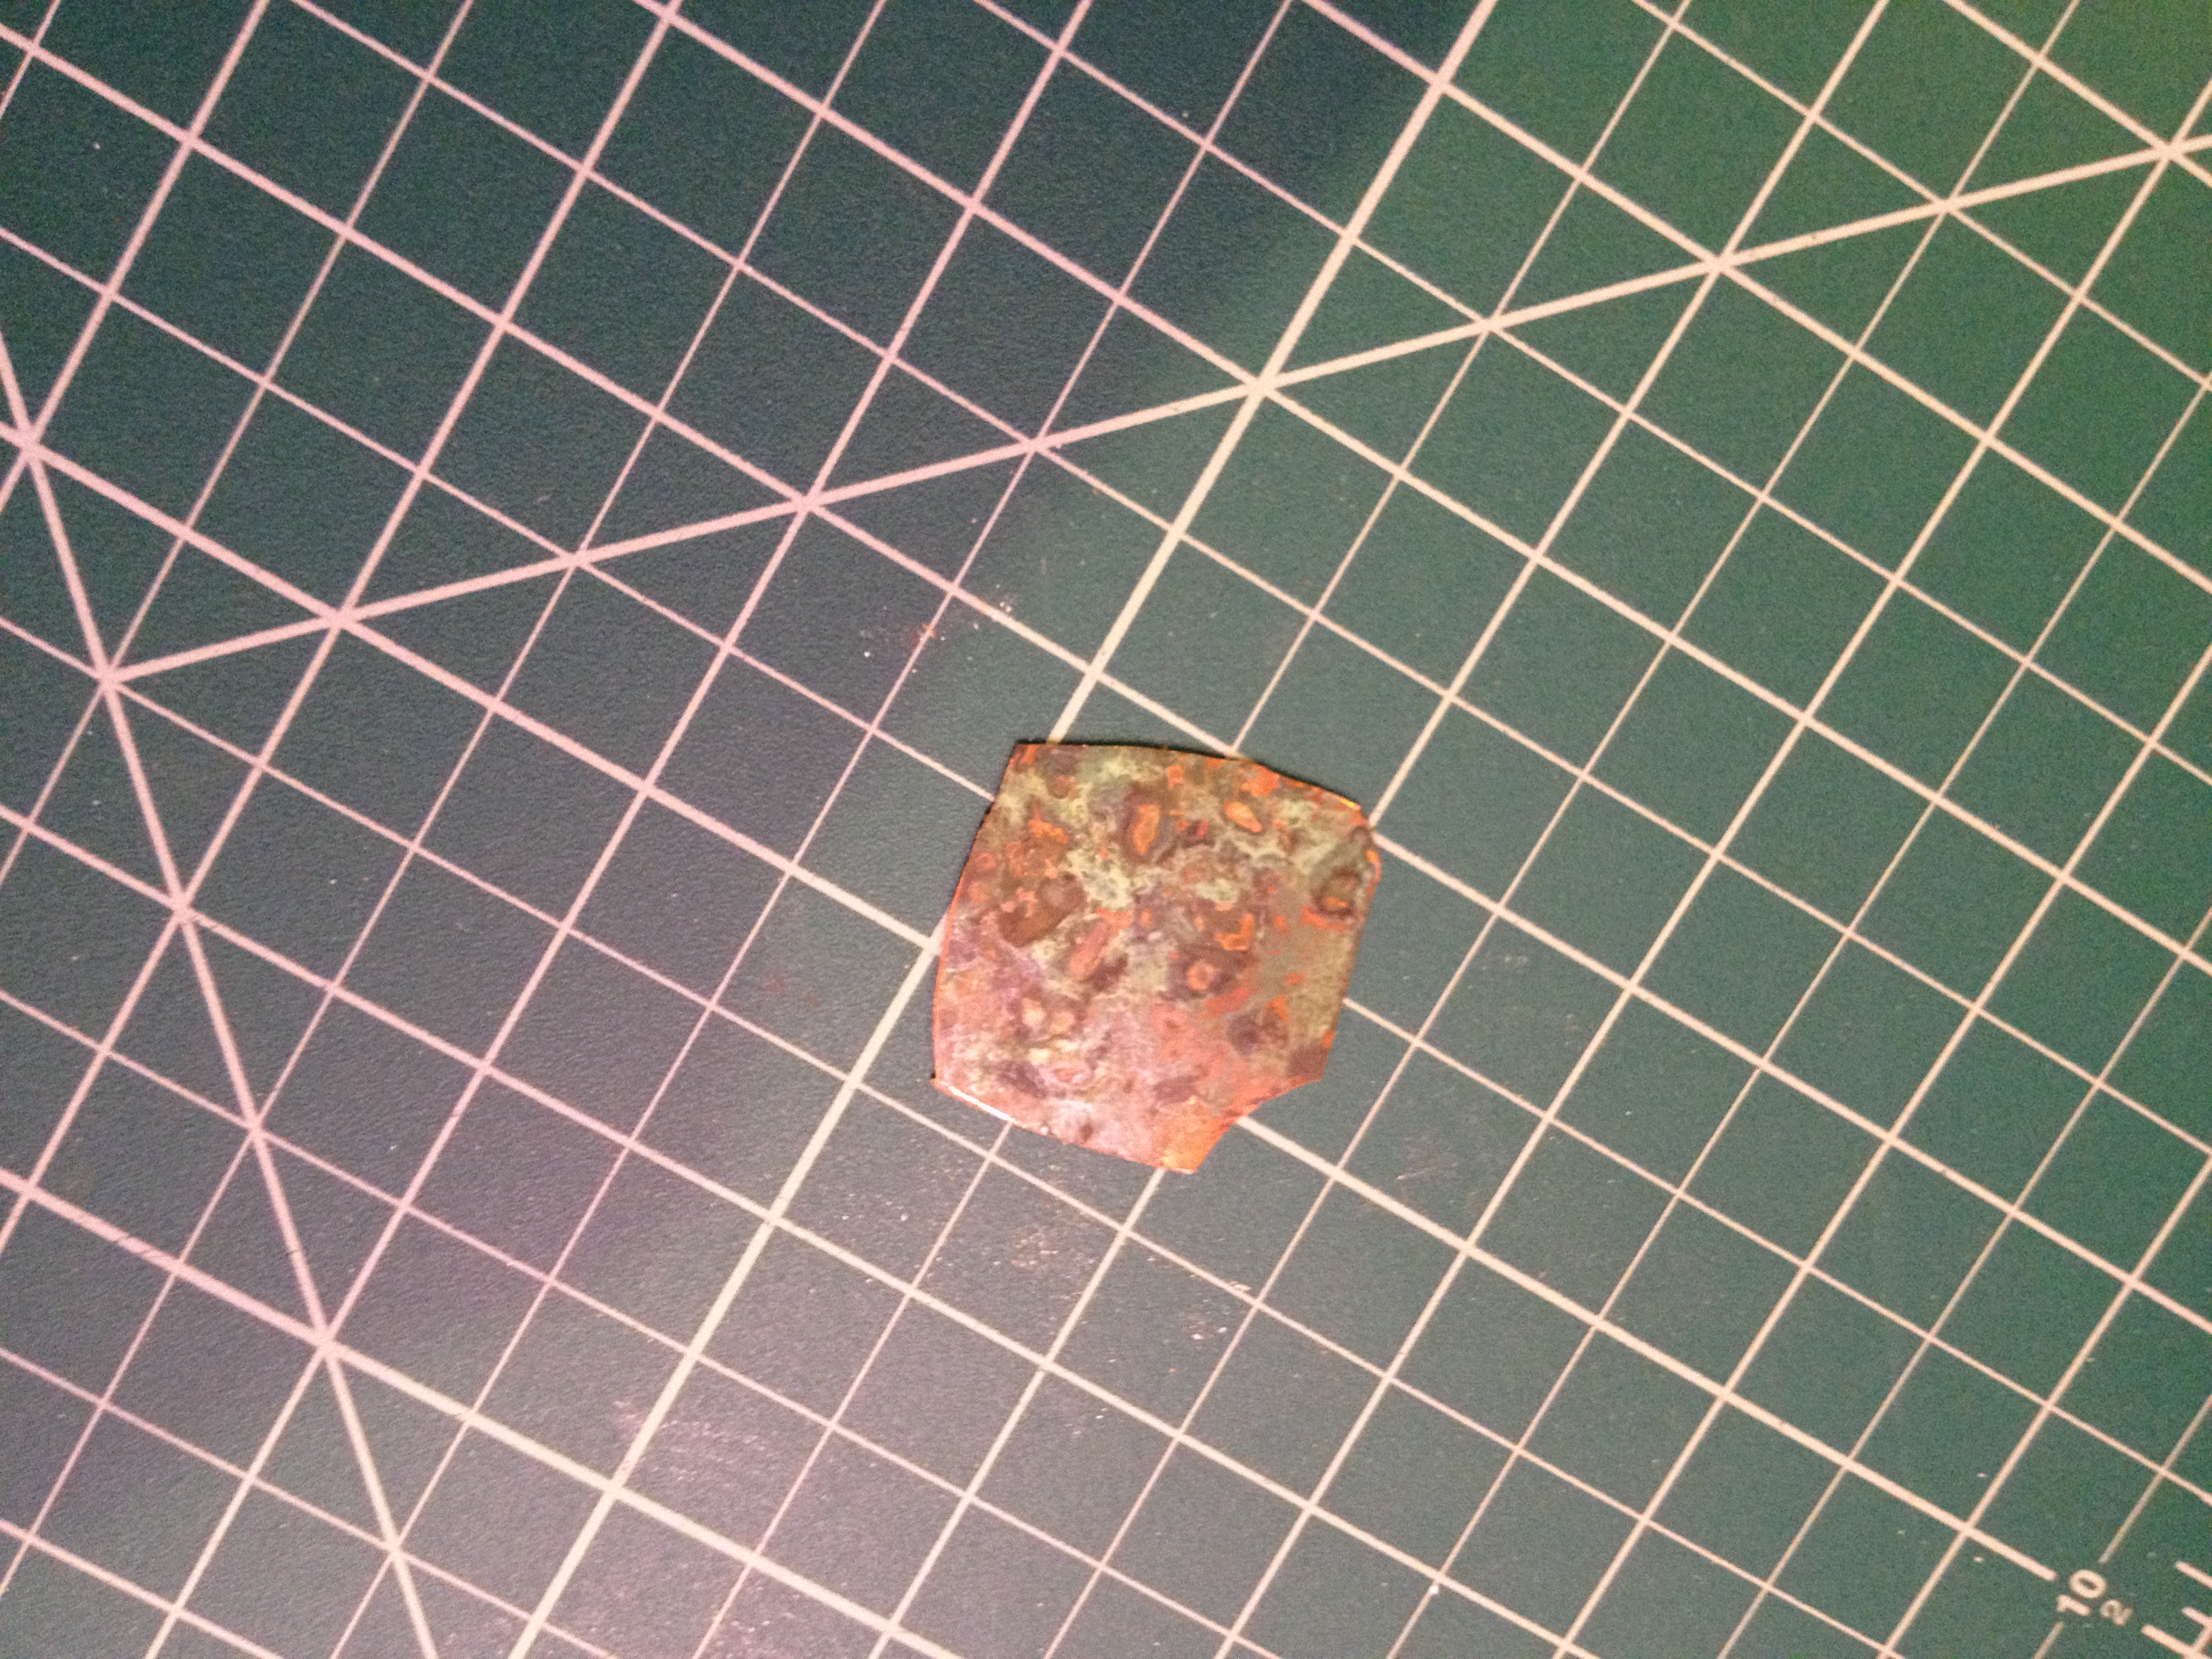
Step 1. Roll the clay to a thickness of 1.5mm. Yes, this is really thick for earrings. All will be made well. Lubricate a texture sheet (the one in the photo is not the one I used in the piece, but the actual sheet used didn’t photograph well). Lubricate a template. Lay the template atop the texture sheet, lubricated side up. Roll to a thickness of 0.75 mm. This will result in a textured, raised pattern on a smooth background. Then cut out the desired shape (I used a circle) and make openings for the earwires.

Figure 2. Drying
Figure 2. Drying

Step 2. I like three dimensional earrings. I dried the clay on plastic Easter eggs to give them shape. Afterward, they were cleaned used standard greenware techniques. I fired them at 1500 degrees F for an hour (I was co-firing 960 sterling).

Step 3. Starting to color.

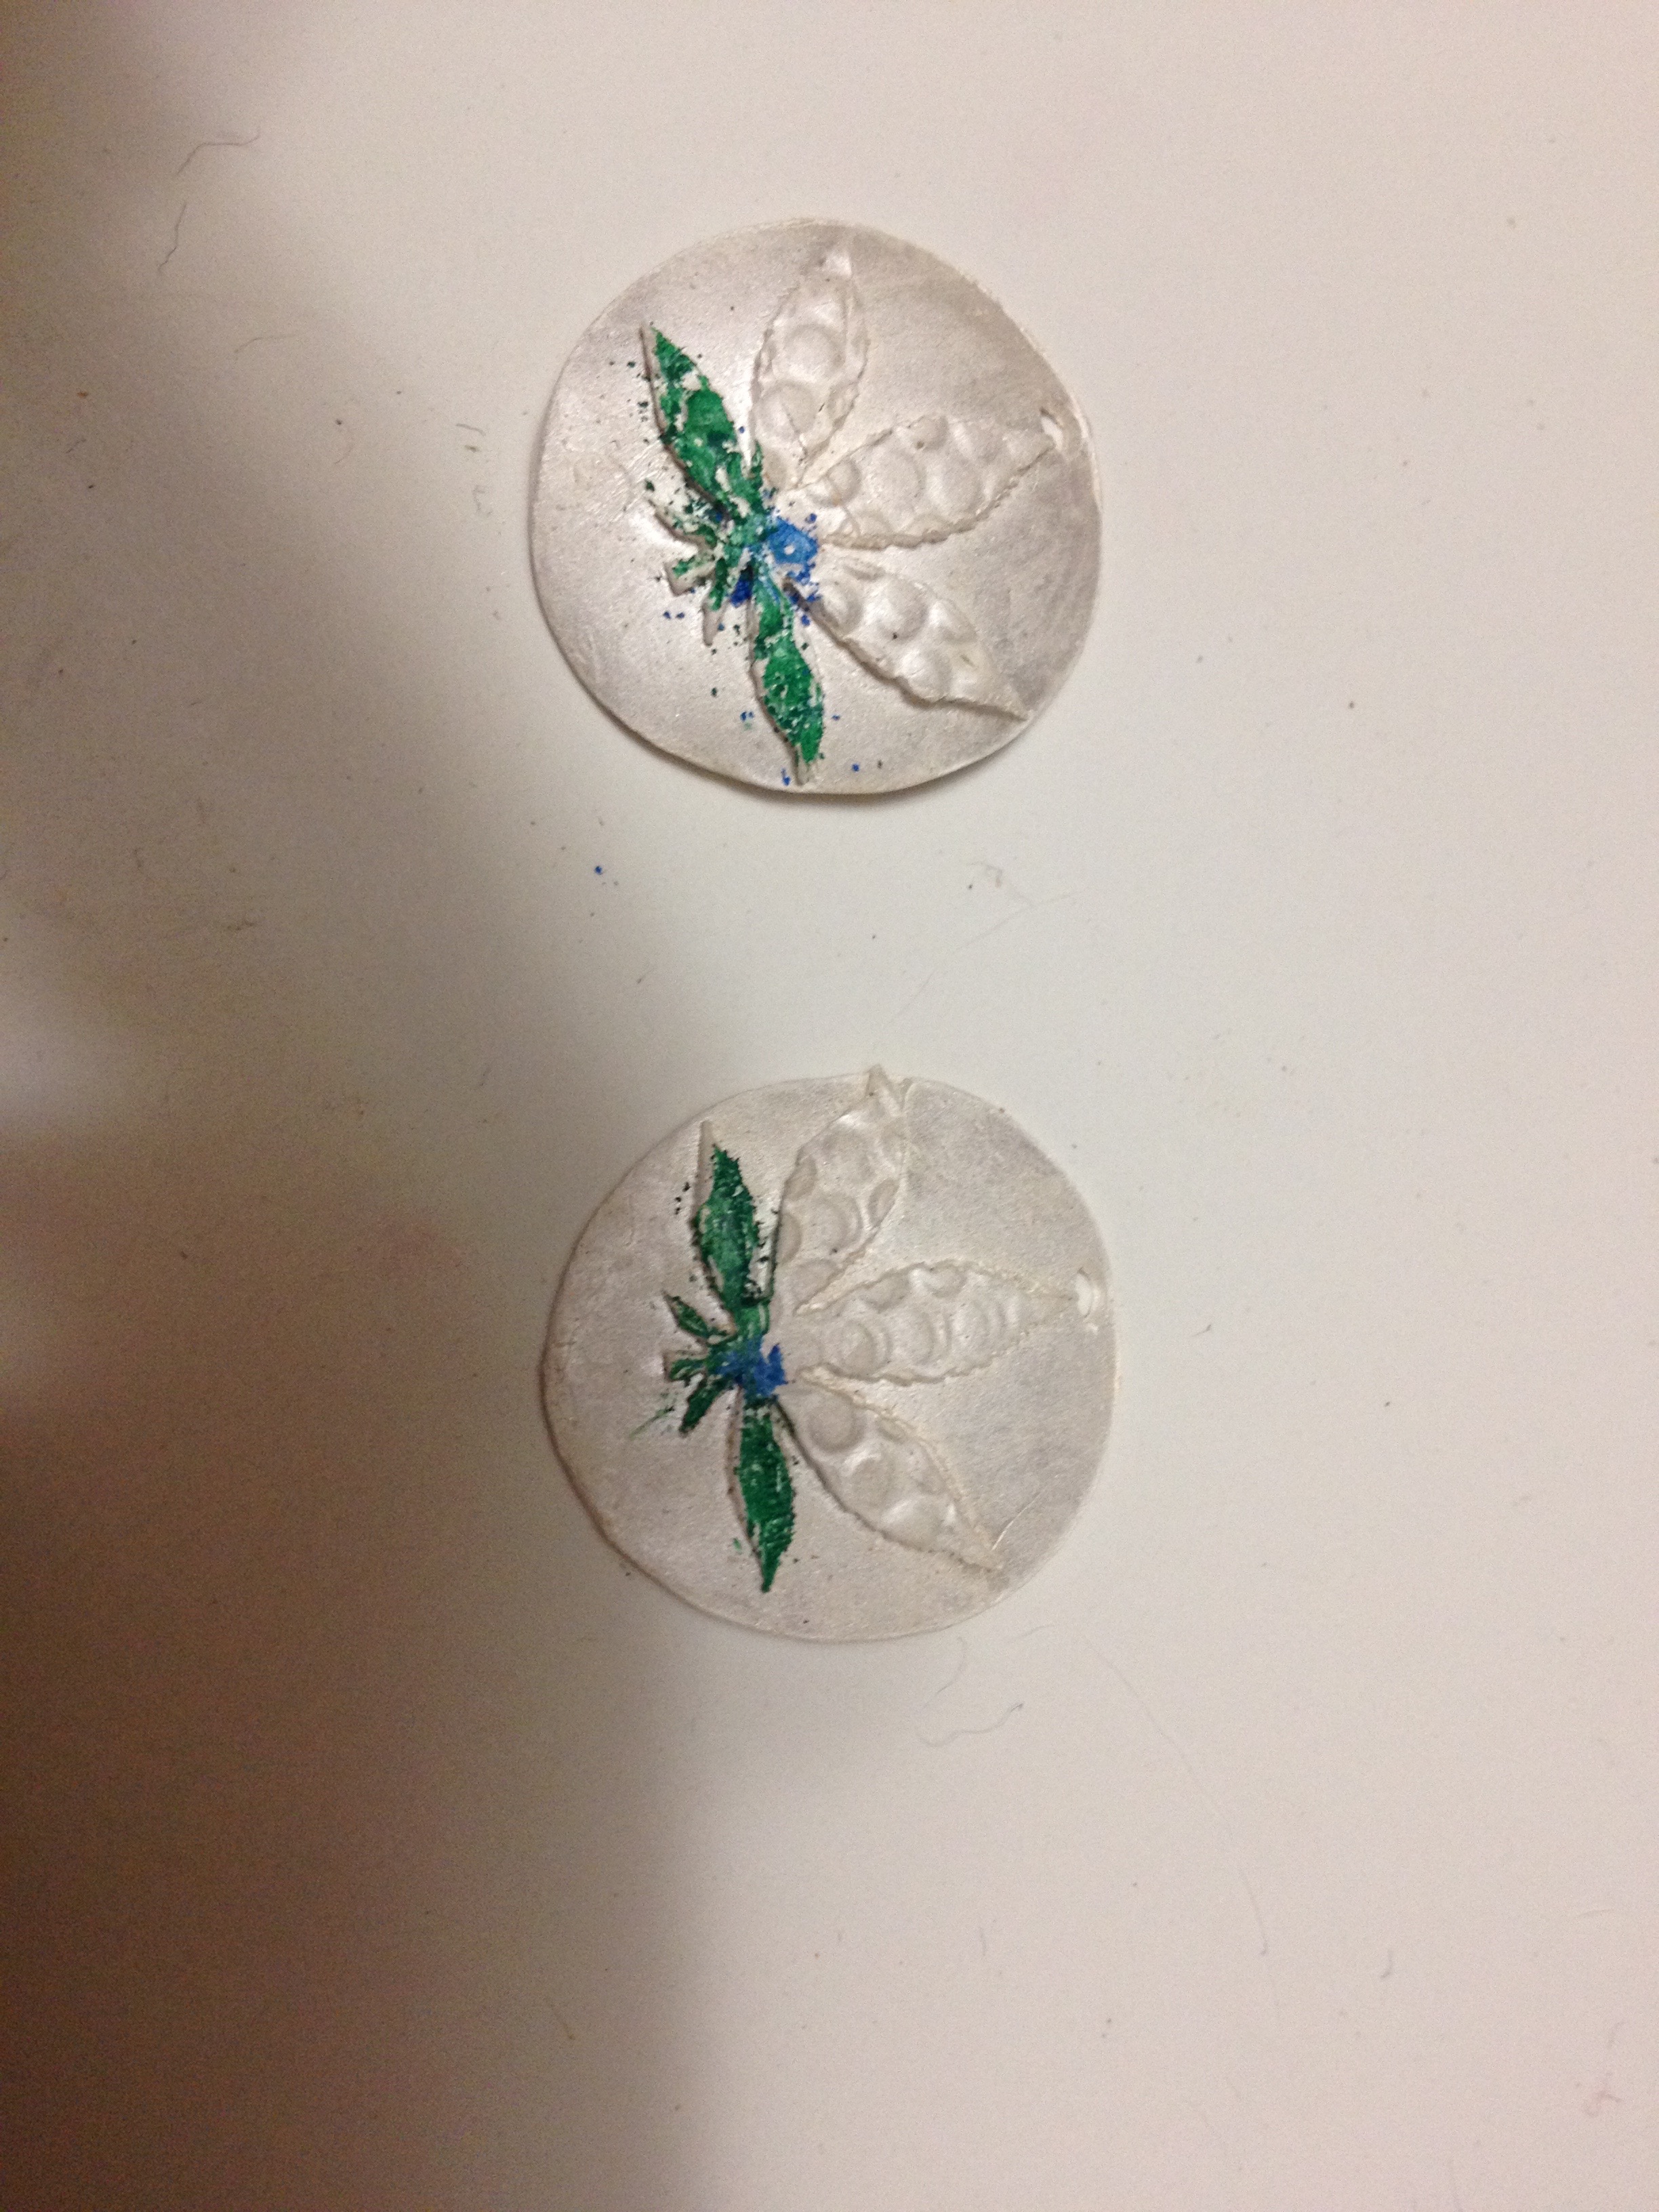
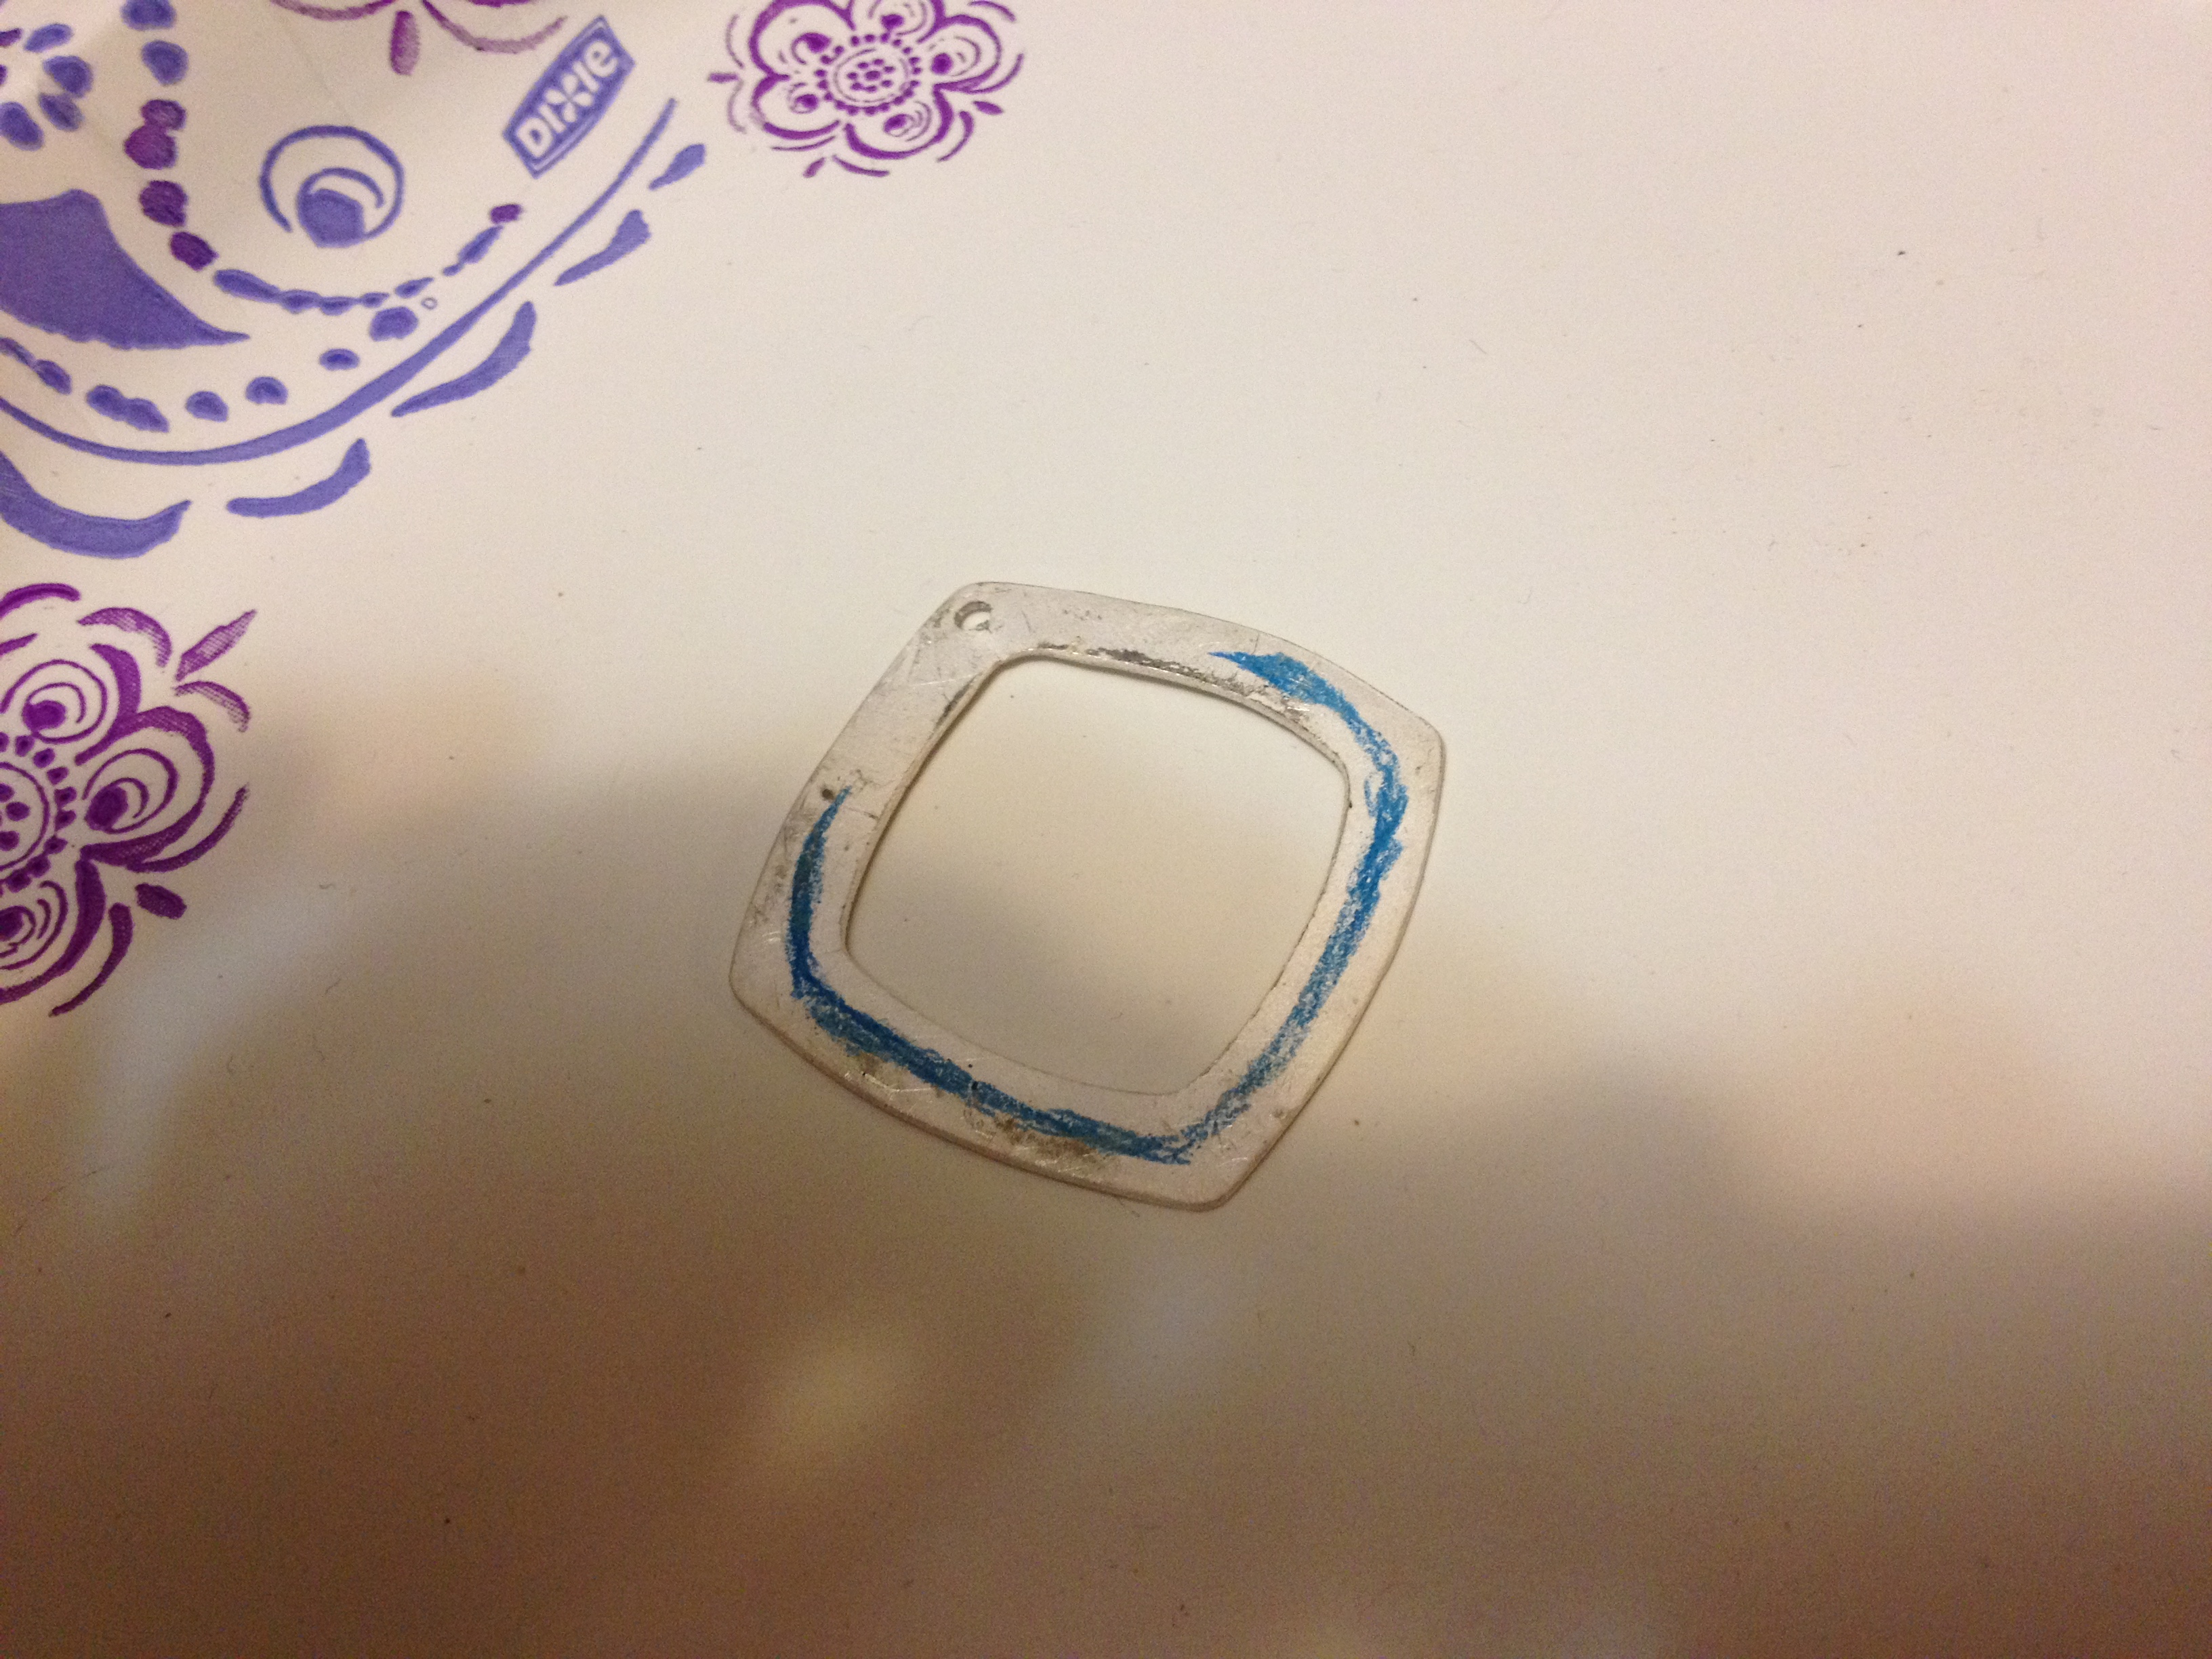
Do not brush the silver after it comes out of the kiln. Instead, after it has cooled, use colored pencils to provide color. The breaks between the different colors will be dramatic. Don’t worry. We’ll fix that later. You can layer, add shadows, whatever.

Figure 4. Color complete.
Step 4. Color complete.

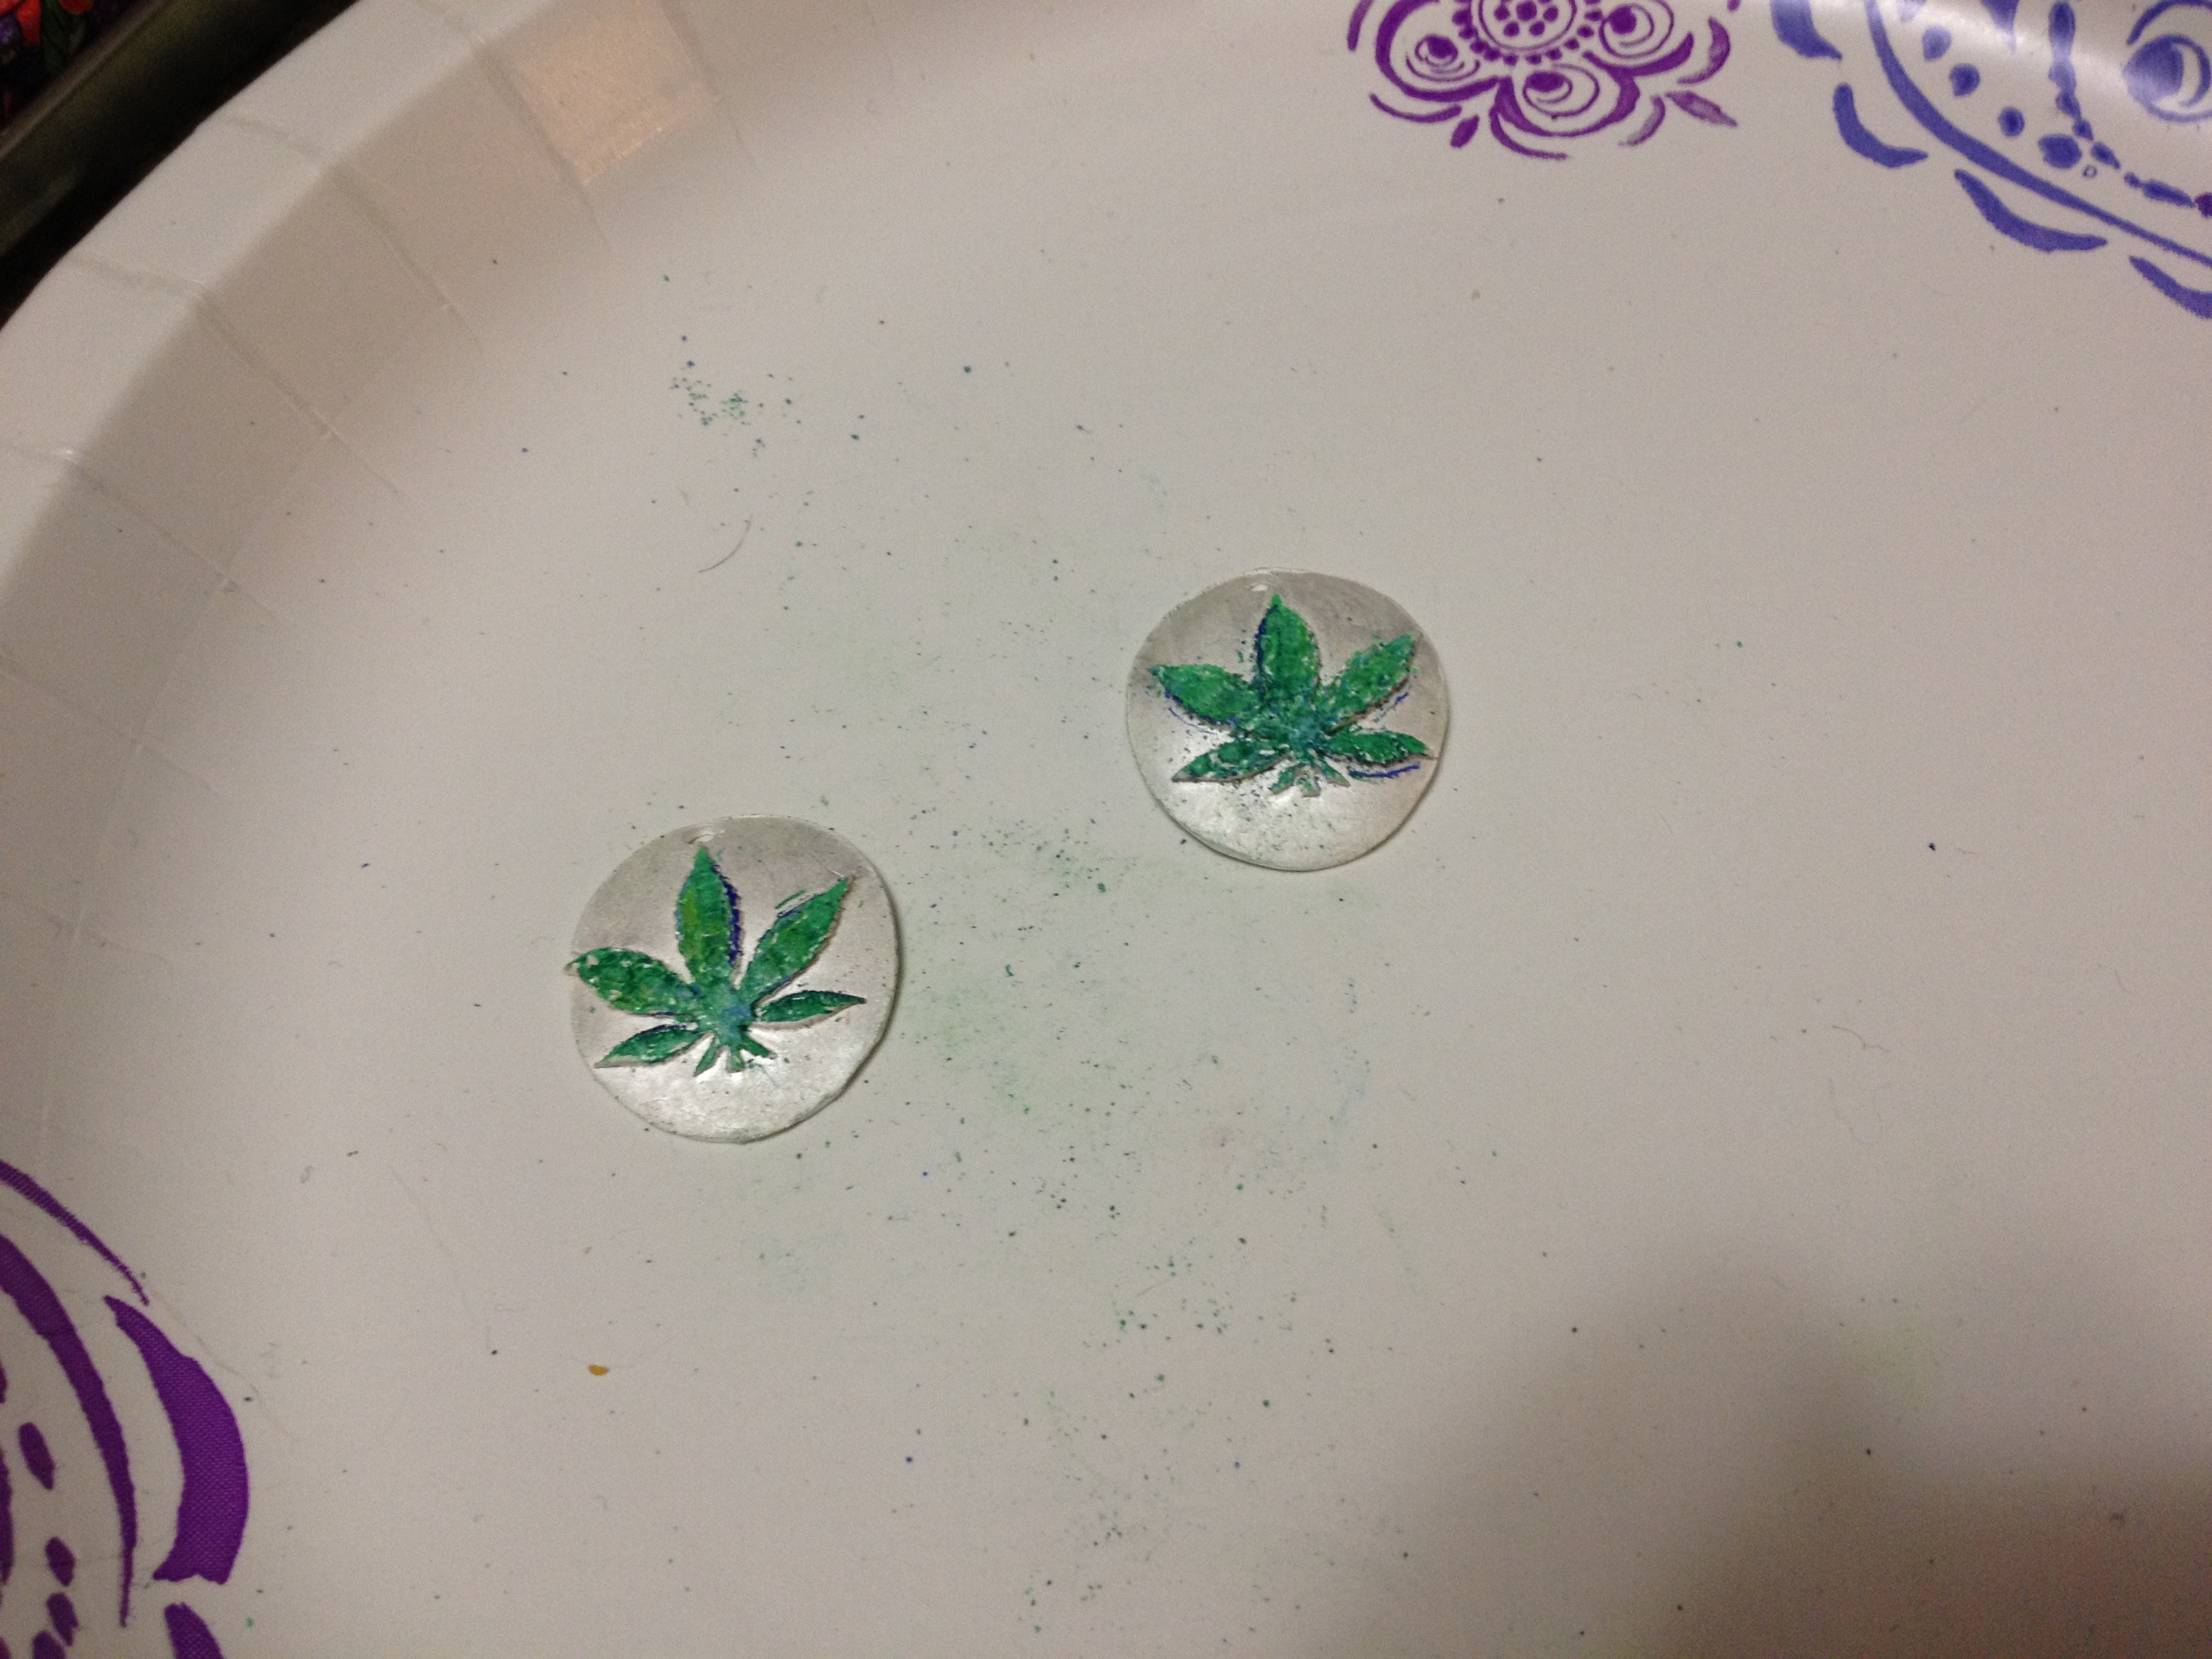
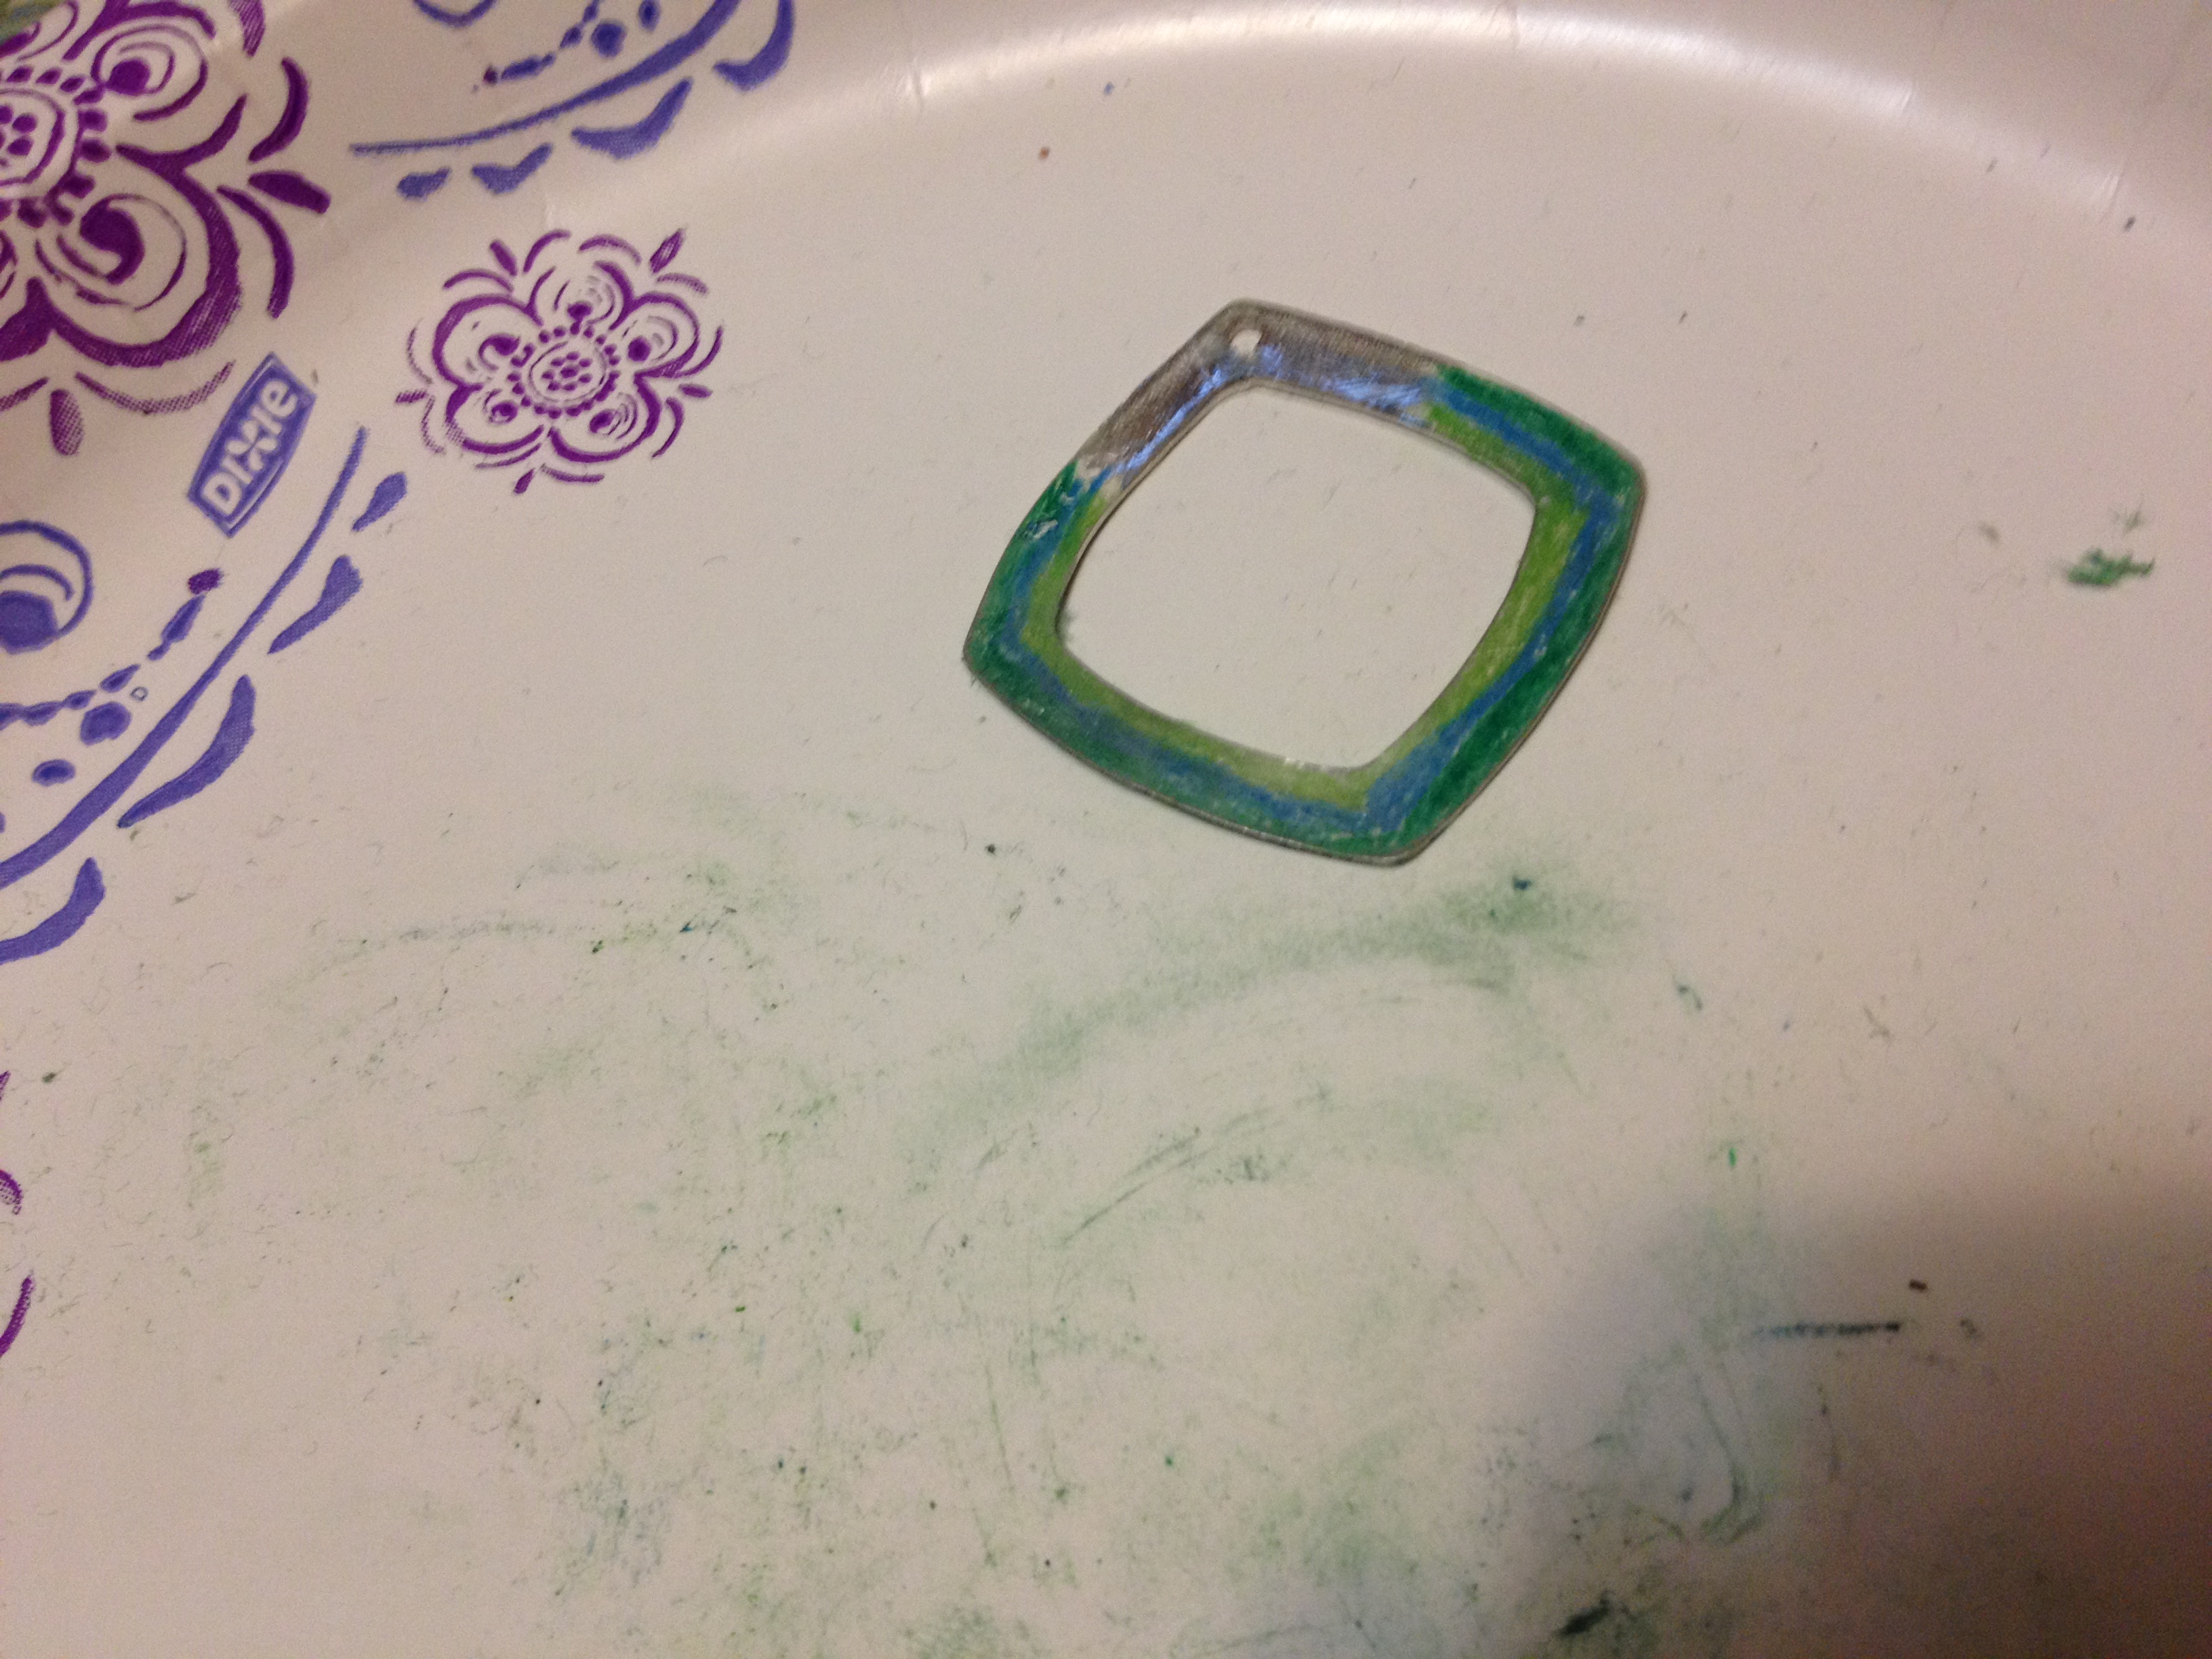
After the color is complete, use a wadded paper towel or similar soft implement to blend colors. The more you rub, the more natural the color will look.

Step 5. Burnish and spray.

Brush, with your thumb over the colored pencil. Yes, you will lose some color, but you can go back in and repair it. Tumbling would remove the colored pencil. To make these shiny, you need an agate burnisher (and patience, to work around the corners). Any spots that are not colored can be fixed with the pencils. Now comes the most important part: spray with the same fixative that artists use for colored pencils. Without that, the color will wear off. The spray is available in a variety of forms (e.g. shiny and matte). Use the one you prefer. The spray is pretty noxious, so it is best to hold breath, spray, stand back, and then breath again. Let the spray dry.

Step 6. All done!
Step 6. All done!

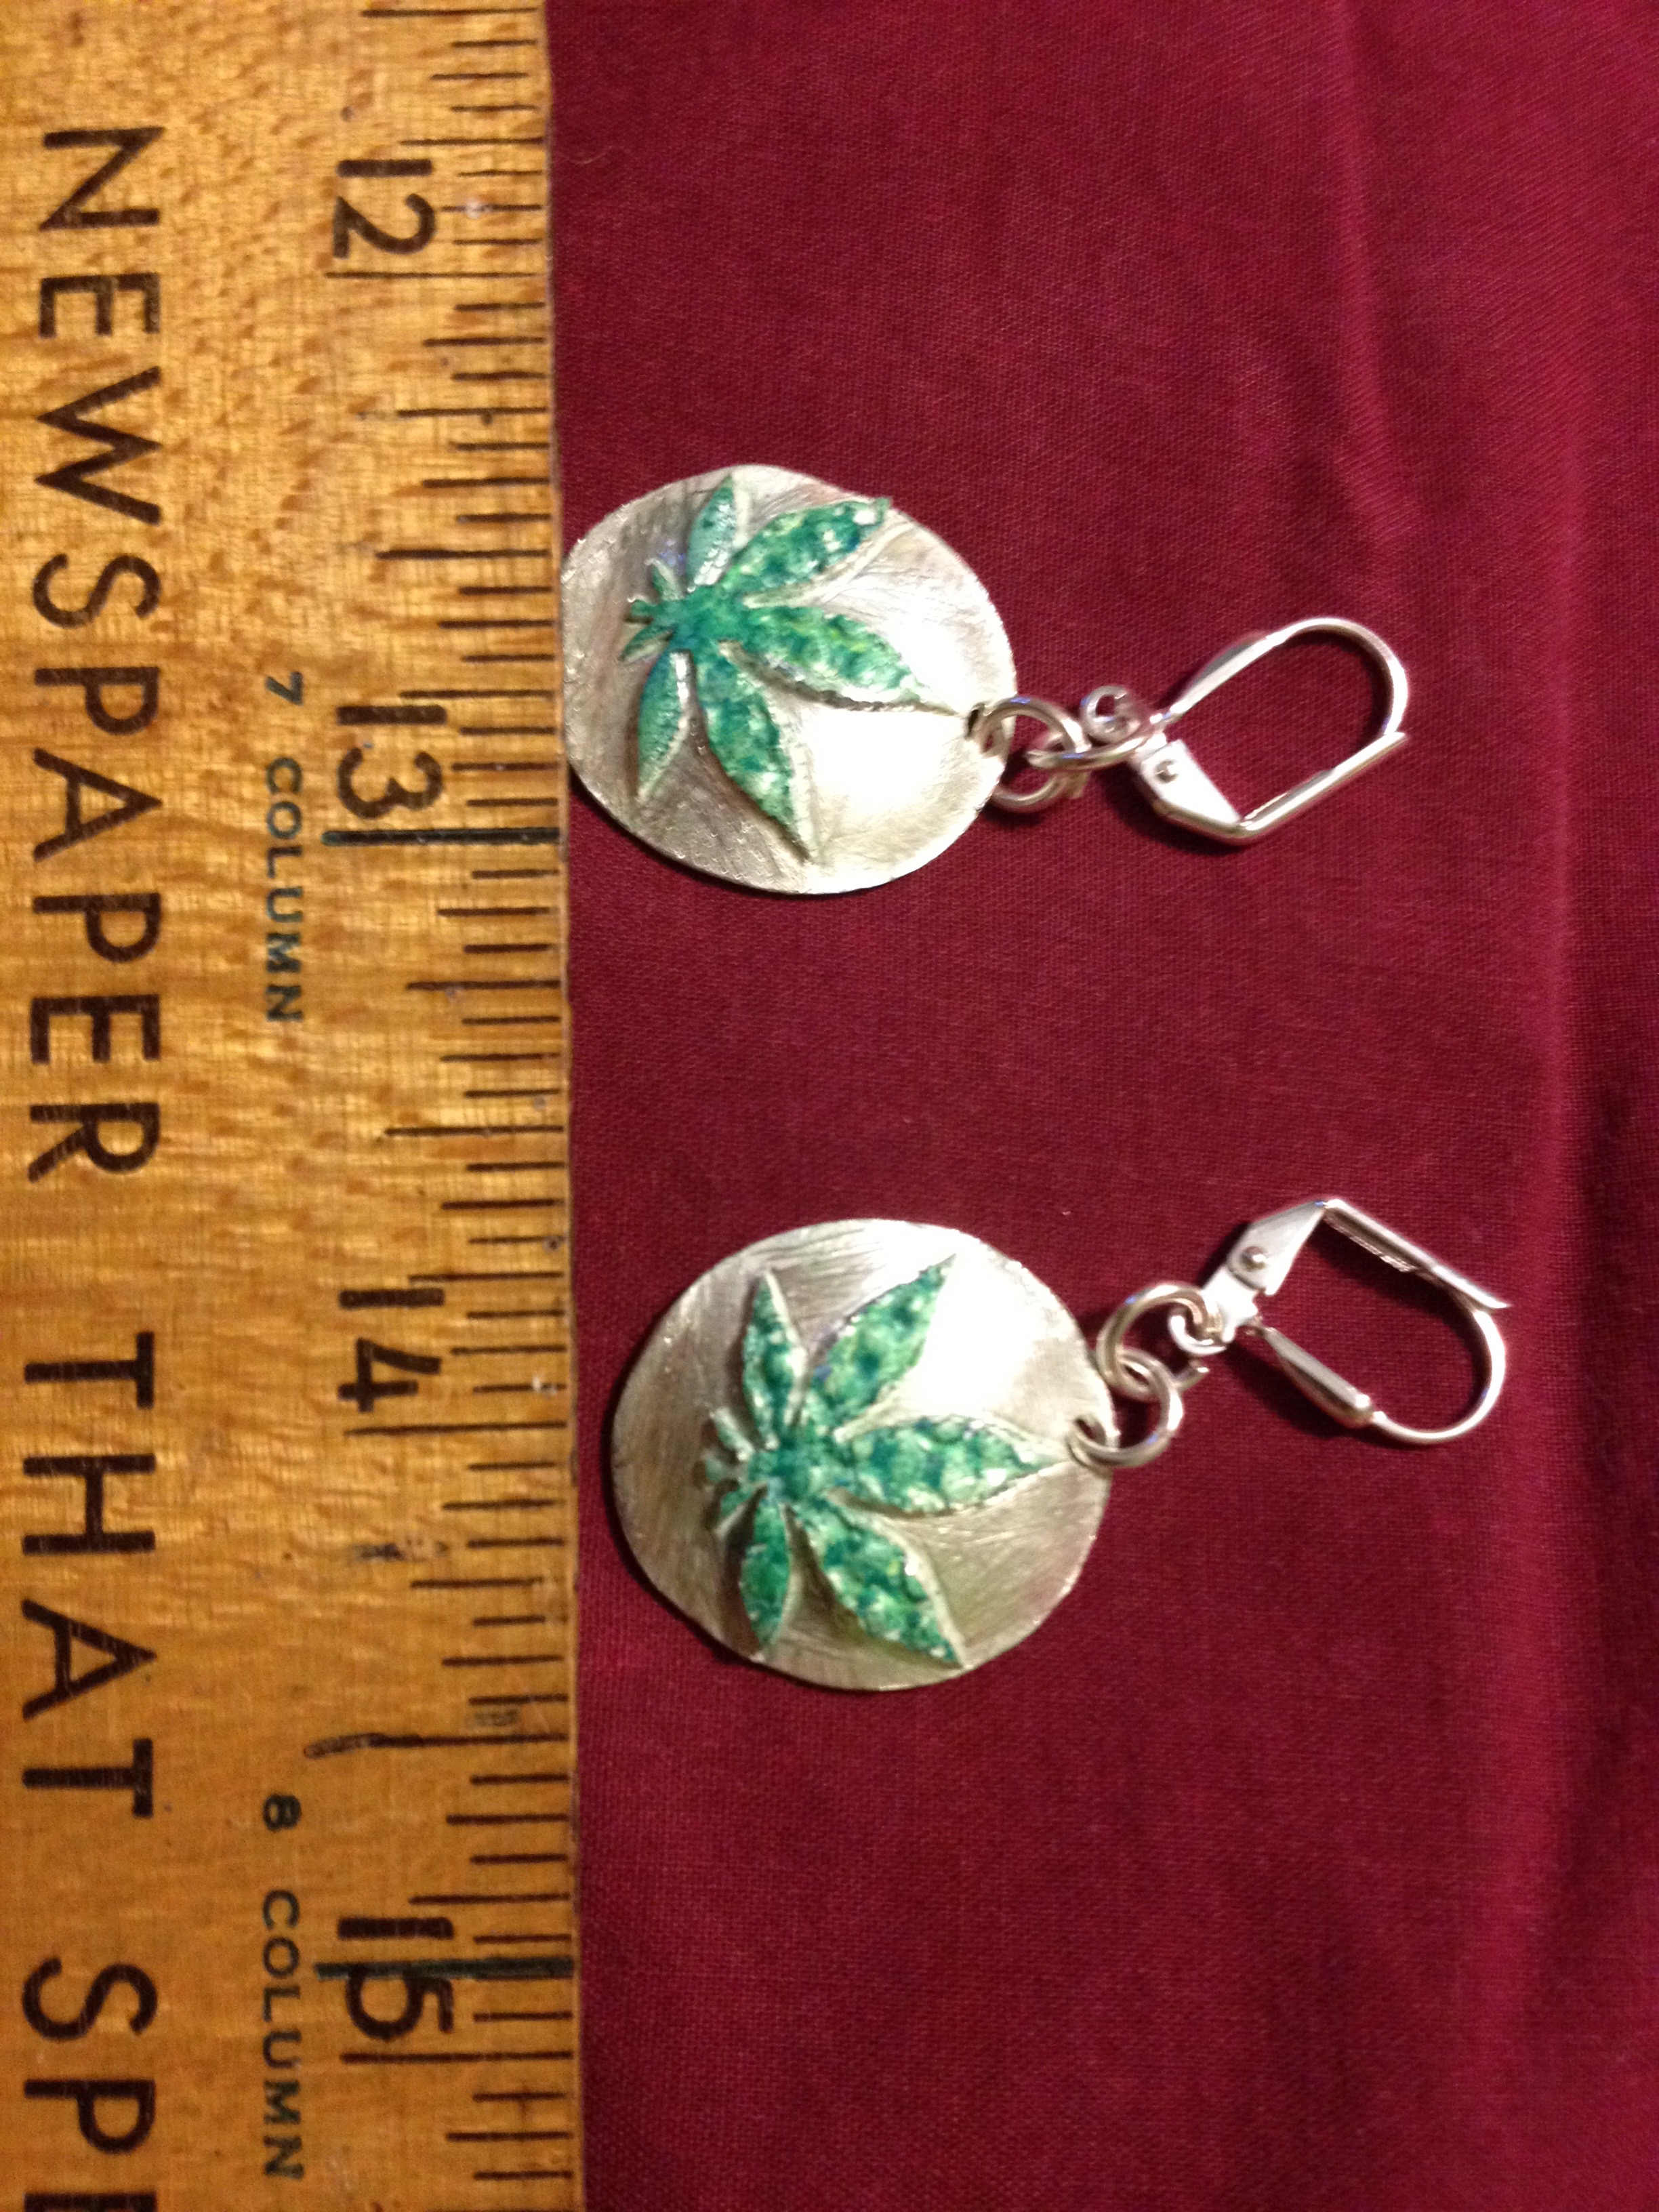
Add earwires. I tend to use two jump rings per earring, but it’s completely up to you.

Colored pencils and metal clay

I recently ran into the idea of using colored pencils on metal clay. I haven’t tried it yet, but I intend to. As I understand it, the idea is that one adds color before brushing the materials that come out of the kiln, smooths the color, and protects the color with the same sort of spray people use to protect colored pencil work on paper. I haven’t started yet — still exploring several ideas. However, I intend to post pictures of all the steps — whether it does or does not come out well. I will keep everyone posted on progress.

Estonia — an underappreciated jewel of Europe

My intention is to mostly talk about jewelry. However, my recent trip to Estonia influenced my jewelry making in several ways — while I was there, I took some classes in traditional Estonian silversmithing, and came back with lots of design ideas.  For example, the face of Kalevipoeg (the Estonain national hero) and the form of Thor’s hammer that appear in ‘Gallery’ both came from Estonia. Therefore, I’m going to ask your indulgence for a new-jewelry post. I’m going to share  a few pictures of an underappreciated, truly beautiful corner of Europe.

In summer, 2015, I attended the Viljandi Craft Camp, in Olustvere, Estonia. This is a picture of an 18th century distillery, where the silversmithing classes were held.
Tallinn, the capital of Estonia, is Europe's best preserved medieval city. This is the view out the window of the hotel I stayed in in Tallinn.
Tallinn, the capital of Estonia, is Europe’s best preserved medieval city. This is the view out the window of the hotel I stayed in in Tallinn.
A small portion of the city walls of Tallinn.
One of the guard towers of Tallinn. Like much of the ancient city, it is reputed to be haunted. No ghosts were present when I was there. They were probably out enjoying the sunny day!
This is Old Thomas. The legend is that an important post in the city's guard was to be filled by the winner of an archery competition. A commoner won. The city rulers didn't want to give him the post, but they made him a guard. He became a fixture of the city. After Thomas (the commoner) died, an image of him was put atop the town hall. It has been refurbished, and even replaced, many times since the Middle Ages, but an image of Old Thomas has perpetually guarded Tallinn.
This is Old Thomas. The legend is that an important post in the city’s guard was to be filled by the winner of an archery competition. A commoner won. The city rulers didn’t want to give him the post, but they made him a guard. He became a fixture of the city. After Thomas (the commoner) died, an image of him was put atop the town hall. It has been refurbished, and even replaced, many times since the Middle Ages, but an image of Old Thomas has perpetually guarded Tallinn.