

I have not posted in a while due to a bout of influenza. However, while ill, I was still working on jewelry (albeit at a glacial pace). I became intrigued with the concept of combining bronze and copper to make a single smooth piece that looks as though one metal is embedded in the other. Over the past few weeks, I made several pieces, each with its own challenges and rewards. I am going to describe the three pieces, and how they turned out, in separates posts. The three pieces are: Roman cat pendant; butterfly earrings; and abstract earrings.
Roman Cat Pendant: While making a piece that had the look of Imperial Rome was, admittedly, not my design, that’s how the piece turned out. That’s one of the joys of metal clay — often you get happy accidents, when things you had never expected emerge from your work.
The first step was to deeply texture a piece of Art Clay brand copper clay, and then to cut a cat shaped piece of it out. I made a flat copper clay background, and attached the cat as follows.
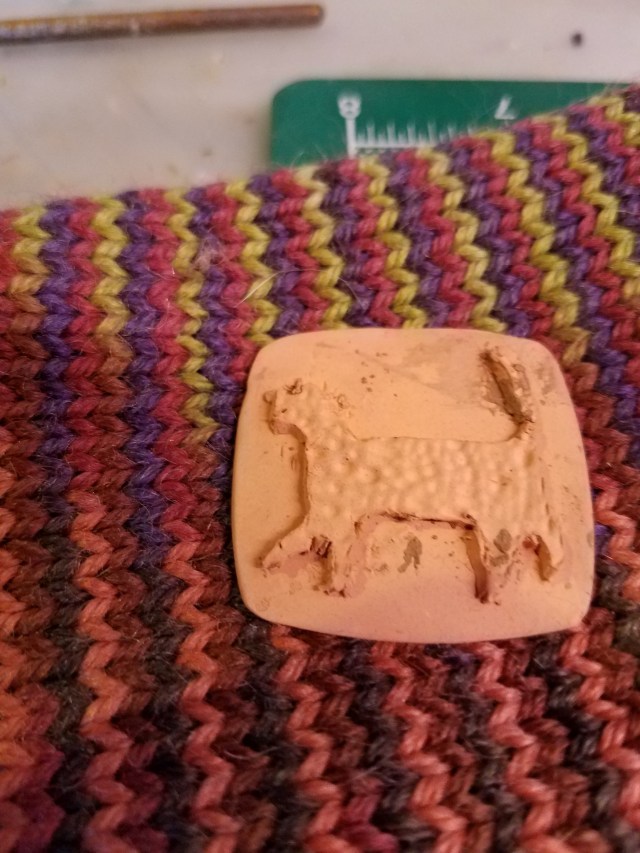
The cat is not very refined. It does not need to be. The next step is to take some Fast Fire Bronz clay, and mix it with water until it becomes a paste (Art Clay copper and Fast Fire Bronz some close to having the same shrinkage, and therefore you don’t wind up causing your work to lose its shape while it is firing) . I then covered the cat and the background with the paste. I waited until the paste had dried. After drying, I started sanding. By carefully sanding away the bronze, I wound up with the copper cat showing through (with some of the texture in the cat filled with bronze) and a bronze background. Ideally, the bronze background should be smooth. This turned out to be a nightmarish process — it took a great deal of sanding to approximate smoothness (and losing some of the texture on the cat in the process). Then, when I thought I was done, I discovered some indentations in the bronze. I filled them in with more bronze paste, let it dry, and sanded again. This process was repeated until I achieved an approximation of my original goal.

Just for clarification: this photo was taken part-way through the process. There are several ‘dings’ that had to be filled in with bronze paste before it was ready to fire. Finally, it was ready to fire. But bronze and copper fire at different temperatures! Fortunately, there is a solution. I fired the piece (in activated coconut charcoal) at the temperature at which Fast Fire Bronz works in my kiln (for me, that’s 1425 degrees F — your kiln might fire either hotter or cooler than it says it does, so you will have to fire test pieces to see what works for you). Art Clay copper will sinter at this temperature in 3.5 hours. After this long firing (and, after cooling, tumbling), the piece was ready!
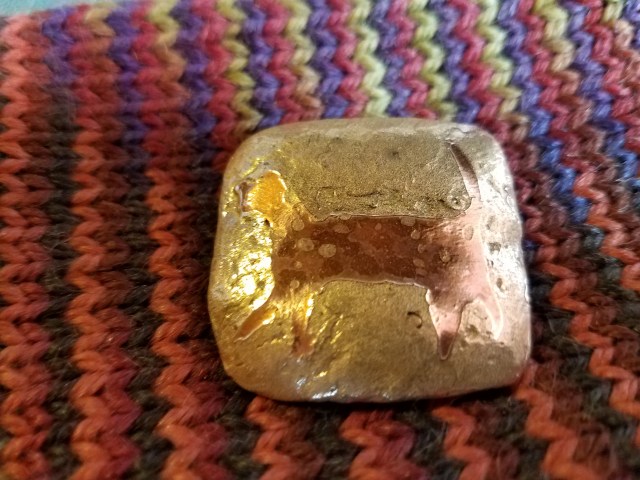
The copper cat shows through, as intended. The bronze background contrasts to it. Some bronze appears on the cat, as intended — both to produce a spotted cat and to have a bit more visual interest than a solid piece of copper. While new copper is pretty, it won’t last. Copper is very reactive and will discolor from both handling and exposure to atmospheric oxygen. To patina it, I chose Bladwin’s patina. Baldwin’s patina reacts with copper, but very little with bronze. Thus, the copper will change color a lot while the bronze will change color a little.
Here is the finished piece, with a chain and a coin for scale.

While I did not intend it to be so, it looks like it came out of Pompei! Always be ready for a happy accident while working with metal clay!
In the next post, I will describe the happy accidents for the butterfly earrings and the abstract earrings.
