

Lentil beads are hollow pendants that look much heavier than they actually are. I’m going to talk about making a lentil bead with an unusual bail, with a touch of Keum Boo.
First, a look at what we are working toward:

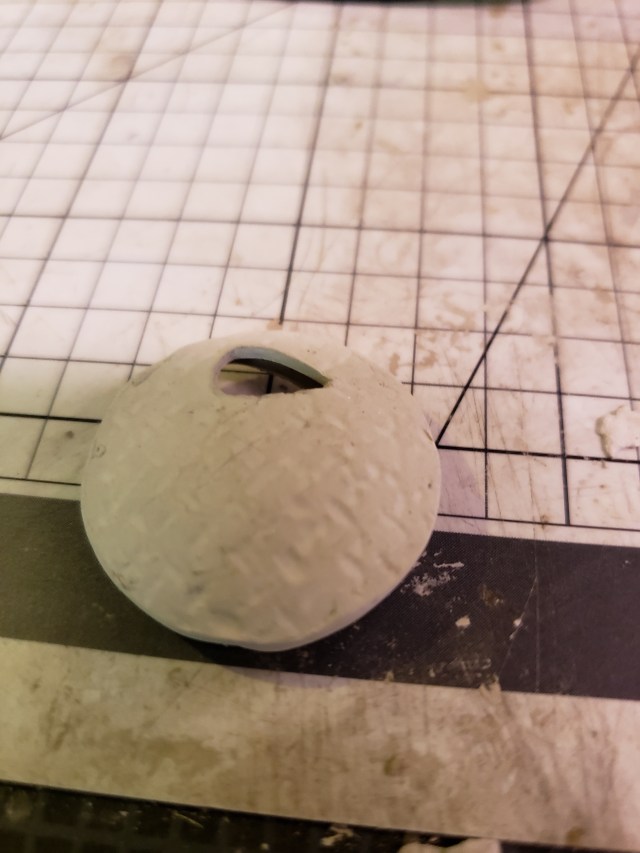
The first step in making a lentil bead is to make two rounded pieces of the same shape, typically 1 mm thick. The simplest shape is a circle — that can be formed on a plastic Easter egg. Other shapes can be done, but we will reserve that for later. Also, I cut openings in the two pieces of the bead. That is not standard — usually, you would leave the bead intact and attach a bail in some other way. However, here I am using an ususual bail design, that I will discuss later.
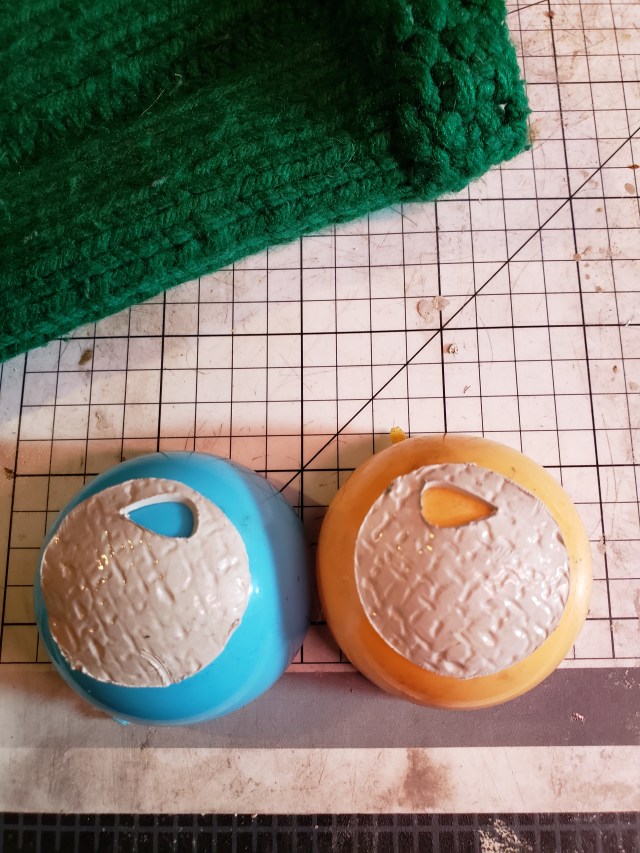
Once these are dry, they can be attached to each other with slip. The two pieces will never fit right on the first try. That is not a problem. You can fix it by a combination of sanding the high spots and filling in the low spots with more slip.
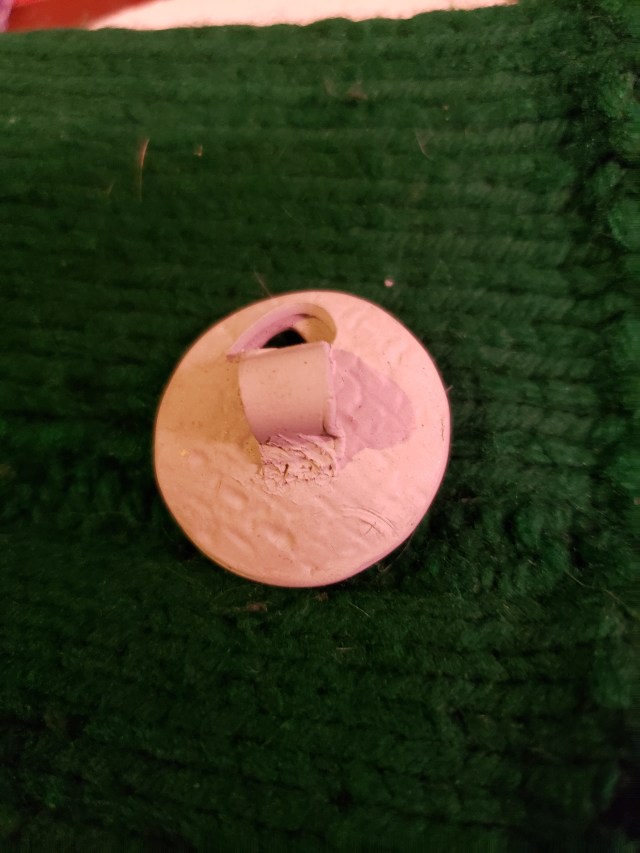
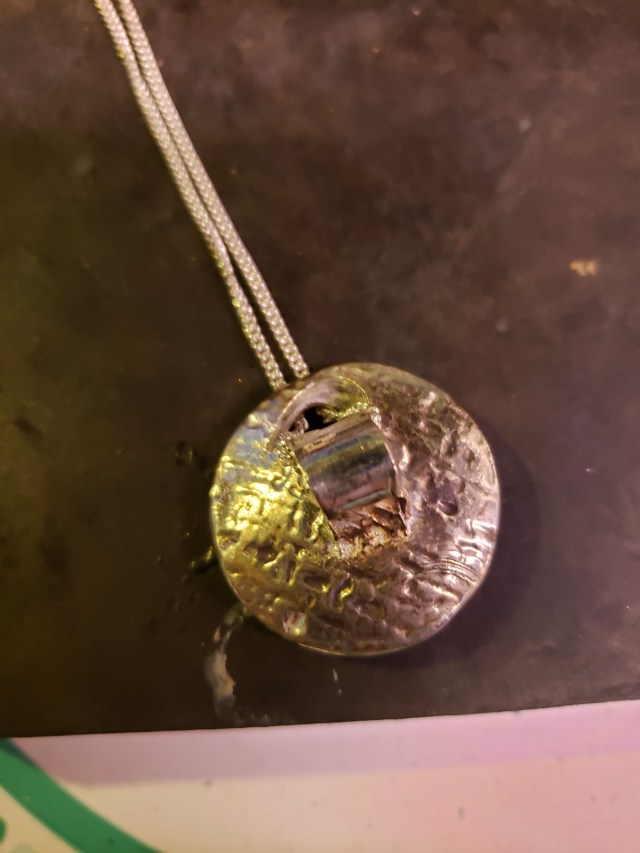
I chose to attach a hidden bail on the back.
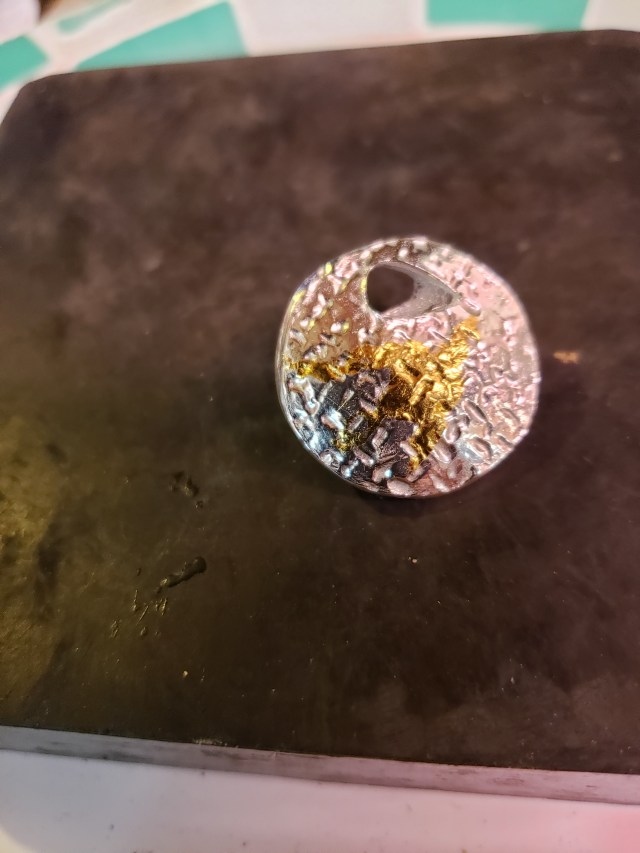
The piece would be sanded to even out the rough spots. Be sure that any gaps remaining between the front and back have been repaired. When this is done, the piece can be fired, brushed, and tumbled. I chose to add some gold, using Keum Boo techniques that I have talked about before. For a quick refresher, prior to brushing, heat the piece to around 800 degrees F — a quick test is that, if it is hot enough, it will char a toothpick with a quick touch. Using tweezers, place gold foil on the piece. Burnish with an agate burnisher. The gold and silver will bond — it will be visually obvious when this has happened. After applying the gold, either let the piece cool naturally or crash cool it. Then it can be brushed. If the gold is properly attached, it will stand up to brushing. However, as a precaution, I cover the gold with my thumb while brushing. After tumbling, if you have left an opening like mine, there will be shot inside the bead. It can be removed by turning the bead upside down and shaking.
Now for the unusual bail. Run a thin chain through the hole on the front. Then run it through the loop on the back. Then run it through the hole on the front again.
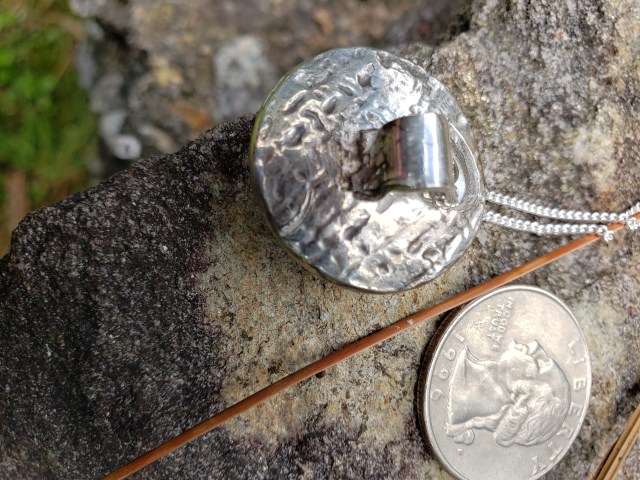
Seen from another view, it looks like this:
The net result is a striking pendant that, while quite easy to make, looks hard. Don’t worry. I won’t tell anyone if you don’t. 😉
